

The process of transferring designs into patterns, specifically for embroidery, is known as embroidery digitizing, and it is both an art and a science. This technique enables the embroidery hobbyists and professionals to embroider complex designs onto textiles. The objective of this blog post is to assist readers in selecting the best embroidery digitizing software tailored to their skill level and the complexity of the design. If you are looking for a simple embroidery platform or, on the other hand, are an advanced designer who requires complex functions, you have found the right guide: This guide will assist you in making educated choices. Each software package’s specific benefits, for example, ease of use, flexibility, and features, will be discussed so that you know the best solution to embroider your imaginative ideas.
What is Embroidery Software?

The digitizing software is designed to help people make user-defined patterns or designs, edit them, and put them in a format that embroidery machines can understand for stitching purposes. It allows users to convert pictures into embroidery files, which may include various design components such as stitches, colors, and textures. As it combines features such as design previews, error checkers, and even conversion of files from one format to another, embroidery software makes the development process less complicated and more precise. It is crucial for amateurs and professionals looking to take their embroidery works to great heights using digital technology and creativity.
How to Digitize with Ease
At the beginning of the embroidery digitization process, I try to make the fragmentation of the process easier for me to perform my work. To begin with, I select the most appropriate programs for me, which are mostly designed much more effectively for peace of use and more tools like Wilcom, Hatch, or Brother PE-Design. I prefer these programs because they offer great design possibilities and better conversion processes that I would use. Starting with a high-resolution image, which is then brought into the specific software, I set my stitch specifications to meet my requirements and every detail I wanted conceived. I account for ways I would be stitching them, the density, length, finish type, and even the colors I would need for the piece of cloth, which would be quite handy. In most cases, I have used the error type checking beforehand to remove any wrong details and the preview wherein the test stitch is not a border, ensuring that my design goes into fabric. Looking into things this way often assures that the end products for my projects are high quality.
Exploring Embroidery Machine Compatibility
While examining the compatibility of embroidery machines, the software you select must work with them. In most situations, this concern stems from the formats enabled within the embroidery software that the embroidery machine can understand. Standard formats are PES, DST, and JEF, but it is advisable to check what formats are particular for your machine since different brands may have them.
Among the technical aspects to consider are the machine’s hoop sizes, which limit the area that can be embroidered. If possible, ascertain that the embroidery software you intend to use has those dimensions for optimum effectiveness. Also, determine the types of stitches that both the software and the machine can handle since various accessories can affect the fabric design and shape of the design to be created.
Also, you need to check how the designs can be transferred. Several machines today are USB-enabled or wireless, which makes it easy to transfer information from the computer to the machine. Besides, looking for machines with automatic thread tension adjustment and color change systems can improve the quality of embroidery, especially for complex designs. If you appreciate these factors and do sufficient research, you can use your business more productively to promote embroidery.
How to Digitize Your Designs Perfectly?
Converting designs from a digital format to a physical fabric has several essential steps that impact the final output. To begin with, a high-quality raster image or vector graphic should be used as a starting point for creating designs. This will act as a reference, and all further design elements will rely on it. After that, make sure to use the right cross-embroidering software that is suitable for your embroidering machine. Again, before starting with the procedure, it is also wise to learn various software features, such as the types of stitches available, the possibilities of creating underlays, and adjusting the density settings to personalize the design.
Once the vector graphic has been imported into the embroidery software, setting up the stitching order is the next consideration. This is an essential consideration as it affects the appearance and structure of the final piece in that each design element may have its thread and will be embroidered in a set order instead of randomly attaching every aspect. In line with this, utilizing layer-by-layer and stitching methods that best describe the details and textures of the design is ideal. In addition, to ensure the design’s accuracy, such as pattern alignment and avoiding thread breakages, use the preview options before stitching starts.
Finally, the design of scrap fabric is tested to predict its behavior in real-life settings. This allows you to adjust the tension, thread colors, or stitch density. So when it’s finally time to execute on the real fabric, you can rest assured that it will yield the results you had foreseen. With adequate planning and testing, you can achieve perfection in analyzing and translating your embroidery designs to a digital platform. This ensures that when it is time to fulfill the vision of making it, the task will be done precisely with the utmost accuracy.
Choosing the Right Embroidery Digitizing Tools
Several factors should be considered when selecting embroidery digitizing tools, and I think it’s a good idea to do a background check on a few popular embroidery digitizing software. To determine your needs, you should compare features from Wilcom, Hatch, and Brother PE-Design since each seems to target a specific skill set or consumer in general. Getting into specifics, Wilcom is known for its more suitable features for professionals. At the same time, Hatch seems more on the simpler side, making it a suitable option for varying degrees of professionalism. On the other hand, Brother PE-Design is best suited for people working with Brother machines as it is easy to use with familiar interfaces. In addition, ensure that the programs can provide the required editing tools or solve your preferred stitch types. In addition to that, reading consumer reviews enables potential consumers to gauge the software’s support to their needs. Whenever possible, consider the free trials of each software in addition to your research before finalizing your choice so that you can consider what seemingly suits your needs the most.
Mastering Stitch Types and File Formats
Embroidery digitizing requires extensive knowledge of stitch types and file formats for transferring the target design pattern. There exist three basic stitch types: satin, fill, and running, which add texture to a surface but differ in their textures and functionalities. Without a doubt, satin stitches are the best mechanisms for edging curves and outlines as the ends are smooth and shiny with the width being less than 8 mm. Fill stitches, or Tatami stitches as they are called, are ideal for solid patterns as they enable cover a wide area over a textured pattern. Then, running stitches are used for embroidery because they give more delicate surfaces with fine lines while using the tiniest thread.
Regarding file formats, the embroidery machines may also vary in the formats they can accept. Most Brother, Tajima, and Janome machines use PES, DST, and JEF formats, respectively, and each is compatible with a particular software. To make sure that a design remains intact despite changing from one platform to another, it is paramount that one comprehends the standards and constraints of the formats. For example, the DST format poses challenges in interpreting designs on different platforms as it does not keep the thread colors. Hence, keeping an alternative copy of the EMB file, which comprehensively includes the color information, is preferable. Comprehending file formats and stitch types can significantly ease the projection of ideas onto the fabric in embroidery work.
Practical Techniques for Custom Embroidery
In terms of effectiveness, I approach the techniques suitable for custom embroidery with immense precision and creativity. First, I always try to make sure the designs I am about to create are ideal for the specific fabric working. The outcome and the end product’s constitution are highly dependent upon it. Whether dealing with satin, fill, or even specialty stitches, using the correct stitch type for the design elements is vital. I also consider the thread tension and the needle used because these two can alter or affect the sharpness and strength of the design. Testing samples with swatches tends to be another core technique as it helps me determine whether any alterations are required, thus avoiding issues such as puckering or thread breakage in the end. Throughout the entire process, I maintain flexibility. In this state, all sorts of design-related decisions assist in enhancing the design sufficiently for the embroidery to maintain a structurally strong impression.
Why Choose Hatch Embroidery Software?
Hatch Embroidery Software is a perfect option for novices and experienced embroidery, considering its user-friendly interface and feature compatibility. It is designed to be compatible with most embroidery machines, which enhances the likelihood of easy transfer of designs because it supports a comprehensive range of embroidery file formats. The program also offers several advanced stitch types and customization options to control design details. Furthermore, Hatch is great at predicting potential stitching issues that may occur on various fabrics using testing tools. The constant patches and an online community of active users ensure improvements for the users, as once you get it, you don’t need to worry about looking for something better, no matter how much more complex the embroidery projects are.
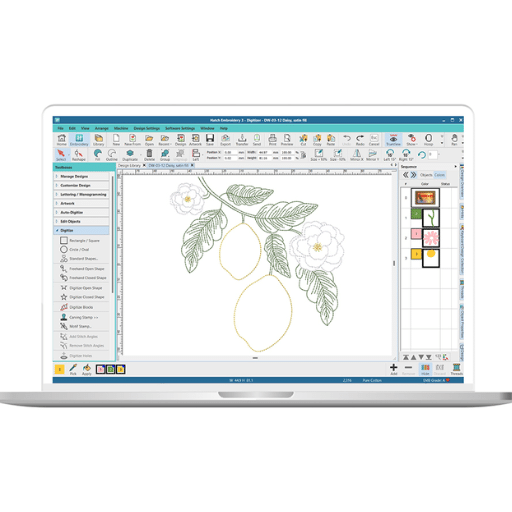
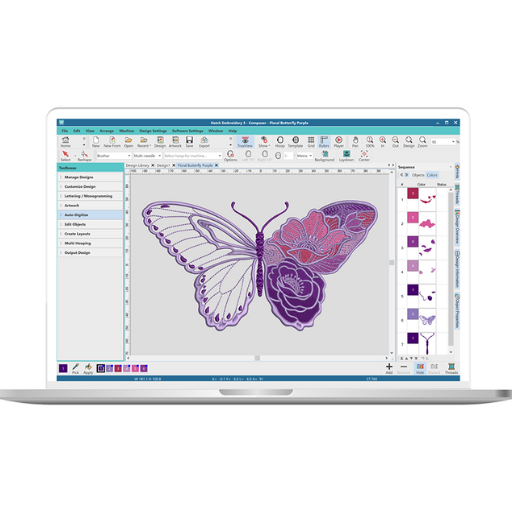
Features of Hatch 3 and Its Benefits
Hatch 3 offers new features that enrich the user experience and extend the creative horizon. It’s easy to use owing to its design layout, which is a plus, especially for beginners and veterans alike, one of its remarkable characteristics. All the tools for managing colors were enhanced to make more complex fusion possible, especially for complex design creations. Possible designs can now be converted into embroiders with the help of auto-digitizing, which allows users to do the same with a lot more ease and minimal input while still managing the quality. There are additional features of hatch 3, such as resizing and stitch angle adjustment, reshaping, and other editing features, all without compromising the stitch quality. The time spent on retrieving and organizing files has lessened due to the introduction of the new design library. All these features make the work democracy in every aspect of the world since it enables one to work efficiently while enhancing the quality of work. Getting Hatch 3 is a significant investment for any embroidery fan, especially if all the work is precision.
Exploring Free Trial Versions
The point is, before buying any embroidery software, there’s no harm in downloading their free trials to check out how good they are. The best embroidery software companies allow you to download and use a trial version for thirty to sixty days. Users can check how to stitch edit, how to use the Digitizing tool, and how to manage designs. However, ensure it works with your embroidery machine files, usually in DST, PES, and JEF formats.
Examine the software’s interface and operating ability during the trial period, specifically when importing and exporting designs. Technical considerations include editing speed, rendering quality, and fabric compatibility. For example, finding software that can work with high stitch counts and offers ample control over stitch placement and density is good. Also, determine whether the trial offers customer service, tutorials, and forums to increase your learning. These features will enable the users to decide on their embroidery needs before buying the appropriate embroidery software they require.
Comparing Hatch Embroidery with Other Software Brands
Hatch Embroidery Software is differentiated from the rest on many parameters, as many have pointed out, compared to other brands, as highlighted. First, Hatch is best known for its easy-to-use interface and multiple personalization options, making it the software of choice for embroiderers at all levels of expertise. Also, unlike its competitors, Hatch embroiders many file types, enabling a wider design scope and support for more machines. One of the most popular details of Hatch among embroidery lovers is its ability to control the design, which is enhanced by incorporating stitching techniques and editing functions. Other brands, in comparison, have fewer updates or resources available over the internet, and, in addition, Hatch produces plenty of materials for its community and updates the software regularly. To sum up, Hatch is well regarded in the embroidery software market thanks to the combination of an easy-to-operate environment, advanced technical features, and availability of a dependable system of support.
What Are the Benefits of Using Machine Embroidery?

Several factors make machine embroidery an attractive option for amateurs or professional embroiderers. Embroidery machines operate faster, which makes them more productive. This is true as machine sewing is significantly faster than hand sewing and allows for simultaneous stitching of intricate patterns or designs that require considerable embroidering time. Furthermore, machine sewing guarantees stitch consistency and that precision and accuracy are adhered to. Regarding fabric design customization, the machine sewing method offers a range of artistic dimensions, from complicated designs such as patches to using more than one fabric color. There is, however, a limitation to what one can do by hand, but technology evolution allows one to apply almost all possible designs with detailed and precise execution. Machine embroidery has a role in achieving volume and allowing for the easy duplication of a particular design, which is a huge advantage for businesses.
Advantages for Hobbyists and Professionals
The best thing about machine embroidery for hobbyists is that they do not need to be skilled at it. Software such as Hatch 3 enables the automation of many challenging tasks, allowing the hobbyist to try different fabrics and designs within limits. For instance, using these interfaces makes it straightforward to change how the threads are stitched, their density, and their color. On the other hand, professionals gain from much lower time wastage and better productivity levels. They can embroider many goods and deliver them within the required time, which is fundamental in business contexts. Specific technical requirements, such as stitch density used in most embroideries, which is normally between 4.0 to 5.0 per millimeter, and thread tension, usually set to 18 to 22 grams of tension force, ensure the fabric and stitching are well done. Such attributes reinforce the precision expected from most professional projects and add a further layer to the level of quality and consistency regarding the output.
Enhancing Creativity with Embroidery Design Software
Embroidery is a technique that is often reiterated and replicated due to a lack of insight and in-depth understanding of its core motives and techniques. However, with the aid of embroidery design software, all these intricate and traditional pieces can be revitalized and beautified even further through this technological advancement. The programs I use are accompanied by powerful libraries comprised of a great deal of designs as well as intuitive interfaces, allowing me to carry out advanced forms with extreme accuracy. To maintain the desired quality of your embroidery, it is necessary to have such programs as Hatch 3, which allows you to keep up with the trends while giving you enough freedom to create new styles. Moreover, specific software enables the transfer of intricate manual tasks, reinforcing them into computerized tasks that are less tedious, allowing you to focus on the artistic element of your embroidery projects. Ultimately, traditional forms can be destroyed to create and allow a new journey, as they all enhance my creativity in the best ways possible.
Understanding the User-Friendly Interface
As per my observations, the interface of embroidery design software is crucial to the globalization of my activities. On the other hand, software features are designed in such a way that they are easy to use. Such graphical interfaces usually have user-friendly pictorials, drag and drop, and adjustable parameters that ease learning while increasing efficiency. This concise organizational structure facilitates appropriate design search and eliminates overlapping strategies, enabling me to rapidly effect alterations and work with various artistic features. It assists in turning intricate embroidery embroidery design tasks into straightforward tasks, thereby enabling novices and experts to design good-quality embroidery.
References
Frequently Asked Questions (FAQ)
Q: What is the best embroidery digitizer software for beginners?
A: Embrilliance is often recommended as a great place to start for beginners. It offers user-friendly features and supports various embroidery file formats, making it accessible for those new to machine embroidery.
Q: How does Embrilliance help customize embroidery designs?
A: Embrilliance provides tools that allow users to customize embroidery designs by resizing, editing, and adding elements like embroidery lettering. It simplifies the process of personalizing designs to fit specific projects.
Q: Can Wilcom software handle commercial embroidery projects?
A: Yes, Wilcom is a popular digitizing software known for its robust features. It is suitable for commercial embroidery work, supports various embroidery machine brands, and offers advanced digitizing capabilities.
Q: Are there free embroidery digitizer options available?
A: Some software programs offer free versions or trials, like Hatch software’s free trial, which can be a good starting point for testing digitizing features without an initial investment.
Q: What features does Embroidery Digitizer 3 offer for design editing?
A: Embroidery Digitizer 3 includes tools for design editing, allowing users to modify existing designs, create appliqué, and use auto digitizing for converting images into embroidery design files.
Q: How can I use Hatch software to improve my embroidery projects?
A: Hatch software offers various features for enhancing embroidery projects, including design editing, monogramming, and support for multiple file types. Thus, it is a versatile tool for both beginners and experienced embroiderers.
Q: What support is available for those new to embroidery digitizer software?
A: Most embroidery digitizer software programs provide a support team or community forums where users can get help with troubleshooting, learning new techniques, and maximizing the software’s features.
Q: Is there a digitizer software compatible with Brother machines?
A: Many digitizer software programs, including Embrilliance and Wilcom, are compatible with Brother machines, allowing users to create and transfer designs seamlessly.
Q: What is the advantage of using a design doodler in embroidery digitizer software?
A: A design doodler allows users to sketch and experiment with design ideas directly within the software, providing a creative space to develop unique embroidery projects before finalizing the design.


