A blend of sewing in the traditional sense and embroidery in high-tech futuristic manner. The Singer Futura XL 400 Sewing and Embroidery Machine is perfect for every sewing aficionado. This article will deal with the properties and advantages of the Singer Futura XL-410, with a community focus, however, towards countless users. The majority of the focus will be more on Starting with Large embroidery fields and incorporating modern technology into the device. No matter if you want to begin a new sewing project or you want to do some sophisticated decorative stitching on your creations, you can be assured that the Singer Futura XL-400 will always become a perfect sewing solution for you.
As a Sewing Machine, What Makes the Singer Futura XL-400 More Attractive to a Buyer?
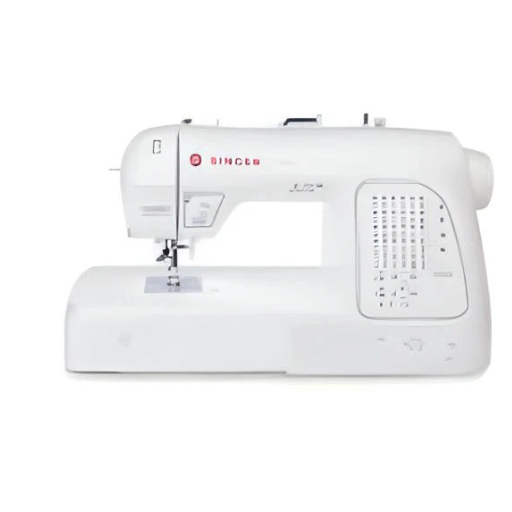
Singer Futura embroidery machine
In the course of this study, the first exhibits that impressed me were the most interesting advantages of the Singer Futura XL-400. This machine features a fully automated one-step buttonhole and 30 sewing Assez patterns, which is made simple for any sewing lover of any learning curve. As it were, the machine’s SwiftSmart Threading System alleviates this pain so that I can commence my activities. It is detailed with amazing embroidering features, two additional hoop options, and 120 unique built-in designs decorated within the device. In addition to that, the design software also allows customer-made designs so that there are hardly any limitations. Apart from being simple, the XL-400 is also designed with an LED light that is bright enough to light the completed or in-the-process of being completed projects. This convenience, combined with technologies and functionality, explains why the Singer Futura XL-400 is still relevant in the market.
Key Features of the Singer Futura XL-400
1.SwiftSmart Threading System:
- As all sewing machine manufacturers know, applying the principles of mass production to the manufacture of household goods should never be done at the expense of quality.
2. Extra-Large Embroidery Area:
- This computerized embroidery sewing machine has an embroidery size of 10 by 6 inches. This translates to the ability to embroider much larger designs, which wouldn’t be possible otherwise since there would be no need to replace the garment with a new embroidery.
3. Built-in Design Library:
- To introduce its features and uniqueness, this beautiful computerized embroidery sewing machine (cat—el, particularly nkostipe) comes packed with over 120 embroidery designs and six alphabets. In such cases, the most varied patterns may be suitable for the specific aspects of this work.
4. Multi-Hoop Capability:
- Thanks to the multi-hoop system feature, it is possible to alternate hoop sizes and designs to make larger designs measuring 20 by 12 inches. However, there is little support for bigger tasks such as quilts, ornamental items that complete projects, and sanitizer projects.
5. 30 Stitching Options Available:
- This machine has 30 built-in stitches, including basic, stretch, decorative, and one-step buttonholes, which makes it possible to perform many sewing projects, from ordinary clothing to artistic heirloom sewing.
6. USB Connectivity and Design Software Compatibility:
- The machine goes with the design software applications, compatible with the USB Flash drive known as XL-400 and allows one to upload design’s directly to it. This allows for ‘almost’ any incorporation of a design that may be necessary for the individuals and the projects they undertake.
7. LED Lights:
- It incorporates proper LED lights towards the sewing area, squinting is minimized, and even in poor visibility due to lighting, it elaborates stitching techniques accurately as it is long arching age above normal lights, especially in electronic sewing the machine.
8. Free Arm Function:
- One can sew with the free arm feature on construction details that are hard to replicate, such as cuffs, collar, pant hems, and other body contours; it makes for easier and better construction of difficult shapes and areas.
These unique features combined make the Singer Futura XL-400 one of the finest options for first-time users and regular sewing lovers looking for a machine that combines different functions while being easy to use.
Comparison with Other Sewing Machines
1. Brother CS6000i:
- Stitch Options: The machine includes a total of 60 stitches, which are composed of utility, decorative, and quilting stitches; thus, the user will find it quite useful if looking for versatility.
- User Interface: It has a simple LCD screen for displaying stitches that users wish to select and a stylish sewing machine with a self-threading needle.
- Extras: It contains a detachable wide table and seam speed controller, which are most useful while working on large projects where table space and crowds are limited.
2. Janome 2212:
- Stitch Options: This LG sewing machine has twelve (12) built-in seams and a four-step buttonhole which means the sewing is reasonable enough.
- Precision: The machine has manual control over the stitch length and width allowing a precise combination of stitching activities to be performed.
- Design: It is famous for its strength and simplicity in design, meaning it is meant for first-time users or people doing light routine sewing.
3. Singer 9960 Quantum Stylist:
- Stitch Options: There are 600 stitches, and it is recommended for intermediate to advanced levels. It could be used for dressmaking, home decoration, and quilting.
- Advanced Features: Besides the provided features, additional features like an extension table, mirror imaging, and stitch elongation enhance the quality of stitching with versatile designs.
- Technology: The machine has a self-threading needle and antenna or an electronic autopilot mechanism for better functioning precision.
4. Juki HZL-F600:
- Stitch Options: The storage capacity of the sewing machine is more than two hundred and twenty-five as there are many plans for decorative stitches as well as common usage ones for various sewing tasks.
- Performance: Other useful features of the device include the metallization of the bodice, which enables the sewing machine to enjoy an industrial-like performance appropriate for intensive use.
- Advanced Features: Additional features include a considerable belly area for fabric positioning and movement around and many styles of electronic buttonholes for the precise sewing of buttons, placement, and any needed buttons.
When looking at these sewing machines, it is clear that each type has specific benefits geared toward different sewing tastes and skills. Comparing them aids in determining which model corresponds with varying sewing project needs, including sewing stress-free, sewing as a hobby, and sewing as a profession.
Benefits of Using a Computerized Sewing and Embroidery Machine
1. Precision and Consistency:
- Computerized machines greatly improve stitch placement and ensure that every stitch goes to the correct spot and has the same characteristics. This is particularly advantageous in bulky embroidery patterns.
- On the other hand, intricate sewing machine designs, which allow for automatic and more dimensional sewing and can change stitch tension, are very sensible, since they guarantee stitch satisfaction.
2. Wide Range of Stitch Patterns:
- These machines have standard sewing patterns with in-depth features, i.e., most of them have millions of internal pattern designs ranging from sewing, decorative, to even stitching patterns for embroidery.
- The best thing about the vast range is that you can carry out more advanced and more imaginative ideas without restriction.
3. Efficiency and Speed:
- Due to the availability of speedy motors, the operation of the sewing machine will be greatly increased in most models. In certain cases, the sewing machine offers relatively higher stitching speeds of up to 1,000 stitches per minute, which helps improve efficiency in large or time-critical tasks.
- Automated functions like thread clipping and needle threading minimize the user’s redundant effort and time, optimizing the processes.
4. Customizability and Personalization:
- Users can design and store certain stitches and embroidery patterns for specific purposes.
- Digital and embroidery machines with USB ports and import features allow users to transfer digital designs from the computer which broadens the creativity.
5. Ease of Use and Accessibility:
- The use of easy LCD touch screens for clarity makes navigation and access to the machine settings and the tutorials available faster and is friendly to users, even new learners.
- There are tutorial modes and help modes that allow new users to familiarize themselves with the device’s features, reducing the time it takes to learn it.
6. Durability and Longevity:
- The sewing machines are built using robust materials as well as backward technology and thus live up to these expectations of possibly using these machines continuously. They are heavy use and are therefore guaranteed on quality.
A number also have excellent support and warranty options to cover future performance and maintenance needs.
To Begin Using Your Singer Futura XL-400, What Are the First Practical Steps?

In order to start using your Singer Futura XL-400, it is wise to begin by reading the instruction manual for the machine. It is important to start by mounting the machine on a suiting surface and connecting it to a power source. It is then important to follow instructions on how to thread the machine and that the spool and the bobbin are intact. You will also be taught how to use the embedded tutorials and the LCD screen for some basic functions or settings. Also, part of the knowledge, make use of a a lot of websites and videos published on YouTube concerning the machine operation and it parts. After you are used to the basics, proceed to the design libraries and program to sew out some diagrams. Always remember to carry out the preventive care procedures that will help in maintaining the machine in the good state for many years.
Unpacking and Assembling Your Machine
1. Inspect the Package:
- Make sure that: Before adopting this function, your Singer Futura XL-400 has arrived in the package. As a result, the claim cost may be high, and no one wants to pay redux.
2. Unpack Gently:
- To begin with, open the box and carefully remove its contents. Inside the box, you will find the sewing machine, its power cord, foot pedal, various presser feet, needles, bobbins, and user manual.
3. Check All Parts:
- The manual also includes a list of parts that must be checked off so the user doesn’t forget to include them or use them. Such reports should go to the retailer or manufacturer if essential items are missing.
4. Select Your Work Area:
- Choose a flat, dry, and stable area for placing your machine. Additionally, the area should have sufficient power access and also be spacious enough to accommodate handling of the fabric.
5. Fit the Machine:
- Secure the machine in place on the working area. Attach the power cord to the machine’s connector and the main switch. The foot pedal can be inserted into its respective slot.
6. Set up:
- Press the power switch to turn the machine on. The power ON is indicated by LCD illumination, which means all is well and the machine is in working condition.
7. Fix Accessories:
- With the pressing foot aimed correctly in the holder, snap and fix the foot in position. Then, follow the manual’s instructions to wind a bobbin and place it in the bobbin case.
8. Test Initial Settings:
- First, sew a trial stitch on scrap fabric to check if all the machine settings and the machine itself are in good working order. Then, perfect any imperfections with the LCD touchscreen.
Understanding the Controls and Functions
1. Power Switch:
- A power switch enables or disables the machine. Switch off the machine when it is not being used to save power and for safety purposes.
2. LCD Touchscreen:
- This is the main control center for most of the machine’s functions. It demonstrates the Patterns of stitches to be used, their length and width, and the settings. It is also equipped to show current information about the matrix or stitch and its mode.
3. Stitch Selection Buttons:
- These buttons are primarily found beside the LCD screen. They help to select different stitch patterns in case one is not performing well and needs to select several stitch patterns. The table of the stitch guide provided herein illustrates the display of stitch-by-stitch patterns.
4. Tension Dial:
- Changes the upper thread tension. Equal tension on all threads is necessary to have balanced stitches. This step requires more practice because one has to keep testing the sewing on the waste fabric until the appropriate tension is reached on the fabric being worked on.
5. Speed Control Slider:
- This slider sets the highest limit on the sewing machine’s speed. Use this feature to choose a faster speed according to the fabric being used and your skills.
6. Needle Position Button:
- It enables one to raise or lower the needle manually. This is commonly used for adding or removing cloth or making complicated corners when sewing.
7. Reverse Stitch Button:
- This button is useful when seams need to be reinforced. It allows the sewing machine to make backstitches at the beginning and end of the seam to strengthen it.
8. Electric Thread Cutter:
- It cuts the upper threads and the bobbin threads at the press of a button without using scissors, saving time.
9. Presser Foot Lever:
- Use this lever to raise and lower the presser foot. The foot should never be lifted when sewing, as fabric movement should be uniform.
Sewing cannot be stressed enough especially when aiming for quality project results. These controls and functions must be comprehended for such sewing efficiency.
Installing the Futura Software for Embroidery Designs
To make it easy for you while installing the Futura embroidery software, do the following in the explanation:
1. System Requirements Check:
- First, check that your computer meets the minimum system requirements for the software. In most situations, this entails having a stipulated RAM capacity, processing power capacity, and some disk space. Also, check if the Windows version that you want to install the Futura software on is compatible with the one you have.
2. Downloading the Software:
- Use the installation media for Futura software you purchased from the official website or the most recent installation supplied at the time of enrollment. Make sure you choose the right version suitable for your operating system, such as Windows or Mac.
3. Running the Installer:
- How to run xwb install/exe: Go to the executable file you downloaded from the internet and double-click it to run the installer. Pay attention to any instructions on the screen, select the installation folder, and accept the agreement if asked to do so.
4. Installing All Other Required Drivers:
- You may be required to install something else while installing the software that is essential to connecting the software with your embroidery machine. Ensure these are well installed since poor installation may lead to disconnection problems.
5. Activate the Software:
- Upon installing the software, you may be required to activate it using a product key. The key should be included in your purchase or communicated to you electronically. Type in the key when directed to activate the software fully.
6. Update the Software:
- Look for the available updates, if any, to enhance the software’s performance and correct problems from the previous installation. Most updates are found in the software’s updates menu, titled ‘Check for Updates’.
7. Connect Your Embroidery Machine:
- When the software is fully installed, the next step is to plug your embroidery machine with the necessary USB or any other way. When launching the software, check the connection status of such machine to the software to determine if it is in order.
8. Test the Installation:
- Start the software and perform any simple embroidery to check the status of the installation. This will also enable you to get to know the interface and features of the software.
These conditions will help ensure that the Futura software is properly installed and ready for the construction of attractive embroidery designs.
What Types of Projects Can You Create with the Singer Futura XL-400?

The Singer Futura XL-400 is a multi-functional reach with various amazing features and design enhancements that allow me to develop several kinds of projects. I can do customized embroidery in ways such as personalizing towels with initials or other designs, ornamenting articles of clothing with unique designs, or making beautiful items for the home, including cushion covers, table runners, etc. Quilting has become possible because of the machine’s attention towards large embroidery work. The Futura XL-400 also uses various types of fabrics, which means that a person can design a wide range of items, which include denim and silk clothes and scarfs. Working with already detailed designs or designing them myself can almost effectively guarantee that level of originality and creativity where the sky is the limit, especially for a craft enthusiast who loves instilling a very personal element in their work.
Embroidery Projects for Beginners
1. Beginner monogramming towels
- Have fun monogramming towels using your initials or a simple motif. This simple design project can be the first step in your embroidery practice.
- Materials Needed: Terry cloth towels, embroidery thread, stabilizer.
- Estimated Time: 1-2 hours per towel.
- Skill Level: Beginner.
- Tips: This product has an easy-to-use water-soluble stabilizer. This prevents the material from sagging and is easy to remove.
2. Cushion Covers for Decoration
- Description: Personalize your interior with beautiful embroidered cushion covers.
- Materials Needed: Embroidered cloth, embroidered cushion cover, assorted colorful threads, foam hoop.
- Estimated Time: 2-3 hours per cover.
- Skill Level: Beginner.
- Tips: Do not be afraid to try simple bold designs so that you get used to the idea of positions and changes of the thread.
3. Patchwork Design on Handkerchiefs
- Description: Make a few handkerchiefs with a small embroidered border or a few small embroidered motifs.
- Materials Needed: Mother handkerchiefs made of cotton, embroidered handkerchiefs, and sharp needles with embroidery floss.
- Estimated Time: 30 minutes per handkerchief.
- Skill Level: Beginner.
- Tips: You can try out other kinds of stitches such as backstitch and stem stitch which will bring in more creativity.
4. Embroidered Bag
- Description: Decorate a plain tote bag with flowers or create any design of your choice.
- Materials Needed: Embroidered canvas bag, embroidery thread, transfer pen.
- Estimated Time: 3-4 hours.
- Skill Level: Beginner.
- Tips: To make the struggling fabric more stable and controllable while stitched, use interfacing.
5. Basic Embroidered Table Runner
- Description: Prepare a stylish table runner with seasonal designs and/or patterns.
- Materials Needed: Linen embroidered with floss, fabric pen, and linen cloth.
- Estimated Time: 4-6 hours.
- Skill Level: Beginner.
- Tips: Instead, go for repetitive patterns so that the task’s aim becomes clearer and a rhythm of work processes develops.
Such projects are a good way for novices to experience the construction of basic embroidery skills while becoming acquainted with the workings of the Singer Futura XL-400.
Advanced Sewing Techniques with the Singer Futura XL-400
1. Free-Motion Embroidery
- Description: A method in manual control whereby one moves the fabric to achieve elaborate patterns.
- Materials Needed: Special stitching aides amin030 with embroidery stabilization, a range of types of embroidery silk, free-motion foot,
- Estimated Time: This will depend on the design of the drawing.
- Skill Level: Advanced.
- Tips: Get it right on scrap fabric first. That way, you can practice your control and tension adjustments.
2. Machine Quilting
- Description: Use the xl 400 to sew different layers of fabric together with different patterns of stitches.
- Materials Needed: Quilting needles, baby batting for making fabric sandwiches, quilting threads, etc.
- Estimated Time: 5-8 hours if you do it for a small quilt.
- Skill Level: Advanced.
- Tips: Always draw lines to mark out your quilting lines using a fabric pen.
3. Applique
- Description: A technique in which a fabric object is placed upon a piece of fabric and is sewn down to create a decorative effect.
- Materials Needed: Fabric for applique. Fusible wt29 web. Embroiderers scissors.
- Estimated Time: 3-4 hours, depending on the design.
- Skill Level: Advanced.
- Tips: Use fusible web to hold down the applique pieces before sewing them on.
4. Cutwork Embroidery
- Description: This is a specific style of embroidery where sections of the fabric are cut out to form patterns during the sewing stage rather than the end of it.
- Materials Needed: Heavy-duty thread, tissue laminating, specialized embroidery scissors.
- Estimated Time: Between three and five hours, with emphasis on how complicated the design is.
- Skill Level: Proficient.
- Tips: Gentle handling of cuts will protect the design as well as the fabric used.
These advanced techniques extend the possibilities available in constructing various projects using the Singer Futura XL-400 sewing machine, allowing sewists to push themselves to design new, more complicated styles and collages and to improve their embroidery and sewing.
Tips for Designing One’s Own Embroidery Patterns
1. The First Step Is The Most Important: Have Something You Want To Achieve
- Details: Begin with rough or computer graphics of your design. Strong visual directions also help considerably reduce the amount of virtual imagination during the embroidery process. Before that, focus on the colors, sizes, and positions.
2. Choose Appropriate Material
- Details: Identify the fabric to use which will be appropriate for the design and endure the embroidery. Use closely woven fabrics for smoothly made complex designs to avoid distortion. Common examples are cotton, linen, and even silk.
3. Use Good Quality Threads
- Details: The stitches will be stronger and more beautiful if high-quality threads are used. Polyester and rayon threads are usually chosen due to their strength and the shine factors. Certain threads of certain colors will not be ideal with the normal fabric and stitches, therefore, it is imperative to try them out on pieces of fabric before they are utilized on the actual sewn fabric.
4. Employ Effective Stabilizers
- Details: Fabric backs prevent the distorting of the material due to puckering effects during stitches, in case of other extra materials used in the sewing process. Select the needed type of stabilizers: tear-away, cut-away, or water-soluble type depending on the requirements of the project. In most cases, heavy fabrics will need more of these stabilizers.
5. Adjust Machine Settings
- Details: Adjusting the tension and the speed of your machine helps to improve the precision of the clean embroidered line work. Perform settings on a fabric sample and not directly on the final piece. Please ensure that you are performing any maintenance or updates to the machine.
6. Digitize Designs Thoughtfully
- Details: Concentrate on the stitch density, its direction and type, and few other things. Programs like Embrilliance or Hatch help in creating exact stitch files. However, it may prove to be useful to make a digital preview and approve it prior to embroidering.
7. Practice Techniques
- Details: Practicing different techniques, including the satin stitches, fills, and underlays, on a continuous basis, improves one’s efficiency and accuracy of such elaborate works as custom designs. Take a workshop for advanced embroidery. And also spine some online courses to improve on the skill. It is indeed possible to summarize all these step-wise and exhaustive tips and the relevant tools and techniques in elevating the lower level of custom embroidery done projects to more of a professional level.
How do you troubleshoot issues associated with the excellence of features of the Singer Futura XL 400?

In troubleshooting problems regarding the basic functions of the Singer Futura XL-400, the first step is to ensure that the machine is on and properly plugged. If for some reason the machine does not come on, I always examine the power cord to see if it is appropriately inserted to the wall outlet and to the machine. Next, I check that the correct type of needle is fitted and in a good condition, as sharp needles cause skipped stitches, therefore changing the needles frequently is crucial in this case. It is important to check the thread tension, and since it is one of the reasons for imperfect stitching, I rotate the upper thread tension, adjusting the dial. I clear bobbin thread tangles, and if there are any, remove the bobbin and check that the bobbin is wound and placed correctly. Suppose nothing gets stitched as it is designed to be. In that case, I proceed to the next step, which is software updating, because the lower part of the machine and embroidery patterns will not synchronize properly if software features are out of date. Preventive measures and periodic servicing of the machine, such as excess dust and lint from the bobbin area and oiling certain parts as necessary, have been proven to relieve several usual complaints.
Lastly, I refer to the user guide for interpreting error codes and confirm that I have the right stabilizers and fabric for the task.
Solving Thread Tension Problems
Thread tension problems are common with the Singer Futura XL-400. Here is a list of the causes and how they can be addressed:
1. Too Much or Too Little Upper Thread Tension:
- Details: If the upper thread tension is either excessive or less than what is required, stitches will either pull the fabric or appear distorted.
- Solution: A reasonable amount of upper thread tension will be adjusted using the dial consecutively while a piece of fabric is placed to see how the stitches look until they are neatly and flatly open.
2. Improperly Installed Thread:
- Details: Misthreading interrupts the balance of the upper and lower tension.
- Solution: Re-thread the machine but ensure that the thread goes on all tensioners and into the needle so that mashing is not required.
3. Checking Bobbin Tension:
- Details: If the fabric comprises several layers, the wrong bobbin tension can result in wrinkles or loops at the bottom of the fabric.
- Solution: Verify if the bobbin is appropriately wound and modify the bobbin tension screw only when it is necessary to do so when the bobbin lacks those adjustments and the tension screens are uniformly barred.
4. Incompatibilities between needle and thread:
- Details: Improper needles used with specific types of threads also cause tension problems.
- Solution: Use the corresponding needle and suitable thread and fabric to achieve the correct amount of tension.
5. Worn or Damaged Parts:
- Details: Some parts, such as the tension disk, do not function properly when worn out.
- Solution: Check the machine for worn-out or damaged spare parts and correct these according to the user guide supplied by the manufacturer.
- Monitoring each of these and gradually correcting will help, for the most part, prevent thread tension challenges, and the level of embroidery will be perfect and up to professional standards.
6. Bobby Issues Rectification:
- Details: An incorrectly wound bobbin affects the sewing of the threads evenly, leading to knotting or looping them.
- Data: The main configurations for leveling bobbins are inadequate machine threading for bobbin winding and foreign stroking of the bobbin, which increases bobbin size.
- Solution: The bobbin must be wound accurately and evenly as indicated in the machine’s manual.
7. Incorrect Bobbin Insertion:
- Details: Incorrect bobbin placement can restrict or alter the flow of threads resulting in tension impairment.
- Data: In a top-loading machine, using bobbin counterclockwise insertion or omitting the tail thread through the bobbin case results in chronic symptoms in stitching problems.
- Solution: When reinserting the bobbin, ensure it is placed as stated by the machine.
8. Adjusting Bobbin Case Tension:
- Details: It is normal for a bobbin case tension to slacken with usage and this negatively affects how neat the stitches look on the fabric appreciation, there are loops on the underside of the fabric.
- Data: To encourage proper rotation of the tension operable screw towards to bobbin case tension innermost being internal, especially when tuning the end or finishing the project, should not be practiced nowadays.
- Solution: Stepwise variations can be made on the bobbin case tension while applying some fabrics to be tested on them.
9. Using the Wrong Bobbin Type:
- Details: Bobbins are distinct for each sewing machine, and using a prohibited bobbin will cause problems. For example, the threes will get jammed, and missed stitches, essential for the designs, will occur.
- Data: Also, check the bobbin specifications for compatibility with the machine’s specifications, as an incompatible bobbin will be useless.
- Solution: Follow the guidelines set by the manufacturer, and do not to the other side of replacing the machine’s recommended bobbin type with others.
Fixing Stitching Problems in Embroidery
1. Thread Breakage:
- Details: It is quite disappointing when embroiderers have to deal with fixing thread breaks, as they cause many problems, especially when working with embroidery projects that tend to be a bit sensitive to excess fabrics.
- Data: Most of the time, this complication comes from a blunt needle, too loose or too tight thread tension, or the thread itself being wrong during the embroidery.
- Solution: Take a fresh needle. Check the tension of the threads. Make sure that the threads used for embroidery are the right ones.
2. Skipped Stitches:
- Details: Skipped stitches ruin the design work within the evaluation. The erratic implementation of needle types or damaged needles mainly causes these.
- Data: This problem may arise from a bent needle, a wrong-size needle, or even poor fabric stabilization.
- Solution: An appropriate needle type for embroidery should be used, old needles should be changed regularly and fabric should be properly hooped.
3. Puckering:
- Details: Puckering, in this case, refers to turning out features of an embroidered work that were not intended. It most commonly arises from inadequate tension or unstable fabric.
- Data: It can be attributable to fabric being placed in too much hoop and this was more distorted and misplaced during interfacing selection.
- Solution: Reduce Expected Amounts Of Hoop Tension, Use Correct Stabilizers, Distribute Even Tension To The Fabric, Etc.
4. Misalignment of Patterns:
- Details: Pattern Misalignment can cause imprecise designs or poor placement because of the biases encountered in the camera.
- Data: It is more often caused by machine movement or incorrect hooping or inaccurate design of the upper patterns.
- Solution: Counter-check that The Hoops Are Aligned And Make Necessary Adjustments On The Embroidery Machine Before Sewing The Designs.
5. Uneven Density:
- Details: It is important to note that revising the embroidery settings for uneven density can adversely affect the finished work, given its physical and visual aspects.
- Data: This issue could arise out of a combination of too many variations in design embedding settings or skipping of necessary threads tight.
- Solution: Follow up with regular Umbrella systems that follow the Orthopedics Density Program. Adequately release as many folds or tumblers as may be formed only during normal quarter patterns.
Where can I purchase accessories for my Singer Futura XL-400?

There are various and interesting sources I have managed to come across in the internet to learn more concerning the Singer Futura XL-400 accessories. Websites such as eBay and Amazon have good accessories including freestanding specialty presser feet and special bobbins as well. Quite a good number of owners of the singer Futura XL-400 also find parts and designs for this specific type of sewing machine in the singer’s general official web page. In addition, sewing supplies stores like Joann Fabrics or Michaels usually carry some of the related Singer accessories. Also, other people can provide very useful tips on where to buy machine accessories by joining sewing forums.
Most Recommended Sites for Purchasing Singer Futura Accessories.
1. Amazon:
- Details: One of the websites that sells Singer Futura accessories is Amazon and gives a good selection of accessories for Futura users;
- Data: Includes features for competitive prices, customer reviews, and eligible products for prime, among others.
2. eBay:
- Details: For users who are looking for Singer Futura Accessories, eBay is an excellent site to find new or used accessories, sometimes much cheaper.
- Data: Website safety includes seller ratings and buyer protection policies.
3. Singer’s Official Website:
- Details: All the pinpoints above specifying the parts of the Singer Futura accessories are available on web pages other than the brand offers.
- Data: Most of the time, these also contain promotions or discounts on the official merchandise and warranty on purchased parts.
4. Joann Fabrics:
- Details: For in-store purchases, Singer accessories are available at Joann Fabrics, which is ideal for customers.
- Data: Membership and savings coupons are given about sewing materials occasionally.
5. Michaels:
- Details: Michaels sells the Singer Futura accessories in the U.S., including the fairly small presser foot assortment.
- Data: Clients can earn loyalty rewards programs and also enjoy great offers especially frequent crafters.
6. Sewing Forums and Communities:
- Details: When members are cautious in their purchases of the forums, they can come across different accessory and sewing vendors.
- Data: Forum members often discuss how they made their purchases and where they bought items that are hard to find or out of stock.
Essential Accessories for Embroidery and Sewing.
1. Embroidery Hoops:
- Details: These are very helpful in holding the fabric when stitches are being made so that there is straight pulling and precision and accuracy is obtained in the embroidery.
- Data: Offered in different sizes to meet the requirements of various projects and are usually made of wood or plastic.
2. Embroidery Needles:
- Details: This needle’s eye is larger than the average needle’s, allowing the threads used in embroidery to pass through easily and, hence, allowing smooth stitching without the risk of shredding.
- Data: Depending on the type of fabric and intricacy of the design, there are different size staples and those of several sizes, commonly sold in one size.
3. Stabilizers:
- Details: They are designed to reinforce the fabric’s texture and aid in the preservation of the features of highly detailed pieces.
- Data: These also include cut-away, tear, viscous rush, and others suited to different types of materials.
4. Bobbin Thread:
- Details: This type of thread is used to wrap the needle with embroidery fabric to ensure that stitch tensions are balanced when sewing. It is frequently lighter than typical embroidery threads.
- Data: Provided for comfort, mostly on pre-wound bobbins with consistent flow of thread all through embroidery.
5. Presser Feet:
- Details: Walking, darning, and zipper feet, among others, are essential for the performance of specialty stitching.
- Data: Varies with the machines with PSTI enable concealable features on sewing methods change.
6. Embroidery Scissors:
- Details: These are relatively small and sharp pieces of equipment for cutting threads very close to the fabric’s surface.
- Data: Usually provided with cover and made in such a way as to avoid straining the hands when working on detailed work especially for embroidery.
7. Thimbles:
- Details: They act as an alternative to fingers in preventing needles from poking, mostly in projects that need beaded hand embroidery or dense sewing.
- Data: Made in various sizes and materials such as metal and silicone to accommodate different tastes.
On the role of stabilizers in Embroidery Projects
Stabilizers are quite an important aspect of the embroidery project as they assist in holding the fabric in a way that it does not stretch or become out of proper shape. Here is a classification of common stabilizers and their small specifics and statistics as well:
1. Cut-Away Stabilizers:
- Details: These are best for knit fabric and very complicated embroidery patterns, as they stay on the fabric after all of the edges have been cut off.
- Data: Cut-away stabilizers tend to be hard-wearing and sturdy, which is most appropriate for clothing that has been in use for several wash cycles.
2. Tear-Away Stabilizers:
- Details: This type of embroidery backing is used on woven fabrics with designs of low to medium stitch density. After the embroidery process, it can be removed by merely tearing the excess away.
- Data: Available in various specified weights to provide the required comfort through the performance depending on the level of difficulty of the design worked on.
3. Wash-Away Stabilizers:
- Details: This is ideal for thin fabric, pillows, or embroidery where no stabilizer is left over at the end, such as freestanding lace or other types of embroidery.
- Data: It comes in the form of a stabilizing film or fabric, and after the embroidery is done and the reinforcing film is incorporated, it is dissolved in water.
4. Adhesive Stabilizers:
- Details: These are supportive on a temporary basis and are especially good for holding things that cannot be hooped, like caps and small pieces of cloth.
- Data: Such stabilizers contain a slightly sticky surface that allows fabrics to be strong and fully in place, and they can be removed quite easily after the embroidered fabric is completed.
It should be understood that knowledge of the different kinds of stabilizers and their specific functions will improve the shape, detail, and quality of finished embroidery projects.
What Are the Best Practices for Maintaining Your Singer Futura XL-400?

There are many ways to take care of my Singer Futura XL-400 and I constantly try to incorporate these practices to ensure that the machine lasts. The first thing is that I have a habit of cleaning my machine on a regular basis; using a soft brush or a vacuum attachment; I remove lint and dust, especially in the bobbin case and feed dogs area. Such changes, or rather, such people-related changes, i.e., sewing needle changing after every 8-10 hours of work in the sewing machine, reduce stitch errors and prevent the fabric from getting stuck. Even the moving parts are lubricated with oil as instructed in the users guide, and only sewing machine oil is preferred. Every once in a while, I look around for any screws that are loose and try to tighten them to avoid any difficulties caused by the machine in use. I also ensure that every year I have the equipment checked to look for problems that might not be apparent during normal use. Last but not the least, protective measures are strictly adhered to by ensuring that my Singer Futura XL-400 is kept free from dust by means of a cover which is placed on it when it is not being used.
Long-Term Strategies for Machine Maintenance
Maintenance of this nature extends to cleaning and servicing of internal parts of the machine, and therefore, the machine is cleaned. Device cleaning schedule: details: use of soft brushes or even vacuum attaches to suck lint and dust caused on the device with specific attention pointed on the bobbin area and feed dogs.
1. Clean Out Garbage Containers:
- Details: Regular maintenance helps increase the lifespan of the machinery by avoiding the problems associated with built-up waste.
2. Change Needles Frequently:
- Details: Needles must be replaced every 8 and 10 hours of stitching to ensure a sharp needle is used and to avoid damaging fabrics.
- Data: Frequent needle changes will always provide a point that is still sharp enough to pierce fabric correctly, thereby eliminating the chances of having too many missed stitches.
3. Oil Moving Parts:
- Details: Follow the lubrication section of the manual and use only the recommended sewing machine oil on the moving parts.
- Data: Correct oiling practices help reduce contact friction, which in turn aids in the smooth running and life cycle of the machine.
4. Check and Tighten Screws:
- Details: During the working of the machine, there are possibilities of bolts, nuts, and screws becoming loose hence the need for a check upon steady operation of the machine.
- Data: There are little or no vibration-related problems with secured screws does all the related trouble, making the machine furthermore accurate.
5. Professional Servicing Annually:
- Details: Professionally completed works should take place every year to investigate unhealthy trends and repair places where they are discovered.
- Data: It is quite obvious that such issues that are not solvent at any of the stages with users’ home procedures, if taken to professional service, are resolved, lifting up more reliable efficiency in the functioning of the entire machine.
6. Protective Storage:
- Details: When the machine is not in use, it should be covered and stored without dust on top of it to keep it neatly when it is returned and used.
- Data: A machine that is properly stored will not get dirty, hence reducing the chances of getting rust and any other damages as a result of its surroundings.
Cleaning Your Sewing and Embroidery Machine
1. Unplug the Machine:
- Details: Always start with the disconnection of the electrical supply to the machine for cleaning.
- Data: Unplugging the machine enhances safety by preventing an unexpected start and protects the electrical appliances from electric shock.
2. Remove the Needle Plate:
- Details: Unscrew and remove the needle plate to make access to the feed dogs and their surroundings easier.
- Data: Removing the needle plate cavity enhances proper cleaning, and no fabric or thread fibres will be trapped.
3. Clean the Bobbin Case:
- Details: Remove the bobbin case and, using a small brush, remove the lint and any dust that has colonized the area.
- Data: A neat bobbin case means that the bobbin will have no trouble rotating, which means that the thread tension problems will be discharged.
4. Brush Out the Feed Dogs:
- Details: The cleaning brush of the machine is used to remove all the feed dogs’ possible debris from between and around the feed dogs.
- Data: Every stitch of the sewing machine requires adequate hold of the fabric, which is ensured by regularly cleaning the fabric feeder dogs.
5. Wipe the Exterior:
- Details: The outside of the machine would be wiped dry with a clean, soft cloth to remove dust or fingerprint rings.
- Data: Cleaning the outer surface minimizes the chances of dirt accumulation, which may eventually find its way into the machine’s body.
6. Vacuum with a Micro Attachment Mini-Vac.
- Details: Employ a vacuum with a micro attachment to suck in dust and lint in areas that are not easily accessible.
- Data: From the experiment, it was observed that this practice clears debris from places where blowing air cannot be compared with the use of vacuums.
7. Avoid Compressed Air:
- Details: Compressed air is not recommended as it causes lint to dig deep into the machine’s processes.
- Data: It is important to prevent packed air so the machine does not have unnecessary lint embedded in it, which may cause it to malfunction.
When to Seek Professional Servicing?
1. Unusual Noises:
- Details: Any grinding, clunking, or high-pitched noise from a sewing machine is an indication of a fault that could be internal.
- Data: At times, uncommon sounds might be heard from inpatient mechanics. These sounds arise from worn-out gears, misfiled parts, and absent lubricants that will invariably be subject to professionals.
2. Inconsistent Stitching:
- Details: There are instances when measures are taken to clean the machine and replace the thread, but the stitches are still not neat, or there are skips, so the service of the machine becomes necessary.
- Data: This issue can indicate that something is not right, particularly with the timing or the tension settings, which require attention from a technician.
3. Motor Malfunction:
- Details: If the motor is burned out or refuses to respond, then there is something fundamentally wrong with the motor, and a professional examination is required.
- Data: Once you have such issues regarding the motor, you should not attempt to address them yourself. Otherwise, you might make things worse and spoil your warranty, as repairs are demanded, and the right people have the equipment to do such jobs.
4. Electrical Issues:
- Details: Electrical devices that flicker or experience a sudden power drain could complain of a certain element.
- Data: Electrical risks can be threatening and that is why they need to be rectified by an expert to avoid electric shock or fire outbreaks.
5. Persistent Jamming:
- Details: Other possible causes of these fabric jams are mechanical malfunction particularly internal parts that are not visible.
- Data: If not serviced professionally, persistent fabric and component jamming will pose problems such as fabric stretches and subsequent needle damages, which are expensive to replace.
6. Warranty requirements:
- Details: Some of the maintenance practices may include procedures that an expert can repair to help uphold warranty claims.
- Data: Many manufacturers will warrant that any attempt to repair or replace the unit under warranty will be fully supported by evidence that a professional repaired the item.
Conclusion

To conclude, the Singer Futura sewing machine has advanced features and functions, but it is important to remember that maintenance of the machine is essential. Regular problems like raw edges, incomplete pieces, trouble with the machine’s motor and wires, and repeat jamming can be resolved with qualified professional services to help extend the machine’s life. Also, putting in the repair into a repair serving center that involves approved mending where the conditions of warranty are still valid can save the machine from any future breakdowns. Users have the information, so they can handle the Singer Futura embroidery machine in the most functional and vigorous state, helping them achieve all their embroidery designing work.
Reference Sources
- Singer Official Website
The official Singer website provides detailed information on the Singer Futura embroidery machine, including user manuals and maintenance guides that can help validate the importance of professional servicing and adherence to warranty requirements.
- Consumer Reports
https://www.consumerreports.org
Consumer Reports offers unbiased reviews and reliability ratings for various embroidery machines, including the Singer Futura. This resource is beneficial for validating the common issues faced and the importance of professional maintenance.
- Threads Magazine
https://www.threadsmagazine.com
Threads Magazine provides expert insights, tips, and advice on sewing machines, including the Singer Futura model. Articles and forums on this site are great references for insights into common mechanical problems and maintenance solutions.
Frequently Asked Questions (FAQs)

1. How do I update the software for my Singer Futura embroidery machine?
To update the software, visit Singer’s official website for the latest updates specific to your model. Follow the provided instructions for downloading and installing the software, ensuring your machine is connected to your computer during the process.
2. What should I do if my machine is not stitching properly?
First, check for common issues such as incorrect threading, a bent needle, or improper tension settings. If the problem persists, refer to the user manual for troubleshooting or consider contacting a professional technician for assistance.
3. Can I use multiple formats of embroidery files with the Singer Futura?
Yes, the Singer Futura embroidery machine is compatible with several file formats. It is essential to consult the user manual for a complete list of supported formats and any necessary conversion steps.
4. How often should the Singer Futura be serviced?
Regular maintenance is crucial for optimal performance. It is recommended to have the machine professionally serviced at least once a year or whenever issues arise to prevent major repairs.
5. Where can I find the user manual for my machine?
The user manual can be downloaded from the Singer official website. It provides comprehensive guidance on setup, operation, and maintenance for your embroidery machine.