Maintaining a thick, healthy lawn starts with having the right tools, with the main tool being a well-maintained lawn mower. One, however, of the most important and often tended to less, among the mower maintenance options, is the blade sharpening. A set of dull mower blades will tear the grass unevenly, putting the lawn at risk of damage, disease, and ugly appearance. The article serves as a comprehensive guide to sharpening lawn mower blades and how this affects lawn health, and the step-by-step methods to sharpen lawn mower blades. By the end of this article, the reader shall have acquired all the knowledge needed to maintain sharp and efficient blades, allowing the mower to operate efficiently in preparing a patch of beautiful lawn.
Why Sharpening Lawn Mower Blades is Important

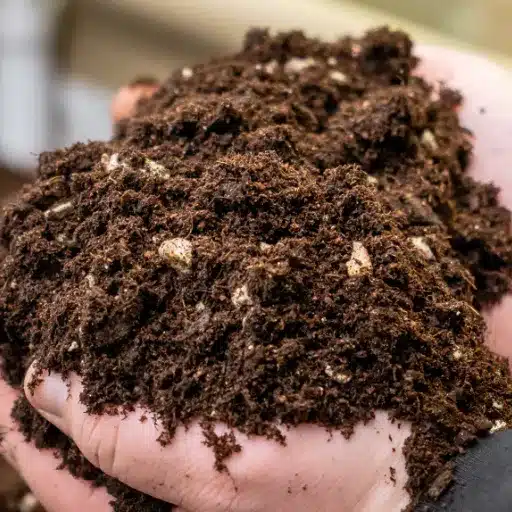
A sharp mower blade is a must to ensure the health and appearance of the lawn. With dull blades, the grass gets torn rather than cleanly cut, which leaves jagged edges prone to disease and pests. Sharp blades give crisp, clean cuts, giving the grass a chance to heal quickly without any additional damage. They also increase mower efficiency by requiring less power and fuel for the same work. It improves your lawn appearance and drags equipment all the way to its end by frequent sharpening of mower blades.
Benefits of Sharp Mower Blades for Lawn Health
Sharp mowing blades are a crucial factor in keeping your lawn healthy and radiant. By cleanly cutting, stressing minimum on the grass due to pulling, sharp blades allow the grass to recover quickly and reduce the chances of attack by fungus. Dull blades tear and shred the grass, which then discolors and falls ill, compromising the health of the lawn.
Research further indicates that lawn mowers using sharp cutting tools are more water-efficient because grass blades cut cleanly retain more moisture and lose less water to evaporation. This may reduce the irrigation requirements during drought-prone seasons or periods of scarce rainfall. Also, sharp blades provide an even cut, giving an aesthetically worthy look to your lawn while avoiding irregular growth patterns.
In contrast, from an efficiency point of view, sharp blades give less wear to your lawn mower, hence fuel saving or battery saving. Research shows that a lawn mower with sharp blades can use 22% less energy to do the same work, representing a greener and cheaper alternative for lawn care. Taking time to sharpen blades on a regular basis will support the health of your lawn as well as reduce wear on the actual tool, minimize your carbon footprint, and allow you to enjoy super-lush green grass.
Impact of Dull Blades on Grass
When dull mower blades come into use, it unwittingly creates a barrier toward maintaining a healthy and aesthetically pleasant lawn. The blades will not cut cleanly, but instead tear the grass, leaving ragged and uneven sides that necessitate the lawn to be more prone to diseases and pests. Lawn experts maintain that the grass, when torn instead of cleanly cut, flower loss of moisture through the edges, destroying and weakening the lawn as it grows older. The stress also hinders proper growth, thus leaving patches of grass that are slow to recover.
In addition, it is the torn grass that creates entry points for fungi to infest, particularly in warm and humid weather when fungi are maximally active. Research says an unhealthy lawn caused by dull blades may require almost 25% more water to recover and flowerly stand, thus adding to its utility costs and environmental strain. Also, grass growing unevenly stands to grow faster and hence may need more frequent mowing. Keeping blades sharp and well-maintained so that additional resources do not have to be poured into ensuring faster growth of lawn is a go-to preventive step toward a greener lawn.
Cost-Effectiveness of Regular Maintenance
Both maintenance of a lawn and frequent sharpening of blades toward appropriate cutting will give great savings in the long run. Researchers argue that well-kept areas require little water, often 30% less than those poorly maintained, making it less on utility charges and environmental concerns. Moreover, sharp blades reduce the chances of lawn diseases, treatment for which occasionally proves costly or may even entail sod replacement. During times, though, a good lawn gets good soil that reduces any need for fertilizers or chemicals down the road.
Neglected maintenance usually leads to scattered uneven cutting, so double the time it takes to be mowed through a season. This means that time and money for fuel, repair, or cleaning up unnecessary labor could have been saved if the homeowner had shown some food for thought toward upkeep. Good looks and health combined as a lawn can increase property value by up to 15%, thus, making it a good investment for any residential or commercial property. Not only does keeping blade sharp and following a proper schedule make the lawn lush, but it also ensures that the process is cost-efficient and environmentally sound resource-wise.
Tools You Need for Sharpening Your Lawn Mower Blade

To sharpen your mower blade properly, you will need some important tools and safety items. Take a look at this very simple list that may be your guide:
- A Wrench or Socket Set- To remove the blade from the mower safely.
Blade Clamp or Vise- To hold the blade steady during sharpening. - Flat File or Sharpening Stone- For manual sharpening and light touch-ups.
- Angle Grinder or Bench Grinder- For a quicker and efficient sharpening, especially when blades are quite dull.
- Gloves & Safety Glasses-To protect your hands and eyes during the procedure.
- Gloves & Safety Glasses – To protect your hands and eyes during the process.
- Metal Balancer- To ensure the blade is balanced after sharpening, so it runs smoothly.
With the above tools, your lawn mower blade will be sharpened safely and thoroughly, and better abilities will be imparted to lawncare.
Choosing the Right Blade Sharpener
Selecting the ideal blade sharpener depends on your specific needs, blade type, and frequency of use. Here are some factors to consider when making your choice:
- Manual Sharpening Tools
Manual tools, such as files and handheld sharpeners, are cost-effective and easy to use for minor touch-ups. They are lightweight and portable, making them ideal for occasional maintenance. However, sharpening with these tools requires time and physical effort. For instance, a standard mill file can take about 15–20 minutes to sharpen a moderately dull blade.
- Electric Blade Sharpeners
Electric sharpeners are designed for speed and efficiency, making them a great choice for regular maintenance or sharpening multiple blades. Models with adjustable angles are particularly useful for achieving optimal edges. According to expert sources, electric sharpeners can reduce sharpening time by up to 70% compared to manual tools. They are suitable for both professionals and homeowners looking for a convenient solution.
- Bench or Angle Grinders
For heavily worn or damaged blades, a bench grinder or angle grinder is a powerful option. These tools are more robust and can restore edges quickly. Bench grinders often come with adjustable guides, allowing users to control the angle and pressure easily. However, they require some expertise to avoid overheating or damaging the blade. Some premium models include cooling systems to mitigate overheating risks, ensuring precision and blade longevity.
- Sharpening Stones
Sharpening stones, such as waterstones or oilstones, provide a high degree of precision for creating a razor-sharp edge. They are available in varying grit levels for both coarse grinding and fine honing. While sharpening stones can produce exceptional results, they demand more time and skill. Professionals often use them for high-quality blade finishing.
- Portable Solutions
For on-the-go maintenance, compact sharpeners with carbide inserts are convenient tools. These sharpeners are budget-friendly and require minimal setup, making them ideal for quick touch-ups during outdoor projects.
- Blade Material Compatibility
When choosing a sharpener, ensure it is compatible with your blade’s material. For example, certain sharpeners are specifically designed for high-carbon steel or stainless steel blades. Using a mismatched sharpener can lead to improper sharpening and reduced blade life.
Essential Tools and Equipment
1. Diamond Sharpening Stones
Diamond stones are probably among the most trusty sharpening tools because of their endurance and fast action. A diamond stone can sharpen different kinds of blade materials like stainless steel, high carbon steel, ceramic, and more. They have a quicker cut rate, which makes these stones perfect for applying sharpness in a hurry and thus, less time is lost doing a slow sharpening job between projects. It has been observed that using diamond sharpeners results in sharpening speed of up to 30% advantage compared to working on a traditional stone.
2. Honing Rods
Sharpening pertains to putting an edge on the blade or restoring its sharpness by removing some metals, while honing means keeping the edge or polishing the blade between two sharpenings. Honing rods maintain a blade’s presharp condition from being sharpened by the user through use or damage. Ceramics are classed as the softest and gentlest honing rods to maintain the edge, hence will have the least amount of metal removed to restore edge. A blade that is honed well can have its working life extended and maintain truly accurate cuts, thereby reducing the rate of industrial waste by about 20%.
3. Guided Sharpening Systems
If they valued precision above anything else, then it may be the cornerstone of any evaluation of sharpening tools and techniques. Guided sharpening setups utilize angle guides to help the user keep consistent sharpening angles, something paramount when sharpening delicate or professional-grade tools. Many systems made today also allow the user to alter the angle of the guiding system for use with blades of different specifications. It is this accuracy that allows the sharpening systems to provide superior blades with edges so clean they are able to hold much longer and thus significantly lift the working efficiency of the blades.
4. Lubricants and Cleaning Solutions
Maintaining sharpening tools means keeping the tools equipped to do their work and doing so for as long a period as possible. Honing oil or water can reduce friction while sharpening, which also reduces heat that could alter the temper of a blade. Withable cleaning solutions will keep all sharpening tools free of clogging that could result from metal dust, in turn, increasing the life span of the sharpening tools and saving replacement costs in the end.
5. Protective Gear
One of the major safety considerations in handling sharp objects is picking up cut-resistant gloves and anti-slip mats. Workplaces with such protective measures witness a 40% decline in accidents associated with sharpening.
Ensuring respectable performance by the blade is optimum, having the appropriate tool and equipment for the job ensures the greatest efficiency and leads to a much longer tool life.
Safety Gear for the Sharpening Process
The use of correct safety equipment in any sharpening process is needed to prevent injury and ensure a smooth operation. Some of the protective equipment essential are cut-resistant gloves, protecting your hands in the event of a slip by accident while holding sharp blades. Cut-resistant gloves with ratings to ANSI or EN 388 standards approximately guarantee the highest level of cut protection. Studies reveal that workplaces that allow the usage of such gloves record about a 70% reduction in hand injuries during tasks involving sharp tools.
Another handy set of protective gear is safety goggles, which protect the eyes against little bits of debris like metal shavings and grinding abrasives. Vision is immensely important because the slightest particle could cause eye irritation or more severe damage. Moreover, respirator masks are advisable on sharpening projects that generate airborne dust so workers do not breathe in these damaging particles.
For anti-fatigue purposes, these mats greatly assist professionals who would be standing for a long time during the sharpening tasks. Not only do these help with comfort, but slip resistance is given to the floor surface. Anti-slip footwear, when combined, adds even more protection against accidental falls.
By using useful safety gear and organizing the workspace effectively, the sharpening process can be made much safer as well as more efficient along with reducing the hazards.
Step-by-Step Instructions for Sharpening Your Lawn Mower Blades

- Gather Necessary Tools
Ensure you have the following tools ready: a wrench or socket set, a blade sharpener or metal file, safety gloves, protective eyewear, and a sturdy workbench or vice.
- Disconnect the Power Source
If your mower is electric, unplug it or remove the battery. For gas mowers, disconnect the spark plug to prevent accidental starts.
- Remove the Blade
Tilt the mower carefully on its side, ensuring no fuel leaks from the gas tank. Use a wrench or socket to loosen and remove the bolt securing the blade.
- Inspect the Blade
Check the blade for damage, such as cracks or deep nicks. If the blade is severely worn, replace it instead of sharpening.
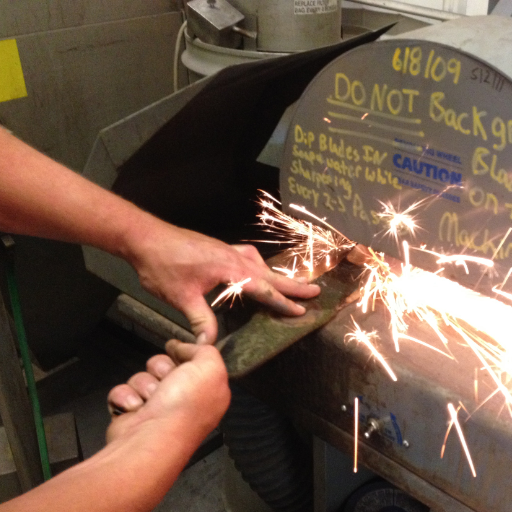
- Sharpen the Blade
Secure the blade in a vice for stability. Use a blade sharpener, grinding tool, or metal file to sharpen the cutting edges, following the original angle of the blade. Maintain even pressure for a uniform finish.
- Balance the Blade
After sharpening, use a blade balancer or hang the blade on a nail to ensure it is balanced. An uneven blade can cause vibrations and damage to the mower.
- Reattach the Blade
Reinstall the blade securely using the wrench or socket. Ensure the cutting edge is facing the correct direction.
- Reconnect the Power Supply
Reattach the spark plug or reconnect the battery, and your mower is ready to use.
By following these clear steps, you can safely and effectively sharpen your lawn mower blades to maintain optimal performance.
How to Remove the Lawn Mower Blade Safely
Each blade removal requires careful preparation to ensure a safe and smooth process. Follow these painstaking steps to have it done successfully:
1. Prepare the Mower
Make sure the power supply is cut off. For gas mowers, take off the spark plug wire to avoid an accidental start. For electric or battery-operated mowers, unplug the mower or take out the battery.
2. Position the Mower Properly
Put the mower on a level surface and then tilt it to its side with the air filter and carburetor facing upward. This prevents any fuel or oil leakage. Use solid blocks or a jack stand to hold the mower securely while working on it.
3. Mark the Blade Position
Mark the blade on top side using chalk or a marker before removing it from the mower to install it later in the very same manner, causing cutting problems.
4. Secure the Blade
Place a wooden block or use a blade lock tool to keep the blade in place. The blade can move while loosening the bolts when this step is overlooked.
5. Loosen the Blade Bolt
Use a wrench or socket to loosen the bolt by turning it counterclockwise. Most blade bolts are extremely tight because of the vibration caused during mowing activities. Keep applying pressure. If it holds you, spray some WD-40 and wait for a few minutes. According to experts, this often greatly reduces the amount of force needed.
6. Remove the Blade and Bolts
Slide the blade carefully off the mower. Keep the bolts and washers in a safe place. Examine the blade for wear: small nicks, bends, and thinning of edges.
7. Check the Mower Deck
Now that the blade is out of the way, take some time to clean the mower deck from beneath. Scrape out grass clippings, debris, and some surface rust with a solid scraper or wire brush. A clean deck will ensure good air flow and cutting performance.
Following the above precautions will ensure that you remain safe while caring for your mower. Routine maintenance, such as blade removal and inspection, will assist with good cutting and further enhance the life span of your equipment.
Inspecting the Condition of the Blade
The blades should be checked for damage like cracks, bending, or excessive wear. I also check for dullness or chips on the cutting edge, as they will reduce efficiency. If the blade shows severe damage or wear, I replace it to make mowing safe and efficient.
Sharpening Techniques: Angle Grinder vs. Manual Sharpening
Angle grinders offer speed and efficiency but require skill for precision, while manual sharpening is safer and more controlled but slower.
| Key Point | Angle Grinder | Manual Sharpening |
|---|---|---|
|
Speed |
Fast |
Slow |
|
Precision |
Skill-dependent |
High |
|
Safety |
Risky |
Safer |
|
Ease |
Requires skill |
Beginner-friendly |
|
Cost |
Higher |
Lower |
|
Control |
Less |
More |
Safety Precautions While Sharpening Mower Blades
Safety precautions while sharpening mower blades include wearing protective gear (gloves, goggles, long sleeves), disconnecting power sources, and ensuring a stable workspace.
| Key Point | Details |
|---|---|
|
Gear |
Gloves, goggles |
|
Clothing |
Long sleeves |
|
Power |
Disconnect sources |
|
Workspace |
Stable and clear |
|
Tools |
Use safely |
|
Spark Plug |
Disconnect it |
|
Angle |
Maintain blade angle |
Protective Equipment to Use
Safety should be the number-one priority when sharpening lawnmower blades. Gloves provide the perfect protection for the hands from sharp edges or slipping while holding the blade. Safety glasses or goggles must always be worn to protect the eyes from flying sparks, metal fragments, or debris coming off the grinding wheel. For extra protection, use a face shield that covers the entire face during sharpening.
A dust mask or respirator is ideal protection against inhaling fine particles and metal dust that comes off during grinding. Ear protection is a must. Noise-canceling ear muffs or plugs would go a long way. Tools like an angle grinder get very loud; some noise levels are above 90 decibels. Wearing long sleeves and pants in thick, flame-retardant fabric could be an added safeguard against minor nicks and abrasions or burns from sparks.
Your chances of getting injured are drastically reduced by using the right protective gear, thereby making the sharpening process safer; this is regardless of whether you are manually sharpening or power sharpening. Remember, the sooner safety comes first, the sooner you are able to protect yourself and have a successful maintenance of your equipment afterward.
Safe Handling Practices
Techniques used in sharpening should be proper to ensure safety in handling and good efficiency. A reported finding has shown that improper handling accounts for a large percentage of workshop injuries among which cuts and fractures are the most common. Initially, secure the tool by holding it with a vice or a special clamp to keep it firmly, preventing any movement of the sharpener or tool. Always use the sharpening angle given by the tool manufacturer. Any deviation from angles accepted can render the tool dangerously ineffective.
Make sure the working surface is clean and well illuminated so that one does not slip on a stray piece of grit or misjudge a movement. Avoid distractions and work at a steady pace; statistics suggest rushed sharpening attempts lead to accidents in 30% of the cases. Check your sharpening tools regularly for wear and tear. An abrasive wheel may give you the feel of a smooth edge, but worn wheels can allow you to dangerously malfunction. Used properly, these handling tips will result in safer working conditions and longer tool life.
Proper Workspace Setup
An efficient tool-sharpening workspace is conducive not only to safety but also to productivity and precision. The workspace should always have good lighting; dim lighting might cause the worker to go wrong or slip. Good lighting can increase accuracy in manual nerves up to 20% according to studies. The area should also be kept clean and clutter-free to ensure free access to tools and materials. Experts and consultants advise having a specific storage zone within arm’s reach to reduce the amount of time spent looking for equipment, saving approximately 15 minutes daily at a bustling workshop. Guarantee the sharpening station stays put by employing non-slip mats because under slight conditions even a modicum of movement could become a matter of paramount precision or even safety. A workbench at waist height with a firm surface helps attain comfort in posture so such work can be done over many longer hours. The lessening of hassles in the workspace would render the execution of sharpening activities far safer, economical, and smooth.
Reference Sources
-
University of Florida – IFAS Extension: Sharpening Mower Blades
This source provides guidance on how often mower blades should be sharpened and the impact on lawn health. -
Virginia Tech News: Sharpen lawnmower blades now for a perfect spring lawn
Offers expert recommendations on sharpening frequency throughout the growing season. -
Kansas State University – Research and Extension: Keep mower blade sharpened for a healthy lawn, expert says
Discusses the recommended sharpening intervals based on usage.
Frequently Asked Questions (FAQs)
Why is sharpening lawn mower blades important?
Sharpening lawn mower blades is important because dull blades can tear grass rather than cut it cleanly, leading to a ragged appearance and increased vulnerability to disease. Sharp mower blades ensure a clean cut, promoting healthier grass and improving the overall look of your lawn.
How often should I sharpen my lawn mower blade?
You should sharpen your lawn mower blade approximately every 25 hours of use or at least once a season. Regularly sharpening your mower blades helps maintain a sharp edge for effective cutting and extends the life of your equipment.
What are the best methods for sharpening a lawn mower blade?
There are several effective methods for sharpening a lawn mower blade, including using a file, a bench grinder, or a specialized blade sharpener. Each method has its advantages, but using a file is ideal for precision sharpening while a bench grinder can quickly restore the blade edge.
How do I remove the lawn mower blade for sharpening?
To remove the lawn mower blade for sharpening, first ensure the mower is turned off and disconnected from the power source. Then, use a wrench to loosen the bolt securing the blade. Once loosened, gently remove the blade from the mower’s spindle.
How can I inspect the condition of my mower blades?
Inspecting the condition of your mower blades involves checking for signs of wear, such as nicks, rust, or a dull edge. Look closely at the blade tips and the bottom of the blade for damage. If the blade needs significant repair or is unbalanced, it may be time to sharpen or replace the blade.
What should I do if my mower’s blades are unbalanced?
If your mower’s blades are unbalanced, it can lead to uneven cutting and increased wear on the lawn mower’s engine. To fix this, you can use a balancer to identify which side is heavier and then remove material from the heavier side or adjust accordingly to achieve balance.
Can I sharpen my lawn mower blade with a file?
Yes, you can sharpen your lawn mower blade using a file. This method allows you to carefully work on the edge of the blade, maintaining a straight cutting edge. Make sure to file from the edge of the blade towards the center, following the original angle of the blade edge.
When should I replace the mower blade?
You should consider replacing the mower blade when it is significantly worn, damaged, or if the blade tips are chipped beyond repair. A new blade will provide a much cleaner cut and is essential for maintaining the health of your lawn.
How can I clean the blade after sharpening?
After sharpening your lawn mower blade, it is essential to clean the blade to remove any debris or metal shavings. You can use a wire brush or cloth to wipe down the blade, ensuring it’s free from anything that could affect its performance during mowing.