Emerging trends in the field of machine embroidery signify that it’s essential for beginners and advanced users to understand how to read design files and file types and how to obtain them. The purpose of this article is to assist in fully understanding how machine embroidery designs work and their interactions with machines. Different types of embroidery patterns, including their specific uses and characteristics, will be introduced. In addition, a comparative study on embroidery file types will allow one to determine how each file type influences the quality of the design and how many different embroidery units can perform the design. Lastly, we will deal with the many ways to download designs, including the options of ‘acquisition’ that will allow you to expand your collection quickly. This blog post aims to provide readers with a comprehensive overview of the critical aspects relevant to the usage of machine embroidery design.
What is a Machine Embroidery Design?

A machine embroidery design is a pattern created for a fabric and is digitally stored as a file for stitching. These designs are professionally prepared using special software to make the order and location of stitching that will be created on the fabric. Different designs consist of outlines, fills, satin stitches, and special effects that create a design for the viewer. To ensure that these designs can be used with various types, files are created and stored in formats that best suit individual machines and their models. Therefore, it is crucial to appreciate the details of these designs to make the embroidery work as desired and of high quality.
Understanding Different Types of Embroidery Patterns
Embroidery patterns can be categorized into various types, each offering unique benefits and applications. Three major types dominate the machine embroidery landscape: fill-stitch, satin-stitch, and applique patterns.
- Fill-Stitch Patterns: These designs utilize dense stitching to cover large areas and provide a textured appearance ideal for intricate and complex images. Fill-stitch patterns are versatile, allowing various shapes and sizes while maintaining consistency and durability on different fabrics.
- Satin-Stitch Patterns: Known for their smooth and glossy finish, satin-stitch patterns are employed to create defined outlines and lettering. They enhance designs by adding dimensionality, making them suitable for logos or monogramming, where precision and elegance are paramount.
- Applique Patterns: These patterns involve layering pieces of fabric over a background fabric, secured with stitches around the edges. Applique patterns are celebrated for their ability to add bold colors and textures without the density of full-fill stitches, offering a creative and often faster alternative to traditional embroidery methods.
Understanding these fundamental patterns is essential for selecting the right design for your project. You must consider factors such as the desired aesthetic, fabric type, and the intended use of the final embroidered product. Each pattern type presents its own technical specifications and artistic potential, influencing the process and outcome of machine embroidery.
How to Download Designs for Your Embroidery Machine
Downloading embroidery designs onto an embroidery machine is a systematic procedure that can be executed successfully by taking certain precautions. First, it is necessary to consult trustworthy websites offering various quality embroidery designs. Websites such as EmbroideryDesigns.com, UrbanThreads.com, and iBroidery.com deserve to be mentioned because they boast a wide selection of products and are easy to use. When on these sites, I look for designs that will be appropriate in terms of the embroidery project scope and cover such parameters as design, complexity of the pattern, and the compatibility of the file format with my machine. Once I am done with a design, I save it on my computer, confirming that it is in an appropriate format, for example, the PES, DST, or EXP formats supported by my machine model. Finally, I put the file into my machine through a USB stick or a direct connection, ready to be embroidered. This method guarantees that new designs will be added quickly, enhancing my embroidery projects with speed and accuracy.
Exploring the Art of Digital Embroidery
Digital embroidery merges traditional craftsmanship with advanced technology, creating intricate and efficient creations. Digital embroidery transforms digitized patterns into stitched artwork using computerized embroidery machines to answer your question concisely. These machines interpret digital files, translating them into precise patterns on fabric.
The technical parameters involved in digital embroidery are crucial to achieving high-quality results. Key parameters include:
- Stitch Density: This defines the number of stitches in a given area and affects the texture and durability of the embroidery. A higher stitch density increases texture and strength, while a lower density may be used for softer finishes.
- Thread Tension: Proper tension ensures smooth stitches without puckering fabric. The typical tension range depends on the thread and fabric type, generally between 2 and 4 grams for polyester threads.
- Stitch Length: Most designs utilize a standard stitch length of 2 mm to 4 mm, which can be adjusted based on the desired finish and design complexity.
- Needle Size: The choice of needle (usually ranging from size 70/10 to 90/14 for embroidery machines) influences stitch quality, with a needle sharp enough to penetrate the fabric without damaging it.
- Embroidery Speed: Typically measured in stitches per minute (SPM), embroidery speed should balance efficiency and stitch quality. Common speeds range from 600 to 1000 SPM and are adjustable based on fabric type and design intricacy.
Understanding and controlling these parameters allows for creating precise and professional digital embroidery projects, allowing for artistic expression while maintaining technical excellence.
How to Sew with Machine Embroidery?
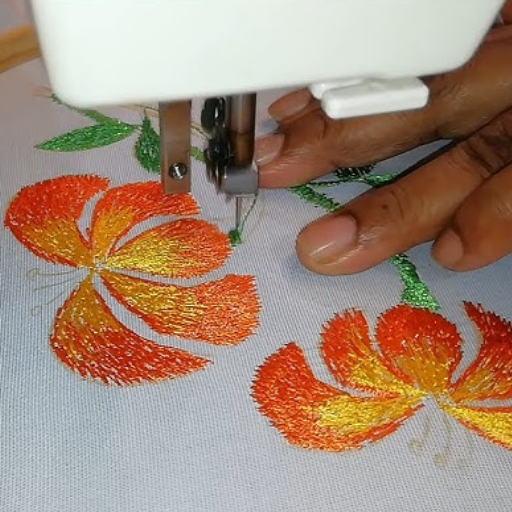
When one wishes to sew with machine embroidery, there is a method that one must follow to excel artistically and technically. Start with the easy task of choosing the right stabilizer. This is important to reduce fabric distortion and want a clean finish. Optimum support is offered when the size of the stabilizer concerning the hoop size is cut slightly larger than the size of the hoop. The next step is picking the needle and thread for the embroidery, depending on the fabric type and the design’s required properties. After that, the fabric with stabilizer is hooped and следует firmly pulled without wrinkles being present on the stabilizer so that there is no movement of the fabric during embroidery. Place the design file you have prepared into the machine by passing the hooped fabric under the needle and positioning the design precisely. Adapt factors such as stitch density, tension, and speed of the machine to the requirements of the work being done. Begin embroidering and pause occasionally to check for thread tensions and replacements for any altercations in the design. After the project, gently remove the hoop, cut away any visible stabilizer or thread tails, and improve the work if necessary. When these procedures are observed, the results from machine embroidery are tremendous, and all measures are followed to avoid mistakes.
Essential Embroidery Supplies You Need
To establish a solid foundation for your embroidery projects, assembling a comprehensive toolkit of essential supplies is crucial.
- Embroidery Machine: Choose a reliable and versatile embroidery machine that is compatible with various file formats and capable of handling complex designs. Consider models that offer adjustable speed and numerous built-in patterns for greater flexibility.
- Stabilizer: Various stabilizers such as cut-away, tear-away, and water-soluble types are vital to prevent puckering and distortion during embroidery. The choice of stabilizer depends on fabric type and design density, ensuring optimal support and finish.
- Needles and Threads: Select high-quality machine embroidery needles, typically size 70/10 to 90/14, to suit different fabric weights. Paired with top-brand embroidery threads, they ensure vibrant and durable stitches. Polyester and rayon threads are famous for their sheen and strength.
- Hoops: Hoops are indispensable for securing fabric during the stitching process. A range of hoop sizes allows you to work on various projects, from small monograms to more prominent motifs.
- Embroidery Software: Although optional, embroidery software can significantly enhance your creative process by allowing you to customize designs, edit patterns, and optimize stitch paths, expanding your artistic capabilities.
- Fabric Scissors and Snips: Precision scissors for trimming threads and excess stabilizer, along with more giant fabric scissors for cutting materials, are necessary for neat final touches and preparation.
Investing in these core supplies will ensure you’re well-equipped to embark on any embroidery project with precision and efficiency. This enables both novice and experienced embroiderers to produce high-quality work consistently.
Choosing the Right Embroidery Machine for Beginners
When choosing a suitable machine, I decided on ease of use and friendly features targeting beginners, which I frequently see recommended on well-known platforms when making my selection. I decided to stick with simple controls when choosing the model since most advanced machines are complex. Brands like Brother and Janome usually appear because they are trustworthy and have instructional features. These machines typically have several built-in patterns and stitches that are suitable and easy for beginners. I also looked for models with inbuilt tutorials and adjustable options that would allow me to learn at my comfort. I kept ease of transportation and maintenance in mind so that it was easy to control and store the machine. By considering ease of use, I also found a machine that fully met a beginner’s needs.
Tips for Perfect Stitch Quality
I discovered some beneficial insights while seeking perfect quality stitches during machine embroidery. To begin with, using the correct fabric together with suitable needles and thread resolves most problems; breakage of needles and the occurrence of skipped stitches are reduced with the use of quality needles of appropriate size and well-feeding threads. Balance in thread tension is also essential; I frequently adjust these settings while testing on a fabric scrap before embarking on my project. Machines need to be kept clean and maintained regularly to eliminate problems such as bumping of the thread. Stabilizer selection is also vital — using stabilizers that are appropriate for the fabric’s thickness and the design’s complexity helps avoid puckering or distortion of the embroidery. With these variables controlled, I’m happy to report that my self-embroidered fabrics look professional.
Where to Find Free Designs and Patterns?
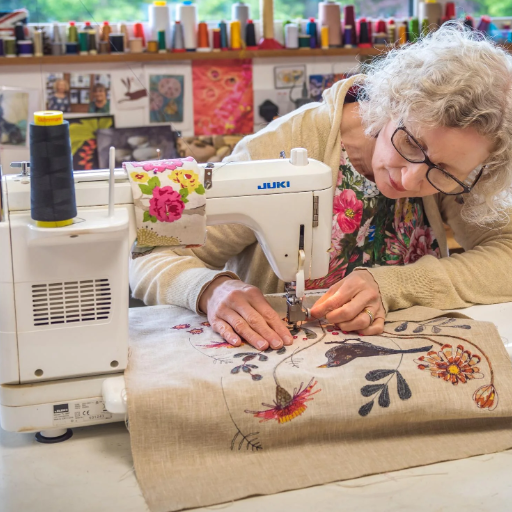
Many reputable online sources can help you get many free designs and patterns for your embroidery needs, which may extend to embroidery projects. For instance, free designs of different themes and difficulties can be found on the websites of EmbroideryDesigns.com and AnnTheGran.com. Furthermore, many machine manufacturers, such as Brother and Janome, provide free digital designs for users with those specific machines on their websites. Other sites, including Reddit and some Facebook dedicated pages, allow users to post their designs, which also helps widen the scope of your creativity further. These sources can help make your embroidery experience better without any extra costs.
Top Websites for Free Machine Embroidery Designs
Identifying top websites for free machine embroidery designs provides valuable resources for both amateur and seasoned embroiderers. After thorough research, several platforms stand out due to their expansive libraries and user-friendly interfaces:
- EmbroideryDesigns.com: This website is a prominent source known for its extensive collection of free and paid embroidery designs. Users can easily search based on themes, styles, or difficulty levels. Additionally, the platform offers a “Free Embroidery Patterns” section, which is updated regularly with new designs available for immediate download.
- AnnTheGran.com: Popular among embroidery enthusiasts, AnnTheGran provides a variety of free designs suitable for different projects. This site has an extensive community forum supporting idea exchange and pattern sharing. Users are also attracted by their design packs, which often include themed sets for cohesive project planning.
- Brother-USA.com: As a leading embroidery machine manufacturer, Brother offers exclusive access to complimentary designs through their official website. These designs are tailor-made for compatibility with Brother machines, ensuring seamless integration. The website updates frequently with new releases and is suitable for various types of embroiderers.
Accessing these platforms enriches your embroidery project options, offering high-quality, diverse designs without additional financial investment.
How to Add to Cart and Download Embroidery Patterns
About the number of patterns available and how to add them to the cart and download them at the end, I have to say that I have found it quite simple and efficient. On EmbroideryDesigns.com, I start by searching through the catalog, which I am accustomed to since I can categorize their designs by the number of themes and their difficulty level. A pattern that interests me is first saved in the ‘ Add to Cart’ option. Then, I see all the items I have chosen in the cart and click the ‘ Check out’ option. After logging in, I choose the ‘ Download’ option to save the file as quickly as possible.
While browsing AnnTheGran, the first thing I do is make sure I am logged into my account. When I expand their free design section, the expected action involves patrons clicking ‘Add to Cart’ for their desired patterns. I click the checkout button when I finish making my choices and go to the cart. The system usually asks for a confirmation, following which the purchased items are retrieved from my account’s download pages.
This is how simple it gets for the registered machine owners on Brother-USA.com. I sign in to my Brother account to claim various free designs, select the ones I need for the project, and place them into the cart. After that, they become readily available for download and include guidelines about importing them into Brother embroidery machines. By doing this, I avoid frustrating situations while broadening my design collection.
Joining an Embroidery Circle Membership for Exclusive Access
Embroidery enthusiasts who wish to have limited access to available resources and be part of a community should consider joining an Embroidery Circle Membership, as numerous benefits come with being a member. Some benefits include access to premium and new releases design collections and being part of member-only forums where industry professionals offer their knowledge, among other great benefits. Technical workshops are, furthermore, often presented covering issues such as how to calibrate machines and design digitization speech. The first thing concerning the membership is the fee, which mostly ranges between $50 to about $150 per year, within the expected membership. Consider the number of designs within the design library. Propose to have as many as you, a designer, need to accommodate a variety of designs in complexity and scope. In addition, how customer support is provided for resolving any problems that arise and require urgent attention is essential, especially for reputable memberships; most have it resolved through phone, email, or even live chat. By matching these technical parameters with your needs and requirements, the benefits of joining an embroidery circle reach a new level.
What Formats Are Available for Embroidery Files?

Several formats are commonly used for embroidery files, each with distinct characteristics suited for different machines and software. The most prevalent formats include:
- PES: Primarily used by Brother and Babylock machines, this format is widely supported and offers compatibility with many home embroidery setups.
- JEF: This is the native format for Janome machines, providing seamless transfer and integration specific to Janome software and hardware.
- DST: Used extensively in industrial embroidery machines like Tajima’s, this format is adept at handling complex designs easily and precisely.
- EXP: Ideal for Bernina machines, this format is known for its efficiency in conveying detailed embroidery instructions.
- VP3: Designed for Husqvarna Viking and Pfaff machines, this format supports intricate design elements and ensures accurate stitching outcomes.
Each file format serves a unique purpose, and choosing the correct one ensures optimal embroidery equipment performance. When selecting designs, verify that the format corresponds with your machine’s specifications to facilitate a smooth embroidery process.
Understanding PES, DST, and Other File Formats
To optimize the efficiency of any machine and for the ease of implementing the designs, exemplary combinations of embroidery files have been established. Primarily used in home embroidery, the PES format, intended for Brother and Babylock machines, is known to be robust and embraced in many applications because of its extensive support. It provides details of every stitch with its recording. On the other hand, the DST format, which is used for Tajima industrial machines, is effective in large structures where quite complicated designs have been incorporated. This explains why it is prevalent in most commercial embroidery fields, as it enables high-resolution designs. JEF is basically for Janome machines that optimize the file paths to minimize stress during operation.
There are also more formats, such as the EXP, designed for Bernina machines to enhance the transfer of design details. The VP3, which can incorporate complicated designs, has also been developed with a perfect stitch for Husqvarna Viking and Pfaff machines. Observing the file format best suited to the embroidery machine is essential to guarantee success. The selection process is so crucial that one does not encounter problems during the transfer or implementation stage.
Converting Design Packs for Different Machines
My first concern is determining the format required for my particular machine while preparing design packs for different embroidery machines. In most cases, I approached using specific software related to embroidery design that was stated in the best embroidery information websites as supporting several file types. Upon entering the software, I find a design pack and click on the save with a scroll-down that lets me hold the design while changing the format to PES, JEF, DST, or any other type. It is almost a ‘religion’ to many embroidery websites, such as SewArt, Embrilliance, and Ink/Stitch, to back up files and test the modified ones on scraps first, mainly so that one can verify that any final work is ready for the embroidery machine. Modalities such as these ensure that the designs are intact and make it easier to do the embroidery machine.
How to Instant Download and Use Digital Files
When downloading and using digital embroidery files, following specific procedures to integrate the files without any hitches on the embroidery machine is essential. First, you should look for a store in the network that sells embroidery designs appropriate to the requested computer. Once you choose the design you want, go to the checkout section, where sending a download link after paying for the order is customary.
To ensure the smoothness of the downloading procedure, check that the internet connection is steady and that there is enough space on the device. For sites that offer files in compressed form, have a file decompression tool like WinRAR or 7-Zip ready, and organize the downloaded files in an appropriate folder for easy retrieval.
Once the downloading is finished, ensure the design format is suitable for your machine; popular ones like PES, JEF, DST, EXP, or VP3 should be checked against the machine finishing embroidery compatibility chart. Use USB flash memory or a direct cable connection for the computer to embroider the design transfer. It is recommended that a sample stitch be run on a fabric similar to the final project to assess whether the design is correct and rectify any stitching irregularities.
These technical stages contribute to smooth processes, keeping the design quality intact and enabling the best execution of embroidery processes.
How to Create a Collection of Embroidery Designs?

Creating an organized portfolio of embroidery designs that will cover all future requirements requires proper planning and selection to ensure that variety is available whenever needed. Begin by acquiring suitable embroidery software that enables you to store your designs in an organized manner; such programs as Embrilliance and SewArt have sophisticated features for collection management. Create sub-categories depending on the theme and purpose of the designs, be it embroidery designs of flowers or crowns. Stress that each of the sub-categories is purpose-specific. Expand your collection by adding new designs from quality sites and save them in formats supported by the embroidery machines you have. Back up your collection in disk drives or the cloud to avoid possible data loss and confusion. For better future use, design a catalog of all the works created with the embedding in tags and descriptors to enable easier access and site navigation. This meticulous method ensures that the bulk of the embroidery design collection will always remain productive resources and can be relied upon for integration within the design process.
Organizing Your Embroidery Design Library
First of all, make sure that you follow the recommendations of some of the best embroidery resource sites on how to store your embroidery designs. First, I would recommend setting aside a few folders on your Folder structures into which you will keep all your files and organize them, relating them to projects, themes, or types. Also, name each file descriptively so that one does not have to spend too much time going through every single file to determine the design in the file. Use metadata and tags to make the designs you add to the software quickly accessible on the software and the operating system. You must also keep your library data on external drives or cloud storage systems to avoid losing your data.
Always select design management applications that will be easily functional within the existing application. Most software solutions help you to see your designs virtually, allowing you to sort or tag them, which is not a wrong way to organize your collections. As pointed out by many online experts, a regular update and review schedule ensures that the library is recent and erases any designs that are no longer relevant or repeated while providing spaces for upcoming ones. When well structured, your embroidery design library becomes a source of great inspiration and an efficient tool for your embroidery activities.
Building a Quilt with Applique Designs
Applique designs can be a great enhancement to a quilt. However, the development of a quilt necessitates a logical and organized process. For me, I begin by searching for applique designs that will fit the quilt’s theme and find such designs in several other places. When the design is decided, I remove the materials: fabric interfacing and matching threads. I then use a requisite embroidery program to adjust the design so that it meets the specifications of the machine being used and can fit the area of the quilt blocks that have been specified.
Some of the goals while preparing for work are washing, ironing, and pre-cutting quilt fabric and applique pieces before the sewing process to prevent them from fading. When everything is in position, I use temporary spray adhesive to firmly hold the applique pieces to the quilt blocks or use pins. I then embroider the applique onto the cloth with a satin stitch encasing or decorative stitch capturing the edges of the applique. This is followed by adjusting my machine’s stitching density and tension to reduce the chances of puckering.
Lastly, I finish the quilt by positioning the blocks, adding borders, and then layering the top with batting and backing fabric. I complete the task of quilting where appropriate, designed to complement my applique work. Drawing ideas and methods from some of the best quilting books, I achieve a superb-looking, well-made, sturdy quilt.
Incorporating Custom and Lace Designs
Using custom lace designs in embroidery can improve the appearance of embroidery work and make it more individual and creative. To do that, you should first choose the designs that best suit your needs. It is possible to effectively transform your lace designs into digital forms with embroidery programs such as Wilcom or Hatch used to achieve such. Choosing a stabilizer suitable for the thin lace material is crucial when creating lace designs. For example, water-soluble or tear-away stabilizers can be used. One must realize that the technical parameters of custom designs are also critical: the fabric resolution that will be used and a stitch density of between 0.2 – 0.4 mm for lace embroidery. Notably, tension needs to be adjusted. The tension is set lower than usually required for complicated lace work, avoiding distortion. Also, to achieve a nice blend of lace and custom designs, the embroidery machine’s hoop’s dimensions should match the design’s dimensions. Given this, the design can rotate or pull freely without any constraints. Considering these technical specifications helps ensure precision and style in blending the custom and lace designs with an emphasis on the overall beauty of the projects.
References
Frequently Asked Questions (FAQ)
Q: What are the standard formats used for machine embroidery designs?
A: Common formats for machine embroidery designs include EXP, HUS, JEF, VP3, XXX, and VIP. These formats are compatible with various embroidery machines, allowing seamless integration and use.
Q: Can I use a single pattern for different hoop sizes?
A: Many embroidery patterns are available in 4 sizes to accommodate different hoop dimensions. This ensures you can use the same design across various projects, whether large or small.
Q: Where can I find free embroidery patterns for download?
A: You can find a range of free embroidery patterns by visiting embroiderydesigns.com. The site offers thousands of machine embroidery designs, including charming and seasonal designs.
Q: How can I ensure high quality in my machine embroidery projects?
A: To ensure high quality in your machine embroidery projects, choose digital machine embroidery designs that are well-reviewed and compatible with your machine. Additionally, use high-quality thread and fabric for the best results.
Q: What types of sewing patterns are popular in the embroidery world?
A: Popular sewing patterns in embroidery include redwork, religious embroidery, and new designs. These patterns offer various styles and themes to suit different tastes.
Q: How do I incorporate different fonts into my embroidery designs?
A: You can incorporate different fonts into your embroidery designs by selecting patterns that include font options. This lets you personalize your projects with names, messages, or monograms.
Q: Are there digital designs available for religious embroidery?
A: Thousands of machine embroidery designs are available for religious embroidery, allowing you to create meaningful projects with spiritual themes.
Q: How can I suggest a new embroidery design?
A: If you have ideas for new embroidery designs, you are welcome to suggest one to us. We will get back to you with feedback and the potential inclusion in our design selection.
Q: What is redwork, and why is it popular?
A: Redwork is a style of embroidery that uses red thread to create simple yet elegant designs. It is popular due to its classic look and the ease with which it can be adapted to various projects.


