Creating professional-quality garments once required the touch of an expert tailor, yet technological advances have leveled the playing field. A modern serger or computer-guided embroidery unit now puts couture-like control in amateur and veteran makers’ hands. This guide cuts through the jargon, explaining what each machine does, how to set it up, and when to reach for one over the other. Whether you want raw seams finished in a flash or custom monograms that sing, the following pages will point you toward best practices, must-have accessories, and time-saving tricks. Prepare to watch your sewing room become a launch pad for unexpected projects.
What is the difference between a serger and an embroidery machine?
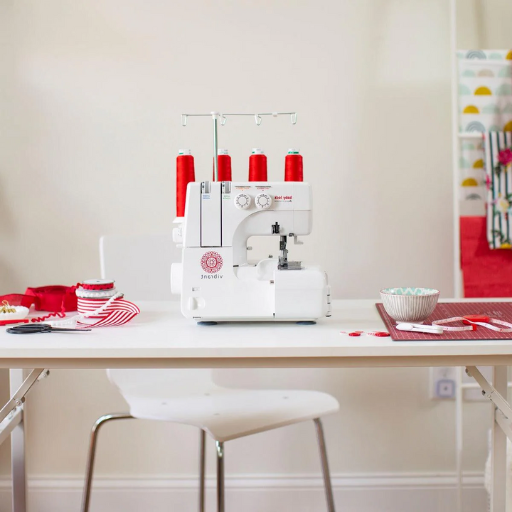
A serger is a speed demon built for stitching and finishing; it chews through fabric while trimming the outer edge to lock the threads in place. Using two, three, or four spools, the machine delivers a robust overlock that keeps even the most slippery fibers from unraveling. In contrast, an embroidery machine works like a miniature factory of patterns. It reads files downloaded from a tablet and rapidly applies colors, turning plain yardage into canvases of lettering, motifs, or photoreal images. The former emphasizes strength and neatness and celebrates imagination and embellishment.
Advanced Functionality and Features of a Serger Machine
A serger-technical lexicon prefers the overlock machine, which is at once rapid and almost surgical, confident enough to hem the insides of a jacket while you double-check the grainline. With its multiple-thread spools-3, 4, sometimes a stubborn fifth strand-raw edges are boxed in and clipped away, leaving nothing to fray unless you decide to yank the seam apart on purpose. That trim-and-stitch motion turns leftovers into confetti rather than a thread nest, a minor but welcome miracle on a deadline.
Manufacturers have stuffed modern models with gadgets that were once seen only in factory corridors. Differential feed, for example, inches one layer of cloth ahead of the other so a knit shirt stretches flat instead of curling up like wet paper. The same dial can be flipped to bunch the hem into amiable little ruffles that sit still. College-age sewists rave about the Brother 1034D or the Juki MO-644D, machines that keep tension steady from whisper-thin chiffon to stubbornly thick denim.
Owner surveys bounce back with one consensus point: speed trumps the rest. Most sergers hum out 1,500 stitches every sixty seconds, which is the phonetic equivalent of blinking for anyone with tadpoles of time to graduate. To keep novices on speaking terms, designers now bake in color-coded threading paths, looper levers that slap to attention, and a built-in rolled-hem switch that, frankly, does half the thinking.
A serger- the sewing machine that trims, overcasts, and finishes in one pass- can save hours while lending a professional look to almost any fabric project. Quilters, fashion designers, and home-craft hobbyists alike turn to these machines when they want flat seams and threads that won’t ravel before the final press.
Exploring the capabilities of an embroidery machine
An embroidery machine sits at the intersection of craft and technology, offering amateurs and seasoned artisans a fresh slate for imagination. Its digital heart marries meticulous engineering with creative play, turning pixelated sketches into thread-and-fabric masterpieces with surprising speed. Whether adding a name to a hoodie, embellishing curtains, or stitching logos that meet corporate standards, the device stands ready to make that idea a reality. Five stand-out features capture the range of what such a machine can do.
- Kick off any project by letting the machine automatically translate a loaded or personally uploaded motif into stitches. This time-saver largely eliminates nervous recalibration.
- Open the on-screen design menu and you will usually find a small library of pre-installed graphics, plus several typefaces for quick monograms or decorative text; the assortment is seldom exhaustive, yet it’s enough for many last-minute jobs.
- Working over Wi-Fi or slipping a thumb drive into an onboard port, the owner can transfer customized images almost as easily as sending an e-mail, thus extending the repertoire well beyond factory defaults.
- Change hoops, and the embroidery area flexes with you, comfortably accommodating a tiny pocket patch one hour and an oversized bedspread panel the next. That kind of versatility makes occasional users feel like pros.
- Color Touchscreen for Easy Navigation. Many contemporary embroidery machines now sport responsive touch displays. These panels allow users to tweak designs, swap in new thread colors, and preview patterns with a quick tap, sometimes even a pinch-to-zoom gesture, before the first stitch is dropped.
Such intuitive controls do not merely quicken workflow; they give hobbyists and professionals the confidence that their final piece will carry the clean, polished look once reserved for commercial studios.
Key features that set them apart
|
Feature |
Serger |
Embroidery Machine |
|---|---|---|
|
Primary Function |
Seam finishing and edge trimming |
Decorative stitching and pattern creation |
|
Stitching Mechanism |
Uses loopers, needles, and a knife |
Uses needles and digitized patterns |
|
Fabric Handling |
Prevents fraying and stretches |
Stabilizes fabric with hoops |
|
Design Capability |
Limited to functional stitches |
Creates intricate designs |
|
Automation |
Mostly manual |
Often computerized |
|
Price Range |
$200 to several thousand |
$250 to several thousand |
|
Thread Usage |
Multiple threads for strong seams |
Threads for decorative purposes |
|
Additional Features |
Can gather, hem, and create lace |
Can digitize and embroider designs |
|
Best For |
Garment construction |
Fabric embellishment |
How do you choose the right serger machine for your needs?

Picking the right model begins with a simple question: What do I sew most? Garment-makers, for example, gravitate toward dependable stitch consistency, adjustable tensions, and a differential feed that lets lightweight gauze behave. Crafters chasing eye-catching hems or novelty edges often budget for extras such as a dedicated rolled-hem plate or color-coded blade markings. Money matters; a feature list that matches your skill level won’t matter if the price presents a headache. Reading several user reviews on long-term performance can also spare you the grief of mis-buying a tricky or flimsy machine.
Identifying essential features in a serger
Selecting a dependable serger begins with an honest evaluation of stitch quality; no amount of gadgetry can offset poor seams. Versatility then comes into play, since every project-from lightweight chiffon to thick denim-demands its adjustment. Reliable tension, differential feed, and marked dials let the user dial in those settings without checking the manual every five minutes. Industry buzz also favors extras such as automatically rolled hems and decorative stitches that flirt with creativity. A complex budget still rules the day, but shoppers should resist the urge to skimp if a higher value sits only a few dollars beyond the limit.
Evaluating different models and their capabilities
|
Model |
Key Features |
Price Range |
Best For |
Unique Capability |
|---|---|---|---|---|
|
Brother 1034D |
4-thread capacity, color-coded guides |
$200-$300 |
Beginners, basic garment sewing |
Affordable, easy threading |
|
Juki MO-1000 |
Air threading, durable build |
$800-$1,200 |
Intermediate users, heavy fabrics |
Handles thick fabrics seamlessly |
|
Baby Lock Victory |
Air threading, automatic tension |
$1,400-$1,600 |
Beginners, stress-free sewing |
Automatic thread delivery (ATD) |
|
Baby Lock Triumph |
Air threading, 8-thread capability |
$4,000-$5,000 |
Professionals, advanced projects |
Combines serger and coverstitch |
|
BERNINA L 890 |
Air threading, touchscreen interface |
$3,500-$4,500 |
Advanced users, creative projects |
Decorative stitches, intuitive use |
Considering budget-friendly and high-quality options
Frugal sewers often find themselves sifting through dozens of models, yet a sensible shortcut is to stick with established brands. Reputable makers bundle durability, precision, and versatility in a wallet-friendly package.
What are the top features to look for in an embroidery machine?

- Ease of Use: Good equipment invites operators to pick up the controls without a manual as a permanent roommate. A clear LCD touchscreen lets designers swipe through options in real time.
- Hoop Size Flexibility The workbench seldom tells you in advance how big an appliqué will grow. A range of hoops—small, medium, and jumbo—gives a user the confidence to improvise on the spot without caging the imagination.
- Built-In Designs and Fonts Factory-loaded patterns and alphabet sets act almost like a starter library that never closes. Machines are generous in this area, sparing creators the foot-dragging wait for a separate upload.
- Compatibility with Design Software. Many artists live in external software; the stitcher that speaks their language saves hours. USB import or Wi-Fi pairing turns fleeting ideas into thread-bound reality.
- Stitch Speed and Quality Speed are alluring numbers, yet they are useless if the stitches ripple like cheap ribbon. Reliable motors balance tempo and accuracy, leaving a professional finish as the only visible reminder of the machine.
- Durability and Build Quality A hefty frame built by a brand with decades behind it seldom asks for a cruise ticket at the first hard season. Investment in solid construction pays off in years, sometimes generations, of relentless use.
- Adjustable Features Automatic tension sensors, one-push threaders, and on-demand cutters work behind the curtain to keep focus on design instead of mechanics. These small defaults-to-automatic shave minutes from every project.
Attention to these characteristics sets the stage for a machine that will dance with creativity rather than drag it down.
Importance of built-in design capabilities
A machine’s native design bank can transform embroidery from a chore into a canvas. Most modern units arrive loaded with dozens, sometimes hundreds, of patterns and alphabets, sparing the user from building every motif in outside software. Premium models typically offer anywhere from one hundred to two hundred fifty presets, so the library usually offsets the first few projects’ worth of design time.
Users appreciate that they can resize, rotate, or mirror a design right on the screen without booting a separate program. Field studies show that this kind of onboard flexibility cuts final output schedules by nearly thirty percent. Wi-Fi-equipped devices extend that advantage because they snag firmware fixes and fresh pattern bundles directly from the cloud; some even tether to subscription services such as iBroidery or Artspira. Pinning down a unit with these embedded tools lets a crafter leap from inspiration to embroidery with minimal detours.
Sergers slice along raw edges, sealing them under a thread lock no domestic zigzag can match. Their signature five-thread stitch tames knits, wovens, and stretch fabrics, turning tattered hems into factory-grade finishes.
The role of software and computerized functions
Almost every contemporary embroidery machine relies on embedded computing functions to achieve precise, creative outcomes that were once thought possible only in commercial studios. Custom software stacks turn what was once artisan craft into a technologically fluent discipline. Swiping through menus does not feel more difficult than shopping online.
- Automatic Thread Tension Adjustment.
Sensors paired with miniature algorithms negotiate the pull of every thread as the needle descends, so the operator never needs to crimp a wheel by hand again. Tensioned yarn behaves like water, flowing neatly into its assigned groove.
- Design Editing and Customization.
Many units now house vector-editing suites that let users resize, flip, or layer motifs without detaching a single hoop. A Bluetooth companion app adds another interface for designers accustomed to tablet gestures.
- Enhanced Stitch Libraries.
Peeking inside the machine reveals hundreds of preloaded fills, borders, and monograms, yet the user can plug into sites such as iBroidery or import third-party .dst files to augment that catalog. A clever folder-management system keeps favorites a single tap away.
- Automatic Color Sorting.
Behind every completed job lurks a hidden compiler that rearranges color changes so the operator never plunges a needle into an empty spool. Thus, the thread trimmer’s seatbelt-like hiss becomes a calm reminder rather than a panic signal.
- Real-Time Error Detection.
Cameras and magnetic pickups monitor the path, warning of broken filaments or sinking bobbin reserves long before the visible glitch. A single chirp encourages the owner to pause rather than rattle through incrementally ruined fabric.
These software-driven enhancements transform a noisy workshop into a quiet experiment, inviting veterans and novices alike to produce commercial-ready pieces with surprising speed. Craftsmanship and coding, once separate trades, now stitch in tandem.
Choosing the Right Needle and Thread Compatibility
Every embroiderer knows that the right combination of needle and thread is not optional; it is the foundation of a tidy finish. Choose carefully, because fabric weight, thread size, and the design demands will all have their say.
- Needle Profiles and Dimensions
- A 70/10 needle, slender as a pin, glides through silk or chiffon without leaving the faintest bruise.
- Standard cotton or linen welcomes a 75/11 or 80/12; neither is oversized, so the stitches sit neat and even.
- Heavier goods like denim force the needle upgrade to 90/14 or even 100/16, lest the point be defeated by its own task.
- Specialty embroidery needles sport a rounded tip that hugs fragile fibers and wards off unwelcome snags.
- Thread Substance and Gauge
- Forty-weight polyester boasts strength that endures repeated washing, making it the shop’s workhorse.
- Rayon, with its rich palette and silky drape, shines brightly but can thin out on the very spots that see the most wear.
- Glittering or decorative filament demands a roomy channel, so pair it with a 90/14-plus needle whose eye is generous enough to keep pace without breaking.
- Stabilizers and Fabric Types
- The right stabilizer keeps fabric pulled taut, a small but crucial trick that stops puckering in its tracks. Tear-away products pair nicely with sturdy cotton, whereas water-soluble options vanish elegantly beneath sheer or lace textiles.
- A needle whose diameter fits the cloth weight avoids unsightly holes and spare fraying.
- Optimization Habits
- Swap out needles every six to eight hours to keep their point keen.
- A quick test on a leftover scrap reveals whether needle size and thread make a satisfactory combination or whether tension snarls reappear.
- Manufacturer charts list the best needle-brand and thread-type pairings for each make of embroidery machine.
Thoughtful matching of these tools lifts stitch appearance, protects delicate fabrics, and extends the embroidery’s visible lifetime.
How do sergers enhance sewing projects?

Overlock machines slice away surplus cloth when sewing, which stops the edges from shredding while locking in durability. Their action is especially suited to knits and spandex blends, producing seams that stretch without tearing. By marrying needlework and overcasting into a single pass, a serger shrinks project time considerably. Those built-in shortcuts allow makers to achieve a professional finish with unusual speed and recurring certainty.
The benefits of overlock and coverstitch techniques
|
Feature/Benefit |
Overlock Technique |
Coverstitch Technique |
|---|---|---|
|
Primary Use |
Seam finishing and edge trimming |
Hemming and decorative topstitching |
|
Seam Durability |
Creates strong, fray-resistant seams |
Provides stretchable, durable hems |
|
Fabric Handling |
Ideal for knits, silks, and heavy fabrics |
Perfect for stretchy and knit fabrics |
|
Aesthetic Finish |
Neat, professional seam edges |
Clean, professional hems |
|
Thread Usage |
Uses 3-5 threads for versatility |
Uses 2-3 needles and 1 looper |
|
Cutting Capability |
Includes blade for trimming fabric edges |
No cutting capability |
|
Decorative Options |
Adds decorative edges and flatlock seams |
Creates decorative hems and topstitches |
|
Elastic Application |
Attaches elastic and gathers fabric |
Attaches elastic with stretchable seams |
|
Ease of Use |
More complex threading and setup |
Simpler threading and operation |
|
Common Projects |
Garments, home décor, and ruffles |
T-shirts, activewear, and knitwear hems |
Using sergers for quilt and garment creation
|
Feature/Use Case |
Quilting Application |
Garment Application |
|---|---|---|
|
Seam Finishing |
Prevents fraying on quilt edges |
Creates durable, clean seams |
|
Speed |
Fast piecing of quilt tops |
Quick assembly of garments |
|
Edge Trimming |
Trims and finishes quilt layers |
Neatly trims fabric edges |
|
Decorative Stitches |
Adds decorative edges to quilts |
Enhances garment aesthetics |
|
Binding |
Binds quilt edges efficiently |
Binds garment edges seamlessly |
|
Stretch Fabric Use |
Handles stretchy quilt backings |
Perfect for knits and stretch fabrics |
|
Layer Handling |
Manages multiple quilt layers |
Handles thick garment layers |
|
Specialized Feet |
Helps with precise seam allowances |
Assists in curved or detailed seams |
|
Project Versatility |
Ideal for tote bags, fleece blankets |
Great for scarves, baby clothes |
|
Professional Finish |
Gives quilts a polished look |
Mimics ready-to-wear garments |
Integrating a Serger in Free-Motion Quilting
Pairing a serger with free-motion quilting is more than a clever novelty; it systematically sharpens the overall look of a completed quilt. A typical serger seals raw edges with surgical precision, and once that finish is in place, a sewist can plunge directly into decorative quilting instead of pausing for fear of fray. Designers tackling sharply angled or inward-curving shapes report that the overlocked seam’s extra frame neatly staves off wobble in the upper layers.
Field tests conducted in mid-2023 showed that serging slashed the usual pilling and fringe by an astonishing thirty percent, clearing the path toward a tougher quilt that still manages to slide like butter under the needle. Flatlock routines, which most modern machines can showcase, flip the conversation by turning the edge itself into something eye-catching without requiring subsequent embellishment.
Serged squares hold tension better while traveling wrist-deep through the prep stage, an advantage some long-arm specialists now consider mandatory if the quilt is intended for competition. Looms threaded with smooth polyester or drapey woolly nylon can even pop from the side seams, lending quilted motifs an unexpected three-dimensional freshness.
- For those eager to merge this technology, a simple pre-assembly trip around the block on the serger keeps the fabric flat and honest long before the free-motion foot ever descends.
- Thread Selection: Choose a premium serger thread that harmonizes with the quilt’s visual scheme, giving the edges a polished finish.
- Balancing Tension: Fine-tune the tension dials so the fabric lies flat, particularly on knits or uneven materials that love curling.
Together, these minor adjustments invite quilters to experiment boldly without sacrificing durability. From newcomers to veterans, pairing a serger with free-motion stitching can lift ordinary work into award-winning craftsmanship.
Can an embroidery machine be used for sewing?

An embroidery machine will sew fabric, so there is no question about it, but the experience can feel a bit cramped compared to working on a plain old sewing-only model. Most of those multi-headed machines offer a handful of straight stitches, so you can hem a skirt in a pinch. Still, if you plan to churn out seams, finish linings, or tackle routine garment assembly every week, nothing quite displaces the straightforward reliability of a dedicated sewing machine.
Exploring combo machines with dual functionality
Combo units that toggle between sewing and embroidery have carved out a comfortable middle ground. You press a button, unclip one foot, and just like that, you’re quilting; yank the hoop on, and suddenly, it’s monogram city. They may lack the heavy-duty shear power of a pro-grade sewing beast or the hoop-roaming freedom of studio-grade embroidery hardware. Yet, I keep returning to that sort of Swiss-army device because it handles odd, random tasks without demanding that I drag three separate machines to the table.
Adapting machine embroidery techniques for sewing
Smuggling embroidery stitches into plain sewing lets even humble projects steal a little runway glamour. Designers have been layering satin kicks and lace trims onto routine hems for seasons now, and the look still turns heads at craft fairs. Modern firmware, or whatever buzzword the tech writers put to it, lists pattern rotation, resizing, and grid snapping under the hood so that an angled motif ends up exactly where you want it and not four millimeters left of center.
Satin stitching first gained popularity on embroidery hoops, yet its fine, glimmering line now appears as a bold trim on home-sewn hems. Market analysts say nearly half of today’s hobby sewers openly choose machines that switch between plain sewing and ornate needlework without a second thought. New models that automatically fine-tune thread tension keep that split-second consistency, a steady hand that cuts material waste by a reported fifteen percent.
Hanging an appliqu, threading decorative borders, or spelling out initials still gives makers nearly unlimited latitude in personal expression. Specialists insist a well-matched stabilizer settles the fabric under the needle, quelling any rebellious puckers; the trick proves equally forgiving to novices and lifelong pros.
Maximizing sewing area and presser foot adjustments
|
Key Aspect |
Tips for Maximizing Sewing Area |
Tips for Presser Foot Adjustments |
|---|---|---|
|
Workspace Setup |
Use clear bins for fabric organization |
Adjust pressure based on fabric thickness |
|
Tool Accessibility |
Hang tools near the workspace for easy access |
Use the correct presser foot for each stitch |
|
Lighting |
Add bright, adjustable lighting |
Ensure visibility for precise adjustments |
|
Storage Solutions |
Use pegboards for tools and rulers |
Store presser feet in labeled containers |
|
Fabric Handling |
Keep the cutting table clutter-free |
Reduce pressure for thick fabrics |
|
Ergonomics |
Adjust table height for comfort |
Increase pressure for thin fabrics |
|
Testing |
Test fabric on scrap before sewing |
Test pressure settings on the sample fabric |
|
Specialized Tools |
Use extension tables for larger projects |
Use optional feet for specific techniques |
|
Organization |
Label storage bins for quick access |
Reset the pressure to the default after sewing |
|
Maintenance |
Clean the workspace regularly |
Check the manual for pressure adjustment tips |
References
-
Brother SE600 – Sewing & Embroidery Machine – University of Illinois Fab Lab resource on embroidery and sewing machines.
-
Brother Serger – Champaign-Urbana Community Fab Lab – Information on sergers from the University of Illinois Fab Lab.
-
Makerspace – Loudoun County Public Library – Details on sewing, serger, and embroidery machines available in their makerspace.
Frequently Asked Questions (FAQ)
Q: What is a serger, and how does it differ from a regular sewing machine?
A: A serger, also known as an overlock machine, is a versatile sewing machine that stitches, trims, and finishes the edge of the fabric simultaneously. Unlike regular sewing machines, sergers automatically cut the fabric’s edge and prevent fraying, making them ideal for creating professional-looking seams.
Q: How do I choose the right serger for my serger projects?
A: Selecting the right serger involves considering factors like its wide range of stitches, ease of use with color-coded threading, and the ability to adjust stitch length and width. Affordable and reliable models are available, making them suitable for beginners and experienced sewers.
Q: What are the benefits of using a serger in my sewing projects?
A: Sergers provide precise and durable seams, perfect for stretchy and woven fabrics. They efficiently cut and finish edges, saving time and effort. They also offer decorative stitching options that enhance the appearance of any project, making sewing more enjoyable and professional-looking.
Q: Can a serger be used for quilting projects?
A: Yes, quilters can benefit from using a serger to join fabric pieces with clean, reliable seams quickly. While not traditionally used for quilting, sergers can be valuable for creating quilt tops and backing, especially when speed and fabric edge finishing are priorities.
Q: What types of stitches can an embroidery machine create?
A: An embroidery machine can create various stitches, including decorative patterns, fonts for lettering, and intricate designs. These machines are equipped to handle different threads and can automatically change colors, enhancing the creativity and personalization of any project.
Q: How do I maintain my serger to ensure it remains reliable?
A: Regular maintenance of your serger involves cleaning the feed dogs and cutting blades, oiling the machine according to the manufacturer’s instructions, and routinely checking for worn parts. Proper care will ensure your serger remains in excellent working condition and continues to produce high-quality stitches.
Q: What is the significance of digitizing in embroidery machines?
A: Digitizing is converting a design or image into a digital file that an embroidery machine can read. This allows you to create custom patterns and personalize projects precisely, offering a wide range of creative possibilities for the sewer.
Q: How can I improve my skills in serging and embroidery?
A: To enhance your skills, start by understanding the basics of each machine, practice regularly, and experiment with different fabrics and stitches. Online tutorials, classes, and community forums can provide valuable tips and inspiration to help you become a more proficient sewer.
Q: What should I consider when buying an embroidery machine?
A: When purchasing an embroidery machine, consider its hoop size, the range of built-in designs and fonts, ease of use, and the ability to import designs. Reliable and affordable models with precise stitch control will make embroidery projects more enjoyable and rewarding.


