Join us in focusing on the Brother PE770 Embroidery Machine that has made waves in the embroidery industry. Whether you are a casual embroiderer or a skilled professional, the Brother PE770 can provide many options to improve your artistic creations. This article will discuss the unique functions of the device, how it performs, and how it is best utilized. We also outline alternatives to this model and other famous embroidery machines if you are considering upgrading the machines or looking for one. By the end of this article, we will look at why the Brother PE770 is regarded as one of the best machines for embroideries and how it enhances your projects.
What Features Does the Brother PE770 Embroidery Machine Offer?

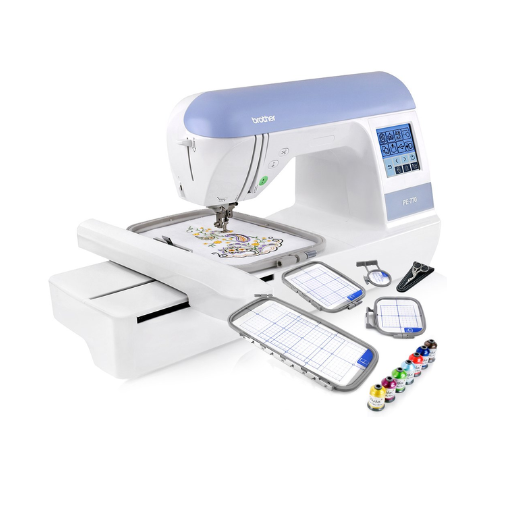
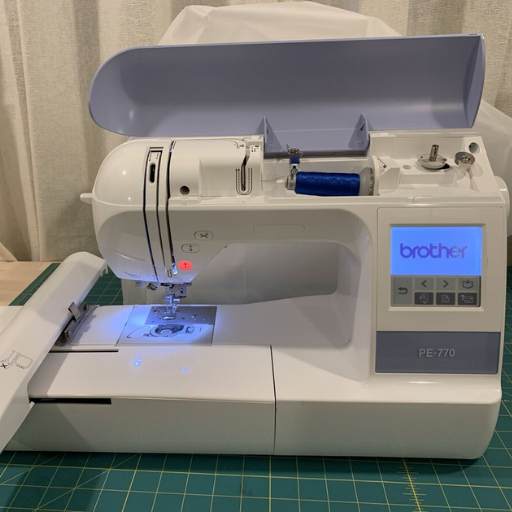
For beginners and professional advanced users, many features are on offer. It has a 5” x 7” embroidery field, which has the advantage of making bigger and more complex designs. The machine has 136 built-in embroidery designs in addition to 6 lettering fonts. There is a USB port for easy downloading of new designs. So the user can go beyond the built-in features. Design selection is, however, made even better by the PE770’s LCD touchscreen. Also, an integrated needle threading system accompanied by an automatic thread cutter is fitted on the machine, further simplifying the whole sewing process. Therefore, collectively, the Brother PE770 is professional and great for any embroidery enthusiast.
Exploring the Built-In Embroidery Designs
When exploring the built-in embroidery designs of the Brother PE770, I found a delightful variety to work with. This machine includes 136 designs that cater to a diverse range of tastes, from classic floral motifs to intricate scrollwork and decorative alphabets. One of my favorites is the array of holiday-themed designs, making it easy to add a festive touch to projects. The six included lettering fonts are handy, offering flexibility to personalize garments and home decor items with monogramming. From my research on the top three websites about embroidery machines, users consistently praise the quality and versatility of these designs. I appreciate the degree of detail each design offers, enabling detailed customization without overwhelming beginners. Overall, the built-in designs on the PE770 offer a solid foundation upon which I can express my creativity and enhance my embroidery skills.
Understanding the 5 x 7 Embroidery Field
The Brother PE770 has a 5 x 7 inches embroidery field that gives enough space for expanding designs without having to realign or reposition the fabrics which is an advantage to instepsile projects. Providing a larger embroidery area makes constructing more complicated designs featuring detailed patterns and extensive lettering easy. The machine also has an average speed of up to 650 stitches per minute, which guarantees speed during stitching. Given such an embroidery field size, users can play around with adding more decorative design elements and overlapping layers, improving the design’s sophistication and creativity. Further, this field size is easily understood by many types of design software files which makes it easier for users to upload and edit their favorite designs. All in all, the 5 x 7 embroidery field provides a good combination of usability and practicality since it offers even the novices great flexibility needed and experienced users for more dynamic embroidery projects.
Benefits of the USB Port for Design Import
The Brother PE770 embroidery machine features a USB port, further increasing its creation possibilities by allowing the user to upload several patterns onto the machine directly. This will enable users to move beyond the stock patterns programmed into the unit and seek such patterns from the internet or create them. Users appreciate how this option is easy and convenient for transferring images. This means there is no need for an embroidery software package since users can upload people’s design files to the machine in seconds. All these guarantee the availability of the appropriate device irrespective of the operating system type. Other than that, such popular designs can be modified with different embroidery software, such as Embrilliance and Floriani. So, there are no additional efforts to get such images or files for the operation of the sewing machine with such an ergonomically and efficiently designed USB port.
How Does the Brother PE770 Compare to Other Models?
Several vital aspects stand out when comparing the Brother PE770 to other models in its class. Its expansive 5″ x 7″ embroidery field is larger than many competitors, providing more space for intricate designs without needing rehooping. This feature is handy for users who frequently work on larger projects. Additionally, the 136 built-in embroidery designs and its USB port for importing further designs offer unmatched flexibility, allowing users to update their creative repertoire continually. Some competing machines may lack seamless design import capabilities or require additional software purchases. The backlit LCD touchscreen also provides a more intuitive and modern experience than analog displays on older models. Moreover, the PE770’s automatic needle threading and thread-cutting features simplify the embroidery process, a convenience not always available on less advanced machines. These combined features make the Brother PE770 a strong competitor in the embroidery machine market, offering both innovation and user-friendly operation.
Compared with the PE800 Model
When comparing the Brother PE770 with the PE800 model,I’d say the PE800 offers some noteworthy advancements. The PE800 boasts a larger LCD touchscreen, which improves ease of use and design navigation. Additionally, it includes 138 built-in designs and 11 fonts, surpassing the PE770 and offering more creative options. While both models support USB import for custom designs, the PE800’s enhanced screen and extra features provide a more modern embroidery experience. Overall, if you decide between the two, the PE800 might be worth the upgrade for those seeking additional designs and a more updated interface.
Evaluating Embroidery-Only Machines
With the Brother PE770 and PE800 in context, which are embroidery-only machines, let’s analyze its features and ease of use. Machines only meant for embroidery can do delicate, thoughtful designs without the additional complexity of sewing. Take the Brother PE770 as an example – it has a 5″ x 7″ embroidery field with 136 designs built in, and the PE800 enlarges this field to 5″ x 7″ and has 138 designs in addition to several fonts. Custom designs via USB flash sticks are available with both machines, which many competitors offer only through purchasing additional programs. Typical technical parameters, for example, revolve around the stitch speed, maximal embroidery area, and memory size. Up to 650 stitches with a fastening speed per minute and the ability to hold several designs are what the PE770 brings, and one can say that it is suitable for household use. At the same time, the PE800 follows with even more exciting news of a large advanced LCD screen, making it easier to choose and edit designs. Therefore, when recommending an embroidery-only machine, it is advisable to understand how important these particular aspects are to you to avoid frustration in using the machine.
Advantages of a Computerized Embroidery Machine
The use of computerized embroidery machines has various benefits that significantly improve the efficiency and creativity of the entire work. To commence with, the users can perform step-by-step designs owing to the computerized nature of the machines. They easily upload designs with USB; thus, most models have a built-in design library, including customizable fonts and patterns. Secondly, most of the machines are equipped with adjustable embroidery fields like the ones possessed by Brother PE770 and PE800, which empowers the machine to work on various fabrics, thus making it possible to take on larger projects. Thirdly, however, color LCD touch screens that can use the interface improve the easiness of selecting designs, making it easy for amateurs to learn and for professionals to exercise more creativity.
Computerized embroidery machines are distinguished by traditional technical parameters in embroidery machine crafting, such as increased stitch speed, the highest recorded stitch rate being 850 stitches per minute, and high design file storage capacity within the machines. Other enhancements include basic machine design alterations such as rotation, mirroring, and resizing, all of which create better user experiences. When shopping for a computerized embroidery machine, such technologies must be factored in, considering the creative aspects you wish to achieve alongside accuracy and comfort.
How to Use the Embroidery Machine with Built-In Designs?

To use the embroidery machine with built-in designs, begin by powering on the machine and selecting the design menu on the LCD touchscreen. Browse the available designs using the selection arrows to navigate the options. Once you’ve chosen a design, ensure the appropriate embroidery hoop is attached according to the size of the design field – in the case of the Brother PE770, a 5″ x 7″ hoop is often suitable. Next, load the desired thread color into the machine and thread the needle using the automatic needle threader for convenience. Ensure the fabric is correctly hooped and securely positioned beneath the needle. After the setup, press the start button to commence embroidery. The machine will stitch the design automatically, pausing if any thread changes are required – at which point, you will need to switch the thread color as indicated and resume stitching. This straightforward process allows you to unleash creativity effortlessly by leveraging the built-in designs of the embroidery machine.
Setting Up the Embroidery Hoop
Setting up the embroidery hoop is crucial to ensure precise and error-free stitching. Begin by selecting an embroidery hoop compatible with your design size and the machine specifications. For instance, the Brother PE770 usually accommodates a 5″ x 7″ hoop. To properly attach the fabric, loosen the screw on the outer ring of the hoop and separate the two parts. Place the fabric over the inner hoop, aligning it evenly to prevent distortions. Carefully press the outer hoop down, ensuring the fabric remains taut, and tighten the screw without causing wrinkles or undue tension in the fabric. Some standard technical parameters to consider include ensuring the fabric is firmly secured and evenly distributed without overlap, which could affect the design outcome. Adjust the hoop alignment on the machine’s base before embroidering. Maintaining appropriate tension and alignment ensures the machine operates seamlessly, delivering clean and professional results. For best practices, confirm that the fabric and stabilizer are compatible with the embroidery fabric requirements outlined in the machine’s user manual.
Loading Embroidery Patterns via USB
To load embroidery patterns via USB, I first ensure that my pattern files are in the correct format compatible with my machine, such as PES for Brother machines. After verifying the format, I transfer the files onto a clean USB drive using my computer. I then insert the USB into the embroidery machine’s port and use the machine’s interface to navigate the options, selecting and previewing my desired pattern. Once satisfied, I upload the pattern onto the machine, ensuring it’s properly aligned with the chosen hoop size before beginning the embroidery process.
Tips for Choosing the Right Stabilizer
When choosing the right stabilizer for embroidery, consider the fabric type, design complexity, and final product usage. Start by evaluating whether your fabric is lightweight or heavyweight, as this determines whether a light or heavy stabilizer is needed. Opt for a sturdy, non-tear stabilizer for intricate and dense designs for added support. Similarly, delicate fabrics may require a washaway or tearaway stabilizer to prevent damage. Also, consider if the embroidery will be washed frequently; a durable stabilizer that withstands laundering is essential in such cases. Finally, test your selected stabilizer on a fabric swatch to ensure compatibility and desired results without affecting the garment’s texture or flexibility.
What Are the Best Practices for Maintaining Your Sewing Machine?
The sewing machine also requires a specific maintenance schedule for optimum performance and longevity. Start with machine hygiene, which includes cleaning the lint and dust from the bobbin area and feeding dogs using a small brush or vacuum attachment. Blow out the machine occasionally and oil it as per the manufacturer’s instructions; lubrication helps prevent wear on moving parts. Avoid unnecessary strain and risk of jamming the machine by using good quality thread and needles. Tension settings must be adjusted periodically based on the concern for stitch quality. Ensure the machine is kept in a dry place free from dust, and cover it when it is not in use. Also, make certain that the machine is taken for professional maintenance once every twelve months for any intricate adjustments and checks that need to be undertaken. Proper sewing machine care will minimize issues and enhance its operational lifespan.
Cleaning and Care for the Bobbin and Thread
I employ some standard procedures to maintain the bobbin and thread of my sewing machine. Firstly, I periodically remove the bobbin case and clean it with a cleaner brush designed to remove lint or pieces of thread that may accumulate around the bobbin and interfere with sewing. I assure you that I use the correct bobbin size and style, which the machine manufacturer has designed to avoid malfunctioning. In threads, I choose the better quality threads to lessen the chances of lint accumulation and tangle-free stitching. The needle is also changed periodically because a worn-out needle can cause damage to both the thread and the fabric. The provision of these routines allows for skeleton maintenance of the sewing machine, enabling me to ensure it functions well for all the intended tasks.
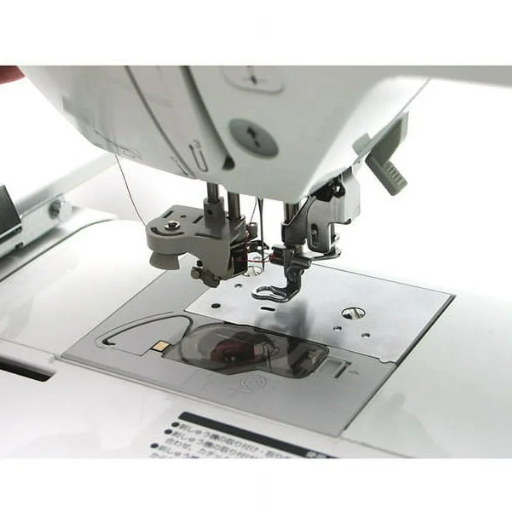
Calibrating the Automatic Needle Threader
Adjusting the automatic needle threader is an essential procedure in the maintenance and efficiency of the sewing machine. Start with reading the manual to locate the particular parts and their functions. Ensure the needle is positioned at the highest level when using the threader. Adjust the hook of the threader in a manner that will be able to penetrate the eye of the needle every time. This entails that the hook goes through the needle’s eye without hindrance. Technical parameters to be analyzed include:
Needle Position: Set the needle at the apex position before the commencement of the procedure.
Alignment of Hook of Threader: The hook must traverse freely level through the needle.
Thread Tension: Ensure the thread tension is optimum to the extent that a slight raise is required should the threader remain unengaged.
If the threader still refuses to operate after these adjustments, the last resort could be contacting an expert who can manipulate the complex parts inside the machine. Such an adjustment ensures the automatic needle threader works fully and lives longer. Hence, the sewing machine is normal.
How to Take Your Embroidery to the Next Level with the Brother PE770?
To take your embroidery to the next level with the Brother PE770, explore its extensive built-in design library and learn how to import patterns efficiently via a USB connection for greater design versatility. Mastering various stitch types and utilizing the machine’s large embroidery area can significantly enhance your projects. Experiment with fabric and thread combinations and incorporate advanced techniques such as applique or monogramming. Regularly explore new embroidery software options to expand your design capabilities. Additionally, maintaining your machine in top condition, as detailed earlier, will ensure consistent quality in your embroidery work.
Utilizing 6 Lettering Fonts for Customization
To utilize the six lettering fonts for customization offered by the Brother PE770, I start by selecting the appropriate font for my project from the machine’s built-in options. Each font provides unique styling, allowing me to personalize my embroidery creatively. I adjust the size and spacing of the letters to fit the design and the fabric perfectly. I ensure that each piece stands out by experimenting with different thread colors and effects, such as bold or italic adjustments. Through practice and experimentation, these fonts enable me to add a professional, personalized touch to my embroidery projects.
Incorporating Larger Designs in Projects
Larger designs can be added to your projects with the Brother PE770 by taking advantage of its 5” x 7” embroidery area with more elaborate images. First, you must select the designs that stay within this range or use other tools to join parts of the design into one complete piece. While resizing, always try to resize them evenly so that the stitch quality is not compromised. Large embroidery files require a stitch to be adequately stabilized to avoid pucker; however, the appropriate type of stabilizer can help. Further, using heavier strands of embroidery thread, such as 40-weight thread, will ensure that your larger designs are displayed prominently. Also, always keep the firmware and the embroidery software up to date, as these can add new features and provide you with newer designs to work with complex tasks. Before stitching the actual design on the garment, always make it a point to stitch the sample on the identical fabric to make a few changes to the design.
Maximizing the Embroidery Area for Creativity
Regarding the creation aspect, I try to make the most of the Brother PE770’s 5″ x 7″ embroidery area. The first step is to logically center the designs on the 5” x 7” space or create a composite design using two or more preloaded images. In addition to these details, the stitch density of the design pattern has to be controlled so that there is no excessive strain on the fabric or resizing of the design, when the pattern is created, the threads tension has to be adjusted. Another factor is the use of an appropriate stabilizer that is suitable for the fabric used to prevent distortion of the embroidery design after application. All these procedures, coupled with the constant test embroidery on the same materials, guarantee a snug fit of the design within the target area, carrying a neat finish. Given such an arrangement, these parameters allow me to extend the machine’s creative limitations while remaining within its technical constraints.
References
- Sewing Pattern Review – Offers detailed reviews and user experiences.
- Amazon Product Page – Includes customer reviews and product details.
- Sewing Machines Plus – Provides technical specifications and product features.
Frequently Asked Questions (FAQ)
Q: What features does the Brother PE770 embroidery machine offer?
A: The Brother PE770 embroidery machine offers various features, including a built-in USB port for importing designs, a 5″x 7″ embroidery area, a touch-screen LCD for easy navigation, and 136 built-in embroidery designs. It is a user-friendly computerized sewing and embroidery machine that is perfect for beginners and experienced embroiderers.
Q: Can I use a USB memory stick with the Brother PE770?
A: The Brother PE770 embroidery machine has a built-in USB port that allows you to use a USB memory stick to import designs. This feature provides flexibility in adding customized designs to your projects.
Q: What kind of designs can be imported into the Brother PE770?
A: The Brother PE770 lets you import a wide range of embroidery designs from your USB memory stick. You can download designs from the internet or create your own and then transfer them to the machine for future use.
Q: Is the Brother PE770 suitable for quilting?
A: While the Brother PE770 is primarily an embroidery machine, it can be used in conjunction with other quilting machines to create quilt embellishments. The large 5″x 7″ embroidery area is suitable for adding decorative touches to quilt squares.
Q: How does the touchscreen LCD of the Brother PE770 enhance its usability?
A: The Brother PE770’s touch-screen LCD allows for easy navigation and design editing. You can select, rotate, mirror-image, and adjust the size of your designs directly on the screen, making it a user-friendly embroidery machine.
Q: What types of thread can be used with the Brother PE770?
A: The Brother PE770 is compatible with various embroidery threads. It uses a standard bobbin thread for embroidery, and you can choose from various top threads to match your design needs. Always ensure to use high-quality embroidery threads for best results.
Q: Does the Brother PE770 come with built-in designs?
A: Yes, the Brother PE770 embroidery machine comes with 136 built-in embroidery designs, including frame shapes and border styles, which provide a great starting point for many projects.
Q: Can the Brother PE770 embroider on large fabrics?
A: The Brother PE770 features a 5″x 7″ inch embroidery area, suitable for medium to large projects. However, you may need to re-hoop your fabric or design in sections for huge designs.
Q: How do I maintain my Brother PE770 for optimal performance?
A: To maintain your Brother PE770, regularly clean the bobbin area, change the needle as needed, use quality threads, and lubricate moving parts according to the manufacturer’s instructions. Proper maintenance ensures smooth operation and longevity of your sewing and embroidery machine.