Choosing the perfect engine oil for your lawn mower is paramount so it will perform and perhaps last over a great period of time. Numerous choices exist, and being able to identify which sorts of oil suit which mower can be frustrating. This guide will give you much-needed clarity by delving into the types of lawn mower engine oils, what distinguishes them, and how to choose one appropriate for your mower by way of its needs and the weather in which it operates. For a newbie to owning lawn mowers or that aged pro, this article is intended to assist them in making an educated decision guiding toward equipment that runs well and efficiently.
Understanding Lawn Mower Oil

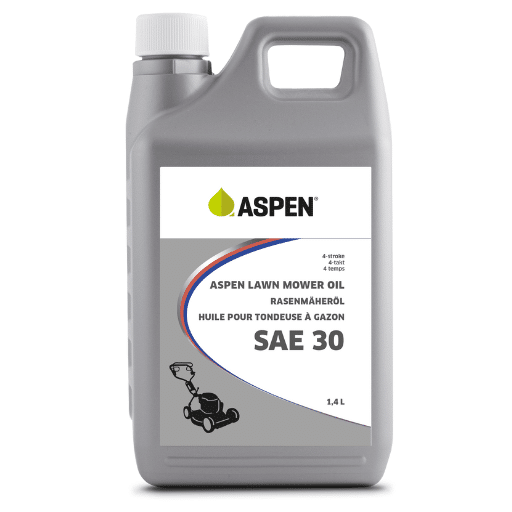
Depending upon type of engine and operating conditions, the lawn mower requires a certain grade of oil. SAE 30 oil is used during warm weather for most mowers or SAE 10W-30 can be used for a wider temperature range, a very versatile choice. In the owner’s manual, the manufacturer’s recommendations and the oil capacity can be confirmed. The usage of synthetic oils such as 5W-30 or synthetic blends would also be very good for modern mowers, which provide much better performance and protection at varying temperatures. Always ensure to use the oil with a small-engine classification; this will guarantee excellent lubrication of the engine, and further, will lengthen the lifespan of your mower. Keep a check on the oil levels regularly and change the oil as specified by the manufacturer.
Types of Oil for Small Engines
Types of oil for small engines include conventional, synthetic, two-stroke, and four-stroke oils, categorized by viscosity, engine type, and temperature suitability.
|
Key Point |
Details |
|---|---|
|
Oil Types |
Conventional, Synthetic, Two-stroke, Four-stroke |
|
Viscosity |
SAE 10W-30, SAE 5W-30, SAE 15W-50 |
|
Engine Type |
Two-stroke, Four-stroke |
|
Temperature |
Cold (-30°C), Hot (+40°C) |
|
Usage |
Home, Commercial |
|
Eco-Friendly |
Synthetic options |
|
Cost |
Low (Conventional), High (Synthetic) |
|
Maintenance |
Regular oil changes |
|
Brand |
John Deere, Honda, etc. |
|
API Grade |
SG to SN standards |
Importance of Choosing the Right Oil
Keeping the engine well-oiled is key attaining optimum performance, long service life, and dependable utility of all motors. Thus, through proper reduction of friction between engine components, the oil dissipates heat from the engine, prevents deposit formation, and resists the oil from oxidation. Like, for instance, investigations have revealed that 50% reduced wear on the engine with high quality synthetic oil guarantees a longer engine life, especially in adverse working conditions. An oil containing detergents, on the other hand, keeps the engine and other internal components clean and free from carbon build-ups and sludge that could harm engine performance.
Oil-type inadequacy escalates engine strain, heats it more, and harbors eventual damages. For example, low-viscosity oil could rapidly break down and poorly lubricate the surfaces at high temperatures thereby leading to increase strain and thermal stress among other issues, while an inappropriately rated oil will not allow for easy starting of the engine during low temperatures. Present recommendations are SAE 30 for warm weather and 5W-30 or 10W-30 for multi-temperature application. An oil that carries classifications such as API (American Petroleum Institute) would be the safest choice in terms of quality and performance.
In abidance, thus, to the equipment manufacturer’s specifications and only using certified and quality oil would grant better performance of your equipment, reduction in its maintenance, and better lifespan.
Common Oil Types: SAE 30 vs. Others
Common oil types include SAE 30, SAE 10W-30, SAE 5W-30, and SAE 15W-50, differing in viscosity, temperature range, and engine compatibility.
|
Key Point |
Details |
|---|---|
|
SAE 30 |
Warm temps, Basic use |
|
SAE 10W-30 |
All-season, Versatile |
|
SAE 5W-30 |
Cold temps, Synthetic |
|
SAE 15W-50 |
Hot temps, Synthetic |
|
Viscosity |
Single/Multi-grade |
|
Temp Range |
-30°C to +55°C |
|
Engine Type |
Two/Four-stroke |
|
Usage |
Home, Commercial |
|
Eco-Friendly |
Synthetic options |
|
Cost |
Low (SAE 30), High (Synthetic) |
Choosing the Right Oil for Your Lawn Mower

Before making a purchase of oil for your lawnmower engine, it’s advisable to refer to the guidelines contained in either the user guide or owner’s manual. It’s a great idea to use the SAE 30 engine oil for the lawn mower when very hot, while the 10w-30 will be able to cope with the cold weather. In the case of the engines of the New Era, the Option of synthetic oils are one of the most useful options as they provide improved efficiency and increase the duration between the engine oil changes. It is very important that the choice of oil in the lawnmower engine’s works in accordance with the certain standards especially in oil service condition to add more safety and build up trust in usage. If all these are observed appropriately, it will assist in keeping en engine in good working conditions and for a long time!
How to Determine the Right Oil
Choosing the correct oil for your lawn mower depends on several key factors, including engine type, climate, and usage. For small engines commonly found in lawn mowers, SAE 30 is a standard option for warmer temperatures, as it provides adequate lubrication and stability. However, for more diverse climates, multi-viscosity oils like 10W-30 are a reliable choice—they perform well in both cold and hot conditions, ensuring smooth start-ups and consistent protection.
Recent data suggests that synthetic oils, such as 5W-30, are becoming increasingly popular due to their enhanced performance. These oils maintain viscosity across a wider temperature range and can reduce engine deposits over time, leading to better fuel efficiency and reduced wear. Additionally, studies indicate that using synthetic oils can extend the oil change interval, ultimately saving time and maintenance costs.
When selecting oil, always check your lawn mower’s user manual for manufacturer recommendations. Look for oils that meet API classifications such as SJ, SN, or SP, which certify their compatibility and quality standards for modern engines. Matching these specifications with your mower’s requirements will ensure long-term reliable performance. As climates and technologies evolve, monitoring advancements in engine oil formulations will help you make informed decisions to keep your equipment running smoothly.
Factors to Consider: Viscosity and Engine Type
It is important choosing the right type of oil for one’s lawn mower as viscosity and the engine’s type are the key things one has to understand while making the choice. Viscosity refers to the thickness of the oil which impacts flow and it is usually expressed in SAE (Society of Automotive Engineers) grades such as SAE 30, 10W-30, 5W-30 etc. In the intermediate conditions between 40F and 100F most lawn mowers have an option of SAE30 oil which is simple in nature and preferred for regions with high temperatures. In colder areas where temperature changes are significant and go below 40°F, multi-grade oils such as 10W-30, or even 5W-30, both of which are synthetic, are preferred since they make it easy to carry out successful cold starting and subsequent hot running and lubricating of the system.
The design of the engine of the lawn mower is significant to the choice of oil that will be used. This type of engines commonly operates as 4-stroke and filters are common in almost every brand of lawn mowers, involves using detergent oils of API classification which is as high as possible such as SN. On the contrary, the two-stroke engine would use an engine oil with that has a particular composition for the high combustion rates. Usually this type of oil also includes smoke suppressants and anti-carbon additives.
Advancements in technology have allowed some calculations in the imitation of synthetic oil performance. This oil has resistance to heat, is very stable and its breakdown point is high as opposed to mineral oils which usually break down under high temperatures. For persons placed in very clear atmospheres such as hot weather countries or the cold ones, advanced types of synthetic oils e.g. SAE 0W-30 have been found to perform well at different ranges of heat.
In conclusion, choosing the right viscosity grade and formulation of the oil for the engine you have installed and the conditions under which it operates can improve productivity a lot, help in the safety of important engine parts. In addition, it will assist in the sustained use of your lawn mower as and when seasons roll back.
Best Oil for Different Lawn Mower Brands
The best oil for lawn mower brands includes SAE 10W-30 for Honda, SAE 30 for Briggs & Stratton, and synthetic oils for high-performance models like John Deere.
|
Key Point |
Details |
|---|---|
|
Honda |
SAE 10W-30 |
|
Briggs & Stratton |
SAE 30 |
|
John Deere |
Synthetic 10W-30 |
|
Toro |
SAE 30 or 10W-30 |
|
Craftsman |
SAE 30 |
|
Engine Type |
Two/Four-stroke |
|
Temp Range |
-30°C to +40°C |
|
Eco-Friendly |
Synthetic options |
|
Usage |
Home, Commercial |
|
Maintenance |
Regular oil changes |
Maintaining Oil Levels in Your Lawn Mower
The proper maintenance of the oil in a lawn mower is necessary for the smooth running and maintenance of that mower. To begin with, it is wise to operate a lawn mower only when the ground surface is flat and allow the engine of running lawnmower to cool. Find the dipstick of the engine oil and it is usually located beneath a graphic representation of oil or has oil written on it. Withdraw the dipstick, wipe clean, reinsert it to the bottom and remove. The engine oil level should be between the “Add” and “Full” marks and if not, kindly add oil, check the oil after done and add accordingly. If necessary, pour oil through the manufacturer warrior into the engine, taking intervals to measure the level using the dipstick to avoid spillovers. After refilling, make sure to replace the lid or the dipstick and ensure a tight fit until the next oil check or filling. But ensure regular checking and refilling as necessary, and oil changes in compliance with the manual should help the lawn mower work better.
How to Check the Oil Level
Maintaining the correct oil level is a crucial part of vehicle care, directly influencing engine performance and longevity. Here are the refined steps to accurately check your oil level, incorporating the latest industry insights:
- Prepare for the Check
Ensure the vehicle is parked on a flat surface and the engine is off. It’s recommended to allow the engine to cool for at least 5–10 minutes after running, as warm oil can lead to inaccurate readings.
- Locate the Dipstick
Open the hood and find the dipstick—usually identified by a brightly colored handle (such as yellow or orange) to differentiate it from other components. Refer to the owner’s manual for specific location details for your vehicle model if unsure.
- Initial Wipe and Inspection
Pull the dipstick out completely and wipe it clean using a lint-free cloth or paper towel. Check for signs of sludge or discoloration in the oil, as these could indicate engine issues or the need for an oil change.
- Reinsert and Measure
Fully insert the dipstick back into the tube, ensuring it is seated all the way in. Remove it again to inspect the oil level. The oil should be between the “full” and “add” markers, or on the calibrated area of the dipstick. Ideally, the level should be closer to “full.”
- Add Oil if Necessary
If your oil level is low, add small amounts of the manufacturer-recommended oil type to avoid overfilling. Use a funnel for precision and check the level with the dipstick after each addition. Overfilling can cause pressure build-up, leading to engine damage or oil leaks.
- Examine Oil Condition
Beyond just the level, evaluate the oil’s clarity and texture. Clear, amber-colored oil is ideal. If the oil appears dark, gritty, or smells burnt, it’s a strong indicator that an oil change is overdue.
- Secure the Dipstick and Cap
Once you’ve finished, securely replace the dipstick and ensure the oil filler cap is tight. A loose cap can lead to leaks or contamination.
- Maintain a Schedule
Most vehicles require oil replacement every 5,000 to 7,500 miles, depending on the engine type and oil quality. Advanced synthetic oils may extend intervals up to 10,000 miles, but always consult your manual or service recommendations.
Using the Dipstick for Accurate Measurement
Accurately measuring your engine oil level is essential for maintaining optimal engine performance and preventing potential damage. Here’s how to ensure precision with your dipstick:
- Park on Level Ground
Before you begin, make sure your vehicle is parked on a flat, level surface. Slopes or uneven ground can cause inaccurate readings by skewing the position of the oil in the reservoir.
- Warm the Engine (Then Cool Slightly)
For the most precise reading, run the engine for a few minutes to reach operating temperature. Then, turn it off and allow it to cool for about 5 to 10 minutes. This ensures the oil settles properly in the sump.
- Remove and Wipe the Dipstick
Pull the dipstick out fully and use a clean rag or paper towel to wipe off all oil residue. This ensures that old readings do not interfere with your measurement.
- Reinsert Fully and Remove Again
Push the dipstick back into its tube completely, ensuring it seats firmly. Pull it out again and immediately check the oil level. Hold the dipstick horizontally to avoid oil smearing up the stick, which can confuse the reading.
- Interpret the Readings
Most dipsticks have markings such as “MIN” and “MAX,” or a cross-hatched area. The oil level should fall between these marks, ideally near the “MAX” line without exceeding it. Low levels indicate the need for a top-up, while levels above “MAX” could indicate overfilling, which might need correction.
- Check Oil Color
While checking the level, also inspect the oil’s color and consistency. Fresh engine oil is amber and translucent. If the oil appears dark, gritty, or contains sludge, it’s likely time for a replacement or further engine inspection.
- Adjust Accordingly
If the oil is low, add small amounts of the appropriate type (check your manual for specifications), allowing it to settle before rechecking with the dipstick. Avoid overfilling, as excess oil can create foam and compromise engine lubrication.
When to Change the Oil
It is essential to make sure that you service your vehicle by changing the engine oil as required within the limit to increase the performance of your vehicle and to reduce engine wear. Although conventional wisdom once recommended oil changes every 3,000 miles, the current technological advancements in engine building and motor oil composition have made this interval significantly longer. At present, most of the vehicles manufactured today on average require the oil to be changed for every 5,000 to 7,500 miles, depending on the manufacturer’s recommendations and the type of the oil being used. There are more such examples as synthetic engine oils that help increase the intervals up to 10,000 or even 15,000 miles in certain scenarios.
If you have your car and wonder when it’s time to carry out an oil change, there are two ways: check the car’s manual or follow the manufacturer’s requirements. Additionally, you must think about the way you drive and the way your car is driven. For vehicles that are being used excessively, for example in stop-and-go or harsh weather or under heavy loads, it is not uncommon for the engine oil to deteriorate much quicker than usual, which necessitates more frequent changes.
Another important factor worth considering is the oil life monitor indicator if such a feature is available in the vehicle. This sophisticated tool learns one’s behavior and also assesses the engine’s operational state, making alerts regarding oil change. Using such signals, updating the log for maintenance can improve the performance of the car engine.
When you are aware and comfortable with the oil change intervals that your vehicle needs and are also knowledgeable with the latest updates, it means your vehicle is highly unlikely to breakdown, and you can equally prolong its service time.
Changing Oil in Your Lawn Mower

Changing the oil in the lawn mower is a very easy process and has great benefits towards the performance and longevity of the machine. The entire process is simple and easy hinged on the following steps:
- Prepare the Mower: Turn off the engine and disconnect the spark plug to ensure safety.
- Sump the Old Oil: Position the mower on a flat surface especially after you have located the oil drain plug, it’s usually located under the deck of the mower. Place a disposable container beneath it then remove the plug (or tilt the mower if its not there ) for the oil to exit substance to be removed.
- Replace the Oil Filter (if applicable): See the model or instruction manual of your mower to confirm its availability and change it if that is indeed the case.
- Pour Fresh Oil Back: Get in touch with the manufacturer and reference the owner’s manual to determine the quantity and viscosity of the oil to be refilled in the mower. Insert more oil slowly to avoid overloading the oil filler and use the dipstick to ascertain the right level.
- Dispose of Used Oil Properly: Process the old oil in a waste oil recycling facility or a wasted motor vehicle parts outlet.
Making timely oil changes that are recommended by the manufacturer will assist in the efficient operation of the lawn mower and help maintain its condition. Please remember to refer to your owner’s guide as directed.
Step-by-Step Guide to Change the Oil
Changing the oil in your lawn mower is a straightforward process that ensures the engine runs efficiently and lasts longer. Below is a detailed step-by-step guide to help you complete the task:
- Gather the Necessary Tools and Materials
- New engine oil (type and amount as specified in the owner’s manual, e.g., SAE 30 or 10W-30)
- Oil drain pan
- Funnel
- Clean cloth or rags
- Wrench or socket set (if needed for the oil plug)
- Gloves (optional, for safety and cleanliness)
- Prepare the Lawn Mower
- Run the mower for a few minutes to warm up the engine oil, which helps it drain more easily.
- Turn off the engine and allow it to cool slightly for safety.
- Disconnect the spark plug wire to prevent accidental engine starting.
- Drain the Old Oil
- Locate the oil drain plug beneath the mower (check the manual for the exact location).
- Place the oil drain pan under the plug to collect the used oil.
- Use a wrench or appropriate tool to loosen and remove the plug.
- Tilt the mower slightly (if applicable) to ensure all oil drains out.
- Replace the Oil Filter (if applicable)
- Some mower models have an oil filter. If yours does, unscrew the old filter carefully.
- Apply a small amount of new oil to the gasket of the new filter for a secure seal.
- Screw on the new filter, tightening it by hand.
- Refill with New Oil
- Place a funnel in the oil fill hole to avoid spills.
- Slowly pour in the new oil, using the amount specified in the owner’s manual (typically 18-20 oz. or as recommended).
- Check the oil level using the dipstick, ensuring it falls within the “full” mark. Avoid overfilling, as it may damage the engine.
- Dispose of the Used Oil Properly
- Transfer the used oil from the drain pan into a sealed container.
- Take the sealed container to a recycling center or an auto parts store that accepts used oil.
- Reassemble and Test
- Reconnect the oil drain plug and ensure it is tightly secured.
- Reattach the spark plug wire to the mower.
- Start the mower and let it run briefly to circulate the new oil, then check for any leaks.
- Document the Oil Change
- Record the date and type of oil used for future reference.
- Follow the manufacturer’s recommended schedule for the next oil change (e.g., every 25-50 hours of operation).
By following these steps carefully, you can maintain your lawn mower’s performance and extend its lifespan. Regular maintenance ensures smooth operation and prevents costly repairs down the line. Always refer to your specific manual for any additional instructions or requirements.
Tools Needed for an Oil Change
Changing the oil in your lawn mower is a straightforward process when you have the right tools and materials. Here is a comprehensive list to help you get started:
- Oil Drain Pan or Container
A sturdy oil drain pan is essential to catch the old oil as it drains from your mower. Look for one with a spill-proof spout to make disposal easier. Many pans are reusable and designed to minimize mess.
- Oil Filter Wrench (if applicable)
If your lawn mower uses an oil filter, this tool helps you remove it without causing damage. A strap wrench or dedicated oil filter wrench can provide the grip needed for a secure removal.
- Wrenches or Socket Set
Depending on your mower model, you may require a wrench or socket set to loosen the oil drain plug. Common sizes include 3/8-inch or 1/2-inch, but always confirm with your specific mower’s manual.
- Oil Funnel
Ensure a spill-free refill with a high-quality funnel. A funnel with a long, narrow spout helps guide new oil into the engine without overflow.
- Clean Rag or Paper Towels
A clean rag is indispensable for cleaning any spills, wiping off grease, and checking the dipstick during the process.
- Engine Oil (Type Recommended by Manufacturer)
Always refer to your lawn mower’s manual to select the appropriate oil type. Common options include SAE 30 for warmer climates or 10W-30 for variable temperature ranges. Using manufacturer-approved oil ensures optimal performance and longevity.
- Oil Disposal Container
Prepare a container approved for transporting used oil to a recycling center. Many auto parts stores and service centers accept used engine oil for proper disposal.
- Protective Gloves
Nitrile or rubber gloves protect your hands from hot oil and grease while offering good grip to handle tools effectively.
- Torque Wrench (Optional)
For those wanting to ensure precise tightening of the oil drain plug and filter, a torque wrench is a helpful addition. This can prevent over-tightening, which could damage threads.
By having all these tools on hand, you can perform an oil change with efficiency and confidence. Always prioritize safety by working on a cooled engine and utilizing a stable work surface. Additionally, remember that proper disposal of used oil is crucial for environmental responsibility—never pour it down the drain or into the ground.
Common Mistakes to Avoid When Changing Oil
From my experience, one common mistake is failing to use the correct type of oil recommended for your vehicle. Using the wrong oil can compromise engine performance and long-term health. Another frequent issue is neglecting to replace the oil filter; always ensure you’re swapping out the old filter with a new one. I’ve also learned the importance of tightening the drain plug properly—not too loose to cause leaks, and not too tight to strip the threads. Finally, never rush the process. Double-check everything, including oil levels after filling, to avoid costly errors.
Maintaining Your Lawn Mower for Optimal Performance

1. Scrub the Deck Once per Week
Scruteer the cutting deck after each use doing away with grass cuttings because in a build up of these grass cuttings could lead to very poor cutting and also, the anything is likely to rust.
2. Assess and Renew the Air Filter
It is also advisable to check the air filter at certain intervals. A filthy filter can make the system ineffective and use up more fuel. Change with a fresh one if it is not up to the standard.
3. Recondition the Blades
Oldly sharpened blade leaves the grass edges untidy, rather than wiping it clean cut in one move. Sharpen your mower’s blades at least up to a period of one year or more given that you are using it heavily.
4. Budget for a New Nick
A very common reason why the lawn mower will not start is the existence of a winked spark plug. It is hence advisable to change it avery year or when you begin to have so many problems with the engine starting.
5. Purchase Quality Fuel
Engine fuel gets deteriorated and forms an unpleasant gas in the stomach that is sure to spoil the engine. The best would be to use gasoline and in case store the equipment use a fuel stabilizer.
6. Safekeeping of the Machine
Tarp the machine if you have no ideal shed, keeping it in place until it is ready to operate, so both the ill-effects of water and weather destroying the elements and the surfaces and the expansion of rust are all completely avoided. Before storage, drain the fuel tank, or in the absence of this facility, keep the engine idle until it runs out in order to reduce fuel-related problems.
All the above procedures will certainly help in prolonging your lawn mower’s life as well as its efficiency due to the best operation extended throughout the season.
Other Maintenance Tips: Air Filter and Oil Filter
In order to maintain the healthy and proper performance of gardening equipment one has to ensure the timely service and maintenance. For example, the air filters in a mower would be cleaned or if worn out replaced frequently to ensure the machine worked perfectly. It is worth noting that proper steps should be taken to maintain small engines such as petrol lawn mowers, every so often wash or replace the air filter for example. In the same wavelength, when carrying out an oil change procedure, make a point of inspecting the oil filter for any foreign particles or damages and replace it where necessary. These little adjustments in the care of equipment make big contributions to their performance and also prevent costly reparations in future.
How Quality Oil Affects Performance
The use of oil in a good quality mower enables it to perform at its best. Since premium oil reduces the frictions between moving parts, the impact of the wear and tear over a long period is minimal. Also, this helps in increasing both the life and the efficient performance of the engine during the time of use. You get to see for instance; that synthetic oil is stable in the face of high temperatures such mowing for long periods at a time.
The results of several researches indicated that there is usually a considerable drop in the fuel consumed by the engine if high-quality engine oil is used. Studies have also shown that engines running on synthetic high detergent oil significantly reduce the amount of sludge build up within the engine which in turn affects the performance of the region leading more cost of the engine being incurred. The use of oil that the manufacturer specifically recommends enhances oil delivery, improves cooling, prevents vaporization of oil, and facilitates more complete combustion.
Ensure that impact becomes greater by keeping an eye on the level of oil in your machine, and change the oils as per the manufacturer’s suggested maintenance schedule. High-quality oil isn’t only meant to increase the overall performance- it also helps to save money because there are lower amounts of items that need to be replaced. Hence, certain expensive engine oils of superior quality will make sure that the lawn mower keeps running without let down and without hitches through the years.
Regular Maintenance Schedule for Lawn Mowers
Proper maintenance is essential to ensure the efficiency and longevity of your lawn mower. Below is a detailed, data-backed maintenance schedule designed to help you keep your equipment in top condition throughout the mowing season:
Daily Maintenance
- Inspect Before Use: Check for loose screws, bolts, or damaged components.
- Clean the Deck: Remove any grass clippings, dirt, or debris from the mower deck to prevent blockages and rust buildup.
- Check Oil Levels: Ensure engine oil levels are within the recommended range to avoid engine damage.
Weekly Maintenance
- Air Filter Inspection: Examine the air filter and clean or replace it if it appears dirty. A clean air filter improves airflow and engine efficiency.
- Blade Sharpness Check: Inspect the blades for nicks or dullness. Sharp blades result in cleaner cuts, reducing strain on the engine.
- Tire Pressure: Verify that all tires are inflated to the manufacturer’s recommended pressure for even cutting.
Monthly Maintenance
- Oil Changes: Replace the oil every 20-50 operational hours or as indicated by your manufacturer’s manual for consistent engine performance.
- Spark Plug Check: Remove and inspect the spark plug. Clean it and adjust the gap as needed, or replace it annually for optimal ignition.
- Belt Tension and Condition: Check the drive belts for wear and proper tension to ensure smooth operation.
Seasonal or Annual Maintenance
- Fuel System Maintenance:
- Drain old fuel at the end of the season and replace it with fresh fuel when the mower is ready for use.
- Add a fuel stabilizer if storing the mower for extended periods.
- Replace Filters:
- Replace the fuel filter annually to maintain steady fuel flow.
- Install a new air filter for maximum airflow efficiency.
- Deck Height & Blade Adjustment:
- Calibrate the cutting height and balance the blades to ensure an even lawn trim.
- Complete Tune-Up:
- Conduct a full tune-up session that includes oil changes, filter replacements, spark plug replacements, and lubrication of moving parts.
End of Season Care
- Thorough Cleaning:
- Remove all grass clippings, mud, and debris from the mower, focusing on the undercarriage and blades.
- Storage Preparation:
- Store the mower in a dry, cool place.
- For gas models, either run the engine until empty or treat remaining fuel with a stabilizer to avoid tank corrosion.
- Battery Care:
- For electric or battery-powered mowers, ensure the battery is fully charged and remove it for storage to prolong battery life.
By adhering to this well-structured maintenance schedule, you can significantly enhance the performance, fuel efficiency, and lifespan of your lawn mower. Regular upkeep not only prevents costly repairs but also ensures your lawn mower is ready to deliver high-quality results whenever you need it.
Reference Sources
-
LAWN-TECH – A repository discussing lawn mower technologies and their use of petroleum and 2T oil. Source
-
Small Engines and Outdoor Power Equipment – A comprehensive guidebook detailing care and repair for lawn mowers, including oil recommendations. Source
-
Remote Controlled Lawn Mower – A study emphasizing the importance of regular oil changes for maintaining lawn mower functionality. Source
Frequently Asked Questions (FAQs)
What type of oil should I use for my lawn mower engine?
The type of oil you should use for your lawn mower engine depends on the manufacturer’s specifications. Generally, 10W30 or 5W30 motor oil is recommended for most small engines. For warmer climates, 30W oil can be used. Always check the owner’s manual for your specific model, such as a Toro or Craftsman, to ensure you are using the proper oil for optimal performance.
How often should I change the oil in a lawn mower?
It is advisable to change the oil in your lawn mower every 50 hours of use or at least once a season, whichever comes first. Regular lawn mower maintenance helps ensure the mower’s engine runs smoothly and can prevent engine failure. If you notice an increase in oil consumption, you may need to change the oil more frequently.
What is the oil capacity for a Kohler engine in a lawn mower?
The oil capacity for Kohler engines typically ranges from 48 to 64 ounces, depending on the specific model. It’s crucial to refer to the owner’s manual of your Kohler engine for the exact amount of oil to use, as overfilling can lead to engine problems.
Can I use conventional oil in my push mower?
Yes, you can use conventional oil in your push mower, but it’s essential to choose the right type. Many manufacturers recommend using synthetic or high-quality conventional oil, such as 10W30, for better protection and performance, especially for air-cooled engines.
How do I check the oil in my lawn mower?
To check the oil in your lawn mower, first, ensure the mower is on a level surface. Remove the dipstick from the oil fill tube, wipe it clean, and reinsert it without screwing it in. Then, remove it again to check the oil level. If the oil level is low, add the proper oil until it reaches the recommended level.
What happens if I use the wrong oil in my lawn mower?
Using the wrong oil in your lawn mower can lead to poor engine performance, increased oil consumption, and even engine failure. It’s crucial to use the recommended lawn mower oil type for your specific mower engine, whether it’s a Kawasaki, Kohler, or any other brand.
Is there a difference between oil for riding mowers and push mowers?
While both riding mowers and push mowers typically use similar types of oil, the specific oil capacity and requirements may differ due to the size and type of engine. Always consult the owner’s manual to ensure you are using the correct oil for your mower’s engine.
How can I reduce oil consumption in my lawn mower?
To reduce oil consumption in your lawn mower, regularly check and change the oil as needed, ensure proper maintenance of the mower’s engine, and avoid overfilling the oil. Additionally, using the right type of oil, such as synthetic options, can help improve engine efficiency and reduce oil usage.
What should I do if my lawn mower is leaking oil?
If your lawn mower is leaking oil, first identify the source of the leak, which could be from a damaged gasket, loose oil filter, or overfilled oil. Addressing the issue promptly is vital to prevent further damage to the engine. If you’re unsure how to fix it, consider seeking professional help for proper lawn mower maintenance.


