The art of machine embroidery on leather opens up a realm of creative possibilities, transforming this durable material into a canvas for personalized designs. In this blog post, we delve into the essential tips and techniques to help you master this craft and achieve professional results. We’ll explore the selection of appropriate leather types, the importance of choosing the right stabilizers, and the role of needle and thread choices in ensuring smooth operations. Additionally, we’ll provide insights into design planning and layout, troubleshooting common issues, and finishing your project for a polished look. Whether you’re an experienced embroiderer seeking to expand your skills or a novice ready to tackle a new challenge, this guide will equip you with the knowledge to confidently create stunning leather embroidered pieces.
What are the Best Practices for Machine Embroidery on Leather?

When embarking on machine embroidery on leather, there are several best practices to ensure outstanding results. Firstly, selecting the suitable type of leather is crucial; thin, pliable leather is generally easier to work with and less likely to damage your machine. Use a heavy-duty stabilizer to provide extra support and prevent the leather from stretching or puckering during the stitching process. Choosing the right needle is equally important; a leather or denim needle with a sharp point will penetrate the material effectively. Additionally, opt for polyester or rayon threads, as they offer durability and a slight sheen that complements the texture of leather. Always perform a test stitch on a scrap piece of leather to adjust tension settings and verify the suitability of your design. Finally, avoid dense or overly intricate designs, as they can overwhelm the leather and lead to material distortion or thread breakage.
Choosing the Right Needle for Leather Embroidery
To select the right needle for leather embroidery, I focus on using leather needles crafted for such materials. Typically, I opt for a size 90/14 needle, as it’s specifically designed to pierce leather without causing harm. It’s vital to switch the needle regularly to maintain sharpness, which prevents skipped stitches or uneven patterns.
Selecting Suitable Embroidery Thread
When choosing embroidery thread for leather, prioritize strength and color vibrancy. Polyester thread is often the best choice due to its durability and resistance to wear, ensuring your design lasts over time. Rayon thread is another viable option, offering a sheen that enhances design appeal. Avoid cotton threads, as they can easily break or fray. Opt for a heavier thread weight that complements leather’s texture, typically a 40 or 50 weight. Always test the thread on a scrap piece of leather to assess compatibility and tension settings.
Understanding the Importance of Hooping Leather Correctly
Correctly hooping leather is crucial for a successful embroidery project. I learned that using a sturdy hoop that fits snugly is essential to preventing fabric movement during stitching. This step ensures the design aligns perfectly, avoiding puckering. I always place a stabilizer beneath the leather for added support. When hooping, I ensure the leather stays taut but not overly stretched, which could lead to distortion. Consistently hooping with care results in clean and precise embroidery, enhancing the final appearance significantly.
How to Successfully Embroider on Leather Goods?

To successfully embroider on leather goods, start by selecting the appropriate tools and materials, such as a sharp needle and strong polyester thread. Prepare your leather by ensuring it is clean and using a suitable stabilizer that provides extra support. Hoop the leather securely to prevent shifting during the embroidery process. Choose your design carefully, opting for simple patterns if you are new to embroidering on leather. Test your design on a small piece of scrap leather to fine-tune tension and stitch settings, ensuring compatibility with your materials. By following these steps, you will achieve durable, visually pleasing results on your leather projects.
Preparing the Leather Surface for Embroidery
First, I carefully clean the leather to remove any oils or residues, since a clean surface ensures better adhesion of the stabilizer and threads. Then, I lightly dampen the leather, which softens it and makes stitching easier. Following this, I apply a layer of stabilizer to the back of the leather for improved stability. I prefer to use a temporary adhesive spray to hold the stabilizer in place, as it prevents any shifting during embroidery. Finally, I select an appropriate needle and thread to match the leather’s thickness, ensuring a smoother stitching process and an impeccable finish.
Optimizing Embroidery Machine Settings
To optimize embroidery machine settings for leather, start by adjusting the needle speed to around 600 to 700 stitches per minute to ensure precise stitching without damaging the material. Set the tension to a medium level, balancing well with the thread type; test on scrap material and adjust as necessary. Select a stitch length of 3 to 4 millimeters for optimal penetration and a smoother appearance. For thread, use strong polyester for its durability and flexibility with leather. Ensure you use a size 80/12 or larger needle, which can handle thicker materials without bending. Recheck the frame to ensure the leather is secure to prevent any movement during the stitching process.
Preventing Needle Perforations on Leather
Prevent needle perforations on leather by selecting the appropriate needle size and type, like a leather or wedge-point needle. Use a longer stitch length to minimize the density of holes and lower the machine speed for careful control. Test on scrap leather to ensure settings do not damage the leather. Avoid stitching over the same area multiple times, as this may weaken the leather. Applying these techniques reduces the risk of perforations and enhances the durability of your leather embroidery projects.
Which Embroidery Designs Work Best on Leather?

When choosing embroidery designs for leather, it’s best to opt for simpler, less dense patterns. Designs with fewer stitches, such as line art or open work motifs, minimize the risk of perforations and maintain the leather’s integrity. Bold and geometric patterns often work well because they provide a striking visual impact without requiring excessive stitching. It’s also beneficial to avoid designs with heavy fills or overly intricate details that might compromise the durability of the leather. Consider using designs that complement the natural texture and color of the leather for the most aesthetically pleasing results.
Choosing Light and Sheer Designs
When choosing light and sheer designs for embroidery on leather, I focus on patterns that emphasize simplicity and elegance. I select designs that have fewer stitches, as they protect the leather from unnecessary strain. Open work motifs and line art are my go-to options because they offer an appealing look with minimal perforation. I avoid heavy fills and intricate patterns that could weaken the leather. My aim is always to ensure the design complements the leather’s natural texture and color, enhancing its appearance while preserving its durability.
Using Dense Designs with Caution
When using dense designs on leather, proceed cautiously to avoid damaging the material. Choose designs with the least possible number of stitches to maintain leather integrity. Minimize the stitch length—ideally, around 2.5 to 4 mm. Use a leather needle to reduce perforation risk and ensure smooth stitching. Consider increasing the tension slightly to ensure even stitching without puckering. To protect the leather, test the design on a similar material before applying it to the final piece.
What are Common Challenges When Working with Leather?

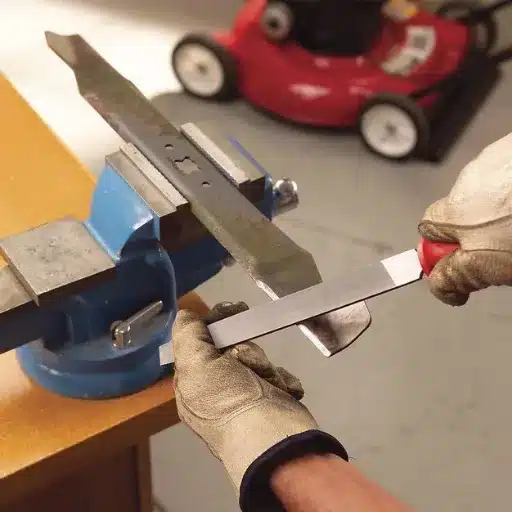
Working with leather presents several common challenges that require careful consideration. First, leather can be difficult to manipulate due to its thickness and rigidity, necessitating the use of specialized tools and needles to avoid damage. Additionally, the natural variability in leather texture and grain may lead to inconsistent results. Staining and color transfer issues can occur, especially with lighter leathers, requiring careful selection and testing of dyes and finishes. Finally, maintaining leather’s structural integrity while embroidering or stitching requires precise technique, as excessive perforation can weaken the material. Balancing aesthetics with durability is key to overcoming these challenges.
Dealing with Thick Leather Types
When dealing with thick leather types, use tools designed for heavy-duty materials. Opt for a sharp, heavy-duty needle and a sturdy sewing machine capable of handling thicker substrates to ensure clean penetration and reduce stress on the equipment. Consider clamping leather securely in place to maintain even stitching. To prevent bulkiness, trim excess material from seams carefully. Employ stronger threads, such as heavy-duty polyester or nylon, to hold up under strain. Prioritize craftsmanship and use techniques like skiving to thin edges when necessary, facilitating easier handling and making your final product both durable and aesthetically pleasing.
Avoiding Damage to the Leather
To avoid damaging the leather, ensure you use the correct tools for each task. Choose a sharp awl and leather needle to make precise holes and minimize tearing. Always test dyes and finishes on a small, concealed area to prevent unwanted staining or color transfer. Keep your workspace clean to prevent accidental marks or scratches, and handle the leather gently to maintain its natural texture. When cutting leather, adhere to pre-measured templates to avoid wastage, and use a rotary cutter for clean, straight lines. Continuously monitor your stitching tension to prevent puckering or distortion, ensuring your final product remains strong and visually appealing.
Handling Faux Leather vs. Real Leather
When handling faux leather, work with a lower heat setting and use a pressing cloth when ironing to prevent melting or damage. Faux leather requires less maintenance but lacks the durability and natural patina of real leather. Opt for a regular needle and thread as it’s easier to sew compared to real leather. On the other hand, real leather needs a sturdier needle and thread due to its thickness and strength. For real leather, condition it regularly to maintain suppleness and prevent cracking. Both materials benefit from using a non-stick presser foot to avoid sticking during sewing. Choose faux leather for cost-effective projects and easy cleaning, while real leather is preferable for projects that demand long-lasting wear and a luxurious finish.
How to Care for Embroidered Leather Items?

To care for embroidered leather items, start by ensuring they are kept out of direct sunlight to prevent fading and cracking. Gently dust them with a soft, lint-free cloth to remove any surface dirt, being careful not to snag the embroidery. For minor stains, use a damp cloth and a mild soap solution, ensuring that the leather does not become oversaturated with water. Allow the leather to air dry naturally, away from any direct heat sources. Use a specialized leather conditioner to maintain the material’s suppleness and to preserve the vibrancy of the embroidery. Store embroidered leather items in a cool, dry place, ideally in a breathable fabric bag to protect them from dust and moisture. Regular care will help prolong the life and beauty of your embroidered leather pieces.
Repairing Holes in the Leather
In order to fix leather holes, you will require a leather repair kit, scissors and sandpaper. Begin the process by sanding around the hole lightly to smooth the rough edges. Second, take a piece of cloth available within the repair kit and cut it to about the same size if not bigger than the hole. Apply a rub of glue around the boundary of the hole before placing the patch under the leather and flattening it. Also apply the sealing compound to the area of the repair and smooth it down with the spatula available in the kit. After the compound sets in, dye or coat the surface to match with the leather. This also helps improve the visibility of the item.
References
-
How to do Embroidery on Leather? – LeatherNeo – Provides tips on preventing leather from bouncing during embroidery.
-
How To Embroider On Leather and Vinyl: Complete Guide – Digitizing Made Easy – Discusses factors like needle size, thread type, hooping, and stabilizers.
-
No-Fear Leather Embroidery Tips! – ColDesi – Provides tips on needle selection and avoiding needle deflection.
Frequently Asked Questions (FAQ)
Q: What are the initial steps for using embroidery on leather?
A: Before you begin using embroidery on leather, it’s crucial to select the right type of leather, such as thin lambskin leather, which is easier to work with. Ensure you have the proper tools, including leather embroidery needles and a suitable stabilizer to hold the leather together during the embroidery process.
Q: How do you hold the leather together when embroidering?
A: To hold the leather together while embroidering, you should use a stabilizer on the back of the leather. This helps to prevent the leather from shifting and ensures clean, precise stitches. It’s essential not to over-stretch the leather when it’s hooped to avoid any distortion.
Q: What type of machine embroidery designs work best on leather?
A: When choosing machine embroidery designs for leather, opt for simple and less dense patterns. Intricate designs could perforate the leather, leading to tears. Designs that are specifically created for leather, with fewer stitches, are ideal.
Q: How do you prevent leaving a mark on the leather from the embroidery hoop?
A: To prevent leaving a mark on the leather from the embroidery hoop, consider using a floating technique where the leather is not directly hooped. Instead, secure it with temporary adhesive spray or tape on top of the stabilizer. This prevents direct contact with the hoop.
Q: What is the best way to embroider a leather jacket?
A: When embroidering a leather jacket, ensure that the area to be embroidered can be laid flat and properly stabilized. Use leather embroidery needles, set your machine to a slower speed, and opt for designs that won’t heavily perforate the leather. Test your design on a scrap piece of similar leather first.
Q: How can you embroider leather patches for a leather bag?
A: To embroider leather patches for a leather bag, select a durable stabilizer that can withstand the sewing process. Use a leather embroidery needle and ensure your machine settings are appropriate for thicker materials. After embroidering, carefully cut the leather patch and sew it onto the bag.
Q: What should be considered when using embroidery on expensive leather?
A: When using embroidery on expensive leather, it is crucial to test your design on a similar, less expensive piece first. Use high-quality needles and stabilizers to prevent damage, and opt for designs that minimize the risk of tearing or perforating the leather.
Q: How can you avoid perforating the leather during embroidery?
A: To avoid perforating the leather, use a sharp leather embroidery needle and select designs that are not too dense. Adjust the tension settings on your machine and ensure the stabilizer is adequately supporting the leather.
Q: What are the benefits of using commercial embroidery on leather products?
A: Commercial embroidery on leather products offers precision and speed, allowing for high-quality and consistent designs. It’s ideal for producing embroidered leather goods at scale, such as branded leather jackets, bags, and accessories. Ensure that the machinery and techniques used are tailored for leather to prevent damage.