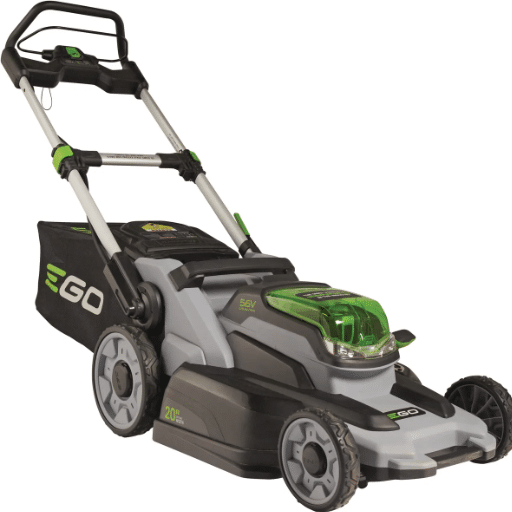
A well-maintained lawn mower gives you a lot of cheer, from lawn care to equipment life extension. Still, many homeowners either forget about or choose to overlook routine maintenance because they feel underqualified to handle minor repairs. This guide seeks to make the change. It will walk you through the most frequent problems, give you tips on how to care for your mower between repairs, and, more importantly, provide you with the confidence to keep your mower going strong from one season to the next. Whether your problems center around a set of dull blades, an engine that does not want to cooperate, or just simply some basic maintenance procedures, you will find direct solutions that help your mower work in top condition. This is going to be a very simple and streamlined process that saves you time, money, and a whole lot of frustration!
Common Lawn Mower Issues

- Engine Won’t Start
- Cause: Often due to stale fuel, a dirty air filter, or a spark plug issue.
- Solution: Replace old fuel, clean or replace the air filter, and check the spark plug for damage or dirt.
- Uneven Cutting
- Cause: Dull blades or an uneven mower deck.
- Solution: Sharpen the blades regularly and check that the mower deck is level.
- Mower Won’t Stay Running
- Cause: Clogged carburetor or issues with fuel flow.
- Solution: Clean the carburetor and ensure the fuel lines are clear. Replace the fuel filter if necessary.
- Excessive Vibration
- Cause: Damaged or imbalanced blades.
- Solution: Inspect the blades for damage, tighten them securely, or replace them if needed.
- Grass Clumps Left Behind
- Cause: Wet grass, dull blades, or a full bag.
- Solution: Mow when grass is dry, sharpen blades, and empty the bag regularly.
- Self-Propelled Mower Not Moving
- Cause: Worn drive belt or faulty transmission.
- Solution: Inspect the drive belt for wear and replace it if damaged. Check the transmission for issues.
By addressing these issues proactively, you can maintain optimal performance and extend the lifespan of your lawn mower.
Identifying Lawn Mower Problems
Identifying lawn mower problems includes issues like starting failure, uneven cutting, smoking, power loss, and engine stalling.
| Problem | Cause | Solution |
|---|---|---|
|
Won’t Start |
Stale fuel |
Replace fuel |
|
|
Dirty spark plug |
Clean/replace plug |
|
Uneven Cut |
Dull blade |
Sharpen/replace |
|
|
Uneven deck |
Adjust deck |
|
Smoking |
Overfilled oil |
Drain excess oil |
|
|
Oil leak |
Fix leak |
|
Power Loss |
Clogged filter |
Clean/replace |
|
|
Dirty carburetor |
Clean carburetor |
|
Stalling |
Clogged fuel cap |
Clear vent holes |
|
|
Carburetor issue |
Clean/repair |
Symptoms of a Failing Mower Engine
Knowing the symptoms of a mower engine going bad is essential to avoid hefty repairs and ensure the equipment’s efficiency. The following are common signs that a mower engine might be having trouble, almost-all the things you need to know about the diagnosis, and how to treat these problems.
1. Difficulty Starting
When a mower engine struggles to start or requires several attempts to turn on, it could be an issue of spark plugs, a clogged air filter, or aged fuel. Usually, regular maintenance, such as replacement of plugs or simply using fresh gas, is the way to go for fixing this.
2. Strange Sounds
A constant knocking, rattling, or sputtering noise indicates that some engine parts, like bearings or valves, could be worn or misaligned. The sooner you address the issue, the greater the chance of avoiding major internal damage.
3. Excessive Smoke
Smoking can mean anything from a few problems to a serious one with your engine. Thick white or blue smoke from the exhaust usually points toward oil leaks inside the engine or problems in the crankcase. Check and secure the oil seals, or maybe the oil level, to identify and resolve the issue.
4. Loss of Power During Mowing
The loss of power under load is an indication that there might be something wrong with the engine: an air passage could be blocked, the fuel lines could be clogged, or the carburetor might be failing. Keeping engine parts clean or replacing them can help restore power and efficiency.
5. Overheating
An overheating mower engine can cause long-lasting damage. Generally, overheating emanates from debris obstructing cooling fins, low oil levels, or a faulty cooling system. Hence, clean the debris and confirm the quality of the oil everyday to prevent excess heat build-up.
6. Fuel or Oil Leakage
Since leaks are indicators of performance issues, they are also unsafe. Some enveloping causes of leaks are a fouled gasket, loose fittings, or a cracked engine casing. A thorough inspection of the engine for worn parts is necessary for replacement.
According to industry data, consistent maintenance reduces the likelihood of engine failure by more than 50%, considerably enhancing a mower’s operational life. Carrying out daily checks and allowing slight issues to be resolved will add to the lawn mower’s lifespan and efficiency, thus saving a lot of time and repair charges.
Frequent Lawn Mower Repair Needs
Just as with any machinery or equipment, lawn mowers require regular maintenance for optimum performance. One very common repair comes under the category of a mower not starting. Probably the most common cause is sparking or lack thereof in an ignition system, or from problems in the fuel system or air filter. Spark plugs can be corroded or coated with carbon deposits and must be cleaned or changed. An air filter that is clogged will reduce the amount of air that reaches the engine, while stale fuel deposits can create layers of resinous buildup that affect its performance gradually.
Another usual issue considered is uneven cutting performance together with dull or damaged blades that cut grass in a way that does not give an even appearance. Sharpening or replacing blades makes the mower cut better, and this improves the mower while beautifying the lawn.
Additionally, wheels or drive belts may be faulty. Worn-out drive belts lessen the ability of the mower to push itself, especially while on slopes or uneven terrains. Likewise, damaged tires and misaligned wheels will interfere with maneuverability at ever time and make maintenance difficult.
Data presents that in 70% of walk-behind and push mower breakdowns, some type of contamination in the fuel system or a general lack of maintenance-related cause existed. A simple task of changing oil, replacing filters, or winterizing the mowers correctly can save an end-user from heavy repair costs. In general, bearing proactive care and promptly taking care of these common repair needs greatly enhance the longevity of lawn mowers while ensuring a top-notch performance at every mowing.
Lawn Mower Repair Techniques

1. Cleaning or Changing the Air Filter
A blocked air filter will slow down a lawn mower. Examine the filter and wind one way and clean or replace as necessary ensuring proper air flow.
2. Spark Plug Review and Replacement
Poor spark plugs, if either one were faulty, will mean that your mower refuses to start. Check for buildup or damage and replace the spark plug for reliable performance.
3. Sharpening the Blades
With a dull blade, grass will be torn untidily, thereby making the lawn uneven and further straining the mower. Sharpen the blades either at the beginning of the mowing season or as needed.
4. Fuel System Check
The use of fresh fuel is advocated along with keeping the fuel lines and carburetor clean. Starting problems and performance issues can occur mostly because of old or contaminated fuel.
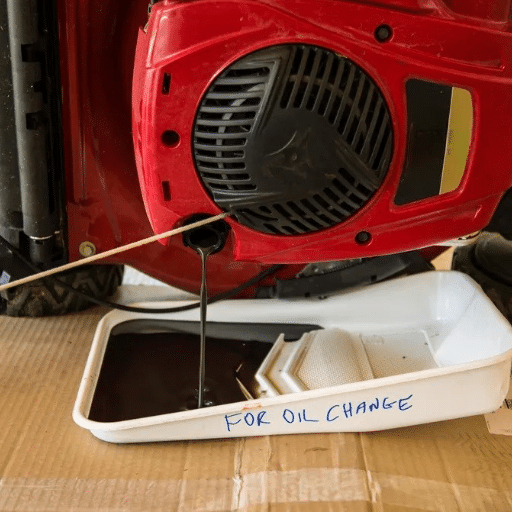
5. Oil Changes
Check and change engine oil regularly for smooth engine running and prevention of long-lasting damage. Always make use of the type of oil the manufacturer has recommended.
With these simple yet effective repair methods, one is capable of keeping the lawn mower in pristine condition and avoiding frequent breakdowns.
Step-by-Step Guide to Repair a Lawn Mower
- Inspect the Spark Plug
Check the spark plug for signs of wear, corrosion, or dirt. A faulty spark plug is a common cause of lawn mower starting issues. Remove it using a socket wrench and inspect the electrode for damage. If it appears worn out or heavily fouled, replace it with a new one recommended by the mower’s manufacturer. For minor dirt or debris, clean the spark plug with a wire brush and check the gap to ensure it’s set at the correct measurement, typically between 0.02 to 0.03 inches.
- Air Filter Replacement
A clogged or dirty air filter can choke the engine, leading to reduced performance or failure to start. Detach the air filter and inspect its condition. If it is a foam filter, clean it with warm, soapy water, and allow it to dry completely before re-oiling and reinstalling it. Replace paper filters if they show signs of excessive dirt or wear. The air filter should be checked and cleaned or replaced at least once every mowing season.
- Check the Fuel System
Old or degraded fuel can lead to starting problems and engine sputtering. Drain any stale fuel from the gas tank and carburetor. Refill the tank with fresh fuel that contains less than 10% ethanol, as higher ethanol concentrations can harm small engines. Additionally, inspect the fuel line for cracks or leaks, and replace it if necessary. Cleaning the carburetor with a carburetor cleaner spray can remove buildup or blockages that impede fuel flow.
- Sharpen or Replace the Blade
Dull or damaged mower blades can tear the grass rather than providing a clean cut, which may stress your lawn. Detach the blade from the mower deck by removing the securing bolt. Sharpen the blade using a bench grinder or file, ensuring you maintain an even edge to avoid imbalance. For blades with extensive damage, opt for a replacement. Balancing the blade is crucial to prevent vibrations during operation.
- Adjust the Mower Deck
Uneven cutting often indicates an improperly balanced mower deck. Use a level to check the deck’s alignment in relation to the ground. Refer to the manufacturer’s manual for instructions on adjusting the height of the mowing deck to achieve a uniform cut. Tighten any loose bolts and inspect for damage or wear on the deck support brackets.
- Replace or Maintain Belts
The drive belt system helps transfer power from the engine to the mower blades and wheels. Over time, belts can become worn, cracked, or loose. Examine belts during routine maintenance and replace if necessary. Always use the correct replacement belt recommended for your mower model to ensure proper efficiency and operation.
By addressing these critical areas during your repair process, your lawn mower can achieve peak performance while extending its lifespan. Routine care saves you time and money while ensuring precise cuts and a healthy lawn.
Troubleshooting the Mower Engine
The engine that runs the lawn mower can affect your yard maintenance schedule, but with a few systematic steps, you should be able to identify and solve any problems. First, start by looking at the fuel system: Make sure there is enough fuel and ensure it is fresh. Stale gas is a common culprit for engines that refuse to start. For a two-stroke engine, the magic lies in the gas-to-oil ratio. Stick to the manufacturer’s recommendations to avoid problems.
Then, examine the spark plug-it is one of the most important components for ignition. A dirty or worn-out spark plug could cause misfiring or even fail to start altogether. Remove the spark plug carefully, clean it from carbon deposits, and check the electrode gap conforms to specifications provided for your mower. If the plug shows evidence of heavy wear, it is better to replace it.
Dirty air filters choke the engine by restricting airflow. Check the air filters for dirt, debris, or damage and clean or replace them as needed to allow sufficient combustion. Also, keep an eye out for carburetor blockages or malfunctions. Should the mower cause it to cough as it mows or refuses to idle, cleaning the carburetor with an appropriate cleaner will often sort out the problem.
After a long time of poor engine performance through use, the oil must be thoroughly examined. Dirty or low oil level could overheat the engine and reduce performance. It is good to change it regularly and ensure that it conforms to the grade recommended in the owner’s manual for effectual lubrication.
Finally, check the mower’s cooling system-let say the fins around the engine block. These can accumulate grass clippings and debris with time. Repeat the procedure for clearing the debris to allow proper cooling and prevent the engine from overheating.
Thereby going through these in an orderly fashion nips most ordinary engine problems in the bud and keeps your lawn mower working reliably. When carried out routinely, this will keep the downtime to a minimum and therefore increase the lifespan of the engine, making lawn mowing a joy.
How to Disconnect the Spark Plug
Disconnecting a spark plug involves locating the plug, grasping the boot, twisting gently, and pulling it straight out without yanking the wire.
| Step | Task | Details |
|---|---|---|
|
1 |
Locate |
Find spark plug |
|
2 |
Grasp Boot |
Hold boot firmly |
|
3 |
Twist |
Loosen connection |
|
4 |
Pull |
Remove straight |
|
5 |
Avoid Wire |
Don’t yank wire |
Lawn Mower Maintenance Tips

An adequate maintenance routine is necessary to keep your lawn mower working like new. The main guidelines are:
- Changing the Oil: After fifty to twenty-five hours of operation or at least once a mowing season, depending on usage.
- Cleaning or Replacing the Air Filter: Hold an inspection once a month and change it every year or whenever it is needed, especially during a dusty condition.
- Sharpening the Blade: Sharpen the lawnmower blades every twenty to twenty-five hours of mowing so they make clean cuts.
- Inspect the Spark Plugs: Inspect the spark plugs once each season and replace them every year for good operation.
- Checking the Fuel: Use fresh and unleaded gasoline, and drain off any old gasoline at the end of each season to keep the engine from being damaged.
By closely observing these very easy yet crucial steps, the life of the mower can be greatly extended and its upkeep assured.
Importance of Regular Mower Maintenance
It is essential to look after the lawn mower as it actually retards aging and facilitates peak performance in any activity it is functioning. The studies show that if a mower is thoroughly maintained, it uses up to 30% less fuel and cuts the grass well, saving much time and effort during lawn mowing. For instance, a shaper mower blade cuts nicely for the grass from tearing and is less susceptible to diseases. Replacing air filters during routine maintenance shows the air coming into the engine and its good performance with a resultant smooth running and low emissions.
Maintenance will keep repair bills from piling up. Dirty spark plugs are among the many faults that can cause an engine to misfire and can be cleaned up in just a few minutes. Another typical cause of starting troubles or even permanent engine damage is stale or contaminated fuel, so regular checks of the whole fuel system are crucial. Tire pressure should be another upkeep detail many fail to consider. A well-inflated tire leads to even mowing pressure, less strain on the engine, and easier maneuvering.
Through regular maintenance and semiannual preventive activities, users of the lawn mower protect their lawn mowers and contribute to sustainability. Efficient mowing activity can cut down on fuel wastage, emissions, and consumption of resources. Therefore, regular maintenance is a win-win formula.
How to Check the Air Filter
Checking an air filter involves locating it, removing it, inspecting for dirt or light blockage, and determining if replacement is needed.
| Step | Task | Details |
|---|---|---|
|
1 |
Locate |
Find filter box |
|
2 |
Remove |
Take out filter |
|
3 |
Inspect |
Check for dirt |
|
4 |
Light Test |
Hold to light |
|
5 |
Replace |
If dirty, change |
Replacing the Spark Plug and Fuel Filter
Regular maintenance of the spark plug and fuel filter ensures optimal engine performance and extends the lifespan of your equipment. Below is a detailed step-by-step process to replace these critical components efficiently:
Replacing the Spark Plug
- Locate and Remove the Spark Plug
Begin by disconnecting the spark plug wire to prevent accidental starts. Using a wrench or socket specific to your engine’s spark plug size, unscrew the plug from the engine carefully.
- Inspect the Spark Plug
Examine the condition of the removed spark plug. A spark plug with excessive carbon buildup, corrosion, or visible damage needs replacement. For reference, a spark plug with a gap larger than 0.02–0.03 inches or misaligned electrodes likely indicates wear.
- Install the New Spark Plug
Use a new spark plug designed specifically for your equipment model. Double-check the spark plug gap with a spark plug gauge to ensure precision. Screw the new spark plug into place by hand to avoid cross-threading, then tighten with a wrench. Don’t overtighten, as it can damage the threading. Reattach the spark plug wire once done.
Replacing the Fuel Filter
- Turn Off the Engine and Fuel Supply
Ensure the engine is turned off, and use the fuel shutoff valve (if available) to stop fuel flow. This prevents spills and ensures safety during maintenance.
- Locate and Remove the Old Fuel Filter
Find the fuel filter, usually in the fuel line leading to the carburetor. Disconnect the clamps on either end of the filter using pliers. Be cautious, as small amounts of fuel may spill during removal.
- Inspect the Fuel Filter
A clogged or discolored fuel filter indicates the need for replacement. A clean, unobstructed filter is essential to maintain fuel efficiency and proper combustion.
- Install the New Fuel Filter
Using a filter compatible with your engine model, connect the new fuel filter by attaching it between the fuel lines. Secure the clamps tightly to prevent leaks. Confirm that the arrow on the filter matches the fuel flow direction, typically leading to the carburetor.
- Check for Leaks
After installation, restore the fuel flow and check for any leaks around the connections. If secure, your replacement is complete.
Sharpening and Tuning Your Lawn Mower

1. Sharpening the Blade
Remove the spark plug to ensure safety before proceeding to the blade with the wrench. Sharpen the edges of the blade with a metal file or an abrasive wheel, making sure that the edges are equally sharpened and retaining the original angle for best results. Fix the blade firmly afterwards.
2. Tuning the Engine
Replace or clean the air filter to maintain clean airflow. Clean or replace spark plugs to ensure consistent ignition and adjust carburetor settings following the manufacturer’s instructions to achieve better performance. Lastly, refill the oil if it needs topping up.
3. Final Check
Start the mower to observe smooth operation. Keep note of any strange sounds or issues and make adjustments if necessary. Regular sharpening and tuning allow the installation to last longer in cutting grass effectively.
How to Sharpen the Blade for Optimal Performance
Maintaining a sharp blade on your lawn mower is critical for achieving a clean, even cut and promoting healthy grass growth. A dull blade tears grass unevenly, leading to brown tips and increased vulnerability to pests and disease. Here’s a step-by-step guide to sharpening your mower blade efficiently:
- Remove the Blade Safely
Disconnect the spark plug to prevent accidental starts and tilt the mower onto its side, with the carburetor and fuel tank positioned upward to avoid leaks. Use a wrench to loosen and remove the blade bolt while securing the blade with a block of wood to prevent it from rotating.
- Clean the Blade
Before sharpening, clean the blade thoroughly to remove grass clippings, dirt, and rust, as debris can affect the sharpening process. Use a stiff brush or steel wool for best results.
- Check for Damage
Inspect the blade for cracks, bends, or deep nicks. If the blade is excessively worn or damaged, replacement is recommended, as sharpening will not restore unsafe blades.
- Sharpening the Blade
-
- Tools Needed
A bench grinder, metal file, or rotary tool with a sharpening stone works effectively for sharpening mower blades. For precision, many experts recommend using a blade sharpening kit designed specifically for lawn mower blades.
-
- Sharpening Process
Secure the blade in a vice, with the cutting edge facing outward. Follow the manufacturer’s recommended blade angle—usually around 30 to 45 degrees—to maintain optimal performance. Smoothly grind or file the edge in one direction only, keeping consistent pressure for an even edge. Avoid overheating the blade, as this can weaken the metal. Dip the blade in water periodically to keep it cool.
- Balance the Blade
An unbalanced blade causes vibrations that strain the mower engine and lead to uneven mowing. After sharpening, check the blade balance by hanging it on a blade balancer or a simple nail in the wall. A balanced blade will stay level; if it tilts, remove additional material from the heavier side until balance is achieved.
- Reinstall the Blade
Carefully reattach the blade, ensuring it is installed in the correct orientation. Tighten the bolt securely but avoid overtightening, which could damage the blade or the mower.
- Test Performance
Once the blade is reinstalled, reconnect the spark plug and start the mower. Test it on a small patch of grass to ensure the blade cuts cleanly and evenly.
Performing a Lawn Mower Tune-Up
Performing a lawn mower tune-up involves inspecting, cleaning, replacing the air filter, spark plug, and oil, sharpening the blade, and ensuring all parts are in working order.
| Step | Task | Details |
|---|---|---|
|
1 |
Inspect |
Check for debris |
|
2 |
Clean |
Remove dirt/grime |
|
3 |
Oil Change |
Replace old oil |
|
4 |
Air Filter |
Clean/replace |
|
5 |
Spark Plug |
Replace/clean |
|
6 |
Blade |
Sharpen/replace |
|
7 |
Fuel |
Add fresh fuel |
|
8 |
Battery |
Test/charge |
|
9 |
Belts/Cables |
Inspect/adjust |
|
10 |
Test Run |
Ensure smooth ops |
Maintaining the Carburetor for Better Efficiency
The mower’s carburetor should be well maintained for a mower that runs smoothly. The most common problems backyard mower operators have are stalling and poor fuel consumption. Maintaining the carburetor includes inspecting it for dirt or gum deposits that clog the jets and disturb the flow of air through them. Carburetor cleaner should be used to dissolve the dirt and wipe it down to help increase fuel flow. Industry insiders note that carbonating can bring down engine performance by as much as 30 percent, which explains why this maintenance is so important.
Look at the carburetor gaskets and seals for any signs of wear and tear. The moment you spot a bad one, crack one, or dry one, replace it immediately to prevent air leaks that might form an irregular mix of fuel and air. While at it, keep the gaskets and seals clean using fresh, ethanol-free fuel courted by experts. If it is an older mower and it has deteriorated to a point where it hardly runs, you could try a carburetor rebuild kit-that will go a long way to restoring it at a fraction of the price of a replacement.
A well-maintained carburetor in your lawnmower will increase the life of the mower and also go toward maximizing the efficiency of the activity of mowing, saving fuel, and thus keeping the equipment effective throughout the season.
Using Lawn Mower Parts Effectively

For planting lawn mower parts effectively, initiate a series of maintenance checks whereby worn or damaged parts can be detected and replaced immediately. Keep manufacturer-recommended parts higher on the priority list in order to preserve compatibility and promote good working performance. Keep blades sharpened so that grass cut cleanly will be watered in the engine. Replace the air filters, spark plugs, and oil as required through regular maintenance, ensuring greater efficiency in use and a longer lifespan for the mower. Store the lawn mower in a dry area under a cover to prevent rust and damage to key parts. It will follow through the process to ensure reliable working and lessen the potential for heavy costs in repairs.
Choosing the Right Mower Oil
A selection of the right oil for your mower system guarantees optimal performance with enhanced engine longevity. Most small engines in lawnmowers use SAE 30 motor oil, which is recommended in areas of warm climates. Synthetic oils like SAE 5W-30 or SAE 10W-30 can further better viscosity and performance in variable temperature conditions where the equipment is being used irrespective of varying temperatures. This also helps by reducing oil consumption and assures proper lubrication over long hours of operation.
While selecting the oil, learn as to what the manufacturers of the mower specify, and they usually state this in the owner’s manual specifying the right type and grade of oil. Synthetic blends, for example, are recommended by many modern engines as they handle high heat levels better and reduce engine deposits. Check oil level and oil condition regularly and change it at least after one mowing season or every 25 hours of operation, depending on which occurs first. Correct oil selection and maintenance greatly contribute to engine efficiency, and hence, lessen wear by up to 50% as opposed to an intensely neglected system.
Understanding Small Engine Components
Small engines consist of various key parts that operate in tandem to deliver good performance. Main parts consist of the carburetor, spark plug, air filter, fuel system, and cylinder, as well as having differing functions vital to engine operation.
It ensures the mixture of air and fuel in the right proportion before giving it to the engine cylinder for combustion. A carburetor, when it is not well maintained, will make it hard to start the engine or reduce the engine’s performance. Yearly cleaning or replacement of the carburetor has been said to have a 15-20% increase in fuel efficiency.
The spark plug ignites the air-fuel mixture in the combustion chamber, giving the energy to act upon as work to power the engine. Worn-out or fouled spark plugs cause misfires, may not start properly, and lower fuel efficiency. Replacing the spark plug every 100 hours of use helps in improving engine reliability and reducing emissions.
The air filter ensures that dirt and debris do not enter into the engine and thus damage it. Clogged air filters have been found to reduce engine efficiency by 30%. Hence cleaning or replacing the air filter, especially in dusty atmospheres, will enhance smooth airflow and good performance.
The fuel system, including the fuel pump and fuel lines, supplies clean fuel to the engine and does so steadily. This prevents fuel degradation and clogging, which are the number one causes of engine failure. Proper maintenance like draining old fuel and replacing fuel filters can help with these.
Finally, combustion is under the purview of the cylinder. Carbon deposits build with time, causing a loss of efficiency and power. With frequent cleaning and the use of good synthetic oil, such deposit formation can be reduced, thereby extending the life of an engine.
A user-end understanding about the maintenance of these components would go a long way in enhancing engine efficiency and durability, as well as cutting down maintenance costs.
Replacing Essential Mower Parts
Replacing essential mower parts is important for keeping its performance at an optimum level and prolonging its life. Maintenance will help avoid expensive repairs, whereas seasonal maintenance will keep the mower running well. Here are the main things you should keep your eyes on and replace as necessary, with details and data to aid in their maintenance.
1. Blades
Mower blades undergo a lot of wear-and-tear when cutting thick grass or dealing with dirty conditions. Research shows dull or damaged mower blades reduce mower efficiency by as much as 30%, also resulting in unevenness in grass height. This creates extra strain on the engine itself. It is suggested that blades be inspected after every 25 hours of use and sharpened at least twice per mowing season. They should be replaced annually or immediately when bent, severely damaged, or excessively dull.
2. Air Filters
The main function of the air filter is to keep dirt and debris out of the engine. Air filters, when clogged, limit airflow into the engine, possibly curtailing engine power by almost 20% and increasing fuel consumption. Generally, manufacturers recommend keeping air filters replaced every 50 hours or at the start of each mowing season. Foam filters should be washed with soapy water frequently to prolong their life if reusable.
3. Spark Plugs
A good spark plug ensures the ease of starting an engine and efficient combustion process within an engine. Due to the build-up of carbon or corrosion, spark plugs cause misfiring and a drop in fuel efficiency by about 15%, therefore they should be undergo replacements immediately after the first 100 hours of operation or annually, according to data suggesting best practice for regular upkeep.
4. Belts
Mowers use crowns belts to rotate the blades and drag the wheels. Cracks, fraying, or stretching of belts results in sluggish performance or stalls of the blades. Replacing belts in two or three mowing seasons or earlier if wear is found will prevent breakdowns. During routine maintenance, an inspection of the belt’s tension will help to catch issues early.
5. Fuel Filters
Filtering impurities that can enter the fuel injection system keeps the engine clean. Blockage can create fuel problems, causing it to sputter or stall. It’s advisable to replace fuel filters every 200 hours of operation or once in a year, especially if there are concerns about contaminated fuel.
6. Oil and Oil Filter
Oil changes, when paired with timely oil filter replacement, maintain engine health. Engine maintenance data reveals that an engine that uses degraded oil has a 50 percent chance of overheat or major wear on internal parts. Usually, it is recommended to change oil every 50 hours of use, with filters, to maintain oil circulation and engine performance.
7. Battery
In the case of electric mowers or other mowers that depend on batteries for starters, ensuring battery health is paramount. Batteries generally require replacement every two to three years; the requirement is dependent upon use and storage conditions. A bad battery can cause slow startup times or no startup at all, impacting the Timings of the mow.
Regular replacement of these crucial parts ensures good returns when it comes to mower efficiency and, in the long run, may save about 40% in repair and fuel expenses. For most favorable maintenance results, it’s important to always refer to the user manual for maintenance intervals and part specifications. Taking care of the machine means that in return, you will have a well-maintained machine providing clean cuts for years.
Lawn Care Best Practices

Essential for creating an environment that dramatically contributes to a healthy and vibrant lawn:
1. Mow Regularly and Properly
Set the mower height properly, depending on your grass type, generally about 2 or 3 inches, allowing it to develop deeper roots and keep weeds in shade. Also remember to never trim more than one-third of a grass blade length.
2. Water Wisely
Provide deep soakings but seldom, about 1 to 1.5 inches deep per week. It includes rainfall. Water early in the morning when evaporation rates are low, and fungal growth can be prevented.
3. Fertilize Properly
Depending on the target season and type of lawn involved, fertilize your lawn. Applying a fertilizer with nitrogen, phosphorus, and potassium components while ensuring even distribution of the fertilizer will avoid patchy growth.
4. Control Weeds and Pests
In keeping the lawn healthy but without applying chemicals overmuch, cultivate weeds and pests with selective techniques such as spot treatments to weeds and environmentally friendly pest control measures.
5. Aerate and Overseed Annually
Fall aeration improves soil structure and allows nutrients, water, and air to penetrate. The process should be followed with overseeding to fill bare patches and create a denser lawn.
6. Mower Servicing
Sharpen your mower blades, check and change its oil while cleaning it thoroughly, for the cleanest cut and to prevent any damage to the grass.
When these are practiced regularly, they will promote and sustain healthy growth plus ward off common lawn troubles, ultimately ensuring your lawn stays lush and green the entire year.
Seasonal Lawn Mower Maintenance Checklist
Seasonal lawn mower maintenance includes oil changes, blade sharpening, spark plug checks, air filter cleaning, fuel management, and deck cleaning.
| Season | Task | Details |
|---|---|---|
|
Spring |
Oil Change |
Replace old oil |
|
|
Blade Sharpening |
Ensure clean cuts |
|
|
Spark Plug |
Check/replace |
|
|
Air Filter |
Clean/replace |
|
Summer |
Blade Check |
Sharpen regularly |
|
|
Tire Pressure |
Adjust as needed |
|
Fall |
Fuel Management |
Add stabilizer |
|
|
Deck Cleaning |
Remove debris |
|
Winter |
Fuel Drainage |
Empty tank |
|
|
Blade Storage |
Clean and oil |
Tips for Fuel Tank Management
To keep a healthy mower fuel tank, I always make sure to use fresh, good quality gasoline for preventing engine problems. I drain any leftover fuel if storing the mower for quite some time, as old fuel can clog it and cause poor performance. I also add a fuel stabilizer to maintain fuel quality and allow the engine to run smoothly. These simple things have helped me maintain my mower in good working condition and ready for use.
When to Seek Lawn Mower Repair Service
In case I face unusual performance issues with a lawn mower, such as difficulty in starting, weird noises, or uneven cutting, I know it’s time to call the repair service. Also, if the problem does not get solved by some basic maintenance, such as changing the air filter or spark plug, he is the man to look after the matter, since fixing it immediately will prevent further strain on it. Regular checking and repairing will help the mower to last longer and keep it working smoothly.
Reference Sources
- Rotary Mowers Safety: Lawn Care Training Guide – Virginia Tech
- How b moinbin it and when to replace it – Michigan State University
- Picture Perfect: Mowing Techniques for Lawns, Landscapes, and Sports – Google Books
Frequently Asked Questions (FAQs)
How can I fix a lawn mower engine that won’t start?
If your lawn mower engine won’t start, check the fuel delivery system first. Make sure there is fresh fuel in the tank and inspect the fuel filter to see if it needs to be replaced. Additionally, examine the spark plug; using one spark plug that is in good condition can make a difference. If these elements are functioning well, consider checking the flywheel and other ignition components.
What are common lawn mower fixes for a dull mower blade?
A dull mower blade can lead to uneven lawn cutting and stress on the engine. Regularly inspect the blade and sharpen it as needed. If the blade is excessively worn, you may need to install a new one. Properly maintaining the blade will help your mower operate efficiently and provide a clean cut.
How do I check lawn mower oil levels?
To check the lawn mower oil levels, locate the dipstick, remove it, and wipe it clean before reinserting it into the engine. Pull it out again to see where the oil level sits. If the oil is low, add the appropriate lawn mower oil until it reaches the recommended level. Regular checks can prevent engine damage.
Why is my riding mower engine backfiring?
If your riding mower engine is backfiring, it could be due to an improper air-fuel mixture or a malfunctioning spark plug. Check the carburetor and ensure that the fuel filter is clean. Additionally, inspect the ignition system to rule out issues with the flywheel or wiring.
How can I prevent the mower from stalling during operation?
To prevent the mower from stalling, ensure that the engine is running at the correct speed and that the mower transmission is functioning properly. Regular maintenance, including changing the oil and cleaning or replacing the air filter, can also help keep your mower running smoothly.
What should I do if my riding lawn mower is leaking oil?
If your riding lawn mower is leaking oil, it might be due to a damaged gasket or seal. Inspect the engine and transmission areas for any signs of leakage. Tightening bolts or replacing faulty components can often resolve the issue. Regular maintenance can help prevent future leaks.
When should I tip the mower for maintenance?
You should tip the mower to perform maintenance, such as cleaning the underside or changing the oil. Always tip it away from the air filter and carburetor to prevent oil from leaking into these components. Ensure the engine is off and cool before tipping for safety.
How do I find local lawn mower repair shops?
To find local lawn mower repair shops, you can search online using terms like “lawn mower repair shops near me” or check local business directories. Ask for recommendations from friends or neighbors who have experience with lawn and garden equipment repairs.
What maintenance is required for a walk-behind mower?
Maintenance for a walk-behind mower includes regularly checking and changing the oil, ensuring the blade is sharp, and cleaning the mower deck. Additionally, inspect the spark plug and fuel filter periodically. Keeping the engine and transmission in good condition can enhance the lifespan of your mower.