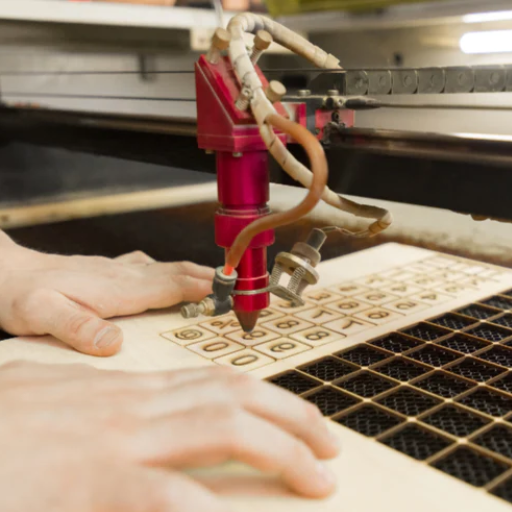
Laser engraving wood is a sophisticated process that marries creativity with technology, enabling designers to attain delicate pieces and professional quality in their work. In this article, I will share everything there is to know about laser engraving wood, from choosing the correct type of wood to the correct engraving settings needed to achieve the best results. Whether you are an expert or an inquisitive novice, this article will tell you the tools, methods, and best practices for making perfect and intricate designs. From knowing the properties of the materials and proper settings of tools to the best work practices, transforming your ideas into real-life creations will be within your reach.
What is the best wood for laser engraving?
Basswood, maple, cherry, and birch are favorites as they provide precise cutting engravings due to their low resin levels and fine grain. When choosing wood for laser engraving, basswood and MDF are great. Softer versions, like basswood, are less demanding to engrave but may burn more efficiently, while harder woods offer cleaner results but involve some scorching. Considering the level of detail needed and the application’s purpose will help when deciding.
Comparing hardwoods vs. softwoods for laser engraving
The comparison between laser engraving hardwoods and softwoods relies heavily on the composition and the structure of the wood, namely its density, grain pattern, and the way it heats up. Maple, cherry, and oak are great examples of hardwoods that yield very dense detail engravings due to their high density. Such fine detailing also reduces the risk of overburning. The tight grain structure improves precision but often requires a higher power setting than traditional softwoods. On the contrary, softwoods like pine and cedar are less dense and compact, making them easier to engrave and cut with a much lower power level. However, the ease of engraving often leads to scorching and uneven engraving patterns that, in turn, make it more challenging to execute complex designs.
All in all, hardwoods are more reliable for professional applications because of their consistency and durability. Softwoods are also known to be much more forgiving for beginners or low-detail projects. Ultimately, the choice is based on project specifications and the detail one wishes to achieve.
Top wood choices: Maple, birch, and walnut for laser engraving
My favorites include maple, birch, and walnut because of their performance and properties. Maple wood is suitable for precise and detailed engravings because it has a consistent density and a moderate grain. While birch is more of a budget option with clean engravings, it does require a little higher power. Walnut, on the other hand, is highly sought after for its dark tones and contrast when paired with light engravings. It showcases detailed engravings exceptionally well. These three types of wood are appropriate for various laser engraving projects because they combine strength, beauty, and engraving effectiveness.
Using plywood and other engineered woods for laser projects
Plywood and other engineered types of wood, such as medium-density fiberboard, are pretty flexible and serve as excellent laser engraving and cutting materials. Plywood, which is laminated wood made with thin sheets of wood glued together, comes in different thicknesses and grades. For laser work, high-grade plywood is preferred due to its minimal voids and tumors that can affect the accuracy of the cut and engraving. Baltic birch plywood is popular for its stability and consistent grain, which helps produce excellent results.
MDF is inexpensive, has a smooth finish, and is easy to cut and engrave. However, the adhesives used in manufacturing MDF produce much smoke, necessitating proper ventilation during laser work. All these engineered woods, while allowing the freedom of design, require careful selection of glue, uniformity of the material, and even how the material is stored to ensure that everything works properly and safely in laser applications. Always use laser-ready or laser-approved plywood and engineered wood to be safe and protect against problems stemming from dangerous substances or inconsistent materials.
How do I choose the right laser engraver for wood?

Choosing the best laser engraver for wood can be puzzling. Some key factors include laser power, bed size, and software compatibility. The laser power enables different types and thicknesses of wood to be effectively cut or engraved within reason. Higher wattage is necessary for thicker materials cutting. The bed size determines the dimensions of the projects you can create, so make sure it fits your design requirements. Check for user-friendly software that supports your file formats and enables precise control over the engraving settings. Always prioritize engravers that deliver constant performance, reliability, and strong customer support to ensure long-term efficiency and satisfaction.
CO2 vs. fiber laser engravers for wood applications
There are notable differences in the functionality of each laser machine, which need to be considered when choosing a CO2 laser or fiber laser engraver for wood applications. CO2 lasers work with a gas mixture and have an unequivocal advantage when engraving wood and other organic materials. Their operational wavelength is in the region of 10.6 microns. This wavelength is preferable for wood as it is engraved deeper and more detailed. On the other hand, fiber lasers work with a wavelength of 1.064 microns and tend to be more efficient with metals and selected plastics rather than organic matter. While wooden marking is within reach of fiber lasers, it is one of the most unsatisfactory jobs for a laser. The detail level is low, and burning or other irregularities are unavoidable. In addition, more CO2 laser engravers can achieve variable thicknesses and more diverse wood types than fiber laser engravers. For woodworkers and wood carving hobbyists, a laser engraver with a fiber solution is the least suitable because of its inefficiency, rigidness, and poor working conditions with wooden surfaces.
Key features to look for in a wood laser engraving machine
When choosing a wood laser engraver, I pay attention to some characteristics that will provide efficiency and quality. To begin with, considering the CO2 laser output is crucial, and a laser with a range of 40W to 150W is preferred. The wattage range allows for using different types and thicknesses of wood. I also need a machine that enables me to adjust the speed and power settings so that the engraving depth and detail height can be skillfully controlled. In addition, a floor unit with a spacious workbed and an X-Y axis system also consolidates accuracy and reliability for larger pieces. Features like air assist that eliminates charring and a properly working cooling system that stabilizes the laser’s performance are also important. Lastly, compatibility with user-friendly software, and consistent access to technical support without barriers helps prevent and handle operational and maintenance challenges.
Beginner-friendly laser engravers for woodworking projects
For the woodworking laser engravers best for novices, I suggest three options based on their ease of use and competence. The xTool D1 Pro is top for its comprehensive software, sturdy construction, and reasonable price, which are ideal for beginners. The second recommendation is the Ortur Laser Master 2 Pro – it has an easy installation, safety protocols, and excellent accuracy and is specially designed for users with little experience. Finally, the Atomstack A5 Pro has simple interface controls, supports multiple software programs, and ensures dependable engraving speed, making it easy for woodwork lovers to learn the engraver’s functions.
What are the best techniques for laser engraving wood?

One must combine strategies to achieve the best laser engraving results to present the desired engraving on wood. For example, the proper kind of wood, birch and maple woods, engrave better than softwood since they burn inconsistently. Also, the laser should be set to the correct power and speed settings depending on how thick and dense the wood is. This ensures that a balance between the cutting depth and precision is reached. Furthermore, proper focus alignment helps ensure sharp and consistent engravings. Cleaning the wood’s surface before engraving also enables the removal of debris or coatings that could impact the effectiveness of the laser. Lastly, check the designs on identical wood scrap pieces to perfect the settings on the laser before using it on the final piece. This allows for professional results alongside optimized operations.
Adjusting power settings for different wood types
In calibrating the strength of the laser beam for various types of wood, it is essential to consider the wood’s density, brittleness, and moisture content. Dense materials like oak and maple require firmer settings, while softer materials like pine and cedar need lower settings to avoid burning or charring. The speed setting must follow the power adjustment to obtain precise and demarcated engravings in all cases. For example, softer woods are best engraved with mediate speeds and powers as higher speeds, with lower power settings, increase the chances of overburning. On the other hand, thicker hardwoods should be cut at low speeds and high power to get more profound and intricate results. Other elements, like the grain and resin of the wood, might also call for slight alterations. These settings should constantly be tested and calibrated on scrap materials before finalizing the configuration for each type of wood.
Tips for achieving intricate designs on wood surfaces
Having understood the nuances of engraving, one knows how to engrave intricate designs on wood surfaces. For this, one has to ensure that the speed and laser power settings are appropriately calibrated to suit the wood used in terms of its hardness and grain structure. In addition, I use high-resolution design files as they increase the level of detail captured during engraving. It is also essential to focus the laser properly, so I check the focal distance twice to avoid any distortion. I also carry out test engravings on the same type of wood before embarking on the final design to adjust the parameters. Also, cleaning the surface adequately helps mitigate interference from dust or debris.
Preventing and managing burn marks in wood laser engraving
Burn marks tend to be a common issue when engraving wood, but they can be minimized with the proper techniques and adjustments. To mitigate burns, the first thing that needs to be done is to adjust the power and speed settings of the laser to a more optimal value. Using lower power and a higher speed decreases the duration of laser exposure, which helps with heat buildup. When masking the wood surface with a low-tack adhesive tape, it turns the surrounding area of the wood into a protective zone, further aiding in ensuring no scorch marks. Equally as important is making sure that the laser is well-focused and clean because there should be no dust buildup on the lens, as it can produce uneven burns and intensify the heat.
To erase burn marks on the surface of completed engravings, light sanding with fine-grit sandpaper can help remove superficial discoloration. In addition, wiping the surface using a soft cloth with a mild solvent such as isopropyl alcohol can eliminate residues, subsequently enhancing the engraving. Always try solutions and techniques on a sample piece before using them on your final work. A combination of preventative measures and engravings can reduce burn marks and achieve professional results.
How do I prepare wood for laser engraving?

When preparing wood for laser engraving, meticulous detail ensures the wood is of the utmost standard. Choose wood species like birch, maple, or cherry, which engrave well. Sand the surface of the wood to smoothen it out and get rid of rough patches that can interfere with the laser’s accuracy. Then, use a lint-free cloth to remove dust or oil hindering the engraving. You can also use masking tape to eliminate scorching around the design area further. Always ensure the wood is dry because moisture content alters the laser’s work. Completing all these preparatory steps will lead to professional quality clean engravings.
Surface preparation techniques for optimal engraving results
To achieve the best engraving outcome, it is essential to prepare the surface correctly. The first step is to take wood of specific types, such as birch, maple, or cherry since those are more suitable for engraving. Use fine-grit sandpaper, 220, to sand the surface of the wood smoothly. Any defects on the surface can disrupt the laser beam’s regularity, so make sure to remove them all. After sanding, use a lint or tack cloth to eliminate dust that could mess with the laser’s precision. Use low-tack masking tape to cover the edges of the wood to prevent burn marks during engraving. The tape shields the piece so there is minimum scorching or resin build-up around the design while ensuring that engraving details remain intact. Ensure that the wood is always dry and sufficiently acclimated to its environment. Otherwise, its moisture content would impact the laser’s accuracy and consistency. Adhering to these steps improves the wood’s surface, so the quality and clarity of the laser engraving are unparalleled.
Choosing the right wood thickness for your laser engraver
The wood thickness you select for laser engraving must match your laser engraver’s power specifications and intended purpose. According to my research, the average power of 30-60 watts found in most hobby-grade laser engravers can efficiently handle 1/8-inch and 1/4-inch wood slices. More power machines above 100 watts can cut through thicker materials that are 1/2 inch thick, with some additional cutting passes. I also pay close attention to my engraver’s specifications and ensure that the wood thickness and settings regarding speed and power are also changed to the optimum position while keeping the precision of the machine intact.
Using masking tape and other prep methods for cleaner engravings
Masking tape is one of the most valuable methods for ensuring cleaner laser engraving through reduced burn marks and residue. Simply place a layer of masking tape, such as painter’s or transfer tape, on the wood surface, which will be engraved on top. The tape will ensure that soot and burning don’t settle over the material during engraving. Once the engraving is completed, you can simply peel off the tape, revealing a more defined design than would have been achieved without the tape.
Furthermore, other techniques could be added to the masking tape. Ensuring the work area is well-ventilated helps diminish excessive smoke, and cleaning the area beforehand ensures that no dust particles obstruct the laser’s path. If further accuracy is needed, the speed and power of the laser can be altered to achieve a better ratio between the cutting and burning of the material. These methods can help maintain the quality of engravings while minimizing the time needed to clean after all the work.
What software should I use for wood laser engraving projects?

As for laser engraving wood, I suggest using widely accepted and dependable options. Considering the importance of the user interface and supporting features, LightBurn is the best software choice as it also allows creation, layout, and control for laser cutting and engraving machines. Adobe Illustrator is also a strong option, particularly for detailed vector designs, but it needs a plugin or another software to be used with the laser. RDWorks is a free software that comes with basic functionalities that are suitable for novice and advanced users. It is commonly used with Ruida controllers. Each of these programs has pros and cons, so I recommend choosing one based on the details of your particular project and the type of laser engraver you have.
Popular design software options for creating wood engravings
Selecting the right software is crucial for achieving precise and efficient results when working on wood engraving projects. Three of the most prominent software options for wood laser engraving include LightBurn, Adobe Illustrator, and CorelDRAW.
- LightBurn
LightBurn is a highly versatile and laser-focused software known for its well-rounded features, including vector editing, image tracing, and accurate laser control. It supports a wide range of laser machines and offers a streamlined workflow for beginners and professionals.
- Adobe Illustrator
Renowned for its robust vector design capabilities, Adobe Illustrator enables users to create intricate and detailed designs. While Illustrator does not interface directly with most laser engravers, third-party plugins or exported designs in compatible formats allow seamless integration into laser engraving workflows.
- CorelDRAW
CorelDRAW is another powerful design tool that excels in vector-based graphics creation and editing. It is widely used for laser engraving due to its precision tools and compatibility with various engraving systems. Its ability to output designs in formats preferred by laser cutters makes it an industry-standard option for many professionals.
Each software solution offers unique advantages tailored to specific needs, ranging from user-friendliness to advanced design features. These advantages make them ideal for a variety of wood engraving projects. Your choice will depend on your project requirements, technical expertise, and the specifications of your laser engraving machine.
Getting started with LightBurn for wood laser engraving
If you plan to use LightBurn for your wood laser engraving projects, the first step would be to check the compatibility of your machine with the device list provided on LightBurn’s official website. After ensuring it is compatible, proceed to download and install the software. Then, set the configurations to match the hardware of your laser engraver. Start by choosing the workspace dimensions to equal the engraver’s bed dimensions, and go ahead and connect the device using a USB or network, if appropriate. LightBurn has a very user-friendly interface that allows users to import designs, modify settings, and even create toolpaths within the software. Make sure to focus and run optimizations on scrap wood before using the desired engraver setting on the final piece of wood.
Tips for converting images and text for wood engraving projects
The LightBurn software tools can adopt moderate brightness, contrast, and sharpness levels to achieve the ideal picture for wood engraving laser projects. High-contrast images are suitable for differentiating between the engraved and non-engraved regions for the best results. Color captures with many gray tones will work best since most laser engravers don’t use color information. For clarity, use a 300-600 DPI resolution for the ideal image.
When choosing a font for text engraving, ensure it is readable at the desired size. Avoid overly thin or intricate fonts, as these will not engrave well on wood. If your laser software requires, make sure the text is converted to vector format. Also, your final design should scale the text appropriately for proportionality and readability. Always test engrave on a sample piece of wood to ensure your settings and design are accurate before the final piece.
What are some creative wood laser engraving project ideas?
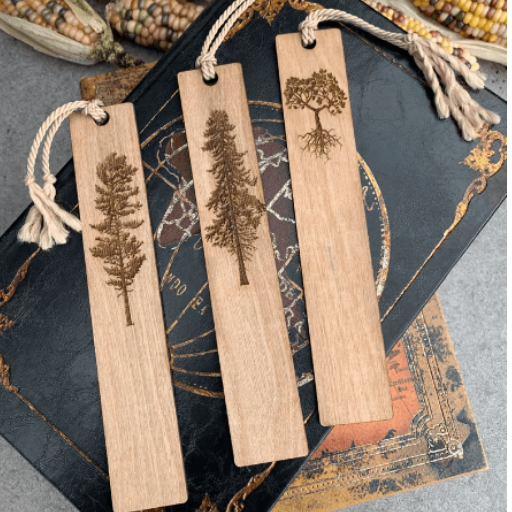
Here’s a list of ten creative wood laser engraving project ideas that you can try: let’s start from the beginning with the high-quality and highly sought-after engraved wooden cutesy coasters that come in a geometric layout, business-style monogrammed coasters, and unique wooden laser engraved photo frames with pictures or quotes. In addition to humorous quote-cut style family name signs, classic name plaque signs for home décor are rather hot in demand. Lastly, name-engraved wooden keychains and elaborate pieces of jewelry, such as bracelets and pendants, offer tremendous opportunities in terms of engravings that cater to detail.
Personalized wooden gifts and home decor items
The Engraved Wood Store is a business that sells personalized wooden gifts and home décor items. These items are popular because they are stunning decor pieces and practical. One form of this wooden gift would be customized cutlery. For instance, a cutting board could be engraved with the person’s name or special date. This is great for weddings or housewarming parties and is an extraordinarily unique gift.
Furthermore, engraved wooden signs can feature classic quotes or special messages. These designs make great additions to the home and are perfect for interior decoration. Other items would include personalized picture frames that have sentimentalized engraved details such as names or dates. These add more depth to the finest of frames. Wooden keychains or coasters can have logos, designs, and even monograms for simpler designs. These are highly appealing and can be used practically. The engraved wood items speak for themselves as they let the person’s skill set shine through personalization. These items are great as gifts for a variety of events or occasions.
Combining laser cutting and engraving for unique woodworking projects
The woodworking industry has benefitted from the emergence of laser cutting and engraving technologies because it achieved precision and accuracy when crafting complex designs that were impossible before. Through these techniques, one can sculpt products from simple to sophisticated or purely decorative to valuable items. In addition, laser cutting offers maximum efficiency in wood shaping, meaning that delicate patterns and ornament details can be added. Moreover, complex designs can also be achieved with computer-controlled components. On the other hand, laser engraving allows for greater personalization or makes it possible to add texts, logos, or other artworks on the surface of the wood.
One benefit of this technique is the freedom to explore various types of wood and finishes with minimum concern for meeting functional and aesthetic appeal. For example, while hardwoods are preferred for luxury projects because of their ability to withstand wear and polished grace, plywood or MDF are good choices for economical projects or bulk production. Besides, the technique is also quite effective since it yields detailed results in minutes, making it ideal for mass production or custom orders.
In undertaking these projects with laser technology, the components that determine the quality of the final product are the type of wood, its thickness, the grain patterns, and its laser settings. When carving with a laser, adjusting the intensity and speed of the laser ensures that the cuts are clean and that scorch marks are avoided, thus retaining the natural beauty of the wood. This blend of creativity and technology allows for many applications, such as exquisite jewelry, masterpieces of architectural models, professional gifts, and personalized home decor items, representing advanced laser woodworking’s efficiency.
Advanced techniques: 3D engraving and layered wood designs
When I work on more advanced methods like 3D engraving or layered wood designs, I put extra care in precision and depth to add more visual and tangible appeal to the project. Achieving a smooth gradient with intricate detailing while retaining the structural integrity of the wood is the desired effect with minimal optimization of laser power and pathing during 3D engraving. On the other hand, layered wood designs use precision alignment in assembly, often using different types of wood or wood finishes to give contrast and depth. By controlling these factors, the result is balanced between aesthetics and structural integrity, which meets the stringent requirements of high-quality woodworking projects.
How do I maintain my laser engraver for wood projects?

Regular maintenance of a laser engraver is crucial to promote performance and longevity. To prevent residues from building up and hurting the quality of the beam, always clean the laser lens and mirrors using a lens-safe cleaning solution. Next, the exhaust system should be cleaned frequently to ensure ventilation is not obstructed by wood dust, increasing the risk of overheating. To maximize efficiency, the laser tube should be inspected for any signs of wear, like reduced power output. All moving sections, such as rails and belts, should be kept unobstructed and well-lubricated to maintain precision. Finally, ensure that the engraver’s software and firmware are up to date so that design files work seamlessly.
Cleaning and maintaining your laser system for optimal performance
I concentrate on a few maintenance procedures to ensure optimal laser system performance. I regularly clean the laser lens and mirrors with a good lens cleaner to avoid losing beam focus. Dust and other foreign particles are always an issue, so I regularly clean the exhaust fans and filters to ensure proper ventilation and prevent overheating. I also monitor the belts and rails, ensuring their adequate lubrication and unobstructed free movement position. Software checkups are also a part of my routine to ensure compatibility with new design functionalities. Also, I keep track of the laser tube’s performance for constant quality of engravings and change it once there is a dip in its power output.
Troubleshooting common issues in wood laser engraving
My first focus to troubleshoot problems with depth of engraving is focus setting and power control. Most of the time, the improper settings of the focus distance and power and speed settings often lead to improper engraving on the material’s surface. Whenever I see engravings with burn marks, I increase the speed and decrease the power to solve the issue. I ensure the laser evenly penetrates through all barriers for all finished wood pieces. Engraving that lacks clarity is analyzed, and disturbing lenses and mirrors are cleaned or replaced if they are overly dirty. If the engraver is not functioning, there is a need to systematically check, confirm all cables are correctly connected, inspect the entire system for software errors, and scan for machine and computer interface issues.
Safety precautions when laser engraving different types of wood
Following safety procedures, while operating a laser wood engraver is critical to avoid accidents. First and foremost, the work area should be well-ventilated, or a fume extractor should be employed, as wood engraving causes smoke emission, which can sometimes be hazardous depending on the wood or finish used. Do not use treated or painted wood, as it can release harmful gasses when burned. The engraver must be operated in an environment free of fire hazards, and the machine should never be left unattended when powered on. In addition, the operator must wear suitable PPE, such as laser safety goggles, to protect the eyes. The work area should be regularly maintained to eliminate any excess dust or debris, which can be a fire hazard. The operator should also follow the manufacturer’s instructions on maximum laser settings and wooden part positioning to ensure that further adjustments do not shift the workpiece during engraving and cause problems with safety and quality.
References
Frequently Asked Questions (FAQ)
Q: What is the best laser cutter and engraver for beginners interested in the wood engraving?
A: A CO2 laser engraver is an excellent choice for beginners interested in wood engraving. These machines are versatile and can handle various types of wood. Some popular options include the Omtech laser series, which offers a good balance of power and affordability. When choosing a laser cutter, consider factors such as laser power, work area size, and software compatibility to ensure it meets your wood laser engraving and cutting needs.
Q: Which wood species are most suitable for laser engraving?
A: Several wood species work well for laser engraving, with some of the best options being: 1. Basswood: Ideal for beginners due to its soft texture and light color. 2. Alder: Offers a fine grain and takes engraving well. 3. Maple: Provides a smooth surface for detailed engravings. 4. Cherry: Produces a nice contrast when engraved. 5. Balsa wood: Very soft, easy to engrave, and great for thin wood projects. Avoid wood with high resin content, as it can produce excessive fumes during engraving.
Q: How does laser wood engraving compare to traditional wood-burning techniques?
A: Laser wood engraving offers several advantages over traditional wood burning: 1. Precision: Laser engraving provides much higher accuracy and detail. 2. Speed: It’s significantly faster, especially for complex designs. 3. Consistency: Laser engraving produces uniform results across multiple pieces. 4. Versatility: It can handle various designs and wood types. 5. Less manual skill required: The process is mainly automated, making it accessible to beginners. However, traditional wood burning can offer a more handcrafted appearance and doesn’t require expensive equipment.
Q: What safety precautions should I take when using a CO2 laser engraver for wood?
A: When using a CO2 laser engraver for wood, follow these safety precautions: 1. Use proper ventilation to remove fumes and dust. 2. Wear safety goggles designed for laser protection. 3. Never leave the laser cutter unattended while in operation. 4. Keep flammable materials away from the laser cutting area. 5. Regularly clean and maintain your laser machine. 6. Follow the manufacturer’s guidelines for laser power settings. 7. Use a fire extinguisher rated for electrical fires nearby. Always prioritize safety when operating any laser-cutting machine.
Q: How do I prepare wood for laser engraving?
A: To prepare wood for laser engraving: 1. Select a suitable piece of wood with a smooth surface. 2. Sand the wood to ensure an even surface for engraving. 3. Clean the wood to remove any dust or debris. 4. If desired, apply masking tape to prevent burn marks around the engraved area. 5. Measure and mark the engraving area on the wood. 6. Adjust your laser settings based on the wood species and desired engraving depth. 7. Create or import your design into the laser cutter software. Proper preparation will help ensure the best results for your laser engraving on a wood project.
Q: What factors affect the depth and quality of laser engraving on wood?
A: Several factors influence the depth and quality of laser engraving on wood: 1. Laser power: Higher power generally allows for deeper engraving. 2. Engraving speed: Slower speeds typically result in deeper engravings. 3. Wood density: Harder woods may require more passes or higher power. 4. Moisture content: Drier wood generally engraves more consistently. 5. Grain pattern: The wood’s natural grain can affect engraving uniformity. 6. Focus: Proper focusing of the laser beam is crucial for clean, detailed engravings. 7. Design complexity: Intricate designs may require adjusted settings for best results. Experimenting with these factors will help you achieve the desired depth and quality in your laser wood engraving projects.
Q: Can I use a laser engraver to cut and engrave wood?
A: Yes, many laser machines can cut and engrave wood. CO2 laser cutters and engravers are exceptionally versatile for wood processing. The key differences lie in the settings: 1. Engraving typically uses lower power and higher speed to create surface marks. 2. Cutting requires higher power and lower speed to penetrate the material. 3. Some machines offer a rotary attachment for engraving cylindrical objects. Constantly adjust your laser settings based on whether you’re cutting or engraving, and consider the thickness and type of wood you’re working with.
Q: How do I maintain my laser cutter for optimal wood engraving performance?
A: To maintain your laser cutter for optimal wood engraving performance: 1. Clean the lens and mirrors regularly to ensure clear laser beam transmission. 2. Keep the laser tube clean and check for any signs of damage. 3. Clean the work area after each use to prevent debris buildup. 4. Lubricate moving parts as recommended by the manufacturer. 5. Check and adjust the alignment of the laser beam periodically. 6. Replace the laser tube when it shows signs of diminished power. 7. Keep the machine in a clean, dry environment. Regular maintenance will extend the life of your laser cutter and ensure consistent, high-quality wood engravings.