This is particularly useful for those who wish to use patterns created using a computer-aided design program in embroidery projects. The following posting aims to simplify the process so that even a novice can implement it quickly. We will go through the list of tools and technologies in the step-by-step instructions necessary to make a successful transfer. Issues of transferring and file conversion of appropriate embroidery design software utilizing formats of standard embroidery machines, using USBs or direct connection, and joint problems will be discussed. In short, this article will be a helpful guide for anyone who wants to transfer any embroidery design from a computer to an embroidery machine.
What is the USB Method for Transferring Embroidery Designs?

The USB approach in transferring embroidery designs involves embedding the USB flash drive between the computer and the machine. First, ensure the embroidery design is saved in a suitable machine support file format, such as PES, DST, or JEF. Next, copy the design file to a USB flash drive. After the file is saved on the USB flash drive, plug it into the USB port of the embroidery machine. The embroidery machine is expected to identify the file and display it, allowing you to choose and load the design to be used immediately. This method is mainly used because of its ease and confidence, i.e., the designs come through without the need for cable connections into the devices or the use of complicated software interfaces. Always check your machine’s manual for appropriate directions and compatibility issues.
Why Do You Need a USB Stick?
Thanks to a USB flash drive, a design can be transferred to almost any embroidery machine. A USB flash drive can transfer design files like .pes and .dst to the machine. For those embroidery machines that do not have an interface with a computer or are not equipped with wireless capability, this tool provides offline access to a wide range of designs. In addition, USB thumb drives are compatible with various embroidery programs and machines because they can hold different files. Due to their dependability and standardization worldwide, USB flash drives easily incorporate virtually all embroidery systems and simply solve design transfer.
How to Format Your USB for Embroidery Machines
When I knew I would use the USB with embroidery machines, I did several things to ensure it functions without problems. First, I insert the USB stick into the computer; then I go to File Explorer. By right-clicking on the USB drive icon, I find and select “Format.” Another important point to remember is the file system usage. Most embroidery machines work with USB formatted as FAT32. I also view the allocation unit size integer and verify whether it corresponds to the machine requirements, which is most likely 4096 by default. Finally, I go through the process of formatting the USB stick to ensure that no important files are retained on the USB because it wipes out all the data. Such a thorough method, as is regularly suggested in the pages available on the internet, ensures that the USB stick is used without hitches in my embroidery machine during the transfer of the designs.
Steps to Transfer Embroidery Designs Using USB
- Reinforce Your Design File: Conclusively, verify that while generating the embroidery design file, the file format of the design file is compatible with the computer machine. Some of the standard formats are DST, JEF, and PES. Always consult your embroidery machine’s operating manual to clarify your doubts regarding the computer machine’s requirements.
- Insert USB into the Computer: Start by plugging the USB Flash Drive into the computer’s USB port. Was this an incredible drive? It is essential to ensure that FAT32 formatting has been utilized for such use likelihood at embroidery machines.
- Transfer the Design to USB: Reveal the file containing the design on the computer. By placing the cursor on the file, the computer will prompt you to copy the file using the format “Right-click and Copy.” Find your USB drive using the file explorer tab and settle for pasting the command. Following this action, the file is copied onto the USB drive to prepare it for use with the machine.
- Attach USB to the Embroidery Machine: After sending the desired files, it is time to remove the USB Drive from the computer safely. Plug the Drive into the USB Port of the Embroidery Machine. Did you succeed? Most will detect this, and a menu offering numerous designs will appear.
- Load and Verify Design: In this step, choose the desired design from a usb stick attached to the embroidery machine’s interface after browsing through the files. Then, ensure that the settings match the intended project and the preview accurately depicts the design.
- Troubleshooting: If a machine does not detect a particular file or a USB disk, crosscheck compatibility with a standard format, reformat the USB stick if necessary, or confirm that the design file is intact. If you face difficulties, use the machine’s troubleshooting instructions.
These steps, by the measures recommended by the best internet embroidery sites, allow for an easy and fast transfer of designs through a USB. Providing acceptable technical parameters and correct procedure follow-up will allow users to enjoy more advanced embroidery of available devices.
How to Download Embroidery Designs from the Internet

According to how I understand purchasing embroidery files from the online market, one must first gather information on the target website or marketplace. Getting design files compliant with their embroidery machine is the most crucial aspect. Once the information is gathered, one must look for file formats compatible with the embroidery machine. People must browse the sites with ample designs to ensure that only top-notch quality designs are downloaded. If my machine used PES, DST, or JEF, I must specify the machine in question while looking for file formats. Once all the specifications and file searching have been done, the user can buy or download the design. The file purchased or downloaded should appear in the computer’s downloads folder, and if that doesn’t happen, the user might need to look through ZIP compressed files. Finally, the design is ready to be executed within the embroidery machine. Ensure to follow the final steps; the operating files should be transferred to a USB. By implementing these steps into the process, all of the user’s requirements through the Internet will be satisfied.
Where to Find the Perfect Embroidery Design Online
Locating a specific design and knowing how to look for high-quality embroidery designs that meet your project specifications is quite challenging. Still, some notable websites are helpful for embroidery enthusiasts who have various designs at their disposal. This includes sites such as Etsy, Urban Threads, Embroidery Library, and many others that offer considerable diversity in collections depending on the machines used. When browsing for a design, it is essential to check that it includes the necessary machine formats, e.g., images like PES, DST, or JEF. Furthermore, most sites allow you to filter by design details like style, complexity, and user reviews.
When discussing technical parameters, stitch count and design size should also be gauged to check whether they are compatible with the given machine and the desired fabric. Ensure the particular file is in a format appropriate for your target resolution and dimensions. Also, remember that some extra settings in your machine are specific for this type of sewing and may influence the results, like needle type and thread tension. Examining those platforms and the stated technical features lets you quickly search for and realize the ideal design for your embroidery works.
Understanding File Formats for Embroidery
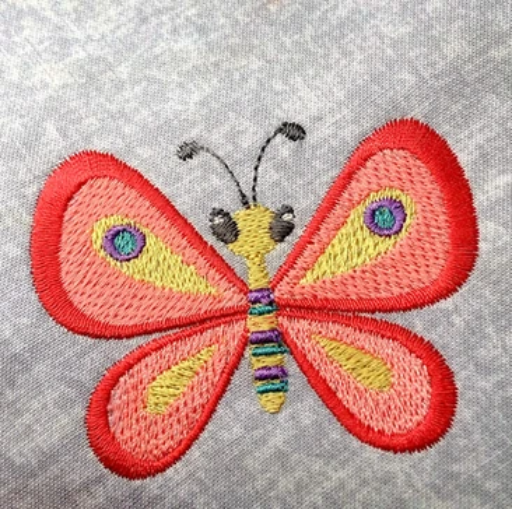
The format of embroidery files is necessary for any design to work with the embroidery machine since they represent the various ways the machine interprets and completes the provided information about the design. The most widely used extensions include PES, DST, and JEF. PES files are familiar with Brother machines and contain many details about the stitches to ensure the design is well reproduced. DST, popularly referred to as Tajima files, is a registered standard of the industry because it is used across many brands but has minimal details about the color of the stitches. JEF files are religious with Janome machines and work well with many stitches in different colors. While selecting a file format, consider whether it’s suitable for your machine, considering its capabilities like stitch count, color change, and design size. Knowledge of these formats enables you to choose and work with designs that best meet your requirements and those of your embroidery machine, further improving the visuals and yielding precision with the project.
How to Download and Unzip Embroidery Files
To begin the process of downloading and unzipping embroidery files, I first go to the specific website I know is authentic, where I can get some designs compatible with my machine – for example, Etsy, Urban Threads, or Embroidery Library. After that, I inquired whether the chosen design was prepared in my machine’s preferred format, PES, DST, or JEF. After purchasing or downloading the designs, I run through the downloads section of my computer to find the file. Many files available for download are in compressed files; therefore, I use a file extraction utility to decompress the file once downloaded. There is no way for me to miss any of the files that I might need for the embroidery project. Once the designs are decompressed from the archive and files, they are transferred to my machine for embroidery purposes, thus allowing me to work on my art without wasting too much time.
Can You Transfer Embroidery Designs from a Computer without a USB?

Yes, as long as your embroidery sewing machine cord accommodates other methods of connecting the two, it is possible to link them without taking advantage of the USB stick. These often involve some sort of cable directly linking the sewing machine and computer, a USB cable, or the data link cable provided by the machine manufacturer. Furthermore, if the machine is Wi-Fi-ready, the design can be transformed using Wi-Fi or Bluetooth. In such cases, ensure your computer has such connection capabilities and follow any guidelines the machine gives relating to wireless data transfer. Many sewing machines have Wi-Fi built-in, allowing easy design transfer using software or applications unique to that brand or manufacturer.
Using Embroidery Software to Transfer
Embroidery software has many advantages, especially when managing and directing projects. For example, several embroidery or design software such as Embrilliance or Bernina Artlink allow me to plug my PC directly into the machine without needing a USB stick. These software solutions also have design creation, editing, and format transfer features. I usually follow the steps set out at the beginning of the project by the websites for Brother-USA, Janome, or Singer. Since my designs tend to revolve around particular project types, I first insert my design into the software and ensure it is compatible with my machine’s format. I then transfer my design from the PC to the embroidery machine using the software’s transfer feature by connecting the two via USB or wireless, depending on what the machine allows. These points are common in all these sites, making it easier for me to do my embroidery efficiently and accurately by using the software’s ability to assist me in sending my designs quickly and faster.
Exploring Wireless Transfer Options
Transferring embroidery designs from a computer to the embroidery machine wirelessly is easy and convenient because it eliminates the use of external devices like USB sticks. From the most credible sources, incorporating modern docking technology into the embroidery machines mainly requires Wi-Fi or Bluetooth. Most Wifi machines require a local wireless network to send design files with the help of thin software applications offered by Brother or Janome. These software applications allow for the transmission of files and the monitoring and controlling of embroidery progress from a distance. On the other hand, machines equipped with Bluetooth are paired directly with the computer or other device, which makes them wireless. To ensure the best performance of the two machines, follow the specifications and guidelines provided by the manufacturer. Brother-USA, Janome, and other large embroidery sites have always complained about connectivity issues due to ‘outdated software and firmware,’ which explains your machine’s limited precision and efficiency.
Pros and Cons of Direct Connection Methods
As I investigated the possibilities of designing embroidery on their interfaces, some notable pros and cons were involved, especially in using direct connections such as USB ports to these machines. It was promising to learn that USB ports were reliable and fast in transferring data from the computer to the embroidery machine, reducing the risk of file corruption. Although I have some concerns with the USB port, dominant industry sources maintain that such ports create a reliable standpoint between their computer and the embroidery machine. This is critical as they try to fabricate many designs in one go. It was also a pro to note that suitable cables remarkably lower the odds of unfitness when I use my machine model RJ-1300.
Despite these advantages, there are several downsides which they feel are essential to take note of. As I have first-hand experience, the main disadvantage is that direct connections tend to be more restrictive as I have to bring my laptop close enough to the embroidery machine. I do, however, appreciate that such sources as Brother-USA, Janome, and some other online forums do caution that positing computers and machines to be far apart may bring about the cluttering of cables, be it standard or proprietary ones and heavy reliance on LAN ports, maybe an inconvenience till faults in any of them is rectified. Ultimately, it seems to me that there is a considerable trade-off in the reliability afforded by direct connection through cables and the simplicity and free movement easily afforded by wireless connections.
What to Do If Your Embroidery Machine Doesn’t Recognize the Design?
If the Embroidery file format fails to be detected by the embroidery machine, the following steps can be used to troubleshoot the cause of the problem. First of all, check to be sure the design file is in the file forms of Pes, dst, jef, or other files that the embroidery machine may support. If not, check the machine’s manual for the required file format. Then, check the USB stick and see if it has been formatted to the proper file system, normally FAT32, which most embroidery machines support. Assume that the USB was formatted properly but the file’s name is still unrecongised, make sure that the specific file is not corrupted or has certain errors- try to download or create the design file again if this s situation. Moreover, check if the size of the allocation unit of the USB stick matches those set by the machine; the wrong setting may cause the machine to be unable to read any files. If these solutions do not help, customer support for the embroidery device manufacturer can be contacted, or other machine model users found on embroidery forums can be approached.
Checking File Compatibility with Your Machine
To achieve file compatibility with the embroidery machine, it is advisable to do the following:
- File format verification: You can guarantee that the design file you want to upload is compatible with your machine, for instance, in PES, DST, or JEF formats. In case of doubt, you can consult your machine’s manual for other compatible formats.
- USB Formatting: Make sure the USB stick is formatted into FAT32, the most common operating system used in embroidery machines. Format the USB drive with the computer’s disk management tools whenever necessary.
- File integrity check: The embroidery design file must be checked for corruption. To ensure safety, consider re-downloading or regenerating the file.
- Allocation Unit Size: The allocation unit size of the USB stick should be tailored according to the machine’s configuration. 4KB or sometimes 8 KB solves the issue, but always check the machine’s instructions.
- Software Updates: Apply the necessary updates for the embroidery machine’s current firmware, which can improve its functionality by accepting different file types.
Following these procedures mitigates the chances of incompatibility issues when working on your embroidery machine and enhances your overall efficiency at work without constant obstructions.
How to Convert Design Files for Compatibility
To ensure that your embroidery machine will accept your design files, I will discuss how I could do this based on credible resources and experience. Now, I determine how my design is formatted by checking its file extension and the file formats that my embroidery machine understands, for instance, whether it is compatible with PES, DST, or JEF. As soon as I get the target format, I engage in the use of embroidery software that is capable of converting files. It is a truism that such suitable means include SewArt Embrilliance Essentials or Wilcom’s TrueSizer, which have proven to convert several design files. In their procedure, the users are required to load their designs onto the software and are given the option to either export the file or save it in a preferable format.
Furthermore, the software is then upgraded frequently to the latest version to apply new conversion algorithms for better results. I carefully check the embroidery I intend to use by altering the positions about them so that they do not embroider all at once and that a test is conducted on a minor part of the design to ensure that the file does not lose its detail and quality during conversion. Adopting these careful and thorough procedures enables me to have no difficulty combining different design file formats and using them in my embroidery works.
Troubleshooting Machine Errors During Transfer
It is an undeniable fact that many things could go wrong during the transfer of embroidery designs onto a machine; here’s a concise outline of how to go about some of the fundamental errors following the top sources in the industry:
- Connectivity Issues: If you use a USB cable or any other data cable to transfer files, ensure all the connections are secure. If it’s a wireless transfer, ensure the computer and the embroidery machine have a stable signal and are linked to the same network.
- Updating Firmware: Not up-to-date firmware can also cause the transfer of the embroidery designs to fail. Many times, the manufacturers update the machine to improve issues like these. Hence, always check the manufacturer’s website or the machine for new updates.
- File Format and Size Limitations: It is also advisable to confirm that the embroidery file format is compatible with the machine. Typically, it should be GPS, DST, or JEF. Furthermore, check that the machine does not have a maximum stitch size exceeding the design file’s. If the size limitation exceeds, then the size limitation depends on the machine’s manual layout.
- USB Stick Specifics: When using USB sticks, be sure they are FAT32 formatted, which the machine requires. Any size between 2 GB and 16 GB is generally allowed, but the maximum size varies from machine to machine.
- Error Messages: If any error codes are visible, look at them. These may point out some exact details you might not have thought of, such as file incompatibility or an internal burn; best of all, these codes can be found together with other indications in your machine’s manual.
- Software Compatibility: Check that the embroidery software suits the machine and the designs. A mismatch of machines and operating software can prevent the completion of a transfer. Still, many of these problems can be eliminated by using recommended software or systems developed by the company.
All of these should, in some way, eliminate the causes for interruptions and generally make the operation of your embroidery machine simpler and less demanding. More precise instructions can be found in your manufacturer’s support on machines.
Why is Machine Embroidery a Great Hobby for Beginners?

A relatively straightforward exercise that reaps artistic satisfaction starting from an embroidery machine is the art of machine embroidery. Thanks to the modern embroidery machine that allows users to create detailed designs, basic sewing skills are no longer limited. Many machine embroidery patterns come with crafting tools that make even the most complicated designs easily attainable. So, any likely user is in safe hands. In addition, for those seeking assistance, whether in the form of resources or online groups, there are many options for learning or simply for help to get started. Furthermore, adding various personal touches enhances the appeal of such projects since they can be used for any item, such as clothes, home decoration, or gifts. Hence, embracing an audience with ideas to try out since machine embroidery is a hobby among many.
Benefits of Embroidery as a Craft
The embroidery craft provides numerous benefits – integrating the creative, cognitive, and emotional aspects. On the one hand, embroidery offers one sense of creativity to enhance one’s artistic talent by converting a piece of fabric into detailed artwork. On the other hand, embroidery helps in practical benefits as the skill involves deep focus and attention and can help alleviate stress. The practice of this craft promotes the virtue of patience and the need for fine motor skills, which eventually enhances hand-eye coordination. Furthermore, from an emotional perspective, embroidering can be “meditative,” and mindfulness has been observed to foster such perception. Besides, the craft helps build community among enthusiasts by sharing projects and within project groups and clubs. Finally, the great heritage and the many potential applications of embroidery allow one to actively fill one’s leisure time for both beginners and master artisans.
Essential Tools and Machines for Beginners
Starting with the appropriate tools and a suitable machine is critical. First and foremost, I need to buy an easy yet reliable embroidery machine, with Brother and Janome being the recommended choices for beginners. The embroidery scissors also accompany the machine, allowing for proper trimming of edges to be clean post the cutting. Furthermore, some stabilizers also play an essential role, especially in preventing the ripple effect whereby the fabric has puckers formed during the stitching process. As for that, I need to select one for my work, be it a tear-away, cut-away, or wash-away stabilizer. I will also need a hoop compatible with my machine to restrain the fabric from moving during embroidery. More so, the polyester and cotton threads I have allowed a wide range of colors to cover my designs and provide more strength. Embroidery digitizing software will also aid me a lot since it will bring creativity into my projects, where embroidery can be altered on a design before it gets embroidered. Such basic supplies should prepare one for the basics of getting into the world of embroidery.
How to Start with Simple Embroidery Designs
Starting with basic designs while venturing into machine embroidery is a good idea because it helps improve skills. It is best to first decide on a relatively simple design that can be embroidered on your specific machine. Ensure that the design file is in a format that can be read by the machine, such as, but not limited to, PES, DST, or JEF, and is properly scaled to fit into the hoop. Since you are a beginner, you should consider focusing on smaller designs that contain less elements and details, 4×4 inch size would be reasonable standard. Locate and prepare both the fabric and stabilizer that go well together with the design, lightweight fabric usually go with tear-away stabilizer when working on simple projects.
When working on the embroidery the machine should be threaded with strong poly or rayon embroidery threads, these threads usually do quite well and breakage is not an issue. Also, to reduce the risk of damaging the fabric and ensure neat stitches, it is recommended to use a suitable needle size, such as 75/11. A good point of action would be setting medium-density stitching as a compromise between the visibility and the coverage without overdoing it.
Start by checking your settings and machine speed; always set it to 600 to 800 stitches per minute. This helps the embroiderer have more control over his/her hand and prevents errors from occurring. Once you are satisfied with your adjustments, sew a test stitch pattern on a fabric scrap to check that it is the right color and that the tension settings are satisfactory. Working with ordinary patterns at first will assist you in becoming confident and proficient in machine embroidery while gradually increasing the complexity of the things you create.
References
Frequently Asked Questions (FAQ)
Q: How can I transfer embroidery designs from a computer to an embroidery machine?
A: To transfer from computer to embroidery machine, first download files of your embroidery designs to your computer. Then, extract any zip file formats and save the designs in a folder. Use a USB stick or direct connection to transfer the designs depending on your machine.
Q: What format does my embroidery machine use for designs?
A: Each embroidery machine uses specific file formats, such as PES, DST, or JEF. Before transferring designs, check your machine or guide to see if it is compatible with the format you are using.
Q: How do I download and use files on my embroidery machine?
A: Download files from a trusted source, ensuring they are in the correct format for your embroidery machine. Extract the files before transferring if they are compressed in a zip file.
Q: Can I transfer embroidery designs to your machine using a USB port?
A: Using a USB port, you can transfer embroidery designs to your machine. Save the design from your computer onto a USB stick, then insert it into the embroidery machine’s USB port.
Q: What should I do if my machine doesn’t recognize the design files?
A: If your machine doesn’t recognize the design files, ensure they are in the correct format. You might need to use embroidery software that allows conversion to the correct file type.
Q: What is the easiest way to see how it will stitch on the computer screen?
A: Use embroidery software or a viewer to see how it will stitch on the computer screen. This can help visualize the final product and adjust as needed before transferring.
Q: Is there a simple steps tutorial available for transferring designs?
A: Yes, many tutorials are available online, including on YouTube, that walk through the simple steps needed to transfer designs from a computer to an embroidery machine.
Q: How do I handle built-in designs versus downloaded designs?
A: Built-in designs are already on your machine and ready to stitch. Downloaded designs must be transferred from your computer to the embroidery machine using the appropriate method.
Q: What should I do if I finally find the perfect embroidery design?
A: If you finally find the perfect embroidery design, ensure it is in the correct format, download it, and transfer it to your machine following the outlined steps. Then, stay calm and stitch your design.