Keeping your lawn tidy starts with maintaining the lawnmower. One of the most significant aspects of servicing your mower is removing the blade for sharpening, cleaning, or replacement. If you prefer to do everything by yourself or it’s your first attempt, knowing how to safely and correctly remove the mower blade can save lots of time, money, and frustration. This guide walks you through a step-by-step process while breaking it down into simple, manageable steps. By the end of this guide, anyone should be confident enough to complete this simple maintenance task and continue caring for the condition of their lawnmower.
Introduction to Lawn Mower Blades

The blade of a lawn mower is one of the very important components, and it does all the jobs of cutting the grass efficiently and evenly. There are different types of lawn mower blades: standard, mulching, and high-lift, all of which serve different mowing purposes. The normal blades cut neatly and versatile, whereas mulching blades chop the clippings finely to aid lawn nourishment. High lift blades generate powerful air movement preferable for bagging the clippings. Regular sharpening and cleaning keep them performing well and increases their life span.
Importance of Maintaining Mower Blades
Maintenance of your lawn mower blades is crucial for the lawn’s health and for the efficiency and longevity of your equipment. With dull or damaged blades, the grass is torn unevenly and, therefore, stressed, vulnerable to pest attacks, and some form of patchy growth occurs. Research reveals that sharp blades promote healthy grass growth by providing clean cuts, which heal rapidly. Also, other than such damaging your mower motor and resulting in increased fuel consumption, a poorly maintained blade can even give rise to mechanical issues with time.
Meanwhile, routine sharpening of mower blades can improve cutting efficiency by as much as 30%, therefore saving a lot of time as well as energy during mowing periods. It is best to check the blades and sharpen them every 20-25 hours of use and replace them if cracking, bending, or heavy wear is observed. This will also reduce the amount of clippings left behind, which makes cleaning up easy and helps keep the lawn looking good. Essentially, blade upkeep in the long run ensures a great time while mowing, making a fine contribution to the upkeep of beauty and vitality of your lawn.
When to Replace a Lawn Mower Blade
Replacing the lawn mower blade is from the highest importance in order to obtain perfect performance and uniform cut. Replace blades usually every 1-2 years, or guide depending on working days of the machine and condition of the land. Some situations occur where blades may need to be replaced more often if you tend to mow over rocks, branches, or various debris that may adversely affect the blades. Indications that your blade wettations replace are saw-edged grass cut, uneven bent cut, conspicuous nicks on the edge of the blade, and vibrations that may be observed during operations, which often indicate imbalance.
Blade thickness has another concern that may have to be known. Blades which become irretrievably thin through repeated sharpening or those which show signs of rust and wear may really become unsafe and inefficient. Dull or damaged blades may increase fuel consumption by up to 20%, as they require the mower to work harder to cut the grass. Inspecting such blades whenever is required and replacing them as soon as possible provide the best working condition for the mower and allow you to achieve optimum results from your lawn.
Tools Required for Blade Removal
Removing mower blades safely and efficiently requires the right set of tools and a focus on proper technique. Here is a detailed breakdown of the tools you’ll need and how they contribute to the process:
- Socket Wrench or Impact Wrench
A socket wrench, or preferably an impact wrench, is essential for loosening the bolts that secure the blade to the mower deck. Ensure you have the correct socket size, typically ranging from 5/8 to 1 inch depending on your mower model. Impact wrenches provide additional torque, which is particularly useful to break loose tightly fastened bolts.
- Blade Removal Tool or Block of Wood
This tool stabilizes the blade and prevents it from rotating during the removal process. A block of wood can be wedged between the blade and the deck housing as an alternative, ensuring safety and stability.
- Gloves and Safety Goggles
Heavy-duty gloves protect your hands from the sharp edges of the blade, while safety goggles shield your eyes from debris or rust that may loosen during the process.
- Torque Wrench
When reinstalling the blade, a torque wrench ensures the bolts are tightened to the manufacturer’s specified torque (commonly between 30-70 foot-pounds). This prevents over-tightening, which could damage the mower, or under-tightening, which could lead to operational hazards.
- Blade Sharpener or Grinder (Optional)
If you’re planning to sharpen the blade after removal, a dedicated blade sharpener or an angle grinder can help refine the blade edge. Be sure to use protective gear and maintain a balanced blade to prevent mower vibrations during operation.
- Penetrating Oil
For bolts that are rusted or difficult to loosen, applying a penetrating oil such as WD-40 can reduce resistance and make removal smoother.
- Bottle Jack or Hoist
Lifting the mower is usually necessary to access the blades. Use a bottle jack or hoist to elevate the machine securely, ensuring it’s well-supported before working underneath.
By equipping yourself with these tools and following safety precautions, you can streamline blade removal while maintaining the integrity of your mower. Proper tool selection can help reduce downtime during maintenance, increasing the overall efficiency of the process.
Preparing to Remove the Lawn Mower Blade

1. Ensure the Machine Is Disconnected From Its Power Source.
Gas-powered machines require that the spark plug wire be detached to be assumed safe from accidental starting. Electric ones will either have to be unplugged from output or have their battery removed.
2. Drain or Seal the Fuel Tank
If you have a gas-powered mower, either drain the fuel or seal the gas tank when tilting the mower.
3. Secure the Mower
Set the mower on an even surface and ensure its stability. In case you should lift it, use supports such as a bottle jack to secure it.
4. Wear Protective Gear
Wear your gloves and safety glasses-these two items will offer protection against sharp edges or flying down debris.
5. Prepare Your Tools
Make sure all your required tools, including a wrench or socket set, are prepared to loosen and remove the blade with ease.
By using these steps, you will be set to safely and efficiently prepare to remove the lawn mower blade.
Safety Precautions Before Starting
Working on the lawn mower requires you to first observe safety measures to prevent accidents or injuries. Detailed safety measures include the following:
1. Removing the Spark Plug
To prevent accidents, always remove the spark plug anytime you work on blades or anything inside the mower, as this will prevent the unintentional ignition of the engine during your maintenance.
2. Setting the Mower Firmly
Set the lawn mower on a flat, stable surface to prevent it from tipping; crooked surfaces cause installation and repair problems. Use chocks or blocks to anchor the wheels if needed, especially if you intend to lift it for blade removal. Good stabilization is ideal to avoid dangers during the repair.
3. Beware of Hot Surfaces
A good practice would be to let the engine and the muffler cool completely if the mower has been used recently. The short period one spends working near hot parts may cause permanent burns or sour experience. The downhill cooling period differs according to mower types. On average, though, it takes roughly 30 minutes.
4. Checking any Gas Leak
Check for any leakage of fuel or oil. It would be dangerous if such a leakage occurred during maintenance just in case any tool made a spark or by friction. Proceed only once all leaks have been fixed.
5. Safe Lighting
Try to conduct maintenance under good lighting conditions for better visibility. The lack of proper lighting makes it possible for measurements to be made incorrectly, bolts may be fixed loosely, or a critical issue might be overlooked during an inspection. Use adequate natural or artificial lighting to increase precision and efficiency.
6. Use of Approved Tools
Use the manual of your lawn mower to identify the correct size and type of tools used for maintenance. Using the wrong tools could lead to damaging parts or injuring oneself while the tools slip away from control during use.
These safety precautions protect you from harm and improve your whole maintenance procedure by minimizing hazards and avoiding unnecessary delays.
How to Properly Position the Mower
Positioning your lawn mower correctly is the primary precaution for any safely performed maintenance activity. These are some steps to carry out for cleaning the blades, oil change, or inspection under the chassis to secure good results:
1. Find a Flat and Stable Surface
Put the mower on a stiff and even surface like a driveway or a garage floor to avoid it from cracking or falling. On improper grounds, instability increases, and hence accidents may be caused. It is established that working on a stable surface can decrease by 25% the chances of injuries caused during maintenance.
2. Disconnect the Spark Plug
To avoid any accidental starting of the engine, disconnect the spark plug with every maintenance procedure, especially while changing or cleaning the blades, as a tiny bit of movement might allow the motor to get activated.
3. Tilt the Mower Properly
The majority of lawn mower manufacturers suggest keeping the lawn mower tilted in such a way that the carburetor and air filter face upward. Tilting in the opposite direction risks fuel and oil leaks that can damage the internal parts of the mower and create a mess. From available information, it is known improperly tilting constitutes a huge portion of lawn mower repairs due to oil contamination.
4. Use Jack Stands or Blocks for Stability
For thorough and safe inspection, the mower must be supported securely on the jack stands or sturdy blocks. One should never depend on the hand grips or makeshift supports pretending they will not give in. Properly stabilizing tools make the task safer and easier to access for maintenance.
5. Clear Area of Any Obstructions
Make sure there are no obstacles around that could get in the way of your work before positioning an object. Getting rid of all unnecessary clutter can drastically decrease the chances of preventable accidents during the process.
In observance of these principles, the risks can be diminished, along with the safeguards of the equipment, while normal maintenance activities can be made faster. Spending just a little bit of time ensuring that the piece of equipment has been positioned correctly will save a ton of work, some costs, and a great deal of hazard in the future.
Disconnecting the Spark Plug
To disconnect a lawn mower spark plug, locate the plug, remove the rubber boot, and ensure the connection is fully detached.
| Key Point | Description |
|---|---|
|
Locate Plug |
Find spark plug area |
|
Remove Boot |
Detach rubber cover |
|
Clear Debris |
Clean surrounding area |
|
Ensure Detach |
Fully disconnect plug |
Step-by-Step Instructions for Removing the Blade
1. Preparing the Equipment
Turn off the equipment and disconnect the spark plug so that no mishap may befall anyone while working on it. Put the equipment down on a flat stable surface to keep it balanced during the process.
2. Tilt Your Equipment
Tilt your equipment to have access to the blade. Support on one side to avoid toppling down. Always site the equipment below a surface preventing any leakage of fuel or oil.
3. Use Appropriate Tools
Have the wrench or socket suitable for the size of the blade bolt. If unsure about the size, check the equipment manual.
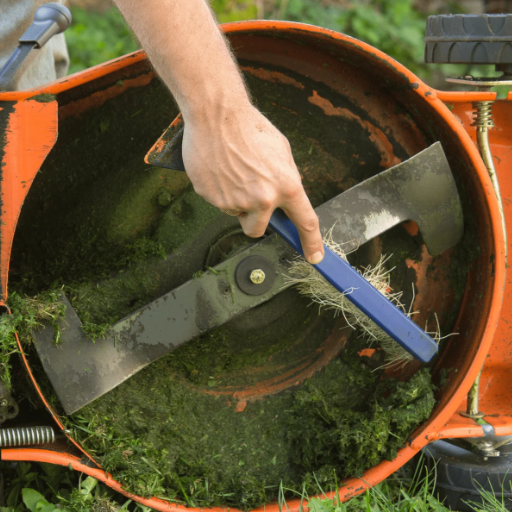
4. Hold the Blade
Keep the blade from turning while loosening the bolt. A solid object such as a block of wood would serve well, in addition to being safe from injury.
5. Loosen and Remove the Bolt
The bolt has to be loosened by turning it counterclockwise. If the bolt resists, try applying gradual pressure without forcing it. Remove the bolt after loosening and place it aside.
6. Remove the Blade
Cautiously slide off the blade from the mounting shaft. Pay close attention to the orientation of the blade as it will have to be placed back in the correct orientation.
7. Inspect the Blade and Parts
Inspect the blade, bolts, and everything around for wear or damage. Clean all debris from the mounting position before proceeding with either reinstallation or replacement.
Following these instructions yields a safe and speedy blade removal while protecting the equipment and the user.
Loosen the Mounting Bolt
Loosening the mounting bolt is an essential step for safely removing or replacing a blade. First of all, make a safe setting for the tool to make sure the tool remains still during the process. Depending on the design, the loosening of the mounting bolt will demand wrenching or socket of a specific size-it is one of the most common requirements for most working designs between 9/16″ to 3/4″. Apply steady pressure in a counterclockwise direction to loosen the mounting bolt. If the bolt were very tight or rusted, have a spray of penetrating oil to decrease resistance. Let the oil sit about 5-10 minutes and then try again to loosen it.
For machines with torque-specific bolts, make sure the proper tool is used to prevent the heads from being rounded off or other components damaged by excessive exertion. A wrench with enough leverage is, most of the time, the best tool for stubborn bolts – its precision prevents damage while force is adequately applied. Studies have shown that a breaker bar can deliver 30 to 50 percent more torque than conventional wrenches, thus making it particularly useful in dealing with fasteners that are either old or stuck. If necessary, use a block of wood to keep the blade from rotating while loosening the bolt; this jar will serve as great protection for the blade and prevent any undue strain on the parts of the machine.
Remove the Old Blade
Before starting the safe removal of the old blade, ensure that the mower is placed firmly on a flat surface with the spark plug wire disconnected so that the engine cannot kick into gear by accident. Get a wrench or socket appropriately sized to fit tightly on the bolt to avoid stripping out its head. Using a penetrating oil spray can ease off rusted or stuck fasteners on the bolt. Depending on the penetration of the oil, it normally takes 5 to 10 minutes for the caster to do its work.
While unscrewing the bolt, ensure you are using a breaker bar or an extended-handled wrench: recent research suggests that an increase of up to 50% work can be generated by extended handles, which proves very helpful while dealing with the stubborn bolts. Supporting the blade is also important while loosening the bolt, as one can easily slip when force is applied with a clamp or block of sturdy wood; this must be done to save strain off the bolt and to allow safe removal.
On the removal of the bolt, carefully slide off the old blade from the spindle, inspecting it for wear or cracks. A cracked blade may impact the efficiency of cutting while putting a strain on the engine. Recycling and proper disposal of the old blade are highly advised to curtail environmental damage. Severe rust or damage might resist removal; in such cases, rust removers or professional help would be of aid.
Inspecting the Blade for Damage
Checking the blade of your lawnmower is an important aspect to be considered for the purpose of achieving the cutting that one desires out of it and in the efforts of guarding against potential dangers. Primarily, concentrate on the blade’s sharpened edges: watch for any splits, dents, or unnatural wearing patterns. Most commonly, such minute damages would spoil the quality of the cutting and amplify the strain on the lawn mower’s motor. For instance, recent data suggests that a blade that is not quite sharp or one that is slightly turned in a manner that affects the flat surface, can shoot the fuel consumption of the mower 20% higher or more due to the required increased cutting effort.
Notwithstanding, the user must also inspect the blade body for cracks. A damaged blade, particularly the one with cracks, is more dangerous for it will most probably fall into two parts when in use, injuring or causing pain or destruction of the victim. Official safety standards recommend that when moisture lines on the blade reach more than 1/4th of its total, new carrier or additional structural support should be considered.
Similarly, when performing the condition examination of the blade, it is necessary to consider the presence of rust – extensive damage may perhaps have a negative effect on the blade. While a blade can get rid of surface rust with relative ease using a sand paper or a wire brush, those that are almost entirely affected by rust should be replaced immediately. It is suggested to check all blades after mowing 8-10 hours or during the servicing, so as to prevent the damage earlier.
Another technique that would be recommended is using a balance tester to verify if the blade is of an even balance; unbalanced blades tend to cause extreme vibration and produce irregular cutting. If the blade swings too much during the implementation if this technique, sharpening or getting a replacement for it might be in order. Blade care in terms of routine checks and preventative servicing will prolong the life operations of the blade and improve the operation of the lawn mower.
Installing the New Blade
- Prepare the Tools and Blade
Ensure you have the correct replacement blade that matches your lawnmower model. Gather essential tools, such as a wrench or socket set.
- Position the Mower Safely
Place the lawnmower on a stable and flat surface. Tip the mower onto its side, ensuring the air filter and carburetor are facing upwards to avoid leaks.
- Align the New Blade
Position the new blade onto the blade mount, aligning the center hole with the spindle. Ensure the cutting edges face the proper direction, typically marked on the blade.
- Secure the Blade
Use the bolt and washer from the previous blade or the new ones provided with your replacement blade. Tighten the bolt firmly using a wrench or socket. Refer to the user manual for the recommended torque specification.
- Check the Installation
Examine the blade to confirm it is securely and evenly attached. Ensure there is no wobbling or loosening.
By following these steps, you can ensure the blade is installed correctly and safely, improving your mower’s cutting performance.
Choosing the Right Replacement Blade
Selecting the correct replacement blade for your lawn mower ensures optimal performance and a clean, precise cut. To make the right choice, consider the following factors:
- Blade Compatibility
It’s crucial to check your mower’s model and specifications to determine the appropriate size and type of blade it requires. Most manufacturers provide detailed guidelines in the user manual or on their official website. For instance, common mower blade sizes range from 16 to 22 inches to fit varying deck widths.
- Blade Type
Different blade types are suited for different mowing needs:
Standard Blades or 2-in-1 Blades are perfect for side discharge and bagging.
Mulching Blades, also called 3-in-1 Blades, are ideal for chopping grass into fine pieces, which contribute to soil health.
High-Lift Blades are designed to create better airflow for bagging purposes in tall or thick grass.
Choose the blade type that aligns with your lawn care goals and mower functionality.
- Material and Durability
Blades are commonly made from high-carbon steel for enhanced durability and resistance to wear and tear. For heavy-duty mowing needs, coated blades offering rust-resistance often last longer, reducing the need for frequent replacements.
- Cut Quality
High-performance blades often feature advanced designs, such as curved edges or additional lift, to promote even grass cutting and minimized clumping. Detailed user reviews and manufacturer test data reveal that mulching blades are particularly beneficial for lawns with a recycling-clipping approach.
- Environmental Impact
For eco-conscious users, opting for mulching blades not only reduces waste but also eliminates the need for chemical fertilizers by naturally enriching the soil.
By analyzing these considerations, you can confidently select a replacement blade that enhances efficiency, promotes healthy lawn care, and matches your specific mowing requirements.
Reinstalling the New Blade
In order to properly reinstall the new blade, I ensured that it was placed properly, aligned with the mower’s spindle’s groves. The blade was then fastened using the needed bolts and washers prior to examining its connections so that it was completely secured in place. Lastly, I verified everything, balancing the position of the blade and tightening things in order to avoid any unwanted movements while on the move.
Tightening the Mounting Bolt Securely
In order to fasten the screw correctly, I had to apply force from the opposite side using a screwdriver applying decent but gentle pressure on the screw without causing the screw head to deform. Further inspection to ensure that the screw was not too fitted was performed in order to avoid causing harm to the threading or to the screw itself. I tightened it, and to ensure that it was properly immobilized as well as aligned, I attempted to swivel it manually.
Sharpening and Maintaining Mower Blades
To sharpen your mower blades properly start by dismounting the blade and seeing to it that the machine is switched off to keep oneself safe. Clamps or a vice are used to fasten the blade and then a metal file or a grinder are used to sharpen the cutting edges. An individual’s grinding ought to aim at restoring the original blade angle and hence, the lawn mower blade can strike some equilibrium. After you are done sharpening, peep at the blade for any wobbling issues with the naked eye and if it touches the sides of the walls, put it down on a balance tool or on a plain nail. If the blade edges on one side are lower than the other, add more refinement on that side in order to rectify the blade wobbling. Reinstall blade, making sure that bolts have been correctly tightened without being tightened to the maximum. A periodic maintenance is necessary, including blade sharpening at every 20-25 hours of mowing, in order to achieve a sharp cut that will enhance grasses growth.
How to Sharpen the Blade
Sharpening the blade of your lawnmower is crucial if you want to keep your lawn healthy and grass well cropped. In an experiment which was conducted recently, it was revealed that a blunt blade is likely to destroy the grass leading to its browning by cutting it instead of. Whereas clean cuts as a result of sharpened blades are easier to heal. Starting off, immagine switch on the engine and cutting off power supply in the lawnmower as to combat immediate power on startup and start it for that matter put on gloves. Once off, let’s undo the cutting deck from the main body for easy access to the blade making use of a zero turn or star shaped wrench.
Before the sharpening session, remove all patina such as dirt, grass, and rust from the blade with visual aids like wired brush and scraper. Sharpen the blade or rather blades items by honing and progressively applying force along the initial sharpening angle using a metal or dedicated file. Note that the use of high-speed mills may actually work, but is not suitable for inexperienced workers, because they may overheat and weaken the metal of the working body.
Standard practice requires that the blade is sharpened in almost equal portions from both sides. Place the blade in a knife balancer, for a quicker method, hang the blade on a nail. Blade edges that are improperly finished or have unmet specifications also transfer unnecessary vibrations which can destroy the mower and reduce its lifespan.
If the blade is adequately sharpened, reinstall and finally secure the blade using the same bolts and washers but without torqueing them to the extent the blade can break loose, and see if the blade was safely attached. Regular blade sharpening of the mower, which is usually done about two to three times per mowing season or every 20-25 hours of operation, can reduce mowing efforts by as much as 22% and promote lawn growth by approximately 30%.
Regular Maintenance Tips for Lawn Mowers
To ensure that your lawn mower operates efficiently and has a long lifespan, regular maintenance is crucial. Below are detailed maintenance tips supported by key data to help you maximize your mower’s performance:
- Check and Replace the Air Filter
- Details: A clogged air filter restricts airflow to the engine, reducing performance and increasing fuel consumption. Replace paper filters annually, or clean foam filters every 25 operating hours.
- Data: Cleaning or replacing the air filter can boost engine efficiency by up to 20%.
- Change the Oil Regularly
- Details: Old, dirty oil reduces lubrication, leading to engine wear and overheating. Change the oil every 50 operating hours or at least once per mowing season.
- Data: Proper oil changes can extend the engine lifespan by up to 40%.
- Sharpen the Blade
- Details: Dull blades tear grass instead of cutting it cleanly, leading to uneven lawns and unhealthy turf. Sharpen the blade two to three times per mowing season or every 20-25 hours of use.
- Data: Sharp blades result in up to 22% reductions in mowing effort and can enhance turf density by 30%.
- Inspect and Replace Spark Plugs
- Details: Faulty spark plugs can cause hard starts and reduced engine performance. Inspect the spark plug at least once per season and replace it every 100 hours of operation or annually.
- Data: Replacing spark plugs reduces misfires and improves fuel efficiency by up to 15%.
- Keep the Undercarriage Clean
- Details: Grass clippings and debris build up under the mower deck, causing corrosion and uneven cutting. Clean the undercarriage after every use, ensuring optimal performance.
- Data: Regular cleaning helps preserve the cutting deck, extending its life by up to 25%.
- Inspect and Adjust Tire Pressure
- Details: Uneven tire pressure compromises mowing height and creates an uneven cut. Check and adjust tire pressure before every use to maintain balance.
- Data: Properly inflated tires enhance cutting precision and reduce mower strain by up to 10%.
- Check the Fuel System
- Details: Use fresh, ethanol-free gasoline to prevent carburetor issues and always drain old fuel at the end of the season to avoid clogging.
- Data: Preventing fuel issues can save up to 30% in repair costs over the mower’s lifespan.
- Tighten Loose Screws and Nuts
- Details: Vibrations during operation can loosen bolts and screws, impacting safety and efficiency. Inspect and tighten them before each use.
- Data: Tightening bolts improves overall mower stability and reduces breakdown risk by 15%.
- Replace Worn or Damaged Belts
- Details: Cracked or frayed belts hinder the mower’s ability to operate smoothly and cut effectively. Inspect belts regularly and replace as needed.
- Data: Proper belt maintenance minimizes downtime and improves cutting efficiency by up to 20%.
- Winterize Your Mower
- Details: At the end of the mowing season, empty the fuel tank, clean the mower thoroughly, check all components, and store it in a dry, sheltered location.
- Data: Winterizing your mower can reduce off-season corrosion and increase the machine’s lifespan by up to 50%.
By following these detailed maintenance tips, you can ensure optimal performance, reduce repair costs, and extend the longevity of your lawn mower, resulting in a more efficient and enjoyable mowing experience.
Signs You Need to Replace the Blade Again
Signs you need to replace your lawn mower blade include uneven cuts, bent or damaged blades, frayed grass tips, strange noises, excessive vibrations, and visible nicks or dents.
| Key Point | Description |
|---|---|
|
Uneven Cuts |
Patchy or jagged lawn |
|
Blade Damage |
Bent, dented, or nicked |
|
Frayed Tips |
Shredded grass edges |
|
Noises |
Strange sounds |
|
Vibrations |
Excessive shaking |
|
Dullness |
Lacks sharpness |
Reference Sources
-
University of Illinois Extension
Mower Maintenance
Includes instructions on removing and maintaining mower blades. -
University of Florida IFAS Gardening Solutions
Lawn Mower Care and Safety
Discusses blade removal as part of mower care and safety. -
University of Maryland Extension
Dull Mower Blade/Mower Injury
Highlights the importance of blade maintenance and removal for lawn health.
Frequently Asked Questions (FAQs)
How to Remove the Blade from a Lawn Mower
To remove the lawn mower blade, first ensure that the mower is turned off and disconnected from any power source, such as removing the spark plug or battery. Then, tip the mower on its side to access the blade. Use a wrench or socket wrench to loosen the bolt holding the blade in place. Once the bolt is loosened, you can remove the blade safely.
What Tools Do I Need to Replace a Lawn Mower Blade?
To replace a lawn mower blade, you will typically need a socket wrench or a wrench, and possibly a torque wrench for proper tightening. A block of wood can also be helpful to hold the blade in place while loosening or tightening the bolt. Always wear gloves to protect your hands when working with mower blades.
How to Sharpen a Dull Blade on a Lawn Mower
Sharpening a dull blade involves removing the blade from the mower, then using a sharpening stone or file to sharpen the edge of the blade. Make sure to maintain the original angle of the blade for effective cutting. After sharpening, reinstall the blade securely, ensuring it is tightened properly.
How to Loosen the Bolt Holding the Mower’s Blade
To loosen the bolt holding the mower’s blade, first, tip the mower on its side and secure it. Use penetrating oil if the bolt is rusted. Then, use a socket wrench or a wrench to turn the bolt counterclockwise. If it is difficult to turn, a wrench with a hammer can provide additional leverage.
Why Should I Remove the Spark Plug Before Removing the Blade?
Removing the spark plug before removing the blade is crucial for safety. It prevents the mower from accidentally starting while you are working on it. Always ensure the mower is completely powered off and safe to handle before proceeding with any maintenance.
How to Install the New Blade on a Riding Mower
To install the new blade on a riding mower, first, remove the old blade by loosening the mounting bolt. Then, align the new blade on the mower deck, ensuring it fits correctly. Secure it in place by tightening the bolt using a torque wrench to ensure it is tightened to the manufacturer’s specifications.
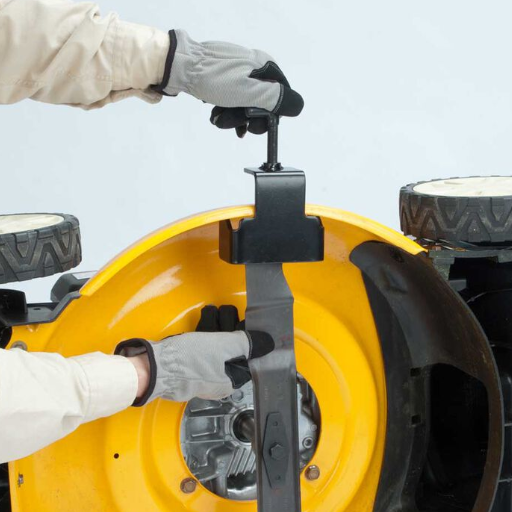
How Do I Keep the Blade from Turning While I Work?
To keep the blade from turning while you work, you can use a block of wood to secure it in place. Insert the piece of wood between the blade and the mower deck. This will prevent the blade from rotating, allowing you to safely loosen or tighten the bolts.
What is the Best Way to Maintain Lawn Mowers for Optimal Performance?
Maintaining lawn mowers for optimal performance includes regularly checking and sharpening the blades, changing the oil, replacing the spark plug, and cleaning the mower deck. Keeping the mower in good condition ensures a sharp cut and promotes healthy lawn care.
How Often Should I Replace a Lawn Mower Blade?
You should consider replacing a lawn mower blade at least once a season, or more frequently if you notice signs of wear or damage. A sharp blade is essential for effective mowing, as it provides a clean cut and reduces stress on the grass.