Custom embroidered patches allow items like clothing or accessories to gain a personal touch. This blog post will provide detailed instructions on how to make these patches with Brother Machine embroidery. You will learn about the selection of materials, how to prepare the machine and the designs, and you will bring out the step-by-step shot of doing the work. This is a step-by-step guide for the professional embroiderer and the novice seeking to learn how to work and produce excellent and attractive quality patches for all occasions. In addition, with the help of Brother Embroidery Machines, one can bring their decorative conception to life. rætt Welcome to the exciting world of embroidery!
What Supplies Are Needed to Make Patches?

If one wants to complete the patch-making process and sew custom patches using a Brother embroidery machine, there are some basic requirements. First, consider the embroidery threads, which should be in the desired color, and the stabilizer to hold the material in place during stitching. Patch fabric base material is needed, preferably cotton or twill. It is essential to have an embroidery hoop that fits the machine to secure the fabric. Most importantly, do not forget to use the sharp embroidery scissors for trimming. Best of all, have the embroidery software that allows editing or creating a digital design that the machine will sew. With these supplies in hand, you are set to begin patch-making.
Essential Embroidery Machine Tools
Embroidered works can be realized successfully if the correct tools are used from the initiative’s start. Guiding options include quality items like the Brother Embroidery Machine, which is fit for the purpose as it performs its functions in style with efficiency in mind. The machine’s hoop aids the source stitching directly onto the fabric so that it does not move during the process. When making seam connections, you will also prepare several bobbins and a bobbin winder for uninterrupted sewing. Embroidering needles capable of serving the purpose of threading through diverse materials and frequent threading is also necessary. In addition, programs that enable customizing or creating designs before the actual stitching can be essential resources. Finally, loose tools should be available, including needles, small screwdrivers, and brushes for cleaning and repair. All these tools, as a whole, make sewing, in general, much more accessible, enabling you to concentrate more on the artistic body rather than mechanical issues.
Choosing the Right Stabilizer and Patch Fabric
The right stabilizer and patch fabric are essential aspects that should never be taken for granted if quality embroidery results are the target. Embroidery supports the fabric and keeps the design in place. For stretchy fabrics, it is essential to use cut-away stabilizers that provide adequate support and remain with the fabric, preventing distortion. If the project involves non-stretchy fabrics, a tear-away stabilizer is effective as it can be removed easily after stitching. Applying water-soluble stabilizers on explicit or delicate materials may also be helpful as they are completely soluble in water and leave no residue.
Regarding patch fabric, choose more rigid bases of materials such as cotton and twill. Cotton is best for soft projects, while twill is suitable for tough patches as it is more robust. For specific parameters, ensure that the weight of the stabilizer corresponds with the thickness and rigidity of the fabric. For selection, look for the weight of the stabilizers between 1 oz (light) and 3 oz (heavy). When looking for fabric, also seek a 150-200 thread count for cotton and appropriate weave density for twill, as these are good quality indicators since they portray an excellent balance of softness and strength.
Additional Materials for Embroidery Patch Creation
You will also need other materials besides the stabilizers and patch fabric to create the embroidery patches successfully. However, embroidery thread, which comes in rayon, polyester, and cotton, is one essential material. Each has its advantages; for example, rayon has a shiny look, while polyester is very tough and retains color when exposed to light. Let us use a thread weight of 40, which is expected for most embroidery machines and appropriate for reasonably detailed designs.
Also embedded in the patches are embroidery hoops that hold the fabric in place when stitching for accuracy and precision in the design. Depending on the project size you are working on, choose hoops with a diameter of 4- 8 inches. Furthermore, patches to be pasted on clothes using an iron require heat-activated adhesive backings. To prevent bonding from going through the patch fabric, ensure that the glue backing you bought corresponds with your patch fabric.
Scissors or snips are essential tools for trimming the thread ends neatly. Also, well-chosen embroidery scissors about 3-4 inches long are ideal for small, sharp, and accurate cutting. The above materials and technical parameters will help produce reasonable and professional embroidery patches. Do not forget that the embroidery machine’s tension must be adjusted according to fabric and thread type and thickness to achieve the best results.
How to Digitize and Design a Patch?
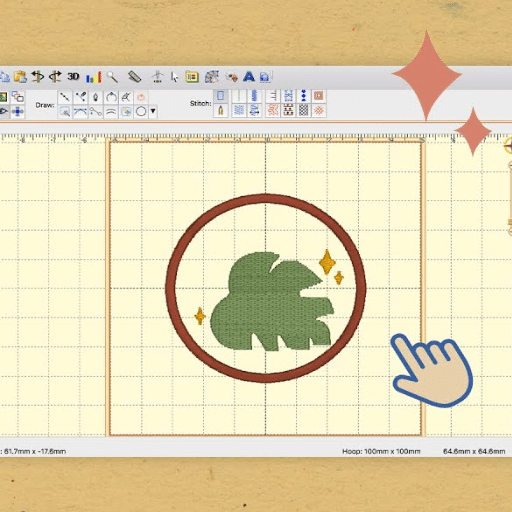
When creating an embroidered patch, the first step is to pick a good embroidery design software to make the patch. This computer program, or rather this element of art, will allow you to export your design as a file that an embroidery machine understands, called digitizing. First, find a picture or graphic that you want to cut and import it into the design program. Use the software layers to outline your design and tell the computer which types of stitches (satin, fill, etc.) you want to be used on your patch, what the complexity of the design should be, and what type of fabric is used. While designing, keep it clean enough to cover the outline and avoid incorporating too much detail that cannot be directly embroidered.
One should select the proper stitch direction and density best suited to the designs of how they intend to look, but should also minimize the number of stitches for faster sewing. Before plunging into actual work, it is recommended to embroider a test sample of the design on the garment that you wish to decorate to check the stitches and see if any revising is needed. Try to combine threads of different colors to form an emphasis on the design pieces at the most critical point. Save this document once you are happy with the design. Before closing the document, change the format that the embroidery machines support, such as the PES or DST format. Place the design file into the machine as instructed by the best embroidery machine specification, set other parameters as instructed, and when everything is done, start stitching your patch.
Steps to Digitize Your Embroidery Design
- Select and Prepare Your Artwork: Choose a clean and suitable design that can be effectively transformed into an embroidery pattern. Import this artwork into your embroidery software, ensuring it’s in a high-resolution format for precise conversion.
- Use Digitizing Software: Employ robust embroidery digitizing software to outline your design. The software’s tools help determine stitch placement, transitioning your image from a graphic to a stitched design.
- Assign Stitch Types: Define stitch types like satin, running, or fill stitches within the design, considering its complexity and the fabric. Satin stitches are ideal for borders, while fill stitches work well for larger areas.
- Optimize Stitch Density and Direction: Adjust stitch density and direction to balance aesthetics and efficiency. Proper settings ensure durability and visual appeal and prevent fabric distortion.
- Color and Layering: Select appropriate thread colors that will bring depth and life to your design. Layering techniques in digitizing help achieve a professional and polished appearance.
- Test with Sample Stitches: Test your design on a sample fabric before finalizing. This trial run allows you to inspect the stitch quality and identify any necessary adjustments, ensuring your final output meets expectations.
- Finalize and Export the Design: Once satisfied with the adjustments, save the digitized design in a compatible file format such as PES or DST. Then, transfer it to your embroidery machine per the manufacturer’s instructions to begin stitching your patch.
Tips for Creating a Unique Patch Design
- Understand Your Fabric: Choose a fabric that complements your design and uses a stabilizer suitable for the patch’s fabric type. Fabrics like cotton or polyester blends are popular, as they hold stitches well without excessive stretching.
- Size and Scale Appropriately: When determining the size of the patch, consider its intended use. A typical patch size ranges from 2 to 4 inches, and detailed designs are more effective at larger scales.
- Select the Right Thread: Opt for polyester or rayon threads, which offer durability and vibrant colors. Ensure threads are colorfast and match the color palette of your design.
- Define Clear Contrast: Use contrasting thread colors to make your design elements stand out. Balance your color scheme to maintain visual harmony and ensure important details are highlighted.
- Incorporate Unique Elements: Include distinctive features such as text, logos, or custom graphics that resonate with your theme. Personalized elements add uniqueness and character to the patch.
- Consider Stitch Complexity: Balance the number of stitches and design complexity. Overly complex designs can lead to high stitch counts, increasing production time and cost. Aim for an optimal stitch count between 5,000 to 15,000 for standard patches.
- Test and Adjust: Always create a prototype and test on the same fabric and stabilizer combination intended for final production. Evaluate stitch quality and design coherence, making adjustments as necessary to achieve a flawless finish.
These tips can create a distinctive and aesthetically pleasing patch that successfully conveys your desired expression or message.
Using Software for Making Custom Patches
Using specialized software is highly beneficial for creating custom patches efficiently. Programs like Adobe Illustrator, CorelDRAW, and Wilcom Embroidery Studio are among the top-rated tools for designing patches. These applications allow for precise vector graphic creation and conversion, ensuring your designs maintain clarity at any size.
- Adobe Illustrator: Known for its comprehensive suite of vector design tools, Illustrator allows for detailed control over each element of your patch. This ensures crisp edges and high detail retention, which is crucial for intricate designs. Key features include path editing tools, various color palettes, and export options for embroidery-ready formats.
- CorelDRAW: This software is praised for its user-friendly interface and powerful vector graphic capabilities. With its advanced color management tools and vast library of fonts and graphic elements, users can effortlessly create complex patch designs tailored to any aesthetic. CorelDRAW also supports various file formats suitable for embroidery machines.
- Wilcom Embroidery Studio: Specifically tailored for embroidery professionals, this software offers specialized tools that automate the conversion of graphic designs into embroidery files. Key technical parameters include stitch density settings, underlay types, and thread trimming options, allowing precise control over the final stitch quality and appearance.
Each program supports importing and exporting in multiple file formats.DST, .PES and EXP ensure compatibility with most embroidery machines. By leveraging these tools, designers can enhance their creative efficiency, ensuring that each custom patch is visually appealing and technically sound for production.
How do you embroider a patch on a Brother Machine?

To embroider a patch on a Brother machine, follow these steps:
- Select Your Design: Choose or create your patch design using one of the recommended software programs mentioned above. Ensure the design is saved in a compatible file format.PES.
- Prepare the Fabric: Cut a piece of fabric slightly larger than the finished patch size. Stabilize the fabric with appropriate backing material to prevent puckering during stitching.
- Set Up the Brother Machine: Turn on the machine and insert the embroidery hoop with the fabric. Make sure the fabric is taut and correctly placed within the hoop.
- Load the Design: Transfer your design onto the Brother machine using a USB drive or direct PC connection. Select the design from the machine’s menu.
- Adjust the Settings: Configure any necessary settings on your machine, such as adjusting stitch density or selecting thread colors corresponding to your design.
- Start Embroidering: Begin the embroidery process, monitoring the machine for any thread breaks or adjustments needed mid-process.
- Trim and Finish: Once the embroidery is complete, gently remove the fabric from the hoop, trim the patch to the desired shape, and finish the edges with a hot knife or sealant, if necessary.
These steps will guide you through producing high-quality embroidered patches with your Brother machine.
Setting Up Your Brother Embroidery Machine
There are some prerequisites to setting up a Brother embroidery machine to ensure the smooth running of embroidery. To begin with, put the embroidery machine on a flat surface and switch it into the power socket. Insert the embroidery foot and verify that it is fastened properly. Then, continue to thread the machine by following the depicted threading path, ensuring that the thread goes through the tension discs and the needle eye correctly. Prepare a bobbin with thread and put it in the bobbin case as instructed, ensuring the slot is indicated for the machine.
Prepare your embroidery hoop by sandwiching the fabric in between the stabilizer and the ribbing of the hoop, then tightening the screw until it is secure. Attach the hoop to the machine’s embroidery arm and check whether the attachment has a ‘click’ sound and is fully positioned. Start the machine and use the menus to set the required and correct size hoop. Ensure the design file you need is uploaded to the machine via USB or compatible software.
Once you have stitched the embroidered design, inspect the stitches to determine what adjustments can be made to improve overall results. Some variations may be based on your operations, which must be factored in during the operation. Consider the stitch tension and speed when tweaking these settings, as they will be necessary. Also, do not forego testing the fabric, as this is pertinent in ensuring the settings are correct for that type of fabric. In sticking to the operation directions provided, you can set up your Brother embroidery machine and enhance how your embroidered patches look.
Hooping and Stabilizing Your Fabric
Embroidery should not be done on a fabric without a stabilizer; there are, however, instances where a fabric does not require stabilization. There is no better conflict in determining a suitable stabilizer than the base fabric and design you want to use alongside the stabilizer. Cut-away stabilizers are ideal for knit fabrics or fabrics with tendencies to stretch. On the other hand, Tear-away stabilizers should be utilized with stable woven fabrics that possess little stretch. Since both sides of a scarf can be seen with water, water-soluble stabilizers are the best option for this fabric. It is also advisable to place the stabilizer below the layer of fabric and smooth the fabric out in between the hoop rings after stripping its layers. The screw attached to the hardware should not be over-tightened to restrict the fabric from getting damaged, but enough tension should be created to overcome any slippage.
When considering technical parameters, pay attention to the following:
- Recommended Hoop Tension: Ensure the fabric is taut but not stretched to avoid puckering.
- Stitch Density: Adjust according to the fabric’s weight and the design’s complexity, typically between 3.5 and 4.5 stitches per millimeter.
- Stabilizer Weight: Most projects use a medium-weight (1.8-2.5 oz) stabilizer but adjust based on fabric thickness.
- Testing: Test a similar fabric with the same stabilizer to verify tension and fit.
By aligning these parameters correctly, your embroidery process will achieve optimal results with minimal fabric distortion and clean, precise designs.
Executing the Embroidery Process
The first step in the embroidery process is to import the design file into the machine in the correct format. Make the necessary modifications so that the image fits into the area to be embroidered. As explained previously, insert the fabric into the machine, ensuring it is tight and firmly secured. Ensure that the needle type and tension are appropriate for the fabric and the design; for many fabrics, a standard 75/11 embroidery needle is often appropriate.
Do a test stitch before commencing work to check whether these settings would work as intended. Emphasis also needs to be placed on the stitch density, ensuring the fabric’s weight is not exceeded or else risk distortion and puckering; this should be adjusted between 3.5-4.5 stitches per millimeter. The thread and the bobbin must also be attached and threaded to avoid breaking them. Finally, check that the speed of the embroidery machine and the length of the stitch are appropriate for the material to ensure the quality of the final product.
Focus the camera on the machine throughout the process of embroidering so that all sabotages, such as breakages of threads or misalignment, are dealt with as the incident occurs. When the embroidery design is finished, slowly and gently pull the fabric from the hoop to prevent any pull-out or stretching during embroidery. Cut away the excess stabilizer and the area surrounding the design, and examine any loose threads or wires that need touching. Following these precautions, provided in an amalgam format from professional websites, will help you produce clean and professional embroidery.
What Techniques Can Be Used to Make a Patch?
Creating a patch can involve several techniques, each offering unique advantages depending on the desired outcome. Here are some essential methods:
- Embroidery: This is the most common method for making patches, where a design is stitched onto a fabric base. The process involves selecting the right thread colors and stitch types to bring the design to life.
- Digital Printing: Using advanced digital printing technology, designs can be printed directly onto the fabric, allowing for intricate details and a broad color palette. This technique is ideal for producing vibrant and complex images that might be challenging to achieve with embroidery alone.
- Sublimation: This technique uses heat to transfer dye onto polyester materials. It provides a smooth finish and is excellent for photographic-quality images, producing long-lasting colors resistant to fading.
- Iron-on Transfer: A heat-activated adhesive is applied to the back of the patch, allowing it to be easily affixed to fabric using an iron. This method offers a quick and convenient attachment option without sewing.
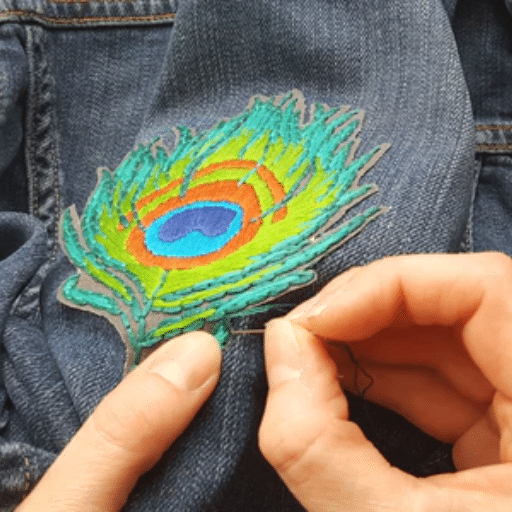
- Sew-on: This is the traditional method in which patches are sewn onto garments or accessories, ensuring durability and a permanent hold. It is often preferred for items requiring frequent washing or heavy use.
You can create durable and visually appealing patches tailored to specific applications by selecting the appropriate technique for your patch-making needs.
Exploring Applique and Satin Stitch Methods
The applique and satin stitch methods can enhance the beauty and detail of textile design. The process consists of stitching parts of fabric to a more excellent fabric base to achieve specific patterns and designs. Standard techniques of restoring quilted items and decorating clothes include the applique technique, which allows using different fabrics, resulting in a unique and artistic product. Fundamentally different from satin embroidery, the satin stitch is used in embroideries to cover a shape/outline with a smooth and shiny line. It creates a more elegant appearance and is an excellent choice for letters and outlines. Achieving a rich world of a three-dimensional patchwork takes redesigning these methods together, making them great for decorative arts and fashion. Thanks to the online materials available, creators can learn from some of the best textile and fashion websites about these sewing styles, which are highly useful and creative.
Understanding Fuse and Iron On Patch Techniques
Fuse and iron-on patch techniques are famous for attaching patches to fabrics without sewing, offering convenience and durability. These techniques involve using heat to bond a patch to a fabric surface, usually with a pre-applied adhesive backing. When exploring fuse and iron-on methods, a few critical technical parameters must be considered:
- Iron Temperature: To effectively apply an iron-on patch, set the iron to the correct temperature, usually between 270°F to 300°F (about 130°C to 150°C). This ensures the adhesive melts appropriately without damaging the fabric or the patch.
- Pressing Time: Maintain consistent pressure while keeping the iron in place for 10 to 15 seconds. This time frame ensures the adhesive bonds securely to the fabric.
- Fabric Compatibility: Not all fabrics are suitable for iron-on patches. Heat-sensitive materials like nylon or other synthetics may melt or warp under high temperatures, while cotton and denim work best for these applications.
- Patch Placement: It is crucial to correctly place the patch on the desired area before applying the iron to ensure proper alignment and adhesion.
These techniques streamline the attachment process, making them suitable for quick garment repairs and stylish enhancements. For further insights, consulting top textile and crafting resources can provide additional tips and variations on these methods.
Creating Multiple Patches Efficiently
Creating multiple patches efficiently involves meticulous planning and the right tools to ensure consistency and quality. Here’s a concise guide based on top resources:
- Material Selection: Choose durable fabrics like cotton twill or polyester blend, which provide a strong base for patches.
- Design Consolidation: Use design software to batch process patch designs. This helps you arrange multiple designs on a large fabric piece, reducing material waste.
- Heat Press Settings: A heat press is more efficient than an iron for multiple patches. Set the machine at 280°F to 300°F (about 140°C to 150°C) with a dwell time of 8 to 12 seconds to ensure even heat distribution and adequate adhesion.
- Pre-cutting Technique: Use a laser or die cutter for precise, consistent patch shapes before applying adhesive. This saves time and maintains uniformity across patches.
- Batch Production: Align patches in bulk on a heat-resistant mat, allowing simultaneous pressing with consistent results.
Adhering to these methods and settings can enhance productivity while maintaining high-quality patch applications suitable for various purposes.
How do you finish and attach an embroidered patch?
To finish and attach an embroidered patch, follow these streamlined steps:
- Trimming: Carefully trim any excess fabric around the embroidered patch using sharp scissors to ensure a clean border. Leave a small margin if you plan on sewing the patch.
- Backing Application: Choose a suitable adhesive or iron-on backing if your embroidered patch requires backing. Apply the support according to the manufacturer’s instructions, typically involving heat activation for iron-on versions.
- Positioning: Place the patch on the garment where you want it attached, ensuring it is straight and centered. If needed, use pins or fabric tape to secure it temporarily.
- Attachment Method:
- For sewing, use a needle and thread that matches the patch border. Employ a tight hand stitch along the edges, or use a sewing machine for a stronger hold.
- For iron-on patches, cover the patch with a cloth and apply a hot iron with firm pressure for the time recommended by the backing instructions. Ensure the heat is evenly distributed.
- Finishing Touches: Check for any loose threads or areas not adhered properly. For sewn patches, tie off the thread ends securely. For iron-on patches, allow them to cool completely before wearing or washing to ensure the adhesive sets fully.
Following these steps, you can achieve a polished finish that securely attaches the embroidered patch to your garment.
Trimming and Fray Prevention
For a professional look, it’s advisable to trim the edges of an embroidered patch so that fraying does not occur. Cut sharp fabric scissors around the patch’s edges, leaving some seam allowance if a sewn patch is planned later. Furthermore, fraying can be avoided further by using suitable fabric sealant or a fray check at the periphery of the patch. This clear liquid glue bonds the threads together and seals them firmly. Another approach to fraying edges is to heat seal them using a lighter. While this technique is effective, care should be taken not to burn the patch. Using various ways of doing so will ensure that your patch looks tremendous and stays intact.
Attaching the Back of the Patch with Fusible Backing
To attach the back of the patch with fusible backing, I press the fusible side onto the fabric using a hot iron without steam. I apply firm pressure for 10-15 seconds, ensuring even heat distribution. I let the patch cool for a minute to ensure it fully adheres to the fabric. If needed, I repeat the process until the patch is securely attached. This technique provides a quick and efficient way to attach patches without sewing, saving time while ensuring durability.
Final Touches on the Edge of the Patch
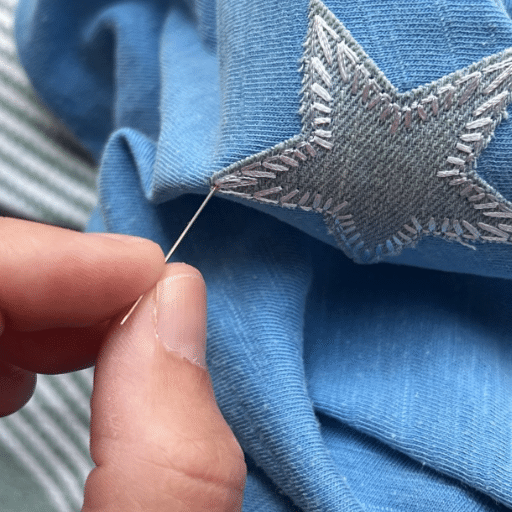
To ensure a clean finish on the edge of the patch, I like to carefully stitch around the perimeter using a blanket or zigzag stitch. This step not only secures the edges but also prevents fraying over time. A matching or complementary thread color enhances the professional look. Often, a sewing machine provides a neat, even stitch, but hand stitching works well for small patches and delicate fabrics. If I aim for extra durability, I consider using fabric glue on the outer edge or applying heat to seal synthetic materials, which helps maintain the patch’s appearance and integrity.
References
Frequently Asked Questions (FAQ)
Q: What supplies are needed to make custom embroidered patches with a Brother Embroidery Machine?
A: To make custom embroidered patches with a Brother Embroidery Machine, you will need the following supplies: patch twill, water-soluble stabilizer, embroidery hoop, embroidery thread, and a Brother ScanNCut if you plan to cut the patches precisely. Additionally, a tutorial on how to make patches is helpful.
Q: How does machine embroidery work to create patches?
A: Machine embroidery uses a computerized design to stitch patterns onto fabric. For creating patches, the design is typically stitched onto patch twill, supported by a tear-away or water-soluble stabilizer, allowing for crisp and detailed results.
Q: Can I find a tutorial on how to make embroidered patches using a Brother Embroidery Machine?
A: Many tutorials are available online, including video tutorials on platforms like YouTube. These tutorials often provide step-by-step instructions and helpful tips on how to make embroidered patches using your embroidery machine.
Q: What is the process of creating a patch on an embroidery machine?
A: To create a patch on an embroidery machine, you must first choose or upload an original design. Next, hoop your patch twill and stabilizer, then use the machine to stitch the design. Once completed, remove the stabilizer and trim the patch to your desired shape.
Q: What is the best type of embroidery material to use for making patches?
A: Patch twill is the best embroidery material for making patches. It is durable and provides a stable surface for stitching intricate designs. A water-soluble stabilizer is also commonly used to support the fabric during embroidery.
Q: How can I use patches made from my embroidery machine in sewing projects?
A: You can sew the patches onto clothing, bags, or accessories as embellishments. Patches can also be used to cover worn areas or to personalize items. Since patches are versatile, they are great additions to various sewing projects.
Q: Are any free patch designs available on an embroidery machine?
A: Many websites offer free patch designs that can be used with embroidery machines. These designs can often be downloaded and uploaded to your machine for personal use.
Q: How does using a Brother ScanNCut enhance the patch-making process?
A: A Brother ScanNCut can enhance the patch-making process by precisely cutting the patch material. This ensures clean edges and accurate shapes, making sewing or applying the patches to other items more accessible.
Q: Can creating custom embroidered patches become an embroidery business?
A: Creating custom embroidered patches can become a successful embroidery business. By producing unique and personalized patches, you can cater to various markets such as fashion, corporate branding, and special events.
Q: Where can I find a transcript of a tutorial on how to make embroidered patches?
A: Tutorial transcripts can often be found on the websites hosting the videos or in the video descriptions on platforms like YouTube. These transcripts provide a written format of the instructions and tips shared in the video.