Portable knitting machines allow anyone to implement their designs onto any product. Patches can be utilized for anything, from personal style to brand enhancement. In this ultimate guide, we will guide you carefully, step-by-step, into making patches for life. The articles will tackle topics ranging from hardware upgrades to basic and advanced software features and many stitching tips. This is an excellent opportunity for even novice or would-be embroiderers to benefit from this guide and do perfect patch-making using their embroidery machines. This set of articles will address these issues in more detail. Bring forth new ideas and awaken your creativity because we’re headed into the patch-creating process.
What Are the Basics of Patch Making with an Embroidery Machine?

Before getting started with embroidery patches, the first step is to choose the fabric and a stabilizer, preferably an embroidery machine. Patches made of twill or felt fabric are a better option. In contrast, a medium stabilizing fabric such as tear-away stiff material is highly recommended as it helps the patch fittings even when stitched. The next step is to find a thread that goes with the patch design regarding scale, tints, and hue. If you design patches, you should also know how to use patch embroidery design programs to create or modify new designs. After preparing your design, ensure you hooped your fabric together, paired with a stabilizing substrate, set a design into the machine, and stitched the patch. The entire process should be monitored, as threading and tension issues may sometimes arise. Last but not least, once the stitching is done, the patch may be removed from the fabric, and if required, a sticker can be put on the reverse side of the patch for easy fixing to other objects.
Understanding Embroidery Machines for Patches
The proper use of embroidery machines is indispensable when producing reliable quality patches. Characterizing these machines differs; choosing the most appropriate will ease your patch-making and determine its quality. When considering these factors, pay attention to the hoop size, as it dictates the size of your patches, and the stitching speed of the machine determines how many patches you can make in a short time. Additionally, designing even the most elaborate patterns can be made easier by built-in design features and machine compatibility with specific embroidery software. Other essential factors are maintenance and use, as automated threading and tension control also reduce the everyday stitching problems. Website reviews and comparisons on the patch through the eyes of the industry do stress some points, including one’s durability or after-sale service, which you will decide based on regarding your patch-making strategies.
Essential Stabilizers and Materials Needed
When creating patches with embroidery machines, selecting stabilizers and materials is crucial for achieving the desired quality and durability. Here’s a concise guide on what you need:
- Stabilizers: The choice of stabilizer depends on the fabric and the complexity of the design. For most patches, a medium-weight cut-away stabilizer is recommended for its robust support, while tear-away stabilizers might be used for lighter fabrics. Ensure the stabilizer is larger than the hoop to secure the fabric during stitching.
- Threads: High-quality polyester or rayon threads are preferred for strength and sheen. Polyester threads are durable and resistant to fading, making them ideal for patches exposed to sunlight.
- Fabrics: Twill is commonly used for patches because of its sturdy structure and smooth surface, complementing detailed embroidery. Felt is another popular option because of its ease of use and vibrant color options.
- Adhesives: If the patches need to be easily applied, consider a heat-activated adhesive backing or a peel-and-stick adhesive for non-permanent attachment. These allow patch placement without sewing.
Remember, the quality of these materials directly influences the patch’s final appearance and durability. Adjust these recommendations based on specific technical requirements or environmental conditions such as exposure to harsh elements.
Setting Up Your Embroidery Machine for Patches
To ensure precise patch execution, configuring your embroidery machine correctly is paramount. Here’s a consolidated guide with crucial steps and technical parameters derived from top online resources:
- Hooping the Fabric and Stabilizer: Ensure your chosen fabric and stabilizer are securely hooped. The stabilizer should extend beyond the hoop’s edges to maintain tension and support. A medium-weight cut-away stabilizer is advisable for most designs.
- Selecting the Right Needle: Use an embroidery needle for your fabric type. A size 75/11 or 80/12 needle is often recommended for polyester or rayon threads, facilitating smooth piercing and stitching.
- Thread Tension Adjustment: Proper thread tension is crucial for clean embroidery. Start with the machine’s default tension settings and adjust slightly if needed, typically within a range of 3 to 5 on the dial, depending on the thread and fabric used.
- Design Alignment: Use your machine’s alignment tools to position the design accurately within the hoop area. Centering the design ensures even stitching and prevents misalignment.
- Stitch Density: Adjust stitch density according to your design’s details. Dense designs may require a density setting of 4.0 to 4.5 lines per mm, while less intricate designs might need less.
- Machine Speed: Set your machine’s speed to a moderate range, around 600 to 800 stitches per minute, to prevent distortion and maintain control over fine details.
- Pre-Test the Design: Before starting the actual patch, perform a test stitch on a fabric similar to your final piece. This will help catch any issues with design scaling or color coordination.
By carefully preparing and adjusting your embroidery machine with these guidelines, you can achieve high-quality patches that meet professional standards. Refer to your machine’s manual for specific recommendations tailored to your model.
How do you embed a patch step by step?
- Prepare Your Materials: Gather your fabric, embroidery thread, stabilizer, hoop, and other tools. Ensure your fabric is clean and free of creases.
- Hoop the Fabric: Place the stabilizer under the fabric and secure both in the embroidery hoop. Make sure the fabric is taut but not overstretched to avoid distortion.
- Load the Design: Transfer your selected embroidery design onto the machine. Use the built-in alignment tools to position it correctly on the fabric.
- Perform a Test Stitch: Use a scrap piece of similar fabric to test stitch your design. This confirms that your settings produce the desired outcome.
- Adjust Settings if Needed: Based on the test stitch, make any necessary adjustments to thread tension, stitch density, or speed to ensure optimal results.
- Embroider the Patch: Begin stitching the design onto your fabric in a controlled manner, maintaining a moderate machine speed for precision.
- Finishing Touches: Once completed, carefully unhoop the fabric. Trim any excess stabilizer and fabric, and finish the edges of your patch as desired.
Following these steps, you can embroider a patch that meets your specifications. Remember to consult your embroidery machine’s manual for specific instructions for your model.
Choosing the Right Embroidery Design for Your Patch
When it comes to creating a patch for which your embroidery will be used, several factors must be considered to avoid an aesthetic failure. As a first step, analyze the intended use and what message the patch is supposed to send out, including but not limited to branding and personal. Search for patterns that would suit the embroidery/design intended for the patch, such as colors that would complement the artwork style or the complexity of the designs. Next, consider the fabric and thread used for the patch; this will ensure that the piece is not too complicated and has no threat of ripping or distortion once it has been created. Lastly, search for modern designs and common patterns around the Internet with the help of relevant blogs, forums, or the most popular brands of embroidery machines. Thanks to the constraints imposed by the function of the patch and the nature of the materials available, you will make a nice and attractive embroidery patch.
Hooping Techniques for Patch Embroidery
Hooping is a crucial step in ensuring the quality of your patch embroidery, as it maintains tension and stability throughout the stitching process. Here are some concise answers to the potential questions you might have about hooping techniques, including relevant technical parameters:
- Selecting the Appropriate Hoop Size: Choose a hoop that matches the size of your embroidery design with minimal excess space. This helps maintain tension and prevents fabric movement.
- Preparing the Fabric and Stabilizer: Ensure your fabric and stabilizer are smooth and secure. Iron the fabric if needed to eliminate wrinkles, and use a stabilizer suitable for the fabric type (e.g., tear-away for stable fabrics, cut-away for stretchy materials).
- Aligning the Design: Mark the center and any alignment points on your fabric using fabric-safe tools to ensure the design is positioned accurately within the hoop.
- Achieving Proper Tension: Adjust the hoop screws to achieve uniform tension across the fabric. The fabric should be taut but not overstretched, avoiding puckering during embroidery.
- Double-Checking Placement: Before beginning, do a test stitch or outline on the fabric to double-check that the placement and orientation are correct.
By following these techniques with attention to the technical details, you will enhance the precision and finish of your embroidered patches, minimize errors, and achieve professional results.
Executing the Satin Stitch for Patches
The satin stitch is a fundamental technique in patch embroidery that requires precision and care to achieve a smooth, professional finish. Below are concise guidelines based on insights from top online sources, offering an amalgamation of best practices and critical technical parameters:
- Needle and Thread Selection: Use an embroidery needle suited for the fabric and select a thread thickness that complements the design without overpowering it. A 40-weight polyester or rayon thread is commonly recommended for its sheen and durability.
- Setting Stitch Density and Length: For a satin stitch, maintain a stitch density that provides full coverage with a typical width of 3 to 5mm, ensuring no fabric shows through. Adjust stitch length to be short enough to prevent snagging but long sufficient for smooth coverage—around 0.4 to 0.6mm is ideal for most materials.
- Stabilizer Options: Choose a stabilizer based on fabric type; cut-away stabilizers work well for stretchy materials, while tear-away is suitable for stable fabrics to minimize distortion.
- Tension Adjustments: Set machine tension to accommodate the fabric and thread and prevent buckling. Too much stress can cause puckering, while too little may result in loose stitches.
- Stitch Direction Techniques: To maintain uniformity and reduce bunching, stitch in consistent directions following the natural grain of the fabric whenever possible. Avoid backstitching within the satin stitch area, as it can create bulges.
By adhering to these guidelines and focusing on technical details, you can achieve satin stitches that add quality and refinement to your patches, ensuring a polished and durable finish.
How to Digitize a Patch Design for Embroidery?
Patches are created using embroidery machines. Several procedures should be followed to realize the desired design and achieve high-quality output. As a first step, identify a program compatible with your embroidery machine’s files and download the application. Copy or design your patch on the software, making sure the size of the materials and shape of the patch are visible and appropriate.
Last, outline the stitch types and the order in which they will be used. Use satin stitches for outlines; the rest can use fill stitches for larger areas. Underlay stitching ensures fabric constancy and that the fabric will not collapse. Work out proper stitch density which will allow proper coverage and the area to remain flexible, pick thread colours that will complement what the design has.
Examine the completed work’s external appearance by examining its virtual three-dimensional form. This will help you discern parts that have been poorly done and areas that need improvement. After everything has been put in order, save the work in a format that fits your embroidery machine. Before production begins, test the stitch using similar fabric to assess how practical the design is.
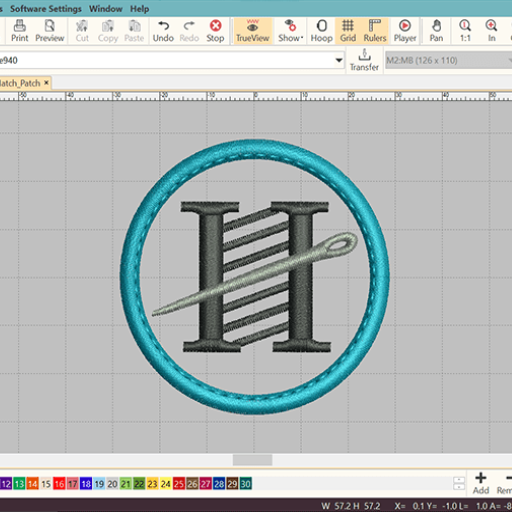
Introduction to Embroidery Digitizing Software
Embroidery digitizing software is essential because it illustrates how an embroidery design looks to the machines. Among the best-selling embroidery software products like Wilcom, Hatch, and Brother – many come with user-friendly design software that allows easy editing, font design, and file organization. The programs allow images to be brought in and stitched, and then, each design component, such as the stitch type, stitch direction, and stitch density, can be altered. Remember that a program needs to satisfy the requirements of the embroidery machine and the skills possessed by its user. Otherwise, a good, easy-to-use program is important to bring more value to embroidery projects and achieve an impressive, professional finish.
Steps to Digitize Your Patch Effectively
- Choose the Right Software: Select embroidery digitizing software compatible with your machine and suited to your skill level. Popular choices include Wilcom, Hatch, and Brother.
- Import and Prepare Your Design: Import your image into the software. Clean up any unwanted elements and adjust the size to fit your patch specifications.
- Select Stitch Types: Decide on the appropriate stitch types for different parts of the design:
- Satin Stitches: Use for outlines and borders.
- Fill Stitches: Ideal for larger areas that need more coverage.
- Run Stitches: Suitable for details and connecting areas.
- Add Underlay Stitches: Incorporate an underlay to provide a foundation for the top stitches, offering support and decreasing the chance of distortion during stitching.
- Adjust Stitch Density: Set the density to balance coverage and flexibility. Use high density for bold areas and lower density for a lighter touch.
- Optimize Stitch Direction: Consider the tension and appearance; altering stitch direction can enhance the design’s visual appeal and performance on different fabrics.
- Select Thread Colors: Match thread colors with your design to create a cohesive look. Refer to a color chart to ensure precision.
- Preview and Simulate: Use the software’s 3D view to preview the design, allowing you to identify and address any issues before starting production.
- Save and Export: Ensure the final design is in a compatible file format for your embroidery machine.
- Test the Design: Perform a test stitch on a similar fabric to verify the design’s effectiveness and make necessary adjustments to technical parameters. Adjust according to the observed results to reach optimal output quality.
Common Digitizing Mistakes to Avoid
- Inadequate Underlay: Neglecting an appropriate underlay stitch can lead to fabric puckering and poor design quality. Ensure you use open underlay stitches for lightweight fabrics and dense underlay stitches for heavier textiles.
- Improper Stitch Density: Excessive stitch density can cause thread breakage and fabric distortion, while too little density might result in a washed-out look. A standard density range for fill stitches is 0.4 to 0.5 millimeters, adjusting as needed based on fabric type.
- Ignoring Push and Pull Compensation: Failing to account for fabric movement can result in misaligned stitches. Incorporate at least 0.2mm of compensation into your design files to maintain alignment.
- Poor Stitch Direction: Inconsistent stitch direction can cause tension issues and affect the overall appearance. Use perpendicular stitch angles in adjacent areas to minimize distortion.
- Unsuitable Thread Selection: Using the wrong thread type or color can detract from your design. Choose threads based on material compatibility and ensure colors match the design plan.
- Lack of Testing: Skipping the test stitch process can lead to unexpected results. Always conduct a test on similar fabric to catch issues like thread tension or design misalignment.
Recognizing and addressing these common errors can enhance your embroidery digitizing results and ensure your designs are visually appealing and technically sound.
What Are Tips for Making Custom Embroidered Patches?

- Design Simplicity: Keep your design simple to ensure all details are represented. Small lettering or intricate patterns may not translate well into embroidery.
- Patch Shape and Size: Select an appropriate shape and size for your patch. Consider its intended use and placement, as this will inform your choices.
- Color Palette: Choose a limited color palette to reduce production costs and ensure a clean, cohesive look. Use contrasting colors for elements that need to stand out.
- Fabric Selection: Choose a base fabric that complements your design and suits the patch’s purpose. Popular options include twill, felt, and cotton.
- Border Type: Decide whether a merrowed border or a heat-cut edge best suits your patch. Merrowed borders provide a raised edge, while heat-cut edges allow for more intricate shapes.
- Backing Options: Consider different backing types, such as iron-on, adhesive, or Velcro, based on your application’s ease and durability requirements.
- Prototyping: Create a prototype to test the design on fabric. This allows you to catch potential issues and make necessary adjustments before production.
Following these tips ensures your custom embroidered patches are high-quality and meet your design expectations.
Designing Custom Patches That Stand Out
Several approaches are worth attention to when creating original embroidered patches. First, a patch idea with a punchy design can automatically make it stand out. Ensure that imagery appropriate for the brand or message is used in a revelatory manner. Besides, suitable materials and threads can also enhance the patch aesthetics. Differentiating your design from standard solutions can be done by applying exciting shapes, sizes, and finishes. Use bunny ears or modern twists like metallic or glow-in-the-dark threads for more depth. As a final touch, ensure that your design receives high-quality and professional digitization so that the final product is unique and well-looking. Your patches will couple the creativity with functional design elements and will likely draw attention and make the intended impact.
Using a Commercial Embroidery Machine
When using a commercial embroidery machine, several vital technical parameters should be considered to ensure accuracy and quality in your designs:
- Machine Selection: Choose an embroidery machine that supports the complexity of your designs. High-end machines often offer multiple needle heads and advanced features such as automatic threading and color changes.
- Stitch Density: Determine the appropriate stitch density, typically measured in stitches per inch (SPI). A SPI of 11-13 is common for most designs, but intricate designs may require adjustments to prevent fabric puckering.
- Hoop Size: Select a hoop size that accommodates your patch dimensions, allowing enough room for stabilization without excessive fabric movement.
- Thread Tension: Properly adjust thread tension to avoid breaks and ensure consistent stitching. A balanced tension prevents loops and maintains thread integrity.
- Speed Settings: Set the machine speed based on design complexity and fabric type. For dense designs or delicate materials, a slower speed, typically around 500-800 stitches per minute, often yields the best results.
- Backing and Stabilizer Choice: Use an appropriate stabilizer based on fabric type and design density. Common choices include cutaway, tearaway, or water-soluble stabilizers.
- Digital File Format: Ensure the embroidery design is in a compatible file format, such as DST or PES, which accurately translates the design to machine instructions.
By understanding these parameters and adjusting them according to your project’s specific needs, you can maximize the performance of your commercial embroidery machine and create high-quality custom patches.
Ironing Techniques for Iron-On Patches
Applying iron-on patches efficiently requires the proper technique to ensure they adhere securely and maintain their appearance. Here are the essential steps and technical parameters for ironing on patches:
- Preparation: Place the garment on a flat, heat-resistant surface like an ironing board. Ensure the area where the patch will be applied is clean and creased-free.
- Heat Setting: Preheat your iron to the appropriate temperature for the fabric type, typically a medium to high setting (around 270-300°F or 130-150°C) without steam. Using steam can prevent the patch from adhering correctly.
- Placement and Covering: Position the patch on the garment as desired. Cover the patch with a thin cloth or a silicone ironing sheet to protect it from direct heat and potential scorch marks.
- Ironing Technique: Press the iron over the patch with steady pressure for 20-30 seconds, covering all edges. Avoid moving the iron back and forth.
- Cooling: Allow the patch to cool for a few minutes before handling the garment. This cooling process helps set the adhesive firmly onto the fabric.
- Final Check: Once cooled, check the edges of the patch. If they are lifting, reapply the iron for another 10 seconds with the protective cloth.
Following these steps should result in a well-adhered patch that enhances the garment’s visual appeal and durability.
How to Attach and Use Your Patch?
To properly utilize and attach your patch, first carry out the ironing techniques described earlier on this page for proper adherence. Following the placement of the patch, check one more time if its edges have lifted and require iron for a short shot to ensure that the patch stays on firmly. Your patch, once applied, is suitable for washing the garment; however, it is recommended to do so in the cold cycle and place the garment inside out before washing so as not to wear out the patch. Steer clear of direct heat or wash cycles high in temperature, which may compromise the glue. Treat your patched fabric cautiously when donning it to avoid tangling or peeling the patch. This ensures that for a long time, your patch stays well integrated into the garment and looks attractive at the same time.
Methods to Attach Embroidered Patches
Attaching embroidered patches can be done using several efficient and reliable methods, ensuring a solid and lasting bond with your garment. Here are three popular techniques drawn from authoritative sources:
- Iron-On Method: This is one of the simplest methods for attaching patches and requires minimal tools. Preheat your garment to remove any moisture. Place the patch in the desired position and cover it with a thin cloth. Press a hot iron on medium heat over the patch for 20-30 seconds, then let it cool for a secure hold.
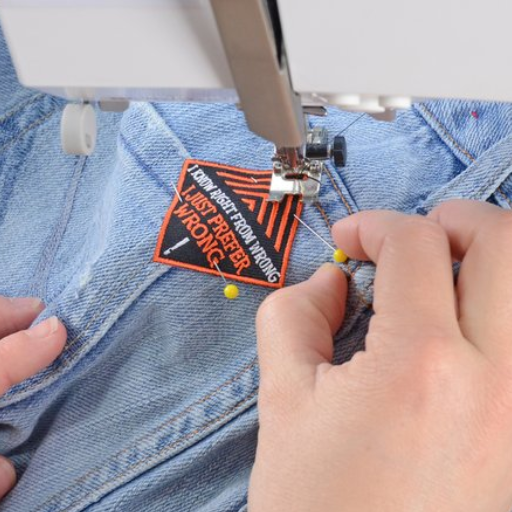
- Sew-On Method: Sewing is recommended for a more permanent attachment. Use a needle and thread that match the patch’s border. Center the patch on the garment and sew along the edges with a straight or zigzag stitch. This method ensures durability, especially for frequently washed items.
- Adhesive Backing (Fabric Glue): This method suits items that cannot withstand heat. Apply fabric adhesive to the back of the patch, press firmly onto the garment, and apply weight or pressure for several hours to allow the glue to set. This method is quick and mess-free but should be used carefully to avoid residue.
Each method varies in strength and durability, so choose based on the garment’s material and intended use. This versatility ensures that your embroidered patches are securely and neatly attached, whether for fashion or functionality.
Creating Iron-On Patches at Home
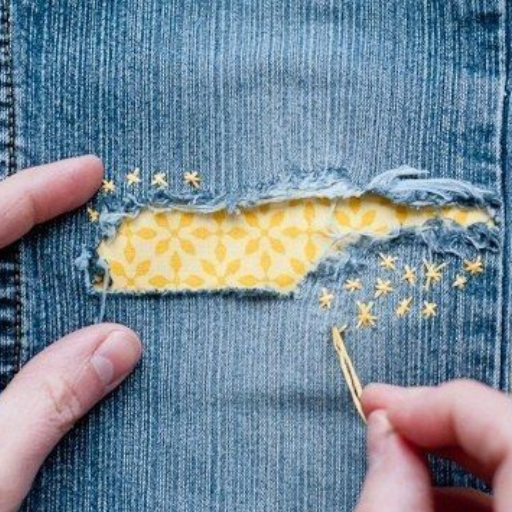
Creating iron-on patches at home is an enjoyable and creative process that allows you to personalize clothing with unique designs. You’ll need a few essential materials: an embroidery machine or needle and thread for hand-stitching, a piece of cotton fabric, an iron-on adhesive, scissors, and an iron. Here’s a concise guide to crafting your iron-on patches:
- Design and Embroider: Begin by sketching your patch design on paper. Once satisfied, transfer it onto your cotton fabric using a water-soluble marker. Embroider the design using an embroidery machine or by hand with a needle and thread, ensuring even and tight stitching.
- Cutting the Patch: Cut the patch into your desired shape once embroidered, leaving a small border around the stitches to prevent fraying. Use sharp scissors for clean, precise edges.
- Applying Iron-On Adhesive: Cut a piece of iron-on adhesive slightly larger than your patch. Place the adhesive on the patch’s back, glue-side down, and press with a warm iron (without steam) for 10 seconds to secure it. Allow it to cool before handling.
- Attaching the Patch: Preheat the garment to remove moisture and apply the patch. Position the patch, cover it with a thin cloth, and press with a hot iron on medium heat for 20-30 seconds. Let the patch cool to ensure it adheres properly.
Following these steps, you can create durable iron-on patches that maintain appearance and adhere firmly to garments. This process can add a personal touch to clothes, accessories, or other fabric items.
Exploring Different Patch Fabrics and Their Uses
When choosing fabrics for iron-on patches, several materials stand out due to their durability, appearance, and application versatility. Below are some popular patch fabrics and their primary uses:
- Cotton Twill: One of the most commonly used materials for patches, cotton twill is valued for its durability and smooth texture. It provides an excellent embroidery surface and is ideal for creating custom patches for uniforms or as decorative elements on backpacks and jackets.
- Felt: Known for its thick texture and variety of vibrant colors, felt is often used for patches that require a softer look. Felt patches are easy to cut and sew, making them famous for DIY projects and crafting.
- Canvas: Canvas is a heavy-duty fabric suitable for patches that require extra strength, such as those used on backpacks or outdoor apparel. Its robust nature ensures it withstands wear and tear and maintains its appearance over time.
- Polyester: Polyester patches are notable for their resistance to fading, shrinking, and wrinkling. They are often used for patches exposed to outdoor conditions, making them an excellent choice for sportswear or military gear.
- Leather: Leather patches are perfect for a luxurious and distinct look. They can be embossed or embroidered and are used on high-end apparel, accessories, or products that require a premium finish.
Indeed, every kind of textile has distinct characteristics that make it appropriate for its purpose. It is essential to know the technical details, including the material’s weight, texture, and strength, before choosing any for the project. For instance, most cotton twill’s weight is 200 – 300 gsm, which is an excellent material to attach embroidery. On the other hand, the synthetic nature of polyester guarantees durability and better color fastness. With the right fabric choice, one can create good patches and perfectly serve their purpose on clothes and other accessories.
References
Frequently Asked Questions (FAQ)
Q: What is the first step in making patches on your embroidery machine?
A: The first step in creating patches on your embroidery machine is to set it up with the correct thread and stabilizer. This involves choosing the suitable patch material and securing it in the embroidery hoop.
Q: How do you choose the suitable patch material for machine embroidery?
A: Selecting the right patch material is crucial. Patch twill is commonly used due to its durability and smooth surface. When choosing the material, it’s also important to consider the design and purpose of the patch.
Q: Can you explain the embroidery process for making a patch?
A: The embroidery process involves stitching the design onto the patch material using your machine. This includes sewing the patch outline, filling in the design, and finishing with an edge stitch like a satin or merrow edge.
Q: How do you make an iron-on patch with your embroidery machine?
A: To make an iron-on patch, you’ll need to add a heat-activated adhesive backing to the embroidered patch. After completing the embroidery, apply the adhesive according to the manufacturer’s instructions before using it as an iron-on patch.
Q: Are there any tutorials available to help me learn how to make embroidered patches?
A: Many online resources and patch embroidery tutorials are available that go over how to make patches from scratch. These tutorials often include step-by-step instructions and video demonstrations.
Q: What type of embroidery equipment do I need to make patches?
A: In addition to an embroidery machine, you’ll need embroidery thread, stabilizers, patch material, and potentially a merrow machine to finish the edges. Each piece of equipment ensures the quality and durability of your patches.
Q: How can I make a patch without using a Merrow machine?
A: If you don’t have a Merrow machine, you can finish the edge of your patch with a satin stitch using your embroidery machine. This provides a clean and professional look, though it may not be as durable as a merrowed edge.
Q: Can I create free patch designs using my embroidery machine?
A: You can design your patches using embroidery software that digitizes patterns. Many embroidery machines available today support custom designs, enabling you to make unique and personalized patches.
Q: How do I attach a completed patch onto the fabric?
A: You can sew the patch onto fabric using a sewing machine or hand. Alternatively, if it’s an iron-on patch, you can simply heat it and press it onto the desired fabric following the adhesive instructions.
Q: What are the benefits of starting an embroidery business focused on patches?
A: An embroidery business specializing in patches offers creative freedom, the potential for high-profit margins, and a broad customer base. Patches are versatile and in demand, making them a lucrative niche for people who want to make various custom designs.