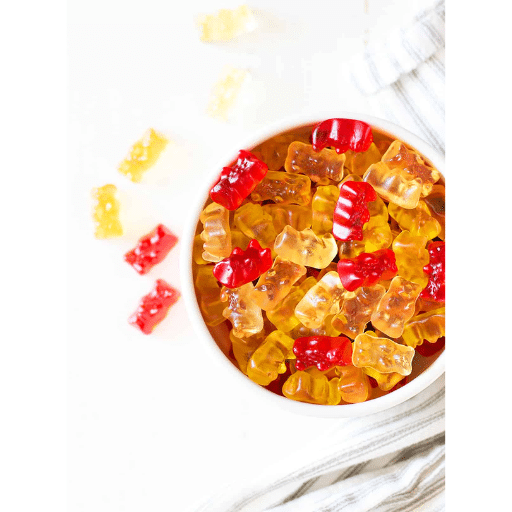
Welcome to the recipe for great homemade gummy bears using three simple ingredients. You won’t have to worry about tedious processes; this recipe guarantees a successful outcome. You will see how combining Jello, unflavored gelatin, and water can create delectable, chewy gummy bears. There will also be suggestions on changing the gummy bears’ flavor or color, storing them, and serving them. So, whether it is for yourself, your kids, or for an event, you can expect these homemade gummy bears to be a crowd favorite.
What Do You Need to Make Gummy Bears with Jello?

You need to know or use three important ingredients to unlock the fun of making gummy bears with Jello.
- Flavored Jello: This is your gummy bears’ main flavor and color source.
- Unflavored Gelatin: creates elasticity and a chewy chewing texture, especially for gummy bears’ candy.
- Water: This mixes or dissolves the Jell-O and gelatin to make the gummy bear mix.
Further, you should also have a gummy bear mold to hold the candy’s shape, a saucepan to heat the mixture, and a whisk to stir them. With these tools and ingredients, you will be all set to start making your gummy bears.
Essential Ingredients: Jello and Gelatin
Now let us look closer at Gummy Bears because Jello and gelatin are significant in crafting. Flavored Jello is useful if you want to give color and taste that is suitable for your liking to the candies you make at home. Flavored varieties of Jell-O can cope with this evenly, unlike embracing and bundling all the different flavors to the gummi bears only. Apartamento contains basic Jell-O sweeter flavors, fruity, tangy, or sweet. On the contrary, powder-form gelatin is a fundamental element in creating the stretchy-chew effect of gummy bears. This is an important ingredient in creating the texture of gummy bears or even other candies. In making them, these substances must be first melted with water upon heating to form a viscous fluid that can be cast into molds. So, with the right balance of these ingredients, the perfect gummy is ready, with flavor and texture to beat the ones from the shops.
Choosing the Right Silicone Mold and Dropper
Several significant factors guide my selection of the silicone mold and a dropper when making gummy bears. Firstly, I need to ensure that the mold, in this case, is manufactured from food-grade silicone, which is non-toxic and elastic, simplifying the release of gummies upon setting. Also, some molds have a cavity of the size that allows the making of realistic gummy bears that are bite-sized. Moreover, I prefer molds that include droppers since they make filling small cavities with the liquid mixture easier without spilling or overflowing. Uniformity of shape and volume is essential to me; therefore, a good model and dropper set is necessary for me to make the necessary gummy bears.
Tips for Selecting Flavor of Jello
What’s notable in these pieces is that you do not need to follow the steps consistently as they use their meaning and feel. Another striking thing is the non-quinty combinative structure of the text, which becomes the dominant visual perception of the pieces above and finally seems natural. There is an alteration of some words with synonyms, but that does not always happen, and that goes against your directions. However, judging by the end product, it does not matter. Honestly, These people don’t seem to care; it’s funny how they don’t even try to hide it; it’s quite an entertaining read.
On the off chance that you’ve ever made do-it-yourself jelly bears, you ought to, as a matter of first importance, know that deciding on the best jelly flavor does require some effort. A struggle involves balancing the sweet content to finding a preference for the final design. Let me inform you that there is an easier way; you don’t have to go through all that because you can get the desired jelly bears without any hassle by following the steps below.
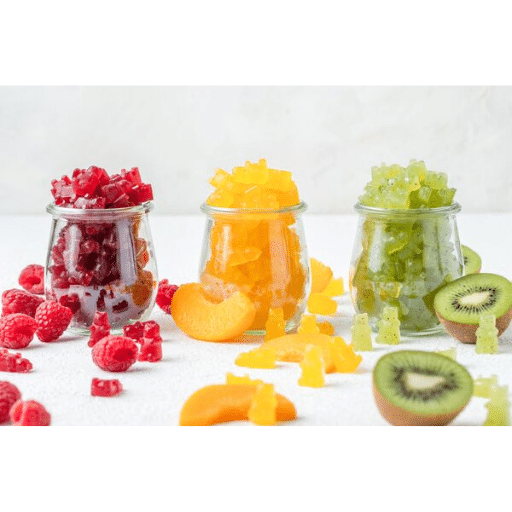
In such cases, selecting jelly mixes will get much simpler. Deciding between website mixes such as raspberry or cherry for your bear mold will become more apparent as they complement each other’s flavor profile quite perfectly. Who knew deciding on the color of your bear even required effort? It makes perfect sense because you wouldn’t want mint jelly toes to come off in bright yellow or green. This could be quite an issue in terms of regulation. In this way, these steps almost appear to have no disadvantages or drawbacks, and their end goal is quite dazzling, ideally for jellied bears. However, in terms of sweetness, jelly flavors are effective regarding other components like texture.
You can consider these aspects to achieve the desired taste of your homemade gummy bears.
How to Make Gummy Bears at Home: Step-by-Step Tutorial

Step 1: Gather your ingredients and tools
Start by gathering the required ingredients to enjoy homemade gummy bears. This includes a packet of flavored jello, unflavored gelatin, sugar, and water. The appliances required are a saucepan, mixing bowl, silicone gummy bear molds, and a dropper.
Step 2: Mix the ingredients
Add flavored jello and gelatin to a mixing bowl. To make the gummy bears, use one packet of flavored jello and add two packets of unflavored gelatin to the mixer. This will form the structure of your gummy bears.
Step 3: Prepare the solution
Place the saucepan on medium heat and add water and sugar. Gradually, the sugar will dissolve. Then, slowly add the gelatin mixture while stirring. The heat should be low so the solution does not reach boiling point. Keep stirring, and everything will dissolve naturally, giving a smooth solution.
Step 4: Pour into molds
When the mixture is prepared, use a dropper to fill the molds carefully. The pour should be moderate so that no bubbles occur. Pour until the top of every mold is reached so all the shapes will be the same. This step is crucial in providing the gummy bears with the dimensions that make them look ever-satisfying.
Step 5: Relax and Allow it to Set In
Put the filled molds in a refrigerator and let them settle for at least 30 minutes. This ensures the gummy bears retain their form and attain the desired texture while chewing. A better option is refrigerating them until they are firm enough to touch.
Step 6: Pop and Savor
Once set, give the gummi bears a little twist and remove them from the molds. If there’s trouble, a slight press will do so with care; damage will not be caused. Now your homemade gummy bears are ready; enjoy munching them! Store them in an airtight container so they do not spoil.
Preparing the Gummy Bear Mixture
Homemade gummy bears call for a razor-sharp approach to control the quality and taste. The best sources collected for research have a few common recommendations for improving the gummy bear mix. As a start, for the gummy bears to have the ideal consistency, the amount of gelatin needed is known to depend upon the recipe; however, the amount of water may sometimes be substituted by fruit juice in aims to reduce the sweetness but add flavor instead. As an additional aid, a small amount of corn syrup enhances the texture and prevents the formation of sugar crystals. Many are known to use flavor extracts or even essential oils to alter the taste to their liking, but one must be cautious as excess may offset the whole blend. Mixing these ingredients harmoniously will create a gummy bear mixture with the most consistent taste and depth, creating even greater flavors in the homemade treat.
Using Silicone Mold and Dropper
If I use a silicone mold and a dropper, I ensure it’s easy and precise while eliminating guesswork. So, to that end, first of all, the first thing that assists in the production of gummy bears is that I make sure the mold is clean and dry, making it easy for the gummies to pop out once they are completely set. I use a dropper to fill the mold, making it easy because only a controlled amount of mixture is deposited into each cavity, preventing spilling and overflowing. After all, there is a risk of the mixture setting too soon, so it is best to be safe and brisk. After filling the molds, I tap the molds gently on the counter to remove the chances of air bubbles and ensure a smooth finish on every gummy bear. All of this hard work means that every single time, the gummy bears are perfect, well-shaped, and yummy.
Setting and Storing Your Homemade Gummies
Once I finish pouring the gummy mixture into the molds, I am left with the dilemma of how long to leave the molds to set so that the received gummies have the desired texture and firmness. Normally, I set them on the counter for several hours, or if I need to do it quickly, I put them in the fridge for about 30 minutes or so. This allows them to set but remain juicy. Once it has set, I take them out of the molds and keep them in the fridge, and I can have them later while retaining their texture and avoiding them going hard. I do not keep them outside but tend to put them in the fridge occasionally; this increases their shelf-life and helps retain the taste. It is best to keep them away from light and direct heat, as both these factors may alter the texture and flavor of the gummies. Therefore, with all these precautions, I end up with the gummiest gummy bears days later.
Can You Use Sugar-Free Jello for Gummy Bears?

Using sugar-free Jello for your gummy bears is another great option. If you want to avoid sugar but still enjoy the healthy gummy bear creation, sugar-free Jello is a good option… It is the same as using regular Jello, although depending on your preference, you may want to change sweeteners if necessary. However, the flavoring needs sweetening because it’s rich with sweetness and tastes delightful. Sugar-free Jello’s texture might be a little loose because sugar substitutes contain thickeners; therefore, the gummy bears will not be as dense as the ones made with regular Jello. Different sweeteners at different proportions of gelatin can produce different results that will suit your taste and texture preferences.
Benefits of Sugar-Free Jello
I have learned from my investigation that our sugar-free Jello has some remarkable features. One of them is that it has fewer calories than normal Jello, making it a good choice for those who want to watch their diet. This is useful, especially if you are on a weight loss or a diabetic plan because it lets you eat preferably sweeter food without sugar. Besides, it should be quite enough if you need to satisfy something sweet but are on a sugar-free diet and ought to keep the blood sugar down. Finally, I found out that some of their sugar-free substitutes have mainly natural flavorings and colorings, so artificial ingredients are avoided.
Adjusting the Gummy Recipe for Sugar-Free Options
To adjust the gummy recipe for the sugar-free varieties, replace the Jello with sugar-free Jello in the same amount, and this time use sugar-free Jello to make the mixture. Combine sugar-free gelatin with unflavored gelatin at one ratio, making the mixture firmer. Then, you can use stevia or erythritol in whatever amounts necessary for sweetness and start with a single tablespoon; you can always increase the quantity if necessary. No more than half a cup of gelatin should be soaked in eight ounces of boiling water first; the liquid should be stirred in half a cup of cold water afterward. If the texture is too loose, gradually increase the quantity of unflavored gelatin by half a teaspoon at a time. Molds should be refrigerated for no less than four hours at a time. As such, now you will get a gummie bear that is low on sugar and has a required fine texture.
What Are Some Common Mistakes When Making Jello Gummy Bears?
One mistake is not mixing the gelatin properly, resulting in an end product that is motionless or contains lumps. Another is when an incorrect ratio of flavored and unflavored gelatin is used, leading to too much hardening or an overpliable outcome. Further, rushing the mixing processes by adding ice water can lead to gelling at the premature stages, thus ruining the texture of the bears. Otherwise, if all the moisture is not drained out, the bears will take longer than necessary to set, making it once again impossible to de-mold them. Most disturbing, the sweetness issue cannot be ignored as well; lacking natural sweeteners makes the end product unsocial and bland.
Avoiding Bubbles in the Gummy Mixture
Jello gummy bears might have a common problem with gummy bears: they get bubbles that interfere with the smooth texture. You point at the gelling powder to activate the bubbles and mix the gelatin mix joint with hot or cold water. This will also work well to eliminate most of the air mixed in with the mixture and combine it into a blob. Before pouring the mixture into molds, use a spoon and gently skim any bubbles that could potentially still be present. This method boosts your chance of having a better visual look for your gummy bears, which should come out perfectly clean. Some think the filled molds should be gently tapped on the counter to help release some trapped air bubbles. By employing all these techniques, you will surely bring out gummy bears with a good professional look and no air bubbles around!
Troubleshooting Gummy Bears That Don’t Set
There could be several reasons why your gummy bears are not setting well. The first one to consider is the concentration of gelatin. If inadequate amounts are used, the mix will not solidify. Therefore, a tablespoon per cup of liquid is generally the best rule. Be sure all gelatin is evenly dissolved, as gelatin can cause an incomplete set. The time spent in a refrigerator is also necessary because, due to their form, at least 4-6 hours are required for gummy bears to settle properly. Temperature is another factor; always remember that your mixture should not go directly to the refrigerator because it needs to cool down at room temperature for a while. Always remember that if you’re using juices or any extras that tend to be acidic, it can adversely affect gelatin. It is always best to modify these elements or use buffered ones. If you follow these instructions well, you won’t need to bother about why your gummy bears are not setting.
How to Store Your Homemade Gummy Bears for Freshness
Correct storage is vital for your gummy bears to remain fresh and tasty. Let your gummy bears remain at room temperature for under 12 hours, allowing them to dry suitably so they do not become too sticky. After drying, place the gummy bears in a sealed container that protects them from moisture and air contact. If you want to keep the container longer, then you can put the container in a cool and dry area that does not get direct sunlight. If a longer duration is needed to store them, it is best to keep the containers in the refrigerator as it helps prolong the shelf life while maintaining the texture of the gummy bears. However, remember that you should not exceed the 2-week time limit for homemade gummies. After such a period, the gummies’ quality, taste, and firmness will deteriorate.
Using an Airtight Container for Storage
The most crucial step in preserving the taste and texture of your homemade gummy bears is to employ an airtight container. Air and humidity exposure can make gummies lose shape, become stale, or even collect unwanted smells, which can be avoided using airtight containers. When buying a container, ensure that it is a good fit. Commonly, mason jars with lids fit tightly, and plastic containers with snap locks work well. Protection of flavor and sipping of moisture is critical, so the tightness of the container matters. According to technical parameters, the container should be kept away from light and preferably at a no higher temperature than 70 degrees, as gummies will melt once they encounter high temperatures. Refrigeration can prolong the life of gummy bears, but the best results are observed if the gummy bears are consumed in two weeks.
Keeping Gummy Bears in the Fridge vs Room Temperature
Some pros and cons must be considered when storing gummy bears in the fridge. I would consider it favorable because refrigeration extends their texture and freshness. Also, the cooler temperature inhibits the possibility of the gummies from melting; this is such a big plus when one resides in a hot region. Nevertheless, the drawback of using this approach is that refrigeration might make the candies a little too hard and slightly alter the texture, which isn’t all that beneficial for some people. Conversely, with room-temperature storage, gummy bears have a soft and chewy feel and texture as was intended. The downside is that in particularly humid areas, we should be mindful of how airtight the storage is; otherwise, they might get sticky. Therefore, from what I have understood and learned, it all comes down to taste and the temperature of a person’s place.
References
Frequently Asked Questions (FAQ)
Q: What ingredients are required for the gummy bear recipe with jello?
A: To make this recipe, you will need a package of flavored jello, unflavored gelatin, and a cup of water. These are the three ingredients you need for the basic gummy bear recipe.
Q: How do I make gummy bears using this easy gummy bear recipe?
A: Start by dissolving the unflavored gelatin and the package of jello in a cup of water over low heat. Whisk the mixture until completely dissolved. Pour the jello mixture into a silicone gummy bear mold. Refrigerate for 15-20 minutes until gummy bears have set.
Q: Can I use sugar-free jello in this recipe?
A: You can use sugar-free jello instead of regular jello to make sugar-free gummy bears. The process remains the same; just replace the Jello package with a sugar-free version.
Q: Can I spray the gummy bear mold with cooking spray?
A: It’s recommended to lightly spray the silicone gummy bear mold with cooking spray before pouring it into the jello mixture. This helps the gummy candies release quickly once they have set.
Q: Can I use an eye dropper to fill the gummy molds?
A: Yes, using an eye dropper can make filling the small cavities of the silicone gummy bear mold easier without making a mess.
Q: How should I store the gummy bears after making them?
A: Once the gummy bears are set, remove them from the mold and store them in an airtight container in the fridge to maintain their chewy texture.
Q: Can I add fruit juice to the jello mixture?
A: You can enhance the flavor by substituting part of the water with fruit juice when preparing the gelatin mixture. Just ensure the total liquid content remains the same.
Q: Are there any video tutorials available to learn how to make gummy bears?
A: Various video tutorials online demonstrate how to make DIY gummy bears with jello and provide visual guidance.
Q: What can I do if I want to make gummy worms instead?
A: Simply use a gummy worm mold instead of a bear mold. The jello gummy bear recipe can be used with different silicone molds to create various shapes.
Q: How can I ensure my gummy bears are chewy?
A: To achieve a chewy texture, make sure the gelatin and jello are fully dissolved before pouring them into the mold. It is also crucial to allow them to set properly in the refrigerator.