Edible crystal candy, known as Kohakutou in Japan, is a delightful confection that captures the essence of glistening gemstones and offers a unique culinary experience. In this blog post, we’ll delve into how to make edible crystals without agar, guiding you through a simple yet dynamic process to create vibrant, jewel-like candies. We’ll explore the necessary ingredients, step-by-step techniques, and tips for adding creative flavors and colors to your creations. Whether you’re making them for a special occasion or simply to enjoy as an indulgent snack, this guide will equip you with the knowledge and skills to master the intricate beauty of Kohakutou candy. Get ready to embark on a delicious journey into the world of edible art, where each piece is a testament to the harmony of taste and aesthetics.
What Are Edible Crystals and How Are They Different From Regular Candy?
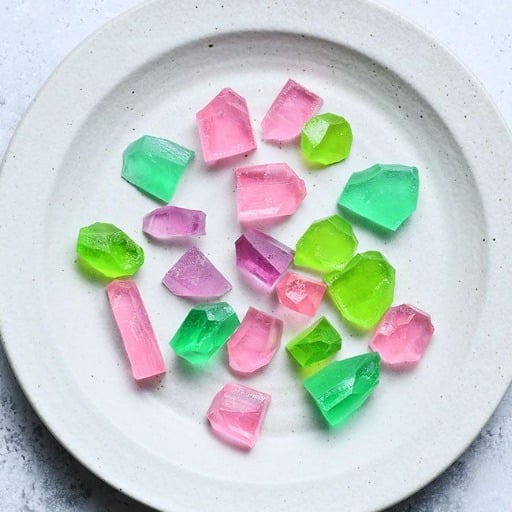
Kohakutou, like other edible crystal candies, is unique and fascinating in many aspects. These confections are not only sweet but also have an appealing look and feel thanks to their semi-transparent features, which resemble the cut surfaces of jewels, unlike ordinary sweets. The making of these candies consists of a peculiar set of ingredients and know-how, resulting in a crystalized crystalline surface enclosing jelly, which is different from the mush allowance experienced with ordinary candies. Additionally, though edible crystals, much like their conventional counterparts, can be flavored, there is a tendency to use natural colorings and flavors first, providing mobility to taste and sight.
Exploring Edible Crystal Candy’s Origins
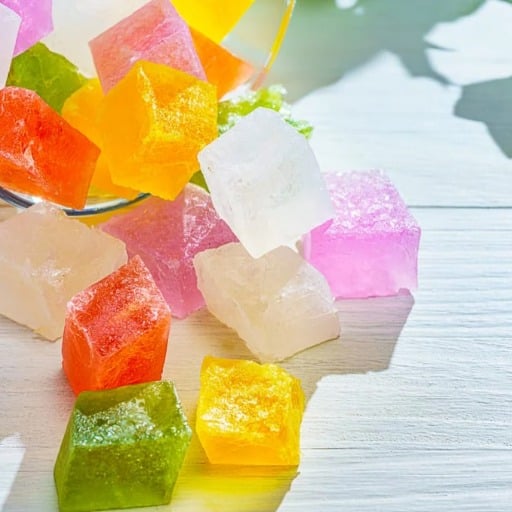
Edible crystal candies are not your absolute regular exotic candy. If you do consider them candies at all, it is quite unfortunate for people who make or eat such candy. They have a certain signature aesthetic and texture, which leads someone to describe the process as more of an art rather than a making of candy. The Japanese edible crystal candy Kohakutou is very eye-catching and quite stunningly beautiful with lowercase t’s on the crystals. The gorgeous jewel-like exterior is followed by the process, which is quite precise with the ingredients and techniques, leaving an adorable crunchy shell with an irresistibly soft jelly-like interior. These delightful hunks packed with flavor are more often than not created through a generous helping of organic ingredients which makes it easier on the eyes and on the tongue. What’s more, each is not simply a mini sweet but a piece of artistic work, which surely makes seeing and biting them both delicious and pleasant. Even the colors are a work of art.
Differences between Kohakutou and Common Candies
So, as I was comparing Kohakutou to common candies, I noticed major differences that set each other apart. For starters, Kohakutou, at least at first sight, is like a magical gem, which, unlike most other sweetened items, is far more textured than a stone. While the rest of the candies are ‘mono-texturing,’ Kohakutou has an outer crunchy layer with a gooey jelly-like inner layer. Taste-wise, it’s rather interesting since most of the candies are artificially flavored; Kohakutou, on the other hand, rolls with natural flavors. Now, in that case, every piece is an off color, a little burst out of colors one would assume to like when painted Dunkin Donuts. Overall, the candy and its looks, along with the variety of textures, certainly have it all as a fun and exciting experience that makes it far more than a classic sweet.
The Function of Agar Agar and What Can Substitute It
In food production, there are different ingredients that are implemented in a product. One of the most critical components of Kohakutou is the inclusion of agar, which comes from red algae due to its gelling properties. This is such a strong ingredient in resolving all the requirements for Kohakutou, which is a gel-filling and vegan product. After considering other options, I noticed that gelatin is frequently used as a replacement, but it is no longer vegetarian. There are some rules to follow when working with agar: melting temperature is around 85°C, which is 185°F, whereas gelation takes place around 32-40 degrees Celsius. This means precision is very important when heating the product so that it matches the desired end texture. Cooking instructions for this ingredient are very important because if not done, the outcome may be different than expected. Different alternatives have different advantages, but they may change the texture of the food or include some non-vegetarian elements.
How to make edible crystals without agar?
Kohakutou will be space-age easier if it works without using agar, and we look forward to using alternative gelling agents. Gelatin, though, would be a great substitute for agar as it allows the recipe to have a similar gel-like texture, so the recipe loses its vegan tag. But to make Kohakutou, with Gelatin first, it should be let to dissolve in hot water immediately, allowing it to fully expand before it is heated. This will help the mixture to achieve the desired level of thickness needed to form the later crystalline structure. It is also critical to get the right ratio of gelatin to liquid proportion, removing the guesswork behind Kohakutou’s texture. Adding more gelatin to the mix makes the end gummy firmer while adding less softens it. Other substitutes can include pectin or konjac, as they also have varying gelling points naturally. It should be noted, however, that using plant-based alternatives does require a period of testing out the circumstances that firm and clear the product, ensuring it meets the traditional Japanese standards of Kohakutou.
Ingredients Needed for a Recipe Without Agar Agar
To make a Kohakutou recipe without using agar, I rely on other gelling agents like gelatin or plant-based alternatives such as pectin or konjac. For a gelatin-based version, I would typically use:
- Gelatin: 1 tablespoon
- Water: 1 cup, divided into warm and cold portions for blooming
- Sugar: 1 cup to create the sweet base
- Flavoring: 1 teaspoon extracts (such as vanilla, strawberry, or any preferred flavor)
- Food Coloring: Drops of your choice to create vibrant hues
- Optional for Vegan Option: Pectin or konjac instead of gelatin, requiring adjustments in ratios
By carefully balancing these ingredients, I can achieve the desired crystalline texture and appearance that defines traditional Kohakutou, all while exploring plant-based inclusivity when needed.
Step-by-Step Guide to Make Edible Crystal Candy
- Prepare the Gelatin Mixture: Start by blooming one tablespoon of gelatin by sprinkling it over 1/2 cup of cold water, allowing it to sit for about 5 minutes until absorbed. Meanwhile, heat the remaining 1/2 cup of water until warm but not boiling.
- Dissolve the Gelatin: Add the bloomed gelatin to the warm water, stirring continuously until fully dissolved. Ensure there are no lumps for a smooth texture.
- Sweeten the Base: Mix in 1 cup of sugar gradually, continuing to stir over low heat until the sugar completely dissolves. The mixture should be smooth and clear without any granulated particles.
- Add Flavor and Color: Incorporate one teaspoon of your desired flavor extract, such as vanilla or strawberry. Enhance the visual appeal by adding a few drops of food coloring and stirring gently to achieve even distribution.
- Pour into Mold: Carefully pour the mixture into an appropriate mold or shallow dish, ensuring even spreading. For best results, use silicone molds as they facilitate easy removal.
- Set the Candy: Allow the candy to set at room temperature for at least 12 hours or until firm to the touch. The gradual setting is crucial to achieve the signature crystalline texture.
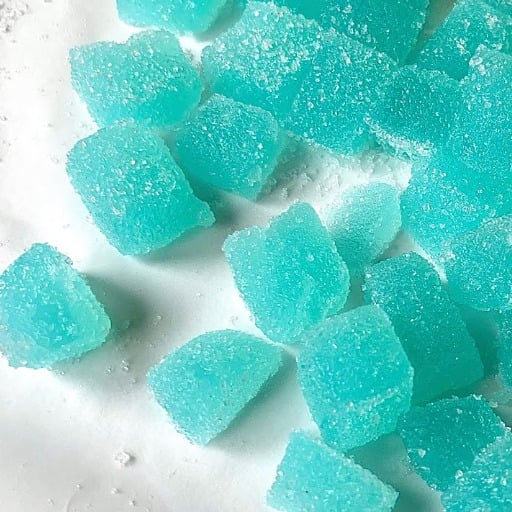
- Cut and Serve: Once set, remove the candy from the mold and cut it into individual pieces resembling crystals. If desired, sprinkle with a small amount of granulated sugar for added texture and shine.
By following these steps, I seamlessly blend creativity with precision, resulting in stunning edible crystals that are as delightful to look at as they are to taste.
Troubleshooting Common Recipe Failures
If I ever end up facing problems with my edible crystal recipe, I make sure to use a previously established structure with the aim of cutting down on my repetitive mistakes or seeking help from an expert. One area that suffers greatly is not achieving the intended consistency for the candy due to gelling issues, where most of the apportioning failure comes mainly from the bad measuring of gelatin content. In its proper accuracy, only one tablespoon should be used for each cup and a half of a liquid mixture of cement firm, which in itself is most crucial.
Another problem could be the appearance of cloudiness in the candy. This usually results from the formation of sugar crystals during the dissolving phase. I prevent this by constantly stirring and ensuring that the sugar has completely dissolved before reaching the upper-temperature limit. Additionally, temperature control is very effective – as long as the temperature is maintained under 230°F, a candy thermometer will work just fine.
Finally, if the crystals do not have any flavor or color, it becomes imperative to check for the strength of the extract or food coloring which was used. Newer extracts will usually make for bolder extracts and a few extra drops of food coloring will help without degrading quality. Checking the expiration dates and shaking them thoroughly before applying may also have favorable effects.
Can You Use Gelatin Instead of Agar in Edible Crystal Recipes?
Yes, it is possible to replace agar in the edible crystal recipes with gelatin, but it has some drawbacks. Gelatin is an animal-derived gel, whereas agar is a vegetable substitute made of seaweed, which means that agar is fit for vegetarian and vegan recipes. When using gelatin remember that it holds differently, for example gelatin gives a softer and more pliable texture while agar gives a firmer set. A different rehydration technique is needed, too. Instead of mixing agar with hot liquid, it is dissolved in cold water and heated instead. It may be okay to alter the amounts to get the consistent texture you wish to because agar usually requires more amount to effectively gel the recipe than gelatin.
Gelatin as a Potential Substitute of Agar Agar
Before adopting gelatin as a replacement for agar in food formulations, I must note several important changes in the making process. First of all, it is not suitable for everyone, especially vegans and vegetarians – which is one of the reasons why I prefer using agar. I notice that gelatin tends to produce a softer set, which can be ideal for certain recipes but may also call for an adjustment if I am looking for the firm set that agar would otherwise provide. Furthermore, instead of boiling it in hot water, I make sure to soak gelatin in cold water for several minutes to prepare it for incorporation into the formulation – in contrast to the inherent characteristic when using agar. In addition, it is also important for me to consider the volume of gelatin that is needed to dissolve – on average about half the weight of agar is necessary, anyway I do my best to balance the portions out so the mixture would come out correctly.
The Use of Gelatin and Its Relation to Taste and Texture
From my experience, gelatin has a distinctly different taste and texture compared to other gelling agents, such as agar, and I have used it in some recipes. Gelatin gives a different gelling effect, making the consistency silky and bondage-free, meaning such effects are appropriate for panna cotta marshmallows and other delicacies because of the way gelatin melts in one’s mouth. Gelatin does not add much flavor by itself, unlike agar, but the essential taste aromas are preserved, so it is really thermally and tastefully multifunctional. However, the final product often ends in an unrealistic texture and taste combination where expectations prevail over the reasonable proportions of ingredients and even the balance of flavors.
Modifying Recipes Calling for Gelatin
In the case of reformulating recipes with five gelatin, I seem to have gotten the consistency and balance in the ingredient ratio exactly right. The idea is to sufficiently bloom gelatin in cold water for between five and ten minutes and then heat it up to dissolve it. It is also very important to observe the ratio, as, on average, one tablespoon of gelatin can gel over around two cups of liquid. Moreover, I have found out that the use of acidic components like lemon oranges tends to decrease the strength of the setting gelatin. Therefore, I sometimes raise the amount of gelatin or use non-acidic gels instead. Furthermore, I avoid using pineapple and kiwi in fresh form as their enzymes can liquefy the gelatin. So, with all such small adjustments I make, I get the right kind of consistency while balancing the requirements of the dish.
What Are the Essential Tips for Making Perfect Crystal Shapes?
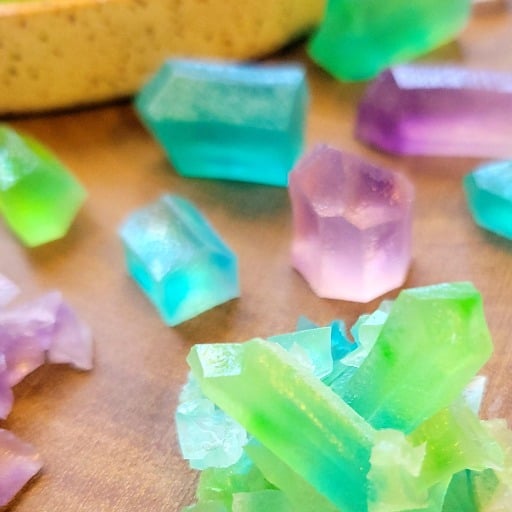
To form flawless crystal structures, an adequate level of precision and patience is needed. First of all, check that your gelatin is well-bloomed and you don’t have any particles of gelatin that failed to dissolve, as those can detract from the transparency and smoothness of the crystals. Any remnants on the molds besides the crystal won’t help; thus, to guarantee clean shapes, all molds used should be clean and dry. Think about the temperature, too; as an example, cooling the gelatin mixture provided in the explanation at a gradual cooling stage helps to avoid the introduction of air bubbles as the smooth texture is obtained. Crystals are also quite brittle, so when removing them from their molds, be careful as well. One also needs to be considerate in bringing in additional substances as they can cause turbidity in the gelatin, which will affect the overall look of the crystal by marring its clarity.
Choosing the Right Molds and Tools
When looking for molds, it is helpful to examine the material and design of the mold, as this can aid in the creation of perfect crystal shapes. Silicone molds are popular due to their pliable design which makes pouring out the jelly into the molds easier without breaking the pieces apart. However, one might also prefer using plastic molds as long as they are of good quality to avoid crystal clouding. Small offset spatulas or a brush might come in handy when trying to remove the air bubbles that have formed on the surface of gelatin. I think it is important to have kitchen scales, and that’s because you need to be precise with your measurements for every ingredient; if you want the crystals to be perfect, things need to be balanced to ensure the best outcome.
How to Cut and Shape Gelatin Like a Crystal
I imagine the general concept involves slicing smoothly while aiming toward the gelatin cutlers, which reminds me of the processes through which spherical balls of ice are created. It probably explains why I feel the urge to tell you that the very first thing you must do to cut gelatin into precise shapes easily is to set it at low temperatures. Just keep in mind that after you do this, sliced gelatin retains its structure much better and will be easier on the cutting edge. I try using a single-edged, seamless, and non-serrated knife that has already been warmed up since it is less sticky when coated with oil. The most common mistake I notice people making in such content is cutting with their hands at the same angle, but I find this is redundant and reinforces looking at forming squares instead. Force should not be used during cuts. Instead, a slicing movement should be employed as a means by which to glide the blade across the gelatin. It is also useful to grease your cutting board or use a nonstick surface, as this reduces any sort of friction over the surface and ensures that the cuts made are smooth and clean while still maintaining the crystal-like appearance of the gelatin.
How to Safely Store Edible Crystals
I use an air-tight container to keep the molds that are edible crystals in perfect condition. The most important control that I pay attention to is the refrigerator to ensure no melting or any distortions occur. Wrapping every crystal in parchment paper is a great way to keep each layer of crystals from sticking to each other. Another thing I tend to do is keep all the molds within a very narrow temperature range as it helps maintain the clearness and terrorization of the molds, and that ideal range is between 37°F to 40°F or three °C to 4°C. To ensure that my edible crystals aren’t disturbed internally, I tend to add a small silica gel packet to the container, and this helps prevent any moisture in the container. Following this regimen helps sustain the edible crystals over longer periods of time and even helps retain their beautiful look and shape.
Where to Discover Videos and Inspiration for Edible Crystal Creations?
The first platform I search for videos and inspiration for edible crystal decorators is YouTube, where amazing creators provide fascinating tips and step-by-step instructions on how to make this impressive candy. Tasty and Nerdy Nummies channels bear many entertaining and easy-to-do edible crystal ideas. Also, Instagram is a good source of ideas through hashtags like #EdibleCrystals or #GelatinArt which features great creations of global fans. Another useful one is Pinterest, which declares it is full of good boards and links to do-it-yourself and professional handiwork. Also, good cooking blogs and sites such as “Serous Eats” or “Epicurious” can help you find new ideas and methods and expand your easter egg crystals-making experience.
Finding New TikTok and Social Media Trends
Finding new TikTok ideas can be a rather fun experience. Simply searching hashtags like #EdibleCrystals or #DIYCrystals is quite enough to find plenty of interesting techniques or even full videos from simple to more complex designs. Engaging short-form content on TikTok that features popular techniques and practices that can be new to me and makes the task engaging in a different manner, such as crafting edible crystals, is a different experience in itself since I have not come across such content before. Moreover, community groups and active culinary experts who share their knowledge, tips, and ideas can be easily found on social media platforms such as Facebook and Twitter. These online communities provide me with the possibility to ask questions and get specific recommendations from more experienced user,s which helps me improve in edible crystal making and expand the boundaries of this art form.
A Look at the Leading Posts, Viral Trends, and What Is Best to Follow
When I look at the top posts of the most popular users and the viral trends, I primarily consider that YouTube, Instagram, and Pinterest, in that order, are the sources that bring up new and interesting ideas in the field of edible crystals. On YouTube, I discover channels with valuable tutorials that give me new ideas for my work. How to succeed on Instagram is no longer an issue because every day, many new magnificent and even exclusive edible art designs are created by talented users and showcased in posts and stories. It does not even require mention that I have it boarded up with an array of well-pinned boards and pins. All of them serve as great sources of inspiration as well as practical guidelines. Each one of the platforms encourages changes to my work in a meaningful way, making sure I am active and interested in different culinary ideas.
Community Feedback and Recipe Variations
I must thank the community for coming up with exciting variations and new perspectives to my edible crystal recipes. There are forums like Reddit and Facebook, and people dedicate their time to them. I get a lot of comments that not only emphasize what needs to be improved but also suggest interesting, unconventional flavors. By working these through discussions, we may also want to note some technical settings: for instance, the ratio of sugar to water, which is used when making the syrup, should ideally be 3 to 1, and the setting of the boiling point, which is around 110 to 230 degrees Fahrenheit to ensure mixing. These details that I learn through the various web forums do not just sharpen my skills, they allow me to take reasonable risks, while mastering the methods needed to produce the same high standard of my work.
References
-
Candy Crystals Recipe without Agar Agar on TikTok – A video guide on making edible crystals without using agar agar.
-
Edible Crystals (Kohakutou Clusters) by Ms Shi and Mr He – This recipe uses fruit juice and sugar to create edible crystals, though it mentions agar agar powder.
-
Kohakutou (Edible Crystal Candy) Recipe on The Spruce Eats – A detailed guide on making Kohakutou, a Japanese crystal candy.
Frequently Asked Questions (FAQ)
Q: What ingredients do I need for a crystal candy recipe without agar?
A: For a crystal candy recipe without agar, you’ll need sugar, water, gelatin instead if agar, food coloring, and flavoring of your choice. You can also add citric acid for a tangy taste.
Q: How do I start trying to make edible crystal candy with gelatin instead of agar?
A: Begin by dissolving sugar in water over low heat. Once dissolved, add gelatin and stir until it’s fully incorporated. Add your desired food coloring and flavoring before pouring the mixture into molds to set.
Q: How long does it take for the crystal candy to set?
A: The crystal candy usually takes about 24 to 48 hours to fully set at room temperature. Ensure it is in a container at room temperature and away from humidity for the best results.
Q: Can I make crystal candy with gelatin instead of agar?
A: Yes, you can make crystal candy with gelatin instead of agar. Gelatin is a great alternative if you’re aiming for a jelly-like texture in your edible crystal candy.
Q: What is the difference between crystal candy made with agar agar and gelatin?
A: Crystal candy made from agar agar tends to be firmer and more brittle, while gelatin gives a softer, more jelly-like texture. Both are delicious, but the choice depends on the texture you prefer.
Q: Can I add citric acid to my crystal candy recipe without agar?
A: Yes, adding citric acid to your crystal candy recipe can give it a tangy flavor, similar to sour candies. Adjust the amount to suit your taste preferences.
Q: Are there any videos or tutorials to help with making crystal candy without agar?
A: Yes, there are many tiktok videos and other online tutorials where you can discover videos related to making crystal candy without agar. These can provide step-by-step guidance and visual aids.