Having a vibrant, healthy flower bed can be pretty demanding, especially when aggressive grass enters and takes over. In flower beds, grass can become a pest much more quickly than lawns: your plants compete for nutrients, water, and space. So if this common gardening bugbear is bothering you, at least you know that many are just as frustrated and, more importantly, effective ways to eliminate this nuisance without inflicting scars on your garden. The following is a walk-through of a few practical, tried-and-tested ways to remove grass from your flower beds, keep the plants safe, and maintain a good look for your garden. You will find everything here, from natural cures to preventive methods, that you need to know to bring into being and always sustain a thriving weedless sanctuary.
How Can I Prepare My Garden for Removing Grass?

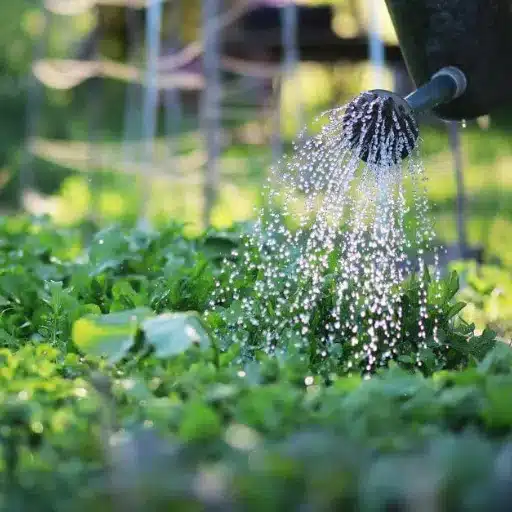
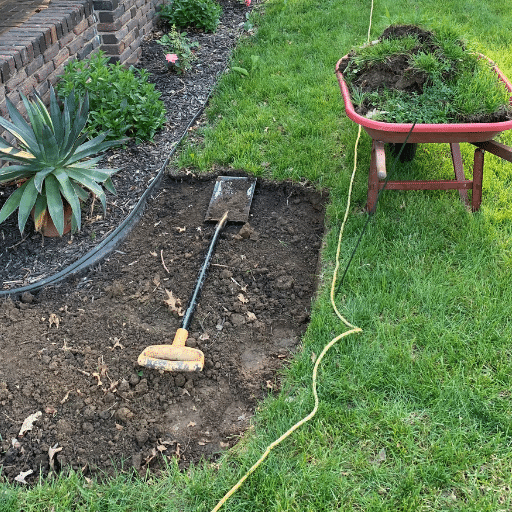
The first and foremost thing to take care of while preparing the garden for grass removal is thoroughly strategizing the entire process. After ascertaining the targeted grass removal areas, mark all the boundaries clearly. Once this is done, sprinkle some water on the soil a day or two before the removal; that will loosen up the grass and make its removal much easier. Take a small spade or a garden fork to lift the grass out gently. If any adjacent plants need to be saved, carefully avoid disturbing them. Finally, get rid of the unwanted grass, but do consider some mulching or application of a weed barrier to keep it from growing back.
Why is it Important to Remove Grass from Flower Beds?
Weed removal from flower beds is crucial for your garden’s health and aesthetics. Grass competes with flowers for water, nutrients, and sunlight. It has been observed that grass may suck up to 80% of all soil nutrients in one shared space, leaving the flowers starved for nourishment to grow and thrive. If not controlled properly, a grass lawn may invade your flower beds, crowding out any chance for ornamental plants to set there.
Grass provides a secondary habitat for pests, fungi, and weeds, which can then spread to flowers nearby and threaten their quality. A grassy area might attract insects such as cutworms or harbor fungal diseases detrimental to ornamental plants. In this way, by removing grasses, one lessens potential threats and improves air circulation and drainage in the flower beds, which is a necessity for healthy root formation.
Besides ensuring no grass enters the flower beds, these gardens remain elegant and geometric. According to recent surveys among gardeners, a landscape with well-maintained flower beds can increase curb appeal by up to 20%, making this practice enormously rewarding for anyone interested in their pleasure or in raising the worth of their property.
What Tools Do I Need to Remove Grass from My Garden?
|
Tool |
Purpose |
Pros |
Cons |
|---|---|---|---|
|
Flat-head shovel |
Manual grass removal |
Inexpensive, precise |
Labor-intensive, time-consuming |
|
Sod cutter |
Cuts and removes sod efficiently |
Fast, clean removal |
Requires rental or purchase, heavy |
|
Rototiller |
Breaks up soil and grass roots |
Quick, retains organic matter |
Disturbs soil, spreads some weeds |
|
Pump sprayer |
Applies herbicides or organic solutions |
Easy application |
Risk of chemical exposure |
|
Plastic sheeting |
Solarizes grass using sunlight |
Eco-friendly, kills weeds |
Time-consuming, weather-dependent |
|
Newspaper/cardboard |
Smothers’ grass for composting |
Adds organic matter, eco-friendly |
Requires planning, takes months |
|
Herbicides |
Kills grass chemically |
Quick results |
Harmful to soil and the environment |
How Do I Protect Garden Plants While Killing Grass?
Protecting garden plants while removing grass requires planning and appropriate techniques to maintain the health and safety of your desired plants. Here are some excellent ways to ensure that your garden is protected while you successfully remove the grass:
1. Use Cardboard or Newspaper as a Protective Layer
Set cardboard or several layers of newspaper around your garden plants before proceeding with any grass-killing method. In doing so, you prevent chemicals or any substances from traveling down to the roots of your plants.
2. Hand Pulling Around Delicate Plants
Grass removal in sensitive areas around plants is best done by hand-pulling. It involves much labor but is the least damaging to any plants nearby.
3. Selective Herbicides
Use herbicides that say they are “plant safe” or selective for grass only and do not harm other vegetation. Always follow directions as stated by the manufacturer and use a shield to prevent overspray.
4. Mulching
Put down a thick layer of organic mulch up to the stems of your garden plants. This will prevent grass from growing, conserve moisture in the soil, and keep the temperature in check.
5. Installation of Edging Materials
Use edging materials such as plastic, metal, or stone to create a physical barrier between grass and plants. This will keep grass from encroaching in your garden and damaging roots during removal operations.
What are Effective Methods to Kill Grass in Flower Beds?
The following methods may be practiced for grass killing in flower beds:
- Multiplying
Cover the grass with a thick layer of mulch or a sheet of black plastic. This will block sunlight, preventing the grass from growing.
- Applying Herbicides
Use an herbicide for grass that will not harm flowers. Follow all instructions on the packaging for an effective and safe application.
- Hand Pulling or Digging
Removing by hand involves pulling out grass, plants, or weeds at gnats or digging with a garden tool. This method is best for small patches.
- Use Boiling Water
Pour boiling water on the grass. This method kills both the grass and its roots through natural means.
By considering and implementing these methods, one can efficiently and elegantly remove grass from flower beds.
Can Herbicide Be Used Safely in Flower Beds?
Yes, herbicides can be used safely in flower beds if applied correctly and carefully. Always follow label instructions, and select herbicides that have been registered for use on landscaped areas or among decorative plants. Here are five key pieces of advice about using herbicides on flower beds safely:
- Select the Right Type of Herbicide
Choose selective herbicides, which kill certain types of weeds while leaving desirable plants intact. These are ideal for use around flowers.
- Application in Calm Weather
Do not apply herbicides during windy conditions, as this might cause the product to drift into your flowers or other nearby plants, causing unwanted damage.
- Put Up Defensive Barriers
Use physical shields or barriers while spraying herbicides to protect flowers and plants from any accidental exposure.
- Avoid Application Rates Different from Those in the Label
Always adhere to the dilution and application rates recommended by the product label. Such adherence guarantees both the safety and effectiveness of the treatment.
- Spot-Treat to Remove Weeds
Do not blanket the entire flower bed with herbicide; try to clean specific weeds through spot treatments to minimize exposure for nearby plants.
When you take these precautions and conscientiously apply the guidelines, you can use herbicides efficiently while saving your flower beds.
How Does Mulch Help in Grass Removal?
Mulching helps in closing down grass by blocking sunlight from forming it, stopping the growth of the grass and, consequently, the weeds, and retaining soil moisture for the surrounding plants.
What is the Process of Smothering Grass?
|
Step |
Key Point |
Description |
|---|---|---|
|
Mow Grass |
Cut grass to the shortest height |
Prepares a flat base for smothering layers |
|
Choose Barrier |
Use newspaper/cardboard as a base |
Blocks sunlight and air to grass |
|
Overlap Layers |
Overlap layers to block all light |
Prevents grass regrowth between gaps |
|
Wet the Barrier |
Water layers to keep them in place |
Improves barrier adherence to the ground |
|
Add Organic Mulch |
Spread 4+ inches of mulch |
Weighs down the barrier, aids decomposition |
|
Wait Several Months |
Allow 2-3 months for composting |
Grass dies and soil improves below the layers |
|
Inspect Progress |
Check if grass is fully decomposed |
Ensure the grass is fully smothered before planting |
|
Plant in Prepared Soil |
Dig through mulch and plant seeds |
Use enriched soil for new plants or garden |
Is Heavy Mulching a Viable Option to Kill Grass?
|
Parameter |
Key Point |
Description |
|---|---|---|
|
Viability |
Effective for killing grass |
Prevents sunlight and suppresses growth |
|
Primary Benefit |
Eco-friendly, soil-enriching |
Adds organic matter and nutrients to soil |
|
Primary Drawback |
Time-intensive |
Grass decomposition takes several months |
|
Materials Needed |
Mulch, newspaper or cardboard |
Creates a layered barrier over grass |
|
Process Step 1 |
Mow grass to the shortest height |
Prepares the surface for mulching |
|
Process Step 2 |
Lay overlapping barriers |
Use a newspaper or a cardboard to block light |
|
Process Step 3 |
Add 4+ inches of mulch |
Ensures complete grass suppression |
|
Process Step 4 |
Wet layers for stability |
Keeps mulch and paper/cardboard in place |
|
Time Required |
2-3 months for grass decomposition |
Depends on conditions like weather |
|
Best for |
Starting new gardens |
Prepares enriched soil for planting |
What Materials are Best for Heavy Mulching?
When it comes to heavy mulching, I tend to go for straw, wood chips, compost, or shredded leaves. They suppress grass well but ensure some disintegration to keep the soil healthy. I favor readily available organic material so that mulching is friendly to the environment and not very expensive. Layering other materials, such as cardboard and newspapers, beneath a good thick mulch further acts as a barrier against weeds while also amending the soil as it decomposes.
How Thick Should the Layer of Mulch Be?
Mulch thickness is significant for efficacy. A suitable balance must be maintained — too thin to suppress grass or retain moisture, or too thick would waterlog and sicken air circulation. The following details specify proper mulch thickness:
- General Grass Suppression: 2 to 4 inches is enough to prevent sunlight from assisting grass growth.
- Moisture Retention: 3 to 4 inches will help maintain soil moisture by limiting evaporation and temperature fluctuations.
- Weed Control: Four to six inches provides an excellent barrier in weed-prone areas.
- Tree and Shrub Beds: Argue-worthy-mothered forests: mulch layer thickness: 2 to 3 inches around tree and shrub bases to protect roots and encourage growth while avoiding root suffocation.
- Cost Benefits: When mulching is meant to enrich the soil, applying 1 to 2 inches to hasten decomposition and nutrient incorporation into the soil is preferable.
Mulch thickness should be adjusted depending on the requirement, which targets functionality and long-term soil health. Always monitor the mulch layer for signs of excess moisture or compaction and freshen it up after a while if necessary.
How to Use Selective Weed Killer in Flower Beds?

Selective Weed Killer is utilized a little differently from other weed killers in landscaping flower beds and should be treated as follows:
- Select the Correct Product: A weed killer has been explicitly formulated to treat certain weeds and is not harmful to the plants it is applied to. Always read product labels carefully.
- Right Time Application: This product should be applied when the weeds are actively growing, usually in spring or early summer. An important thing to remember is to avoid applying just before rainfall because of runoff.
- Protect Your Plants: Target application means using a sprayer or a paintbrush to paint the weed killer directly on the weeds to prevent them from coming into contact with flowering or other desired plants.
- Respect Dosage: The recommended dose on the label should always be adhered to so that the wild plants are not adversely affected and the treatment fully serves its purpose.
- Follow-up: Check the treated area after some days to see how everything is going. If the instructions allow, you may have to reapply the treatment.
To safeguard your safety and the health of your plants, wear protective gloves and other protective gear at all times when refilling a weed killer.
What Precautions Should I Take When Using Weed Killer?
|
Parameter |
Key Point |
Description |
|---|---|---|
|
Personal Protection |
Wear gloves and safety goggles |
Prevents skin and eye contact with chemicals |
|
Proper Clothing |
Use long sleeves and pants |
Reduces skin exposure during application |
|
Weather Conditions |
Avoid windy or rainy days |
Prevents drift and runoff of weed killer |
|
Target Specificity |
Apply only to intended plants |
Avoids harming desirable vegetation |
|
Safe Storage |
Keep out of children’s reach |
Prevents accidental ingestion or misuse |
|
Application Timing |
Use during active weed growth |
Ensures maximum effectiveness of weed killer |
|
Equipment Maintenance |
Clean the sprayer after use |
Prevents chemical residue buildup |
|
Environmental Impact |
Avoid near water sources |
Protects aquatic life from contamination |
|
Label Instructions |
Follow the product label exactly |
Ensures safe and proper usage |
|
Disposal Guidelines |
Dispose of containers responsibly |
Prevents environmental pollution |
Are There Natural Alternatives to Kill Grass and Weeds?
Many natural methods are available to minimize or eliminate the presence of grass and weeds, all without using a chemical-based product. Usually, they are safer for use around the ecology, pets, and other plants nearby. Five of the truly effective natural choices are listed below:
- Vinegar Solution
A simple one-to-one mixture of white vinegar and water should be enough for weed removal. Acetic acid dries the plants, making it an excellent natural weedkiller. Use undiluted vinegar containing 20 percent or more acetic acid concentration for a more effective result.
- Boiling Water
Pouring boiling water on the weeds is direct. The heat kills plants by destroying their cell walls, but if not careful, it could affect neighboring plants.
- Salt
Salt can be an inexpensive way to kill grasses and weeds. Sprinkle salt on the base of the plants you want to get rid of or mix up a salty solution in water. Excessive application can affect soil productivity, so apply only where you don’t intend any vegetation to grow.
- Baking Soda
Sprinkling baking soda over weeds helps curb their growth. The high sodium concentration creates an inimical environment for plants and is highly desirable for surface cracks on sidewalks or driveways.
- Mulching
Mulching with wood chips, straw, or shredded leaves suppresses weeds by blocking sunlight to the soil. It also keeps moisture in and adds organic matter as it decays.
These natural alternatives to chemical weed killers ensure the health and well-being of your garden.
What are the Steps to Till and Prepare a New Garden Bed?

For tilling and preparing a new garden bed, here is what you should follow:
- Choosing a Location
Consider providing enough light and drainage for the plants you want to cultivate.
- Clearing the Area
Clear away any weeds, grass, or debris from the site, ensuring they will not compete with your plants.
- Loosening the Soil
Break up the soil with a tiller, shovel, or garden fork to a depth of 8-12 inches so plant roots can easily penetrate.
- Adding Organic Material
Blend in compost, manure, or organic matter to enrich the soil with nutrients.
- Leveling the Surface
Rake an even surface, free from rocks or huge clumps of soil.
- Test and Adjust Soil
If needed, test soil pH and nutrient levels and treat the soil with lime or sulfur to create the correct conditions for your plants.
Following these steps, you will have created a nutrient-rich and ready garden bed for planting.
How to Ensure the Grass is Dead Before Tilling?
|
Step |
Key Point |
Description |
|---|---|---|
|
Cut the grass as short as possible |
Prepares the surface for treatment methods |
|
Use herbicide, smothering, or solarization |
Kills grass effectively before tilling |
|
Allow the herbicide to take full effect |
Ensures the grassroots are dead |
|
Inspect for regrowing grass patches |
Identifies areas needing additional treatment |
|
Repeat treatment on persistent growth |
Ensures all grass is killed before tilling |
|
Ensure soil is slightly moist |
Facilitates easier tilling and soil prep |
|
Tools Needed |
Shovel, herbicide, or plastic sheeting |
Required for treatment and inspection processes |
|
Key Considerations |
Avoid tilling live roots |
Prevents regrowth and weed spreading |
What is the Importance of Removing the Root System?
Removing roots is essential so that unwanted plants or weeds do not grow again, causing competition for my crops’ nutrients, water, or sunlight. By doing so, I also keep the garden bed clean and ready so that my plants may have the best opportunity to grow.
How to Enhance Garden Soil After Tilling?
Post-tilling care of garden soil to create firm soil that sustains healthy growth of plants is of utmost importance. Here are a few recent practices supported by horticulture that ensure the following:
- Add Organic Matter
Organic materials such as compost, manure, or leaf mold can enhance soil structure and nutrient content. Research suggests that adding 2-3 inches of organic matter to the soil surface and lightly mixing it above the soil promotes fertility and microbial activity.
- Test the Soil and Balance Its pH.
Soil pH is critically important for nutrient availability. You can conduct a soil test using either a home kit or a laboratory service to determine the current pH level. Usually, the ideal garden soil is within the pH range of 6.0 to 7.0: liming may be necessary for acidic soils, while sulfur can lower the pH in alkaline soils.
- Enhance Drainage
Amendments applied to heavy clay soils include sand, perlite, and gypsum to disperse compacted particles, while sandy soils may benefit from vermiculite or coconut coir for effectively retaining moisture.
- Use Cover Crops
After tilling, a cover crop such as clover or rye may be established to enhance soil health by preventing erosion, fixing nitrogen, and supplying organic matter upon later tillage. Agricultural research shows that cover crops increase organic carbon by as much as 15%.
- Introduce Soil Microorganisms
Adding inoculants with beneficial bacteria and fungi will introduce a living community into your soil. These microorganisms will help care for organic matter and release nutrients in forms that plants can uptake.
- Mulch
Apply a 2-to-4-inch layer of mulch such as straw, wood chips, or shredded bark to conserve moisture, moderate temperatures, and suppress weed growth. Recent statistics show that mulches may cut soil water evaporation by 35%.
- Fertilize if Needed
Depending on your soil results, you might want to apply some fertilizers afterward. Bone meals, blood meals, or fish emulsions give a natural balance of nutrients, and synthetic fertilizers are a good choice, obviously if you have a well-defined nutrient need and the growth phase of your plants.
Following these steps will transform your tilled soil into a rich, thriving medium that optimally sustains plant health and yields a maximum crop.
References
-
How to Kill Grass to Create a New Garden Bed – Iowa State University Extension provides detailed methods for removing turfgrass to prepare a garden bed.
-
Using the Sun to Kill Weeds and Prepare Garden Plots – University of Minnesota Extension explains solarization and occultation techniques for vegetation removal.
-
How to Manage Perennial Grassy Weeds in the Garden and Lawn – Another resource from Iowa State University Extension focusing on controlling grassy weeds with herbicides.
Frequently Asked Questions (FAQ)
Q: What are effective ways to kill the grass in flower beds without harming the plants?
A: To kill the grass without harming your plants, use methods such as laying cardboard or newspaper over the grass to block sunlight. This will decompose over time, enriching the soil. Alternatively, applying a grass-specific spray carefully with a sprayer can help target the grass without affecting your flowers.
Q: How can I use cardboard or newspaper to kill grass in flower beds?
A: Lay cardboard or newspaper over the grass you want to remove, ensuring it overlaps to block all light. Cover with mulch or compost to weigh it down and leave it in place for several weeks. This method will smother the grass, kill the plants, and eventually decompose, adding nutrients to the soil.
Q: What is solarization, and how does it help eliminate grass?
A: Solarization involves placing clear plastic over the area to trap heat from the sun, raising soil temperature to kill the grass and seeds in the soil. This method can effectively kill grass and prevent it from germinating.
Q: Can preen or other products help kill grass in flower beds?
A: Preen and similar products can prevent seeds from germinating, helping to maintain flower beds without new grass growth. However, these products are more preventative than curative, so they work best after initial grass removal.
Q: Is using a rototiller effective for removing grass from flower beds?
A: While a rototiller can help remove grass, it can be labor-intensive and might not entirely kill perennial grasses with deep roots, like rhizomes. It’s often best used in combination with other methods for thorough removal.
Q: How does covering grass with plastic help in killing it?
A: Covering grass with clear plastic creates a greenhouse effect, increasing soil temperature to kill grass and weed seeds. This method, known as solarization, requires leaving the plastic in place for six weeks during sunny weather for best results.
Q: What is the role of mulch in preventing grass in flower beds?
A: Mulch acts as a barrier to sunlight, helping to prevent grass and weed seeds from germinating. It also retains moisture, improves soil quality, and provides a neat appearance for landscape beds.
Q: What tools are recommended for manually removing grass from flower beds?
A: A spade or garden rake can be effective for manually removing grass. For deeper-rooted varieties like nutsedge, a spade might be necessary to dig out the rhizomes and tubers thoroughly.
Q: Are any chemical sprays that effectively kill grass without harming other plants?
A: Products like Roundup can be used, but must be applied carefully with a spray bottle to target only the grass. Multiple applications may be necessary, and care should be taken to avoid contact with desired plants.
Q: How can I prevent grass from invading flower beds in the future?
A: Maintaining a thick layer of mulch, using landscape fabric, and regularly checking for and removing new grass growth can help prevent reinvasion. Creating a garden edge or barrier can also help keep lawn grass from encroaching into flower beds.