Finding the right fonts for machine embroidery design can elevate your machine embroidery projects from ordinary to extraordinary. In this blog post, we will guide you through the essential criteria for selecting fonts that complement your creative vision and enhance your craftsmanship. We will explore various styles, from classic serifs to whimsical scripts, and offer insights into pairing these fonts with different fabrics and designs. Additionally, we will discuss common challenges and tips for troubleshooting font-related issues, ensuring steady progress in your embroidery journey. Whether you’re a beginner or an experienced embroiderer, this comprehensive guide will provide valuable pointers and ideas, ultimately assisting you in achieving polished and professional results in your projects.
What Are the Different Types of Embroidery Font Designs Available?
It is not unusual to consider that when one speaks of embroidery one mostly imagines the designs, styles, patterns, and stitches that are associated with it. Font styles are one aspect that is likely to be overlooked in most cases. Embroidery font styles vary, and most of them have been crafted and in existence for centuries. Typography, to me, is a crucial component in designing and crafting logos. I believe it is the first thing potential customers notice. When it comes to branding, scripts, serif, and sans-serif are widely used. Serifs have tiny lines on them, which accentuate the beauty of letters. When trying to convey a message, these are ideal letters to use due to their enhanced aesthetic appeal. Script Font, on the other hand, uses the intertwining cursive style that incorporates script in its wording. Unlike serif fonts, sans serif fonts have no embellishments, making them appealing to the eye.
Understanding fonts for machine embroidery Types and Styles
Focusing on fonts for machine embroidery styles allows for their distinguishing features and usage to be appreciated. Researching further, I discovered that more classic serif fonts still have a place in the design world where they can be used to enhance the overall elegance of a design. Meanwhile, a sans serif type gives a more modern twist whilst still keeping it simple and basic – appealing enough to the required design. On the other hand, script fonts are more appealing when the idea is to go cursive, adding personal touch and style to sophisticated projects. Each type has its benefits and intricacies, and to find the right font for a project, one has to consider the aesthetic goal and the fabric paint to be used. From this discovery, I realized that successful design requires the willingness to try out different styles until the most appropriate one is found.
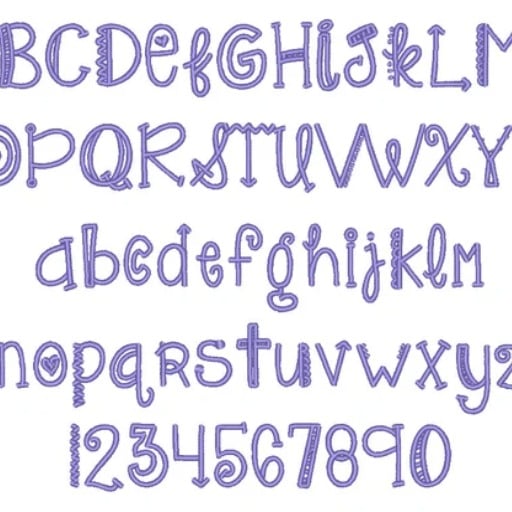
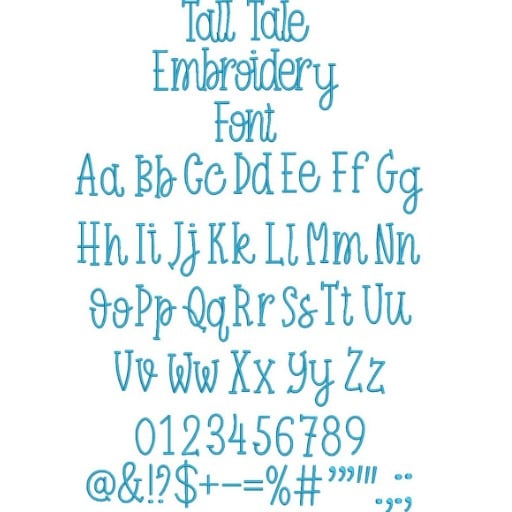
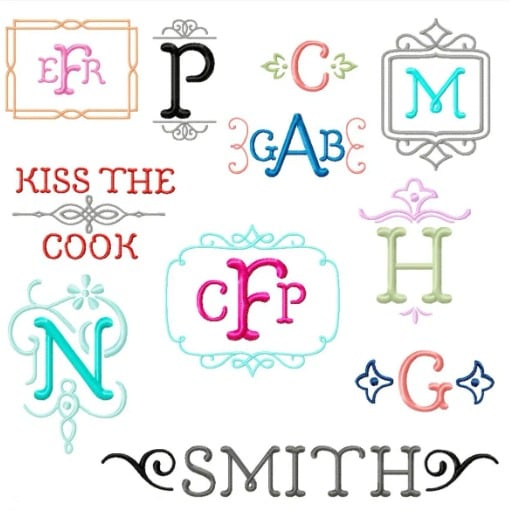
Exploring Popular Alphabet and Monogram Styles
Alphabet and monogram styles have held a special place in the hearts of designers and crafters for many years by enabling personalization and creativity galore. Commonly known alphabet styles include formal ones with elegant script letterings, modern ones consisting of sans-serif letterings, and many playful letters in the ‘display’ style to brighten up the design. In the case of monogram styles, the traditional round and diamond shapes remain the most popular due to their pleasing geometric symmetry and simplicity. Evolved versions of such basic shapes include slightly changed or interwoven letters, which are also quite interesting. The specific style employed can, therefore, contribute a lot towards the general impression of a design, which affords its makers an opportunity to express individual preferences or corporate branding in a more sophisticated way. These alphabetic strokes can be explored in fashion, home, and stationery ideas and so doing exposes myriad artistic ideas and a great deal of personalized creativity.
How to Choose the Right Stitch Font for Your Embroidery Design
The general concept and intention of the project determine the selection of a stitch-type font in the embroidery design. If it is a logo, a garment, or a home decor, then the font must fit into the visual aspect of the design. Another thing to note is that the font chosen for the design must be understandable at the required stitch size, which, as a rule of thumb, serif fonts are good for large text, while sans-serif or block-type fonts are applicable for small areas. As for myself, I also look at the type of stitch used. The embroidery of satin stitches is great for creating bold or sharp lines, and fill stitches are for adding texture to more complicated fonts and embroidery designs. Also, I take into account the minimum and maximum stitch heights that can be used. The minimum is generally around 0.2 inches which makes it suitable for embroidery of detailed images; the maximum applies to bold lettering. Finally, I try different fonts that make up the design while taking into account stitch density and pull compensation, aiming at the most beautiful and resistant output. There is a sensible rationale behind this progression as it assists in the optimal selection of a font, increasing the overall effect of the design without compromising stitching quality.
How to Select the Best Size and Script for Your Project?
Your project begins with determining which size and font style best works on the fabric and design specificities. For instance, with the size, larger sizes might give boldness, but if the work is more intricate, then choosing a smaller size would be more appropriate. The script needs to focus on the aim of the project and the theme. For example, cursive or decorative scripts can give an elegant touch to the project, while modern simple sans serif serve the purpose well, too. Also, it is important to test stitch samples and check for legibility at the size that is deemed suitable, especially for scripts. Also, do not forget to change stitch density and tension relative to the thickness and texture of the fabric to gain the best output. By taking the time to choose properly, there is little doubt that you will find the best fit, and your project will be very accurate and properly done.
Choosing the Correct Size for Embroidery Font
When determining what size of embroidery font to use, I have a number of parameters that guarantee the best results. To begin with, I try to assess the amount of detail that needs to be incorporated—that is, for more intricate models, a smaller font would be appropriate, whereas more prominent designs would require a larger size. The type of fabric used also determines the most appropriate size, as thicker fabrics can allow for a greater stitch size without warping. From my internship and researching the best practices, it was obvious that adjusting different sizes on a scrap cloth is an efficient way of establishing the clearest and most appealing size for any given task. Furthermore, I also take note of stitch density and the pull compensation and modify them to suit the fabric or size. Through this method, I uphold the font’s significance without losing quality or the expected result in the design.
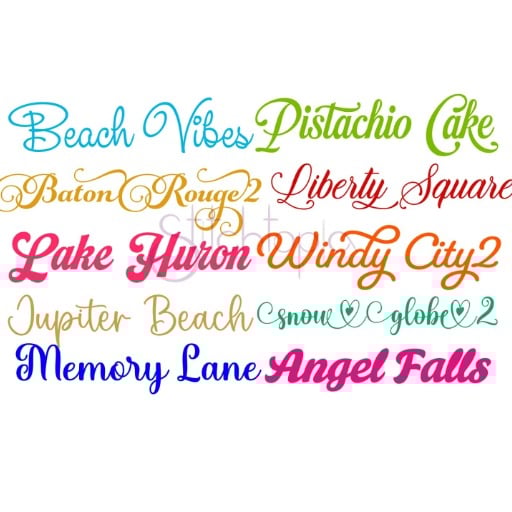
Exploring Script vs. Block Alphabet: Which Is Right for You?
My decision between script and block alphabet embroidery fonts is mostly based on how they look and their functionality. I would say that the script font will provide flair and would be ideal for fonts that need to be a bit more decorative and customized. The downside to script fonts is that they can be hard to read, especially in smaller sizes. In contrast, block letters can still make the wearer look average or plain, but they are easy to read irrespective of size, which means they are practical and useful. I consider the target design’s feeling and the fabric type, a lot more often I use script fonts for celebratory times like weddings or anniversaries and block fonts for business or daily usage. However, I do spend associated amounts of time evaluating the type of my work so that I get to know the font that fits best my artistic goals with practical concerns.
Understanding the Impact of Stitch Size on Design Quality
A deeper insight into the significance of the size of stitches in relation to the quality of a design can be comprehended by understanding the balance between design and function. Based on my research and experience, it is established that for elaborate designs requiring detailed work, finer stitches are required, whereas larger stitches will work well for simple and bold designs. The parameters that need to be addressed include stitch length, which for normal work ranges from two to four millimeters; smaller stitches are for curves and detail, while elongated ones are for straight lines and strength. Moreover, stitch density is also important, and its aspects include clarity, robustness of the design, and the handling characteristics offered by the cloth. By controlling the density within a range that is normal for the fabrics and a typical value between 0.4 and 0.5mm, I make sure that the aim remains on the aesthetics of the end product in addition to its architectural aspect. Adjusting these parameters to desired values ensures that some sort of equilibrium is achieved, which results in high-quality embroidery design.
Where Can You Find High-Quality fonts for machine embroidery?
You can find a variety of high-quality fonts for machine embroidery on online platforms. Etsy and Urban Threads are great marketplaces where you can find many creative designs from different sellers. Moreover, Embroidery Library and Creative Fabrica carry many professionally and user-made designs for any project. There are several sites that also have filters that allow you to narrow design options on style, theme, or complexity. Most of these sites have subscriptions that allow members access to premium design files and new designs as they come out, giving you endless design options for your embroidery projects.
Online Resources for Embroidery Design Downloads
Firstly, Etsy is an important site because here, I am able to get a lot of one-off and custom-made designs that sole designers have developed in different countries. This gives me an opportunity to help creative businesses and also be able to get rare designs. Next, I have found Embroidery Library to be useful due to its vast number of professional designs that are suitable for all levels and styles, which gives me ample room to capture what I want for my projects. Lastly, Creative Fabrica has many offers as well as low-cost subscription services that enable me to get new design inspirations constantly as I am subscribed to new releases every so often; this allows me to always update my embroidery library. I have managed to find quality, unique, and new designs to suit my embroidery needs through the above platforms.
How to Ensure You’re Downloading High-Quality Designs
I use reviews on platforms such as Etsy as benchmarks that enable me to assist in making purchasing decisions on what appears to be trustworthy and good-quality designs. I always aim to buy from sellers that are complimented after purchase, for assurance of good quality delivery. I expect the designs to be of high quality; hence, I sort them on Embroidery Library by best-rated or most popular. Besides, I scrutinize the preview pictures and design parameters in order to confirm whether they fit my specifications. In addition, on Creative Fabrica I use their subscription service so that I am able to try out designs by reputed designers. By looking at the file type of the design and the rest of the designer’s marks on these platforms, I can easily choose designs that satisfy my quality and creativity requirements.
Understanding Machine Embroidery File Formats
When considering machine embroidery file types, I concentrate on the concordance with my embroidery sewing and the intricacy of the design. Common formats include PES, DST, and JEF, which are used by specific brands such as Brother, Tajima, and Janome, respectively. It is worth noting that I always check my machine manuals to see which formats are usable. Other technical terms, such as stitch count, physical dimensions, and number of color changes, are also important. For instance, stitch count determines the density/detail in the design, which will affect the appearance and duration of the production process. The dimensions should correspond to the sizes of my hoop so as to ensure it fits in position while the number of color changes worked out assists in planning how threads are changed. The knowledge of these file formats and their parameters enables me to choose the designs that satisfy my technical requirements as well as my appearance expectations.
How to Use Embroidery Software for Customizing Fonts?
To get started with customizing fonts in embroidery software, pick a software application like Hatch, Wilcom, or PE-Design. After obtaining the software, you will need to open the text or font that you want to use in the program. Most embroidery applications can change the font size, font style, and even kerning. For example, you can change the stitch type and the stitch density to match your embroidery requirements. Check on how the text would look when embroidered. Pay attention to the size of the embroidery hoop frame and alter the picture if necessary. Most importantly, save the resulting custom font in a format file that is compatible with your machine, as long as you guarantee that all collective technical requirements for embroidery work have been satisfied.
Introduction to Popular Embroidery Software
Given that you regularly use embroidery software, such as Hatch, Wilcom, or PE-Design, the very first thing I do is analyze the features that fulfill my requirements. Many users have noted the simplicity of the Hatch program, which makes it popular with most who are new to the software, especially with font customizations, as there are many tutorials available. On the contrary, Wilcom is very sophisticated as it is equipped with professional tools that are targeted for basic elements and larger projects such as precise specs. PE-Design is a combination of interrelatedness and structure, which makes it ideal for those who prefer to create and sew without much difficulty. As far as the chosen software goes, many users have stated that an unmistakable understanding of factors such as stitch density, font proportions, or even file types is integral in achieving the precise embroidery concepts one desires to express. Drawing on the different strengths of each program, I find that it most efficiently fulfills the requirements of my project.
Step-by-Step Guide to Using BX Format in Embroidery
As someone who often utilizes the BX format in embroidery, I’ve streamlined the process to make it as straightforward as possible. BX fonts are incredibly versatile, and they allow me to use my embroidery software more efficiently by providing drag-and-drop functionality for easy font insertion.
- Install Software: First, I ensure I have compatible embroidery software like Embrilliance Essentials installed on my computer. This software offers seamless support for BX fonts and is user-friendly.
- Load BX Fonts: Next, I obtain the BX font files from a reliable source and simply drag them into my Embrilliance software. This makes the fonts instantly available in the software’s font menu, eliminating the need for additional steps.
- Design Embroidery: I then select a BX font from the menu and start designing my project by typing the text I wish to embroider. The convenience of using BX fonts is that they come pre-digitized, so I don’t need to manually adjust individual letters.
- Adjust Settings: I have the flexibility to adjust stitch types, density, and size within the software to ensure the embroidered text meets my specific project needs. This ensures precision and customization tailored to the fabric I’m using.
- Save and Transfer Design: Finally, I save the design in a format compatible with my embroidery machine, often PES or DST. Once saved, I transfer the design to the machine using a USB stick or a direct connection.
By following these steps, I’m able to efficiently incorporate BX fonts into my embroidery projects, resulting in high-quality, custom designs.
Tips for Creating Unique Monogram Embroidery Designs with Software
When creating unique monogram embroidery designs with software, my first step is to select an easy-to-use program like Embrilliance or Brother PE-Design, both of which offer robust tools and fonts for monogramming. I begin by choosing a font style that suits my project. For more personalized designs, I often combine different fonts or integrate decorative elements such as borders or motifs available within the software.
Further enhancing the design involves adjusting parameters such as stitch density (typically between 0.3 to 0.4 mm for most fabrics) and increasing underlay stitches for added stability. I also experiment with different colors to ensure high contrast and visibility in the final product. Once satisfied, I perform a software-simulated stitch-out to preview any necessary adjustments before proceeding to the actual embroidery. By customizing these technical parameters, I can create a visually appealing and distinctive monogram that aligns perfectly with my creative vision.
What Are the Best Practices for Embroidery Font Application?

When working on a design with embroidery fonts, it is good to think about the size of the font, the style of the model, the type of fabric that will be used, and the complexity of the design. This means that it is important to select an appropriate font for your design so that it is easy to read and looks appealing. To avoid issues with stitch density and tension, it’s wise to create a sample design and embroidery where you would stitch the critical parts only. Use the best stabilizers to enhance the embroidery without enabling fabric blemishes. With respect to the lettering embroidery, consistently controlling the thread’s tension should give beautiful edges and clear letters. Similarly, kerning and line spacing are adjustments that can improve the design balance because each letter is entirely visible without clashing with the other. If you are to follow the above procedures, rest assured that the quality of your embroidery and the succeeding jobs will be the best.
Best Practices for Applying Embroidery Fonts to Fabric
Before I begin an embroidery project, I first apply embroidery fonts to fabric, but before that, I ensure that the font style and size fit the design type and the kind of material being used, which is crucial to getting a clear and readable font. As recommended by professionals, I make it a point to carry out a test stitch in order to ascertain the tension and density of the stitch before any final project commences. My stitching is neat to the extent of being unable to see any fabric puckering, thanks to the stabilizers designed for such projects. I also follow younger ideals of embroidery by managing the tension of the threads to achieve a more professional outcome for the stitches. I add or remove space between lines to better refine the entire design’s outlook, considering that all letters should be clear, even the most delicate ones.
Common Mistakes to Avoid with Embroidery Font Application
Before deciding to add embroidery fonts, I hesitate first if the creation font will not compromise the quality. First, I ensure that I adhere to the appropriate thread that fits within the dimensions of my fabric since that will lead to either ripping or not enough coverage. I also avoid adding fonts that are highly designed and are not feasible to either the fabric or the machine since it may cause the design to be illegible. Another mistake I try to avoid is not applying stabilizers as that would lead to the fabric moving out of position during the stitching process. I always make sure that I check my settings regularly, including my tension settings, thus eliminating the chances of threads either cutting off or starting to loop. Jacobs (2012) concludes that the other thing I try to avoid is over scaling a font, which is not recommended since that leads to hashed caps and thick and thin letters, which greatly affect the design. Making a point to be extra cautious about these errors allows me to raise the accuracy and level of my embroidery projects.
Enhancing Your Embroidery Design with Stitch Techniques
In order to achieve effective results when incorporating stitch techniques into an embroidery design, I use several types of stitches, such as satin stitches for smooth areas and backstitches for multiplying details. A zigzag stitch can be helpful for adding depth and concerning a dynamically textured look. In contrast, the fill stitch is the best option for such tasks as covering relatively large areas with an even and smooth blend. It’s important for me to focus on the density of every stitch since it determines the type of fabric I will use. In general, stable fabrics need more densely packed stitches, while delicate materials need sparse stitches. I have also considered the overall hooping processes which serve to keep the fabric firm or taut to discourage puckering and to maintain alignment. Voids formed by varying stitches are later filled with satin, embroidered details, and wide stitches to make the project appear professionally conceived. All these factors affect the final result and appeal to my embroidery skills in an exceptional way.
References
-
Printful Blog: 25 Best Fonts for Embroidery Designs – This source provides a list of classic, modern, and vintage fonts suitable for embroidery.
-
Stitchtopia – Offers a wide collection of fonts for machine embroiderys and designs that are available for instant download in multiple formats.
-
Real Thread Blog: 30+ Best Fonts For Embroidery – This blog provides inspiration and guidance on selecting the best fonts for custom apparel projects.
Frequently Asked Questions (FAQ)
Q: What is a monogram alphabet in font machine embroidery?
A: A monogram alphabet in font machine embroidery refers to a style of embroidery that uses letters to create a unique design, often used for personalizing items with initials or names.
Q: How can I use a cursive alphabet for my embroidery projects?
A: You can use a cursive alphabet by selecting a cursive font machine embroidery design that suits your project. These designs are available in various machine formats, such as hus, vp3, and exp, and can be resized to fit your needs.
Q: What does “skinny” mean in the context of embroidery fonts?
A: “Skinny” refers to a style of font machine embroidery where the letters are narrow and elongated, creating a sleek and modern appearance.
Q: How do outline fonts differ from filled embroidery fonts?
A: Outline fonts are designed with just the outline of the letters, while filled embroidery fonts have stitches filling the entire letter. The choice between the two depends on the desired look and fabric used.
Q: Can I purchase a collection of fonts for machine embroiderys in a cart?
A: Yes, many embroidery font websites offer the option to add different font machine embroidery designs to a cart for easy purchase, often with discounts or coupons available.
Q: What is an applique font in machine embroidery?
A: An applique font in machine embroidery involves stitching a design onto fabric and then cutting away the excess, allowing for a textured and colorful look using different fabrics.
Q: How do I choose the right bx font for my embroidery projects?
A: BX fonts are specifically designed for use with Embrilliance software. Choose a bx font that matches the style and size requirements of your project, such as options available in 1.5, 2 inch, or 3 inch sizes.
Q: What are bean stitch and chain stitch in embroidery fonts?
A: Bean stitch creates a thicker, textured line by repeating the same stitch several times, while chain stitch creates a looped pattern. Both add a unique texture to embroidery designs.