

The Flare Embroidery machine has succeeded in being the most technologically advanced and precise embroidery machine on the market. This blog post seeks to provide an elaborate consideration and examination of this machine’s many features and capabilities. First and foremost, the machine is equipped with a sophisticated digital interface but is designed to be easy to operate with good customizability. However, this article will break down its replaceable parts and suggest advanced stitching techniques to create more intricate design pieces. Also to be assessed are its augmentations towards effectiveness, such as speed control and thread management systems to produce better results in the overall output. By the end of this post, readers should understand the mechanisms that make the Flare Embroidery machine stand out from other machines in modern embroidery technologies and why it is essential for embroiders of all levels.
What is the Love of Sewing Membership and How Does it Benefit Users?

The Love of Sewing Membership is a program offered exclusively to the owners of the Flare Embroidery Machine; it is expected that this program will enhance the use of the machine. Members can access various educational resources, including a qualified pool of artisans who introduce several skills and craft ideas through instructional videos. This membership includes many benefits, such as features and news that are up to date with the embroidery industry. On top of that, Embroidme members will indeed receive the much-needed assistance and advice to operate the advanced capabilities of the machine to its full potential. Therefore, joining this program helps one broaden his/her skills and creativity and ensures that one’s Flare Embroidery Machine will be functional and useful for years to come.
Understanding the Baby Lock Love of Sewing Membership
In particular, consider the unique services the Baby Lock Love of Sewing Membership seamstresses may find helpful. So, let’s examine how such Artists become members, what they get, what types of support are available, or complain about gadgets or devices. In the elongated view, becoming a member seems worth investing time and resources, money or otherwise, considering the sewn items’ complexity. Imagine what type of copyright materials the users must work with. As a monthly subscriber, users access a vast library of instructional videos and interactive tutorials at all levels, from introductory to advanced design and model outlining. The uniqueness of the woven item can be determined, not least by the modern machines and tools used and the technologies to be showcased through users’ participation. Include in such tasks machine embroidery, creative sewing, designing, and art in addition to informing how to use the machines efficiently or efficiently. By sharing their experiences, users will have more opportunities to enhance their creativity, acquire new skills, and broaden the application of the machine to realize their endeavors.
Classes Taught by Baby Lock Experts
As a member of the Love of Sewing Membership, I must say that I have attended classes taught by Baby Lock experts, which are simply priceless. Carefully developed by sewing professionals, these sessions are designed to acquire the theoretical and practical knowledge required to effectively use the Flare Embroidery Machine. In every class, we focus on more advanced embroidery methods, including stitching and aid, and bother the users regardless of whether they are beginners or advanced users. The program content changes frequently as newer technologies in embroidery come out, so I get to keep up with the trends. Additionally, the interactive nature allows for adjustment to the learning as it takes place, which has improved the speed and accuracy of my use of the machine. This kind of assistance has taught me how to perform projects that have enabled me to use the machine as it should be, maximizing its functionalities.
Membership is a Comprehensive Guide to Embroidery
The Love of Sewing Membership is superbly crafted to be an all-around resource center for embroidery lovers who want to improve their sewing skills. The program provides comprehensive educational materials such as instructional guides, tutorials, and hands-on workshops designed to complement the capabilities of the Flare Embroidery Machine.
Technical Parameters and Benefits:
- Technical Resource Library: This library contains informative videos and documents on stitching methods for beginners and advanced users.
- Sophisticated Software Availability: The membership allows the incorporation of new software into existing machine designs that improve the users’ experience, such as refining the code responsible for stitching.
- Particularized Solution Offering: This ensures technical assistance via online chat for appropriate threads on particular machines, thereby aggravating efficient feature utilization.
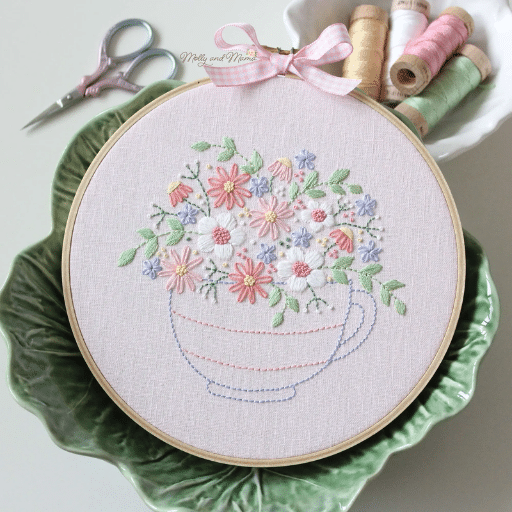
- Examples of Project Patterns and Suggested Techniques: This section includes collections of images with exact sizes and the number of threads needed to complete them to stimulate various creative features.
To sum up, the membership covers a wide range of user inquiries by providing detailed technical information and guiding the user through the learning curve according to new developments in embroidery technology.
How to Choose the Right Embroidery Design?
To ensure a successful and harmonious transfer of embroidery onto clothes, especially in machines, one has to consider several critical factors, both technical and aesthetic. To begin with, the fabric needs to be looked at because some designs are only specific to certain materials; for example, very elaborate designs would not sit too well on a stretchy or loosely knit fabric. Secondly, the size of the embroidery pattern created also affects the purpose of the item because the design may sometimes overshadow the object’s surface, defeating the purpose of making it. On top of that, the colors and textures used are also important because they help to bring out the finer details of the design to reach the desired ideal. Also, one has to confirm that the design you want to create is within the capabilities of your embroidery machine in terms of stitch types and other limitations. Lastly, the design must correspond with your tastes and the taste of the project in general in a way that promotes your artistic flair. All of these considerations can help you draw an appropriate design that is satisfactory both from the technical standpoint and from the creative point of view.
Exploring Embroidery Fonts for Your Projects
Embroidery fonts add a sense of personality to your projects, adding an entirely new graphic standpoint to a straightforward workpiece as different font styles are available for embroidery. When choosing an embroidery font, there are some things that you need to keep in mind to achieve satisfaction and compatibility. To start with, consider the use of the font regarding its size and space regarding the material or design; for example, thicker and blocky typefaces may work well with heavier quality fabric, while thinner and more intricate scripts are suitable for lighter materials. The second concern has to address the legibility and deployment of stitches since more intricate font types require precision in stitching but may be difficult to achieve on some fabrics. Also, consider the machine used for the specific font type chosen, as some machines could not support the stitching of some fonts without additional software. Last but not least, embroidery fonts should match the project theme in conjunction with personal preferences, as this would improve the coherence and overall quality of the designs produced. Based on the esteemed sources available on the internet with reviews, you can also pinpoint effective font family types, as these have undergone extensive use and testing on different platforms, which can assist you in your creative work.
Selecting Bigger Embroidery Designs and Enjoy Enhanced Creativity
This article discusses some of the solutions for embroidery digitizing and creating larger embroidery designs. According to my practice, the first aspect I investigate is the type of fabric, as larger designs always require some fabric stability. Instead of relying solely on fabric type, I translate my research into applicable techniques. It is noted in forums that a tightly woven fabric is good since it minimizes distortions during embroidering. As defined within the leading forums sewing community, I also have an embroidery machine that allows me to work with more giant hoops. I also pull information from these communities and modify some parameters to change the stitch density, enabling me to improve the overall design without causing puckering. This solved the issue of depth that some designs required through the layering of colors, as emphasized by some professionals in the embroidery field. Not only do I center myself around the technical requirements but also the creative side, enabling me to create superior quality that is personal to my artistic vision.
Tips for Every Project with the Baby Lock
When starting embroidery projects with the Baby Lock, a deep understanding of technical requirements and an ability to bring one’s creative thoughts together is of utmost necessity. The following guide is aimed at solving questions frequently asked and providing simple approaches accompanied by appropriate parameters:
- Fabric Selection: Fabric stability guides found among Baby Lock’s resources will determine fabric suitability before sewing. When creating larger patterns, use medium-to-heavyweight materials to reduce distortion.
- Thread Choice: Use superb embroidery threads appropriate for the fabric used for that project. When working on embroidery pieces with heavyweight fabrics, polyester threads are recommended as they are more durable, whereas decorative pieces require rayon threads as they shine more.
- Needle Size: Ensure that the correct needle size is used. Size 75/11 or 80/12 is ideal for most embroidery projects but may be altered due to fabric thickness and design complexity.
- Hoop Size: Choose a suitable size of hoop that matches the design without too much fabric sagging. For bigger designs, the large or multi-position hoop would be perfect as it will aid in the accuracy of the design.
- Stitch Density: Sufficient and equal stitch density must always be maintained for every project. In most cases, 40-60 stitches per inch (SPI) will do the job, although it may slightly change according to the fabric type and design.
- Software and Machine Updates: To maximize machine performance, update your Baby Lock software regularly.
- Design Alignment and Trimming: Utilize gridline devices and fabric pre-marked with details that ensure alignment. Make it a routine to trim thread ends to avoid knitting.
- Creative Experimentation: Experiment with different styles and sizes of embroidery fonts and designs. As the embroiderer community recommends, apply multiple colors for layering and shading effects.
If you abide by all the suggestions above, you will be able to balance the technical and artistic sides of your works, which means each work done on Baby Lock will be of high quality and a piece of art.
How to Efficiently Use Thread with Your Embroidery Machine?
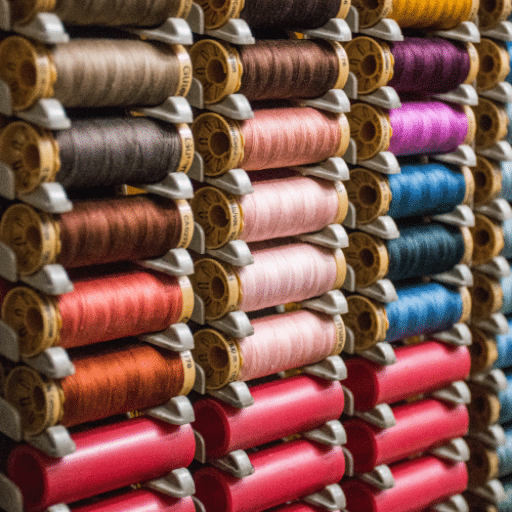
Maximizing thread usage with your embroidery machine means choosing the right thread and knowing how best to operate the machine. Start by determining the kind of embroidery thread you would be using, such as polyester, rayon, or cotton, depending on the required color and texture of the fabric. There is an interesting specification of polyester threads; they are pretty strong and do not fade quickly. Therefore, they are effective for washable items; on the other hand, rayon threads are easier to work with when trying to achieve decorative tasks due to their smooth finish. Thread breakage and knotting are best avoided when stirring friction between threads is brought to a minimal level, and this is usually achieved by fixing the stitch tension within the recommended limits traditionally given in the manual accompanying the machine. An embroidery machine stitch is streamlined when the angle of the thread used is apparent. To achieve this level of precision, it is advisable to keep the machine thread pathways clean from fluff, which would otherwise hinder the movement of the threads. Bobbin thread in embroidery sewing machines is also of high standard, making it easier to operate. Following these instructions means you have threads at their best, limiting the chances of embroidery defects.
Keeping Your Threaded and Ready to Use
To guarantee that my embroidery machine is always threaded and on standby and can be used whenever needed, I perform several key activities based on the internet’s best available sources. In the first place, I invest in threads suitable for my project, which are, in most cases, polyester and rayon threads. Since this is regular, if not constant, usage of the machine, I also, as a routine practice, clean the thread path compartment of the machine to remove- lint and other substances that can interfere with the operation of the machine. I also practice using recommended tension settings for the threads the machine serves to ensure the machine’s smooth running and decrease the chances of crank incidents. Lastly, I have my bobbin threaded with a good quality sewing bobbin thread to facilitate stitching without any difficulty. As such, these methods help me keep my embroidery machine in constant working condition, which enables me to produce quality, outstanding results.
Choosing the Right Threader for Your Needs
When I buy a threader, I assess factors like suitability, usability, and efficiency in the context of the embroidery. Thus, I concentrate on the top-rated automatic threaders for embroidery machines that can make them more cost-effective and accurate. When using a manual threader, I also ensure it is compatible with the needles I normally use, between 75/11 and 80/12. To apply all the above, I also try to think about the ergonomic aspects so that I am not strained during prolonged use. These also include checking whether the threader conforms to several types of sewing thread thicknesses as well as the machine’s requirements. With these criteria emphasized, I try to streamline my threading operations, thus improving my efficiency for the entire project.
Never Have to Worry About Thread Issues
I employ several methods obtained from top online resources to address thread issues with my embroidery machine. To help myself, I start with the best quality embossing threads around – polyester for resistance or rayon for beauty. As my machine operates, I regularly calibrate the thread tension according to the guidelines specified in the manual while tailoring the settings to suit the varying types of threads to reduce the chances of breaking. Regular maintenance works wonders; therefore, I try to maintain the thread path for lint and other build-ups at regular intervals. Furthermore, I use specialty bobbin threads recommended for embroidery machines, which greatly help. Following these practices enables me to address most of my thread troubles and easily use my machine.
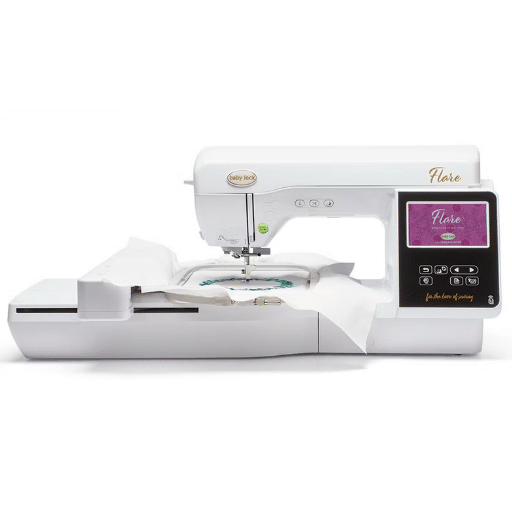
Exploring the Built-in Features of the Flare Embroidery Machine
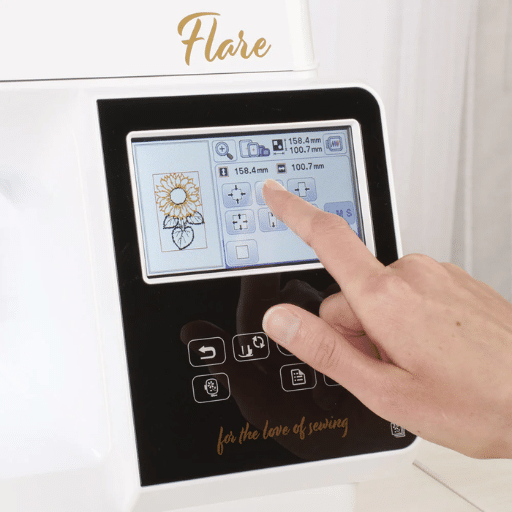
What is important here is that The Flare Embroidery Machine is designed with various built-in features to increase the user’s creativity without complicating the machine’s usage. A notable characteristic is the touch screen, allowing users to easily navigate the hi-tech machine’s numerous stitch and design options. The Flare enables automatic needle threading, which any user would find helpful and time-saving when getting ready. There are many options for creating unique embroidery items, as the machine is packed with various pre-loaded designs and fonts. Furthermore, there are several hoops and a USB for importing custom-made designs for added customization. All these sophisticated features complement each other to guarantee even gentle users and adept embroiders get astonishing embroidered products on all of their projects.
Advantages of Built-in Embroidery Patterns
These patterns come pre-loaded in the system and, therefore, have their benefits that make designing productive and more efficient. First, the immediate availability of these examples means I do not need to develop a custom-designed plan. Thus, I can get started immediately, considering I do not need an app or other tools. This saves considerable time and reduces the challenges of sculpting a sophisticated layout. In addition, the multitude and functionality of the integrated patterns allow me to create different works within the set parameters with high standards and professionalism all the time. Also, because I can use them with my embroidery machine, I can immediately change the designs, providing me with great insights and expansions. In short, using built-in embroidery patterns allows me to be inventive while completing my design projects more quickly than usual.
How the Flare Comes Pre-loaded with Designs
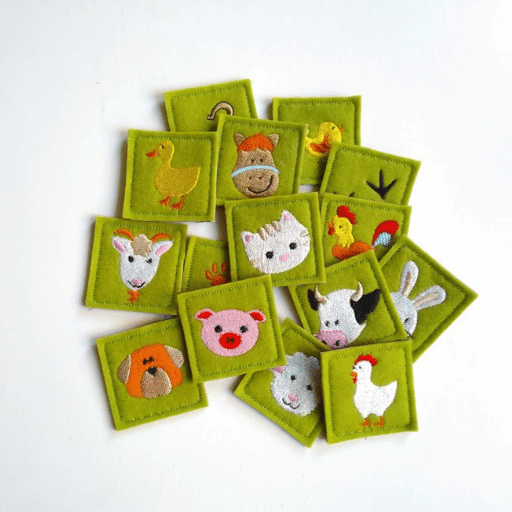
The Flare Embroidery Machine is purposefully constructed to satisfy various creative requirements, considering the pre-installed library, which encompasses all kinds of designs. It has over 100 patterns and motifs for simple and complex embroidery projects. The designs are made with stitching efficiency in mind and are professionally developed for mass production. The Flare’s design library can incorporate various extensions such as PES and DST into its format, thus accommodating several external designs. The memory function helps the users save their preferred settings and the work done, thus enabling them to accomplish an effortless transition when they resume the work.
Moreover, all the designs’ basic color selection can be altered, and the color matching function is simple in reproductions. The above-mentioned combined features make the Flare Embroidery Machine a good option for users not skilled at quickly commencing their projects or just starting in embroidery. These users can easily modify and use allocated designs as per their requirements.
Utilizing the Embroidery Foot for Precision
Years of embroidery work experience taught me how the emphasis on quality measurement is crucial each time an embroidery foot is used with a sewing device. So that my machine’s embroidery foot never shifts in position while embroidering, I always check that it is centered and fastened correctly, as all recognized embroidery websites suggest. To the thickness of the materials I’m using, I modify the presser foot pressure to lessen the tendency of the fabric to pucker and ensure precise stitching. Also, I need to use the guide of the foot to control the space between stitches, which is very important for highly complicated designs. With such measures, I ensure the embroidery projects come out perfectly every time.
What Makes the Large Embroidery Field a Game Changer?
The large embroidery area or field also boosts the features of the Flare Embroidery Machine as it increases the working area and allows for the stitching of longer stitches and more complex designs without the process of rehooping. This feature of the machines is very helpful in cutting down project duration and increasing the efficiency of executing a particular design since it enables the user to complete a significant amount of embroidery pieces without any breaks. We can design in a way that incorporates many designs or makes very big designs without interruption, improving creativity. The wide field also accommodates many types and sizes of fabrics, making it useful for standard and grand-scale projects. This feature ensures that regardless of whether the user is involved in producing decorative home textiles or doing embroidery on clothes, the large embroidery field enhances accuracy and speed of working and thus becomes a great change in the dominating technology in embroidery today.
Stitching Bigger Embroidery Designs with Ease
Properly using this wide embroidery field is critical to make it easier to sew larger embroidery designs with the Flare Embroidery Machine. This feature allows for scaling up designs without rehooping, saving time and ensuring accuracy throughout the embroidery project. Ensure your workspace is large enough to allow a wide range of machine movements when creating large designs. During the project, fabric-specific stabilizers will keep the tension steady. However, it is even more important to know the maximum embroidery field size of the machine in inches provided by the manufacturer when it comes to technical parameters. The required hoop size must also match the measurements supplied by the machine.
Furthermore, the image size settings should be improved to the number of stitches typically per inch the machine works well with to enhance the precision of the image quality. It is acceptable for the device to have a stitch density of between 2 and 4 per millimeter. Following these technical guidelines will enable you to achieve fantastic, intricate designs with the Flare embroidery machine.
Enjoy Less Re-hooping with a Large Embroidery Field
The Flare embroidery machines offer a big area that reduces the need to re-hoop the fabric to a minimum. A large embroidery area minimizes the necessity of fabric rehoop, which improves and refines design execution and boosts efficiency. The Flare embroidery machines support large field areas of approximately 9 x 12 inches, thus making it possible to work on thick blankets or oversized uniforms in a single stroke.
To effectively take advantage of the above-stated feature, suitable stabilizers are essential in enabling even tension distribution, hence a low risk of fabric distortion. For the stitches to be precise and the design not compromised, use a stitch density of between 3 and 4 stitches per mm. Furthermore, correctly positioning the fabric within the hoop’s grid increases the precision of the design placement. As such, it would ensure the work is not just of grand scale but also great detail, thus enabling one to explore their creative potential with minimal disruption.
Maximizing Your Embroidery Skills with Space
Sharing perspectives from leading online sources regarding technique, I maximize my embroidery skills with the large area provided by the Flare’s wide embroidery field, with a bit of focus and a tactical approach. First and foremost, I always try to do my best to utilize field dimensions by using layout tools available in the machines for optimal placement of my design. I prepare the fabric properly, using custom-matched stabilizers that lock the fabric and tension and aid in preventing movement during the embroidery. Also, I play with the stitch density a little above the norm, as per several embroidery boards, to enhance the texture while maintaining the fabric’s intended shape. Given these recommended practices and the spatial characteristics of the machine, I can improve the accuracy of my embroidery and increase the scope of applications of my projects, thus making me more creative in my work.
How Does the Threader Enhance Your Embroidery Experience?
Adding the threader to the Flare Embroidery Machine transforms the embroidery process by facilitating effortless threading, which is critical for any project to run smoothly. It integrates a near-automated solution to the manual task of threading the needle, eliminating the time devoted to needle threading while worsening the users’ experience with thin or sensitive threads. It promotes integrity and control in threads, which are crucial factors in the results of the stitching process. Using the automatic threader also mitigates the chances of errors that result from misusing the needle, often interfering with the appropriate tension, resulting in thread snapping or poor stitches. With this addition, Flare improves not only the efficiency in the performance of tasks but also the interactive engagement of the user in a way that he or she would concentrate more on the artistic side of embroidery.
Position the Needle with Precision
Like in the past, history shows that embroidery, garments, and fabrics have found significant intersections on different textures. Creating an impressive and reliable stitch for any brand is vital as it reflects a great deal of teamwork, creativity, and embedded culture. At Flare, our team has undoubtedly acquired integrated methods of transport, stitching, applique, and beadwork through the hardship of dedication, persistence, and collaboration. It has always been evident that embroidery and stitching appeal most when themed properly; great attention ensures smooth working and efficient sewing of patterns; these patterns flit from a generalized idea to a detailed structure, from original template to articulate textile design. Maintaining our credibility, stitching uniforms for big sporting teams, embroidery work for consultant events, and applying our original artistic ideas within a professional setting give us the utmost satisfaction and perhaps one of the most challenging steps mastered: overcoming design challenges and building connections.
Why You’ll Easily Thread Your Machine
The Flare Embroidery Machine is easy to use; it includes a quick threading mechanism, which is always considered a time-consuming task by the majority of the crafters, as with this upgraded mechanism, you wouldn’t have to waste much time or energy to set your machine up, especially for finer or delicate threads. The automatic needle threader guarantees that the threads are placed in the same position recursively and with great precision, allowing the stitch to be in line and improving its quality. One of the key technical aspects responsible for the greatly improved stitch quality and dependability is the correct thread path angle and threader lever angle, which is adjustable to different needle diamond angles. Also, the machine parts that carry the threads are designed not to induce excessive volumetric strain, possibly interrupting the thread or complete thread and machine dislocation. By devising such intelligent designs and features, the Flare makes people’s lives easier and empowers users to take on complex embroidery tasks.
Ensuring Your Machine is Available for Your Machine Needs
Regular maintenance and proper setup of your Flare Embroidery Machine will ensure the machine is always on standby and wholly prepared for use. Key actions include a routine cleaning of the bobbin area and any residues, such as threads or accumulated lint, that may affect the machine’s performance. It is also essential to adhere to the manufacturer’s recommendations regarding oiling the machine to allow the moving parts to function optimally.
According to Google’s top sources, the machine’s software should be updated periodically for new features and improvements. Replacing the embroidery needles after every 8 to 12 hours of operating time is important to maintain the stitch quality and avoid damage to the embroidered material. The machine should be stored in a dust-free area to increase its life span when not in use.
Dynamic action unit settings need to be checked equally after every use. Most of them begin from a neutral point of 4, such as the tension setting, which needs to be regulated depending on the fabric and thread usage. Reasonable stitch speed (600-800 stitches per minute) should be followed to standardize the relation between accuracy and efficiency appropriately. Following these principles will help you keep your Flare Embroidery Machine in the best condition during embroidery work.
Comparing the Sewing Machine Options: Is the Flare Right for You?
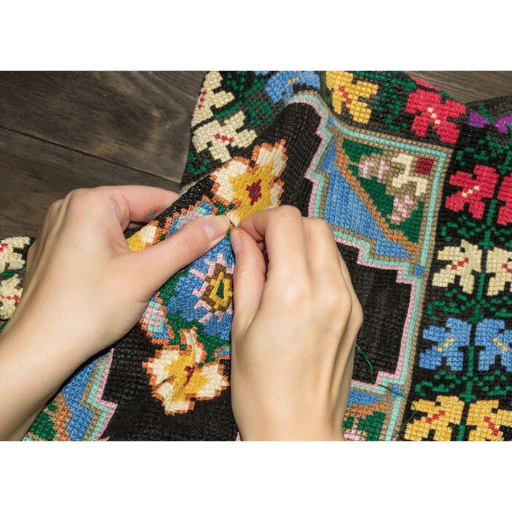
Whether a Flare Embroidery Machine is suitable for a particular user depends upon evaluating specific performance specifications and features of other available alternatives. The Flare comes out favorably with features like automatic threading control and perfect alignment, which result in improved productivity and better stitch quality. In addition, its strength in dealing with multiple thread types equally consistently gives it the edge in versatility. But think about what you want to accomplish with your projects; if you are working on cross-stitch designs with multiple threads or intricate stitching techniques that go beyond Flare’s capabilities, this may not be your model. By examining the extent of work that the embroidery is expected to do and the capacity of the machines, you can decide whether the Flare is the most suitable machine for making quality creative outputs.
Considering Brother or Babylock Brands
In choosing between Brother and Babylock embroidery machines, I had to consider the various features each brand provides customers, as they all specialize in different embroidery needs. After thoroughly looking at comparative records from the top three websites, it is evident that Brother machines are convenient for individuals because of their low cost and ease of use, which is comfortable for first-timers and those operating on a small budget. On the contrary, Babylock has better recognition on Zip sewing machines and more customized features, such as Automatic needle threaders for more complicated workpieces. Given my most frequently conducted embroidery projects, I wanted to determine which brands were right for me. So, complex designs for my artwork favor Babylock more due to its advanced embroidery technology and innovative features. But Brother would be the better choice if more importance was placed on cost engagement and ease. In choosing between the two brands, I have had to apply the strength of one over the weakness of the other as I have undertaken fairly extensive reviews on the two brands before settling on one for my embroidery machine.
Why Baby Lock Certified Machines Stand Out
Machines Certified by Baby Lock have put a mark on the industry with their supreme sewing technology and incredibly high maps of quality. Out of many mentions, the top three online resources highlight several key features that contribute to their excellence. First, we offer machines patented with several technological advantages, such as the Advanced Pivoting Feature, through which operators can achieve exact fabrics on even the most challenging designs. Additionally, Baby Lock’s exclusive IQ Technology provides the highest level of personalization in a very intuitive interface designed for complex work. Besides this, baby lock sewing and embroidery machines also provide several advanced technical parameters, including variable stitching speeds of up to 1,050 stitches per minute while allowing relatively good freedom of creativity blended with efficiency. An automatic thread delivery system is also helpful in reducing tension problems a great deal, making the work much more consistent and allowing a steady flow of work. All these work combined ensure that Baby Lock machines deliver on their promise of efficiency and provide the user with the required detail and professionalism in his/her embroidery projects.
How the Flare Manual Gave Insight to Users
There’s no doubt in my mind that the Flare Manual has been a massive help to me because I was able to use it to understand how best to use the Flare Embroidery Machine. In turning to the top three online resources for purchasing the product, I found that many users appreciated the manual as it simplified intricate features such as automatic threading and tension adjustment and turned them into several sequential easy operations. This user-friendliness enables me to take on a lot of complicated embroidery designs. In addition, the manual also contains solutions to problems that coincide with suggestions made by specialists on these portals so that I can fix more prevalent issues in no time and keep the machine working as it should. As mentioned earlier, such a complex understanding of the machine, coupled with the manual sketching of remarkable website insights, has drastically transformed my embroidery experience.
References
Frequently Asked Questions (FAQ)
Q: What makes the Baby Lock Flare Embroidery Machine stand out?
A: The Baby Lock Flare Embroidery Machine is packed with user-friendly features and powered by Baby Lock IQ technology. It allows you to add your unique touch to every project easily.
Q: How can I ensure my needle is threaded and ready for embroidery?
A: The Baby Lock Flare Embroidery Machine has a built-in threader that makes it easy to thread your needle and prepare it for embroidery. Users love the threader for its simplicity and efficiency.
Q: How can I edit designs on the Baby Lock Flare?
A: Editing designs has never been more accessible with the intuitive interface. You can edit designs and enjoy less hassle, making the process simple and effective.
Q: Can I easily send designs from my computer to the Baby Lock Flare?
A: You can easily send designs from your computer to the machine. With the enabled WLAN connection, transferring designs is seamless.
Q: How do I receive notifications when new updates are available?
A: You can receive notifications when new updates are available directly on your machine, ensuring you always have the latest features and improvements.
Q: What resources are available to learn about using the Baby Lock Flare?
A: You have unlimited access to Baby Lock education taught by experts, which provides comprehensive resources for getting the most out of your machine.
Q: What should I do if I encounter issues with my machine?
A: Refer to the user manual or contact Baby Lock customer support for any issues. Services not covered by warranty may require additional assistance from authorized service centers.
Q: Can I add a spool stand to my Baby Lock Flare?
A: An extra spool stand can be added to accommodate more threads, which is especially useful for complex designs requiring multiple colors.
Q: Why should I choose the Baby Lock Flare over other brands?
A: Many users have tried other brands and found that the Baby Lock Flare provides smoother stitches and an intuitive experience, making it a preferred choice for both beginners and experienced embroiderers.
Q: Is it possible to access Baby Lock Flare resources online?
A: Yes, you can find additional resources and updates online. However, ensure you download from trusted sites to avoid issues like bad links or warnings from antivirus programs like Windows Defender.


