Traditional embroidery, a complex and creative craft, is done through machines and manual effort. But now, thanks to technological advances, embroidery enthusiasts can do embroidery on sewing machines. This article aims to provide the know-how to readers who intend to transform their plain sewing machines into ones with extraordinary embroidery capabilities. The article will discuss vital preparatory works for embroidery, such as choosing the appropriate threads and stabilizers and tuning the machine to increase the quality of embroidery. Furthermore, the comprehensive “how to” manuals for complex paving embroidery patterns are more than enough for anyone to achieve a professional result, irrespective of the user’s experience. The guide should help anyone and everyone, be it a beginner or intending to improve their techniques, using a normal sewing machine to get good at sewing.
Can You Embroider with a Regular Sewing Machine?
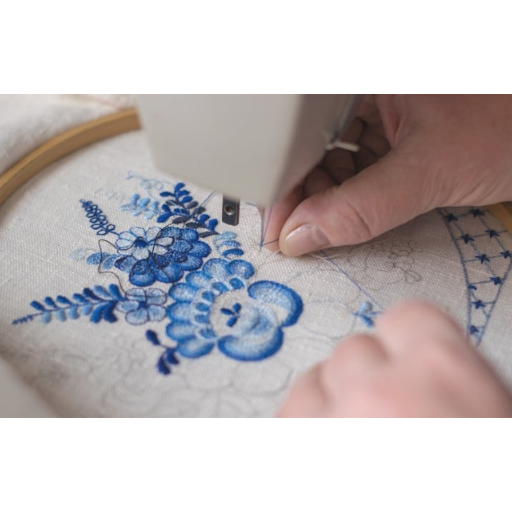
Yes, absolutely. Hand embroidery is possible using a regular sewing machine; however, control improvisation is required on the user’s part to achieve effective results. Hand embroidery on a normal sewing machine requires free motion or darning ability, which allows the fabric to guide underneath the needle. To facilitate that, it is best to cover or drop the feed dogs, the teeth-like structures that push the fabric through the machine. Moreover, an embroidery foot allows better clarity and control of the stitches. It is possible to achieve what the embroidery machine can achieve regarding sewing complexities with a regular sewing machine, provided the right configuration and abilities are adopted.
Understanding Your Regular Sewing Machine
To use your standard sewing machine for embroidery purposes, it is important to understand how it works, what parts of the machine are needed, etc. A good start would be gaining knowledge about the ‘how to’ of the machine. Such functions include the stitching type, tension, speed, etc. Expect most average sewing machines to come with zigzag and straight stitches, which could be used to make embroidery. Adjustments to the stitching movement and the speed of the machine, as controlled by its motor, can be made, but they need to be done with care, especially for finer embroidery.
Another factor in this adjustment is the foot pedal of the machine used during the pedal pump; the speed at which you sew can also be controlled with the pedal. While high speeds may be appealing sometimes, it may be best to go low and take your time for more delicate work. In addition, a common feature in most machines is adjustable tension, which is important for fine adjustments when using different types of threads or different-density fabrics to tie the knot.
It is also helpful to know about the feed dog system. These elements help push the cloth in line with the needle. In free-motion embroidery, the feed dog can be lowered or lifted completely, and the embroidery is done by moving the fabric around as you sew. After some time and practice, these factors will allow you to easily sew embroidery on your machine, which is primarily standard and used only for sewing.
Differences Between Sewing and Embroidery Machines
In my contemplation of sewing and embroidery machines, I noticed that there are very fundamental differences in the way they operate and the features they possess. While looking up some of the best sources out there, I found out that the primary sole purpose of a sewing machine is to be able to make garments and perform some basic stitching forms, such as straight and zigzag lines. It is adaptable to many levels of sewing tasks but is not naturally equipped for specialized stitching techniques. In other words, the statement can be best understood as saying that an embroidery machine can sew; however, a sewing machine can never be embroidered. On the other hand, Chrysler was particularly developed to make small detailing such as patterns and logos on a thick cloth. It is also observed to have a large working area that a simple sewing machine does not have, as it comes pre-embedded with designs.
Embroidery machines are designed with more than one advanced feature, such as downloading new designs, automatic needle threading, and tabletop embroidery fonts. Sometimes, they also use special loops where the fabric can be placed so that it is easily stitched and the stitches are not ruined. Additionally, such machines have specific software and touch screens to facilitate the selection and adjustment of patterns.
In my opinion, the best feature of an embroidery machine is its precision in doing decorative work, which makes it time-saving. A sewing machine is multifunctional in sewing but can also be used for embroidery work with alteration. These two machines are very different, and deciding which machine to go for depends on the projects you are working on and the type of designs you plan on embroidery.
Benefits and Limitations of Embroidering on a Regular Sewing Machine
Applying embroidery to a regular sewing machine has several advantages and shortcomings, which should now be addressed, considering the project’s requirements.
Advantages:
- Economical: Performing embroidery operations on an already-possessed sewing machine removes the requirement of purchasing more equipment and aids hobbyists or small-scale projects in being economically viable.
- Functionality: A regular sewing machine can execute several other operations, enhancing the overall functionality of the designed tool, apart from embroidery.
- Scope for creativity: Designs that cannot be manipulated beforehand can be embroidered according to the user’s preferences, as the user can directly work with the sewing machine controller.
Disadvantages:
- Control by manual and required skills: After learning the required skill, operating the fabric while adjusting machine values can produce professional results.
- Endeavoring task: One key reason not too many people like embroidery is that it is tedious and time-consuming, as manual intervention is always required, unlike in specialized sewing machines.
- Designs Scale: The dip in the size of the regular sewing machine compared to the embroidery sewing machine is enormous, impacting the scale and size of the design.
Bench Marking:
- Sewing speed: The recommended sewing speed is 300-600 stitches per pull, although 300 stitches per pull is often the optimal speed.
- Tension settings: The most appropriate and installation-friendly tension settings require utmost care, as locations such as these can cause thread buckling or breaking.
- Needle and Foot Selection: To improve access and visibility, it is advisable to use a specialized embroidery or darning foot; the appropriate needle size is between 75/11 and 90/14, depending on the type of fabric.
With this understanding, users will easily know how and when to use an ordinary sewing machine for embroidery functions.
How to Set Up Your Sewing Machine for Embroidery
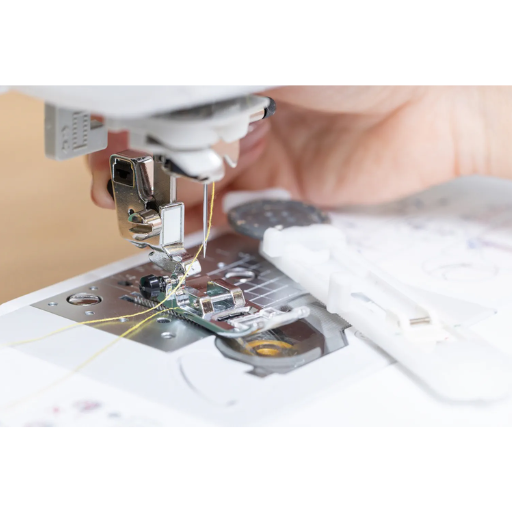
As the first step toward equipment visualization, remember to have basic supplies like embroidery thread, a stabilizer, an embroidery or darning foot, a suitable needle size between 75/11 and 90/14 for most stitches, and an appropriate embroidery machine. Ensure the design plan is ascertained to select an appropriate threading type, which generally uses threads with lots of strength and lacquer for robust embroidery.
Depending on your machine’s boundaries, you can lower or disengage the feed dogs using embroidery hoops for more control. This allows for free motion while attaching the embroidery foot threads and aligning them correctly in the vicinity of the needle head. Next, appropriate stabilizers can be selected to be stitched with the fabric, ensuring the selection halts any chances of stitching disturbance leading to puckering during the process.
Generally speaking, a standard thread stitching speed of up to 600 per minute can be recommended for novices, but anything below 300 will not suffice. By learning how to balance and adjust several of the selected thread settings, users will likely be able to adjust their machines and convert them into standard sewing machines that would allow for delicate threading with a high degree of precision not present before.
Essential Tools and Materials Needed
When working on detailed embroidery projects on a regular sewing machine, there are specific tools and requirements that one needs to have to succeed. As per the input sourced from the best available sources on the internet, these basic items provide a good starting point for efficiently using your sewing machine for embroidery.
- Embroidery Frame or Hoop: A good embroidery hoop is important for fabrics that require stable positioning. It holds the fabric surface taut around the embroidery surface to avoid wrinkles and create ideal conditions for needlework. Choose hoops compatible with your machine’s size.
- Sewing Machine Embroidery Threads: Strong sewing machine embroidery threads are important to enable vibrant and long-lasting designs. The threads provide the sheen and strength required for complex designs.
- Embroidery Stabilizers are among the most important items in embroidery. These products are placed on the fabric to stop it from moving or stretching during the sewing. Different stabilizers can be tear-away, cut-away, or water-soluble, depending on the fabric and stitches used.
- Choosing the Right Needles: Proper embroidery machine needles are paramount and can be selected based on the weight of fabrics and the complexity of the design. Sizes range from 75/11 to 90/14 needles.
- Darning or Embroidery Foot: An embroidery/darning foot or a darning foot brings about better world vision and control, which are necessary for fabric movement in free-motion embroidery to obtain special and complicated details in meandering designs.
- Embroidery may be done without the need to purchase an additional machine. The embroidery can even be done quite simply using a regular sewing machine. Although, as you can understand, this isn’t an entirely easy task. There are some things you ought to keep in mind.
- Mechanical adjuster for expanding sewing machine: Make sure your sewing machine has adjusters for tension settings and feed dog control for better and more effective fabric handling and designs. The Mechanism should be entirely adjustable.
- Tweezers and scissors: Precision scissors are required for trimming threads closely and handling small snippets of thread or small pieces of fabric taw, further maximizing small detailing.
First, buying all of these basic embroidery tools and materials will allow your sewing machine to do so much more than just sew. After performing the tasks above, the creative potential will extend much beyond.
Preparing Your Machine for Embroidery
Before I begin getting my sewing machine ready for embroidery, I make sure I have all the adjustable tools, such as the hoop, embroidery threads, stabilizers, needles between 75/11 and 90/14, and an embroidery or darning foot. I then choose my fabric’s correct needle, thread, and tension settings to prevent puckering or broken threads.
To prevent the fabric from moving while aiming to achieve a higher degree of stability, I place it in an embroidery hoop with a stabilizer. If my machine permits, I lower or disengage the feed dogs to have additional control over free-motion embroidery. Having attached the embroidery foot, I fine-tuned the machine’s stitch tension and speed to 300-600 stitches per minute. I go through all these steps before commencing detailed work on embroideries so that my creative potential can flourish alongside the machine’s ability.
Choosing the Right Embroidery Needle and Thread
With the right selection of needles and thread, satisfactory embroidery can be carried out on a regular sewing machine. First, the needle’s choice depends on the fabric and the complexity of the design. Generally, an embroidery needle size 75/11 will be perfect for lighter fabric, and a 90/14 needle can be used for heavy materials. Choosing the eye of the needle properly will also help reduce seam damage to the fabric.
In regards to the choice of threads, embroidery threads have aesthetics as well as functional purposes. They are ideal for detailed works where sheen and strength are needed. Polyester/cotton is also expected to be used because of its strength and coloring possibilities. In addition, the thread in the bobbin ought to be finer and of lighter weight than the thread at the top to reduce thread tensions and the breakage of threads. There are fitting parameters of bobbin tension, upper threads, needle size, and stencil pattern that, if properly observed, will enhance the quality of embroidery without compromising yarn or design details.
What Techniques Are Used to Embroider on a Regular Sewing Machine?

Achieving professional embroidery results on a regular sewing machine requires mastering skills and techniques. They include:
Free-motion embroidery occurs when the machine’s feed dogs are disengaged. This allows the fabric to be moved in any direction and allows control over the stitching patterns to achieve intricate designs.
Appliqué: Here, fabric shapes are first sewn onto a base fabric using dense satin or zigzag stitches to secure edges, and then decorative stitching may be added.
Thread painting: Using different colored threads, stitch shapes that mimic brush strokes can be created, making it easy to make detailed and gradient-filled designs.
Monogramming involves stitching initials or names on items for personalization. This requires tight control over the lettering to ensure balance, firmness, and proper spacing, often requiring a masking template or a pattern.
Edge stitching means that accent stitching along the seam lines or edges of the fabric may be done for decoratively contrasting features to highlight design features in the embroidery.
Users can learn all these techniques with creativity, and the sewing machine’s enhanced functionality enables it to make unique embroidery designs.
Introduction to Free Motion Embroidery
Free-motion embroidery turns a standard sewing machine into a skillfully artistic stitcher. This process requires using either a cover or lowering of the feed dogs to allow the user to move the fabric as they please about the needle manually. Mastery over the Feed Dogs makes creating threads similar to freehand drawing possible. Creating musketeers and paintings becomes simple because users can fabricate complex designs.
Important tools involve a darning or embroidery foot, which allows for clear visibility of the area being worked on, and a hoop or frame, which allows for consistency and hold of the fabric being worked on. Quality threads and appropriate needle choices are vital to prevent thread breakage and ensure smooth stitching.
As it often seems difficult to free-motion embroidery at first, it does require some patience and practice to handle the focus such activity requires to provide the user with a new level of stitching hand skills. However, mastering the skill does lead to a new creative freedom that would allow for individualized stitches, intricate needle paintings, and complex styles over basic fabric patterns – from such a perspective, free-motion embroidery is the perfect balance between efficiency and art.
Using the Embroidery Hoop Effectively
The efficient use of an embroidery hoop is essential for sewing precision and performing high-quality machine embroidery repeatedly. The first step I take is to pick an embroidery hoop that corresponds to the size of my project and the fabric’s thickness. I take the fabric and put it on top of the inner ring, which is loose enough to cover the ring without deep creases along the fabric. Next, I take the outer ring and place it on top of the fabric, screw the securing device tightly, as a result, the fabric has an even tension and no sagging on the surface.
To position my embroidery pieces, I start by not pulling the fabric so tightly on the hoop that it center is distorted, just enough taut that it doesn’t slip during the actual embroidery. To see that my tension slippage remains even where there is much stitching during the process, I shift the tension of my hoops throughout the work. These practices, acquired by the use of experience and by looking up respectable online sources, guarantee that my embroidery pieces will have the enviable uniformity and quality of workmanship. Along with my strategy for this particular task, the final preparation stage of setting up my embroidery work, I enable my subsequent creative works to gain more accuracy and a better look.
Mastering the Zig Zag Stitch for Embroidery
The zigzag stitch is an important decorative embroidery technique used on all standard sewing machines. To master this technique, one must comprehend the technical parameters and settings that impact stitch quality.
First, the stitch width and length should be customized depending on the fabric and the required design. For example, typical stitch widths extend between 2.0 mm and 4.5 mm, and the stitch length can be between 0.5 mm and 1.5 mm for those making satin stitches tailored on edges or in an appliqué. Adjusting these factors allows for a range perspective to be formed from seam-wide zigzags to narrow seams rubbing tighter against each other and vice-versa everywhere.
Moreover, it is necessary to alter the tension for a certain fabric (or thread). Polyester or rayon threads are advisable as they are much easier to use and shine. For most sewing machines, the tension settings range between 3 and 5 to avert the material from groping and maintain an even stitch formation.
Another important factor is the cutting of the embroidery needle size, which, on most fabrics, size 75/11 is ideal; however, for more complicated patterns or thicker fabrics, 90/14, which is bigger, maybe better. More rarely, treading and clean and sharper ends are less likely to result in stitches that are skip-losing distortion.
When trying combinations of vertical and horizontal stitches and fabric types, sewers can breathe easily. They will find their designs’ optimum ratio of stitch width, length, needle tension, and type. When they understand these parameters well, they can use the zigzag stitch effectively in their sewing machine to embellish the embroidered patterns creatively.
How to Create Embroidery Designs on a Sewing Machine

Crafting embroidery patterns using a conventional sewing machine consists of several steps that need to be performed with an understanding of how the machine operates and how designs are created to achieve good results. The first step is to choose fabrics and stabilizers depending on the design; it is noted that a medium-weight stabilizer is ideal for most projects because it prevents the fabric from shifting or becoming puckered. It is important to select a needle that fits the fabric and the thread to be used; usually, a general-purpose needle comes in handy while looking to do simple embroiders.
Start sketching or transferring the design onto the fabric with a water-soluble pen. The freehand drawing is a template that will assist you in stitching the design on the cloth. Start threading your sewing machine with either embroidery or darning foot, then lower or cover the feed dogs so you can pull the fabric with your hand. Set the stitch length and width to the desired level of your design. Perform several embroidery trials on cloth pieces until you get the right parameters for your machine.
Good quality threaded embroidery is used for outstanding and long-lasting patterns by regulating the tension setting for various threads. Ensure your embroidery hoop does not marvel at the fabric’s grain. While working, perform in a measured and rhythmic manner, moving the fabric towards the needle for smooth forwarding for perfection in stitches. From time to time, change the tension settings and cross-check the firmness of the hoop to achieve the best quality of stitches.
Finally, wash off any last symbols of temporary patterns and attentively remove the stabilizer as required. Applying these strategies and paying attention to the machine and the positioning of the fabric will help you achieve complex and well-executed embroidery.
Transferring Designs onto Fabric
When transferring a design onto a fabric, the correct approach should always be followed to maintain the geometric fidelity of the fabric and the design itself. An appropriate method of transfer is selected depending on the project’s objectives and the type of fabric used. The most well-known transfer techniques include trace paper, heat transfer, and water-soluble pens.
Beneficial: Identify the inkjet printer or a copier for heat transfer and print out the required image onto special heat transfer paper. After this, place the paper on a fabric with the image facing down and heat it using a heat press or iron. This technique works very well when a complex design requires clarity and plenty of detail.
Water-Soluble Pens: This technique involves using a pen to draw a design on fabric, which blues off using water after the embroidery. This method is quick, straightforward, and non-permanent, which is useful when a design can be drawn but requires amendments immediately.
Before applying the method to the fabric, testing it on a scrap piece is advisable to determine the best outcomes and verify that no adverse effects will be induced on your project fabric. Each method has advantages and disadvantages, so choose the one that best suits your design and material characteristics. Following these methods, along with the appropriate embroidering stabilization and considering the right needles and threads, is ideal for achieving a good transfer, which is the first step towards good embroidery work.
Using Stabilizers for Better Results
In my experience, choosing the appropriate stabilizer is very important in minimizing puckering and providing better stitching using the selected type of embroidery. Depending on the fabric used and how intricate a design is, different stabilizers are available, such as cut-away, tear-away, water-soluble, heat-away, or so claimed by major publications such as Threads Magazine and SewDaily. For instance, cut-away stabilizers are perfect for stretchy fabrics as they are a one-time solution that will not distort the fabric after washing. On the other hand, for lightweight designs on woven fabrics, use a tear-away stabilizer as it assists the stitches in the same way and is easy to remove afterward. Water-soluble stabilizers are perfect for intricate sewing or high-visibility designs on delicate fabrics like organza, as they do not leave any residues behind. To ensure that the fabric used and the complexity of the design are suitable for a particular stabilizer, I try out different sorts of stabilizers on fabric scraps to help me improve my embroidery work.
Tips for Creating Intricate Designs
Embroidery is a booming industry; making intricate designs requires creativity and a strategic approach, which maximizes the odds of getting the order right. This section will give business idea tips to centerpiece their embroidery business around:
- Conceptualization and Sketching: A proper plan is required to deliver the project through a sketch or a digital drawing pad. Having an idea of the final product helps reduce reversals. Opposing colors are advised to help differentiate the design elements during the embroidering phase.
- Choosing Fabric Type: The scale of your embroidery depicts the fabric and stabilizer types you will use. Especially for the larger scales, embroidery such as the ones for caps requires thicker stabilizers to stop heavy fabrics from swaying. Testing them out before using them on the final prototypes is a must.
- Threads and Needle size: Threads depend on the needle’s eye. A perfect business would have the best needles that accommodate all kinds of embroidery threads. A perfect thread-needle combination would maximize the final product. However, metallic threads will add complexity and require stronger eye sizes.
- Purchase Settings for Machine: Specific settings must be altered when dealing with complex designs. Practice the draft stitches on other fabrics to gain feedback so once the final piece is created, the quality will be outstanding.
- Detail and Precision: It might be worth checking out magnification tools. As stated earlier, detailed sections such as the stitches must be perfect, as even a slight distortion would have repercussions during free-motion embroidery.
Integrating appropriate strategies, developing appropriate fabrics, and effectively adjusting machine settings increase the quality and complexity of your embroidery designs. The ongoing repetition and experimentation with various fabrics and techniques should help you make them appear more professional.
What Are Common Challenges and Solutions in Machine Embroidery?

One of the issues that one has to face while working with embroidery is thread breakage. This problem also has a solution, so one must ensure that fabric tension settings are correct and that the thread and the needle are combined. Furthermore, for future eras, one would have to select the appropriate thread and needle per the fabric being used and ensure that the machine’s tensions are checked consistently. A common problem in the fabric’s embroidery is puckering, mainly due to having an inadequate amount of stabilizer within the fabric’s composition while sewing. Further steps can be ensured by employing a more dense stabilizer while confirming that the fabric is placed properly in the sewing machine’s hoop. A factor caused by punching, essentially pressure while sewing is skipped stitches – this also happens when the needle is either not sharp enough or cannot suit the fabric type. Therefore, it also makes a difference if you have the right thread. These challenges can also result in the sinking of the sewing piece. To tackle such issues, one must clean the machine and ensure all the components function as they should. Cleaning the machine and gloves in between using it for embroidery can help with many problems, especially in creating a smooth embroidery experience while maintaining a solid result.
Troubleshooting Tension Issues
From my practice, I understand that addressing tension problems in machine embroidery is a delicate and elaborate task. First, I check that the thread path is appropriately established and the machine is threaded properly. Different tensions in upper and bobbin threads can also affect each shot, which may lead to poor stitching or even thread snapping. Furthermore, reliable sites like Made to Sew, AllFreeSewing, and The Spruce Crafts recommend changing settings a little at a time; I frequently test stitches using similar fabric scraps and often change the tension when necessary. I remember such practices as cleaning and oiling the machine regularly, as managing Boston’s lint buildup would affect the tension in stitches. Purchasing the best threads would also help when sewing, but using a thread with the right weight alongside the correct size needle would be an added advantage. Thus, these recommendations made troubleshooting and resolving tension issues easier, enhancing the embroidery’s quality and consistency.
Handling Fabric Slippage
To prevent fabric slippage in machine embroidery, it is crucial first to understand effective hooping methods and the right selection of stabilizers.
- Hooping Technique: You must adjust the tension or pressure of the embroidery frame as it is being thoroughly positioned. The fabric in development is pulled, and let’s say that it’s not stiff enough to encourage distortions yet stiff enough, at least, and it may otherwise lead to problems when computerized sewing machines start their work. It is vital to draw the hoop tension enough not to stretch the machines operating too much or move the fabric.
- Stabilizer Use: Decide on the type of stabilizer, depending on the fabric and the design details. For example, a non-slipping stabilizer could increase the gripping power of the fabric pieces and lower the chances of slipping. Spray adhesive could assist in keeping the fabric wrapped sufficiently within the embroidery frame when a slick fabric such as satin or silk is used.
- Tension Settings: Always closely monitor machine tension settings to prevent slippage. This should be done through weight adjustment since weight determines the fabric’s slippage-prone characteristics.
- Technical Parameters:
- Hoop Tension: Change the hoop height so that the fabric fits snugly against the upper panel of the inner oval ring. This is specifically referred to as adjusting the magnitude of the outer force while the inner force is positioned.
- Stabilizer Weight: Use the average amount between 20-40 g/m² for lightweight fabrics to prevent over-stabilizing the fabric but offer stabilization to an optimal weight.
- Adhesive Spray Application: The end of the modules should be sprayed with a minimum quantity of adhesive spray to provide additional grip without causing stains or smudges.
By incorporating certain factors and techniques, control over fabric slippage can be enhanced, thus improving the precision and quality of the machine embroidery work. Continuous rehearsal and fine-tuning of a given project will enhance the outcome.
Maintaining Your Machine for Optimal Performance
As mentioned in the assignment, the supporting information that enables me to maintain my embroidery machine in good working order properly includes Brother sewing, Sewing Machine Fun, and Machine Embroidery Geek. I perfectly clean the interior dust and lint surrounding the bobbin case to avoid the accumulation that could impede the machine’s performance. I replace the needles often, ensuring they are sharp and fit for the fabric and thread to reduce stitch problems. I also oil the machine’s movable parts as directed by the manufacturer on the usage of the machine to permit easy movement. Additionally, servo motor systems housed in certain models help perform periodic thread tension checks and adjust settings. If done in proper sequence, my embroidery maintenance steps can contribute to the great perfection of the results while the machine’s life span is increased.
References
Frequently Asked Questions (FAQ)
Q: Can you embroider with a regular sewing machine?
A: Yes, you can embroider with a regular sewing machine by using specific techniques and tools, such as a free-motion foot or darning foot, and lowering the feed dogs to guide the fabric manually.
Q: What do I need to start embroidery on a regular sewing machine?
A: To start embroidery on a regular sewing machine, you’ll need a free-motion foot, embroidery thread, a piece of fabric, an embroidery hoop, and stabilizers like water-soluble or tear-away to support the fabric.
Q: How do I prepare my home sewing machine for embroidery?
A: To prepare your home sewing machine for embroidery, install a free motion foot, lower or cover the feed dogs, and use embroidery thread instead of regular sewing thread to achieve better results.
Q: What is the role of the presser foot in machine embroidery?
A: The presser foot holds the fabric in place while you guide it manually. For embroidery, using a free-motion foot allows more flexibility to move the fabric in any direction.
Q: Can I use any thread for embroidering on a sewing machine?
A: Embroidery thread is recommended instead of regular sewing thread because it is designed to handle the high speed and tension of machine embroidery, resulting in a more polished finish.
Q: How do I ensure my design is on the right side of the fabric?
A: To ensure your design is on the right side of the fabric, mark your fabric accordingly and orient your hoop correctly before you start sewing. Always double-check the positioning before starting.
Q: What are feed dogs, and why do I need to lower them?
A: Feed dogs are the metal teeth under the presser foot that move the fabric as you sew. Lowering them for embroidery allows you to move the fabric freely by hand, which is essential for creating designs.
Q: How do I move the hoop while embroidering?
A: Move the hoop slowly and steadily while embroidering to guide the design. This requires practice to maintain consistent stitches and avoid puckering the fabric.
Q: What types of projects can I tackle by learning to embroider with a sewing machine?
A: By learning how to embroider with a sewing machine, you can tackle projects like monogramming, decorative stitching on clothing, and creating custom home décor items.
Q: Do I need special embroidery scissors for my sewing projects?
A: While not required, embroidery scissors are helpful for sewing projects. Their sharp, precise blades make it easier to trim threads closely and neatly.


