Embroidery machines have become a game changer when making custom T-shirts, as precision and efficiency never reached this level with any other traditional method. This guide elaborates on the appropriate machine’s essential features and technical aspects for T-shirt embroidery. Compromise on the thread type and stitch speed, software integration, or locking designs into hoop size – we leave no stone unturned in seeking the factors that dictate the selection process. Further, we introduce several leading models from the industry that suit the requirements of amateurs and professionals to provide reliability and performance. Finally, this guide will make the readers fully conversant with the embroidery machine types, enabling them to select models based on their requirements and the specific technology to be incorporated.
What is the Best Embroidery Machine for T-shirts?

When selecting the most appropriate machine for the embroidery of T-shirts, several things should be evaluated, including stitch quality, speed, and ease of use. The Brother PE800 is a strong alternative owing to its 5″ x 7″ embroidery field suited for larger designs and a vast library of 138 in-built embroidery patterns. Additional features include an LCD touchscreen, which simplifies the design process and compatibility with different brands of embroidery threads and, therefore, high quality. On the other hand, the Janome Memory Craft 400E uses an LED lighting system for high-speed stitching at 860 stitches per minute, ensuring accurate attention to detail. These aspects of both machines enable them to be categorized as good machines, whether for domestic or commercial use, depending on the financial capabilities of the consumer as well as the type of work required.
Factors to Consider When Choosing an Embroidery Machine
In choosing a T-shirt embroidery machine for T-shirts, I have several distinct aspects in mind that would ensure that I can meet my personal and professional purposes. First, the stitch quality is the most important; the clear and sharp stitches the machine provides bring beauty to any design. Coupled with sewing and embroidery functions, I prefer machines of that nature as they give versatility to different projects. Furthermore, the sizes of the machine’s hoops determine the size of the artwork that applies to them; I would prefer machines with multiple hoop sizes to allow many designs. Integrating with embroidery software is also crucial as it will enable me to design and modify the designs easily. Also, the ease of operation, such as simple touch screens and good user guides, is critical. So I go to the best sites and read the reviews of the site users to choose the best strategies for such machines, which guarantees the Embroidery experience.
Top Picks for the Best Embroidery Machine for T-shirts
1. Brother SE1900
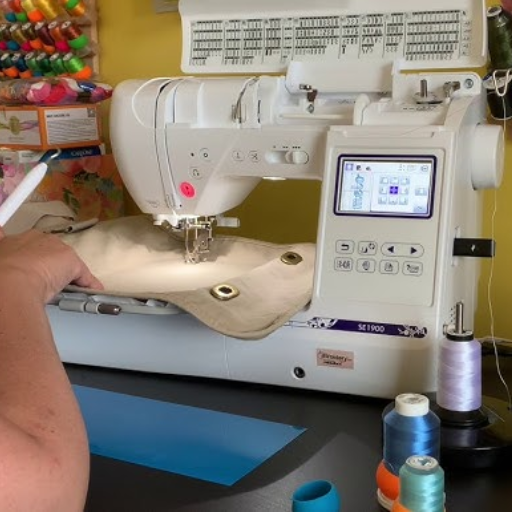
All my examinations point to Brother SE1900 as a cut above its competitors. It has a sewing embroidery area of 5’’ x 7’’, allowing users to design T-shirts, 240 sewing stitches, and 138 embroidery designs as built-in features. Other helpful features of this model include an automatic needle threader and a large color touchscreen display that improves the ease of operation and design selection.
2. Janome MB-4S
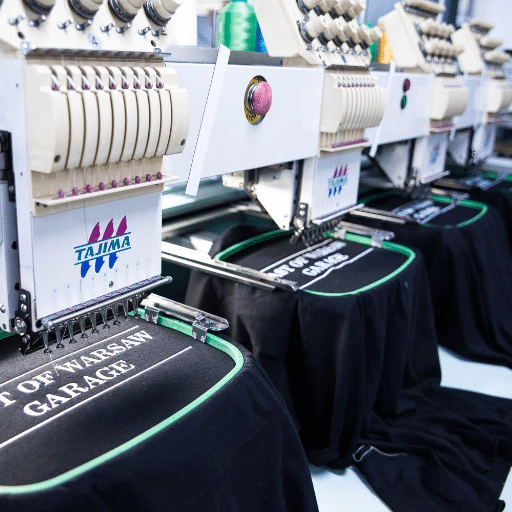
The machine is most remarkable for its elegance and power according to most reviews & is a common suggestion of actual users who know customer needs. Janome MB-4S is a four-needle machine whose only purpose is to rotate a needle and cut an embroidering time. Its robustness and complementarity of its special hardware and vast software allow it to be acquired as a safe option only for severe and purposeful people into embroidery.
3. Singer Futura XL-550
Another commonly referenced machine is the Singer Futura XL-550. It has additional features that allow users to sew and embroider, making it a great all-in-one model for any user wishing to extend their crafting skills. The machine has a large embroidery area and supports an impressive multi-hoop capacity, which allows for extensive and endless design possibilities. The machine also supports software that makes design management easy for complex T-shirt creations.
Comparing Single-Needle vs. Multi-Needle Machines
While comparing a single-needle embroidery machine to a multi-needle embroidery machine, I believe both types have their merits depending on the scale of work involved. I would recommend single-needle machines such as Brother SE1900, primarily for hobbyists or small-scale projects because they are inexpensive and easy to operate. Single-needle machines usually have one embroidery head, come with manual color changes and thread cutting, and are simple machines that beginners can appreciate. On the other hand, multi-needle embroidery machines such as Janome MB-4S are meant for professional use as they are built for high productivity because they can change threads automatically. Many reviews from user review sites believe that multi-needle machines are capable of embroidering complex designs at a faster pace. With multi-needle machines, the only downside that people mention is the learning curve and initial cost cuts. From the experiences of people on popular sites on the internet, I would say my preference between those mentioned above mostly depends on the density and depth of the ‘work’ to be performed – simple and lower quantity ‘jobs’ are ideal for single-head machines. In contrast, bulk work is suited for multi-needle machines.
How to Embroider T-shirts with a Machine?
T-shirt embroidery using a machine involves several systematic stages to achieve quality results. To begin with, the design should be chosen, and appropriate embroidery software should be used in resizing, rotating, and positioning the artwork if necessary. The T-shirt should be prepared by embedding it into a proper stabilizer that helps reduce the fabric’s puckering during embroidery. After that, the T-shirt has to be adequately hooped so that the fabric is firm but not over-stretched to maintain the quality of the apparel. Send the design to the embroidery unit either through a USB flash disk or directly, then insert the required embroidery threads into the machine properly. Sews a test stitch onto the same fabric being embroidered to test how the design will look and initiate any adjustments if needed. Once all is set, start the embroidery machine and supervise its operations to rectify problems, such as broken threads or poor tension settings. When all is over, take out embroidery samples very carefully from the hoop, cut the excess threads, and remove the stabilizer in line with the manufacturer’s guide to display your T-shirt that has been embroidered with intricacies.
Step-by-Step Guide to Machine Embroidery on T-shirts
Regarding T-shirt embroidery dealing with T-shirt embroidery, I have a simple, straightforward, layer-by-layer strategy. To begin with, I first chose the design by looking through the most popular embroidery software, the size and orientation of which are also adjusted well. Afterward, I prepare myself for the T-shirt, where I look for a suitable stabilizer for the type of fabric I want to use; for instance, cut-away for stretchy fabrics to maintain the shape of the design. Then I take the shirt and the stabilizer and put them together hooped in an inflatable garment to prevent bunching. Then, I moved the design over to the embroidery machine, turning it on the right way and connecting it through USB or the internal software system. After putting my embroidery threads on the machine, I run a fabric test on my T-shirt to check if everything is in place. After this, I begin with the embroidery work while looking at the machine closely and being ready to fix problems regarding breakages or patterns, such as tension. In the end, I take the T-shirt off the hoop, cut off excess threads, and follow instructions on removing the stabilizer to tidy the edges. This method does not contradict the opinions of the best embroidery enthusiasts’ portals and guarantees the quality of work.
Choosing the Right Embroidery Thread and Designs
My main focus in selecting embroidery thread is its quality and matching with the project. In this case, I agree with the information provided by those who have a say in this matter: they state that polyester threads are the best for T-shirts because they withstand frequent washing and are rich in color. Besides, rather than just the best thread, I also consider the weight; a thread weight of 40 is optimal for most embroidery projects as it achieves the right level of detail while covering a moderate area. When it comes to the specifics of designing the logos or the patterns, I usually work with well-known embroidery software that contains a fair number of such patterns and allows consideration for the design file formats compatible with my machine. As to the other factors, the diversity of the designs and the overall number of stitches, I do my best not to use designs that seem too intrusive for the background fabric and, therefore, enhance it instead of covering it. The experts of the leading sites in the industry provide these guidelines. The advice is reasonable, and I practice it, meaning the embroidery is always professionally constituted.
Setting Up the Embroidery Area for Success
As with any task, an adequate working space gives one the best opportunity to work quickly and offer quality. You will first need to set up a well-lit work area, either by natural light or other light sources, so that you can see and discern finer details and color differences. When seated at the machine, you should be able to turn quickly without a squeeze, making loading and offloading materials relatively easy. It is also essential to have an appropriate table to withstand the weight and vibration of the machine since stability determines the accuracy of the embroidery machine with its timing and positioning.
Some tools and materials, including but not limited to threads, stabilizers, and needles, should be kept within arm’s reach so that each does not take too long to use. A thread rack and storage containers may also be suitable for easy access and management. Also, try to keep the working area free of unnecessary dust and tiny particles that may enter the machine and cause interference with normal operations.
Dew points, humidity, and temperature should not be overlooked when focusing on specific operating conditions. The relative humidity should be maintained between 40–60 percent to avoid excessive thread breakage or incorrect tension, while the temperature should remain constant to prevent any surprises during embroidery. Also, ensure that there are ample electrical outlets, that the wiring is neat, and that the required surge protection devices are fitted to accommodate the machine’s power requirements. Achievement of these technical parameters ensures an effective working environment for embroidery and maintains adequate professionalism.
What are the Benefits of Using a Computerized Embroidery Machine?

The use of computerized embroidery machines comes with several benefits that boost productivity and the quality of the work. First and foremost, they enable complex and accurate designs, which can be done with appropriate software that supports many design formats and modifications. The outcome also guarantees fine stitching, which is orderly and of high-quality standards. In addition, the repetitive manual work, which is usually the case with standard embroidery, is reduced here because the machines have distinct automated features that speed up the completion of embroidery tasks. At the same time, computerized embroidery machines are very flexible in terms of the type of materials they can work on and the types of stitches; therefore, the creativity is widened. The fact that these machines make it easy to copy one design from one item to another also makes the machines fit for bulk production and, in return, increases the output. Due to the improved user-friendliness that extends from touchscreen controls to wireless connectivity, the machines are again easy to handle and learn. This is advantageous for both new users and the experienced users. To conclude, when it comes to computerized embroidery machines, the finishing of tasks is faster, but the quality and size of embroidery design tasks are better than before.
Understanding the Embroidery Process with Computerization
In my investigation of the computerization of the embroidery process, I regard it as an undoubted advantage to use the machines with such precision and efficiency. Thanks to the sophisticated programs, I can carry out rather complicated patterns, which is a quality appreciated. Such functions as project managers choose not only make tasks more manageable but also save time in completing the projects. Top highlighted among the leading websites: for this reason, there is efficiency in that it encourages one to be creative rather than doing manual work. I am also supported by the scraps of these dictatorial references that the machines allow for various materials and stitches, broadening my creative understanding. The effect of computerized embroidery machines is always professional, making them an integral part of my practice.
Advantages of Computerized Embroidery for Embroidery Enthusiasts
Regarding embroidery, computerized machines have changed how the practice is done for enthusiasts such as myself. One of the benefits of using these machines is their impressive quoting accuracy. This kind of precision improves the standard of my work in that it is possible to do finer designs that are impossible to achieve using other techniques. Furthermore, because such actions are monotonous, many of these tasks are now done in a fraction of the time they used to take as they are automated. The range of stitches and the variety of fabrics that can be utilized enables me to be more creative and ensure that no two tasks are alike. They are user-friendly and have simple graphics and controls, which means the machines are not complex to operate and come with a shorter learning curve, focusing more on design and putting it into practice. As expert sources point out, this revolutionary technology improves output and creativity, making it a must-have tool within my embroidery equipment.
Tips for Machine Embroidery on T-shirts

Several aspects must be observed when embroidering T-shirts to achieve the desired results. First, choose the right stabilizer for the fabric’s stretch. A cut-away stabilizer is often recommended to maintain the design of knit fabrics. Always use a ballpoint needle; these needles are designed for knit fabrics and significantly reduce the chances of snags and holes. Use threads that blend in with the T-shirt’s fabric; polyester threads are firm and slightly shiny, enhancing the design. Another possible preparatory solution would be to wash the T-shirt before the embroidery, which helps to prevent problems with shrinkage in the future. Make sure to apply the correct pressure by realistically hooping the fabric to create a puckered look on the fabric, but do not stretch it too much. Lastly, always make a practice stitch of your design on a scrap piece of fabric to ensure proper sizing and density. Embroidery professionals recommend considering the design placement and placing it usually ‘1-2 inches’ below the T-shirt’s neckline for center alignment purposes. If you follow these guidelines, you should be able to make T-shirts with professional and good-looking embroidery.
Common Mistakes to Avoid in Embroidery Projects
Designing embroidery units is both enjoyable and daunting. The quality and effectiveness of your endeavors can be improved by avoiding several mistakes. It has been noted by eminent sources in embroidery that one of the most fundamental errors is the selection of an inappropriate stabilizer, which results in puckering or distortion. Choose the requisite stabilizer appropriately depending on the fabric type and the design’s intricacy. Another common mistake is the failure to re-adjust the necessary thread tension, which leads to irregularity in the stitches and texture patterns. Where it is practical, ensure the required tension settings in your machine correspond with the particular thread and fabric. Also, if the designs are not appropriately hooped, there will be misaligned designs and damage to the fabric, but the fabric should be held evenly without overstretching. A failure to use the correct needle is also a prevalent mistake. When the fabrics are different, use different types and sizes of needles to stitch without damaging the threads and ensure accuracy. Last but not least, if these rules are broken and the placement of the design is ideally left for the last minute, there would be no end to disappointment; design placement is more technical than intuitive, and it needs a lot of care about measurement and marking so as the design goes precisely where it is required on the garment. Embroidery results can be improved by avoiding some of the errors many make when embroidering.
Enhancing Embroidery Designs with Technology
While striving to improve the embroidery designs, it has become evident that technology is of great importance. It is also a point that the most progressive resources, in so many words, advanced design programs, have boosted the creative part of my work immensely, enabling me to develop elaborate and atypical designs that are impossible to get with manual methods. The availability of online resources allows for quick and easy pattern downloads and alterations, which broaden my imagination. Actual visuals and models of what is conceived can be provided when the design is being created, hence modifications can be done to ensure that the work after the design has been executed is precisely how it was imagined. In addition, employing remote technologies increases communications and the sharing of materials, which has been observed in the leading sites, which is very important for innovative design development. Earning employees using these technologies, I was able to improve the visual and organizational components of the embroidery projects, so technology has become an integral part of the process.
Maintaining Your Embroidery Machine for Longevity
Your embroidery machine must be well maintained to last long and work efficiently. After every operation, use a lint-free cloth to wipe dirt and lint from the needle and bobbin case. Always oil the moving components of your machine as the manufacturer advises to avoid abnormal wear and tear. Always choose high-grade oil suitable for embroidery sewing machines. Change the needle after every 6 to 8 hours of active use, as worn needles will result in poor-quality stitches and tears in the fabric. Update your machine to the latest version, as this helps to improve and fix existing bugs.
Ensure that all the tension controls on the machine are correctly tuned per the specifications provided by the manufacturer. Regularly check for firmware updates to remain compatible with the latest version for new design applications. These maintenance tasks, emphasized in the context of industry benchmarks, greatly enhance the machine’s durability and smooth embroidery effects. Following these instructions maintains the quality of your embroidery work and the working conditions of your machine.
What is the Best Embroidery Machine for Beginners?

When selecting the best embroidery machine for beginners, it is necessary to consider some essential factors that will correspond with the skills and requirements of the projects. According to many embroidery professionals, Brother PE800 is one of the easiest to operate and rich-featured machines. With this device, users have a 5″x7″ embroidery field, which is more than enough for most projects at this level. The device features a color touch LCD that is good for selecting and altering designs comfortably. Beginners can start with the built-in possibilities, starting with 138 preset designs and 11 fonts, without the immediate need to use outside design software. Janome Memory Craft 400E is also viable, as its best-known features include sharpness and reliability. It has a wide work area and enables users to know more about their work by resizing and editing images on the machine. For those who sew and do embroidery, Brother SE600 provides a good design for both. This makes them suitable for most novice embroiderers who wish to grow their abilities as these machines offer a good compromise between usability, usability, and price.
Choosing an Embroidery Machine for Beginner Projects
A beginner must consider the ‘performance’, ‘multifunctionality’ as well as the price aspect of the embroidery machine. Brother PE800 and Janome Memory Craft 400E are among the best choices. They are user-friendly yet have advanced features that a beginner and an expert can use. The Brother SE600 has sewing and embroidery functions; it’s also useful for those wanting to try out several crafts without needing different machines. The most important considerations are]: This includes hoop size, number of built-in designs, and editing features that define the scope of the projects and the degree of design alteration. They also influence the budget, and these models are reasonably priced in terms of features and performance. It is not complicated to understand that buying an embroidery machine boils down primarily to answering what needs to be learned first and what is expected in the future.
Key Features to Look for in a Computerized Embroidery Machine
Certain vital aspects must be considered when assessing a computerized embroidery machine to maximize crafting with it. First, consider the size of the embroidery area; a workspace that is not less than most recommendations enables complex masterpieces to be made, allowing free room for creativity. It is also essential to have a simple interface, such as a color touch screen, to make it easy to operate and design to promote the workflow. Built-in ready designs and the option to upload your designs with the help of a USB connector increase options and broaden the creative basis. Like other experts in the field, consistent stitch quality is one of the features to look for requiring stitch strength combined with tension control as industry standard practice. Also, make sure that the machine can work with different types of threads and that regular updates on the software are available to allow the machine to be used with current design applications. With these features in mind, you can choose a machine to improve your various embroidery projects while helping you develop your skills.
Starting Your Embroidery Business with the Right Equipment
My entry into the embroidery business began with a sound purchase of equipment that meets my business and production requirements. After looking at top sources, my final choice was the Brother PE800 because of its recommendable, user-friendly, and robust features suitable for beginners and small enterprises. It has a 5”x7” embroidery area, which is adequate for many possible undertakings. Thus, it is ideal for several client possibilities. In addition, because I wanted more significant and detailed embroidery patterns, I paid for the Janome Memory Craft 400E, which is more accurate. Many built-in designs and advanced editing features are available for both models, which are essential for a range of unique and customized products. I am confident that such machines commit themselves to quality and productivity, which are critical as the business expands.
Exploring Popular Models: Brother SE1900 and Brother PE800
In evaluating the Brother SE1900 vs. Brother PE800, the specifications of each model should be compared to understand the advantages presented by each model and the embroidery requirements one might have.
The Brother SE1900 combines embroidering and sewing into a single device, making it multifunctional. It has a native embroidery field measuring 5” x 7” and employs an LCD color touch screen to select and edit designs. Moreover, the SE1900 has 240 sewing stitches integrated into the system and ten frame shapes, enabling various designs and crafting applications. Various connectivity options are available, such as USB port support that allows for design imports that will help creative expansion beyond the pre-installed library.
On the other hand, there is the Brother PE800, a specialized embroidery machine that is easy to operate and has extensive functionality, making it ideal for beginners and professionals. Like the SE1900, this machine has a decent embroidery area of 5 by 7 inches but has 138 built-in designs and 11 fonts mainly intended for heavy design operations. The PE800 also features a color touchscreen; therefore, designers can easily manipulate designs and move seamlessly from one stage to another.
In terms of design, both machines are known for their accuracy, reliability, and ease of use. When deciding, it comes down to whether the versatility and multi-functionality provided by the SE1900 are more appealing than the pure embroidery capabilities of the PE800.
Features and Benefits of the Brother SE1900
The Brother SE1900 can be classified as an all-in-one type machine since it presents many features suitable for houses and shops that sew and embroider. The SE1900’s greatest strength is the ability to do several tasks, namely, switch from sewing to embroidery and out again. The size of the embroidery area on the machine is 5″x7″, which means that larger designs can be embroidered without the trouble of rehooping, which is nevertheless vital in highly detailed tasks. The color LCD screen is a touchscreen; these facts about the machine help ease of use when selecting and editing designs.
Having 240 built-in sewing stitches plus other embroidery options makes this model well-suited for a wide variety of projects that require different designs, as it has 138 built-in embroidery patterns. Because the SE1900 includes automatic needle threading and a quick-set bobbin, setup time and productivity are greatly enhanced. By utilizing a USB port for extra connectivity, users can upload unique designs, thus extending their creativity beyond the standard selections.
Moreover, the Brother SE1900 still receives praise regarding the durability of its construction and the consistency of its stitches—a must-have for both amateurs and professionals who want to achieve a particular caliber in their work. The possibility of easy operation, great range of functions, and stable productivity make the Brother SE1900 the best choice for those looking for an all-in-one machine for performing various crafts.
Why Choose the Brother PE800 Embroidery Machine?
The Brother PE800 Embroidery Machine is the optimal choice for those interested in machine embroidery as it is easy to operate, making it suitable for all user levels. Likewise, this device’s 5″x7″ embroidery area allows users to be more efficient in creating intricate embroidery designs, as rehooping is not needed as much as with smaller areas. Including a color LCD touchscreen interface also means there is little room for complication while designing, as users can conveniently edit or select patterns. With 138 built-in designs and 11 font styles, the Embroidery PE800 can lend someone the ability to execute spectacular projects that require one to focus on many intricate details. Connecting via USB is another selling point as one can import their designs and free up more space inside their head. Many users have mentioned the reliable construction and the high stitching quality of the PE800, which makes it ideal for anyone trying to improve their skills.
Comparing the Brother SE1900 Sewing and Embroidery with Other Models
I think the Brother SE1900 is superior to its rivals. The versatility of the SE1900 combines embroidery and sewing functionalities that cannot be seamlessly replicated for multiple crafting requirements. Its 5’’ x 7’’ embroidery field is handy and suited for large projects. It also goes very well with reviews that stress efficiency and variety. The color LCD touchscreen is claimed to be very user-friendly when performing design work, with simple operations to streamline the process. When substitutes offering embroidery machines only are considered, the additional features of sewing the embroidery machines make a positive difference for the SE1900. It is, therefore, perfect for individuals looking for sophisticated sewing machines. All the reviewers seem to agree that the Brother SE1900 is ideal for users looking for a versatile and reliable efficient machine coupled with an accommodating structure to enable designers to explore their creativity and develop designs of their choice.
References
Frequently Asked Questions (FAQ)
Q: What is the best embroidery machine for shirts?
A: The best embroidery machine for shirts depends on your specific needs, such as whether you want a combination or an embroidery-only machine. Popular options include the Brother SE1900 sewing and embroidery machine for its ease of use and the Janome MB-4S four-needle embroidery machine for more complex designs.
Q: What features should I look for in a t-shirt embroidery machine?
A: When choosing a t-shirt embroidery machine, consider features like speed, maximum embroidery area, built-in embroidery designs, and whether you want a single-needle or multi-needle machine, such as the Janome MB-4S.
Q: Is a single-needle embroidery machine suitable for home embroidery?
A: A single-needle embroidery machine is often suitable for home embroidery, especially if you are new to machine embroidery on shirts. It is versatile and easy for various projects, including shirt embroidery.
Q: Can a sewing and embroidery machine handle both tasks effectively?
A: A sewing and embroidery machine can effectively handle both tasks, making it a great choice if you want one machine for all your sewing and embroidery needs. The Brother SE1900 is an excellent example of a combination machine that performs well in both areas.
Q: What is the advantage of a large embroidery area?
A: A large embroidery area allows you to work on more significant designs without re-hooping your fabric, which is especially advantageous for machine embroidery on shirts. Look for machines with an embroidery area of 5″x7″ or larger for more flexibility.
Q: How do commercial embroidery machines differ from home embroidery machines?
A: Commercial embroidery machines typically offer higher speeds, larger embroidery areas, and more needles, making them suitable for high-volume production. Home embroidery machines are designed for personal use, providing ease of use and affordability.
Q: Are built-in embroidery designs important in an embroidery machine?
A: Built-in embroidery designs provide a convenient way to start embroidering without additional software or downloads. They are a great feature for beginners wanting to create shirts with pre-designed patterns.
Q: How does the Brother embroidery machine compare to other machines on the market?
A: Brother embroidery machines, like the SE1900, are known for their user-friendly interfaces, reliability, and versatility. They are highly rated for home use and offer a balance of features and affordability compared to other machines on the market.
Q: Should I choose a dedicated embroidery machine or a combination machine?
A: Choose a dedicated embroidery machine if you primarily want to embroider and need specialized features and capabilities. Opt for a combination machine if you want the flexibility of sewing and embroidery in one machine.