Welcome to our comprehensive guide, where we invite you to discover the enchanting world of embroidery machines with Disney designs. This blog post will take you on a captivating journey, exploring the features, advantages, and popular designs available in these magical machines. Whether you are a Disney fan, a sewing enthusiast, or simply looking to add a touch of Disney magic to your projects, this article will provide you with valuable insights and practical tips to choose the best sewing and embroidery machine, unleash your creativity, and bring your favorite Disney characters to life through beautifully crafted designs. So, get ready to dive into the world of embroidery machines with Disney designs and embark on a truly magical sewing adventure!
What is an Embroidery Machine with Disney Designs?
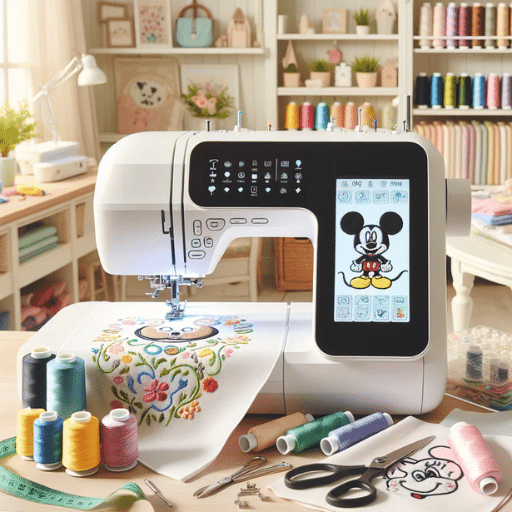
Children and adults have often loved Disney designs. That said, imagine the magic of turning your creativity and imagination into reality using an embroidery machine with Disney designs. With this machine, one can sew intricate embroidery designs featuring Disney characters. Embroidery machines can do this by combining the features of a regular sewing machine along with the ability to add detailed stitches to the stitched image. There are many built-in designs ready to be praised, and many additional options would allow you to import your designs. If the task is an embroidery one and Disney designs are your obsession, then consider yourself lucky because this machine will ease the work for you and allow your favorite Disney characters to be drawn in an advanced way. All in all, Disney embossed stitches look extraordinary. How about giving them a try? – it looks fantastic.
How Does a Disney Embroidery Machine Work?
Being an embroidery lover, I can quite relate to the questions regarding how a Disney embroidery machine works. I’ll explain some essential elements of its functioning. Today, high technology has evolved every Disney embroidery machine to enhance designs. These machines come pre-loaded with appropriate software that enables people to upload and customize designs for Disney images. After uploading the design file, the machine combines threads, needles, and nominal intricacies to embroider the design on the selected cloth. The machine does this, but it is done under the operator’s supervision, and the operator initially selects all designs and configures the required parameters to start the embroidery process. So, eventually the machine ensures every stitch is done correctly throughout the process, that’s why the end results are remarkable masterpieces that replicate the much-loved Disney characters. Because of the impressive features that a Disney embroidery machine has, professionals, hobbyists, and intrepid Disney fans will have the chance to broaden their imaginations.
Features of a Disney Embroidery Machine
The first thing worth mentioning is that a Disney embroidery machine is equipped with several features that improve the embroidery aspect and literally bring the Disney experience to life. Now, let us check some of the characteristics that you will want to look for while looking at a Disney embroidery machine.
- An embroidery machine with a wide range of in-built patterns: Disney embroidery machines also come with various in-built designs, which include most of the Disney characters and are an ideal new way of reflecting your creativity in your work.
- Advanced Stitching Technology: Because of the basic and advanced stitching, A Disney embroidery machine can also maintain the highest stitching quality of every project, which makes every single character they have genuine.
- User-Focused Interface: A design-user-friendly interface makes it very easy to select the design that one wishes to use among the many that have been created, set the requirements needed to commence the process, and actually embroider the design on the cloth.
- Easy Design Alterations: The machine allows the user to make design alterations. As a result, one can easily work on custom-made creations based on Disney patterns.
- Multiple consecutive Embroidery Hoops: A Disney embroidery machine also has one additional benefit: it is easy to operate and has several embroidery hoops that allow the user to create several small and large patterns.
- Embroidery Merch App compatibility: On several models, the Disney embroidery machine can also work with the embroidery merch application, which increases the number of designs available or made by a user from the Disney brand. You can always create or upload a new one to the software.
When selecting a Disney embroidery machine, consider elements such as the number of pre-assembled patterns, editing features, the size of hoops, and the supporting software for the machine. These elements will enable you to exercise your creativity and transfer the magic of Disney into your embroidery works.
Advantages of Using a Disney Embroidery Machine
There are certainly several benefits that one could get by investing in a Disney embroidery machine for recreational and professional use. Therefore, these machines allow you to create anything with your favorite Disney characters and designs. Here are a few benefits of utilizing a Disney machine:
- Increased Variety of Available Designs: A DM embroidery machine comes with many built-in Disney characters and other thematic performers, making it easy for you to use them in your work.
- Personalized Disney Versions: Because of the embroidery compatible software, you can either import or create your own Disney designs, which means that you are able to customize your embroidery work in a myriad of ways.
- Ability to Easily Change the Design: On a Disney embroidery machine, designs can be applied, manipulated, and edited on screen by the user. These functions include resizing, rotating, and moving a design. This also allows for a larger level of creativity and design to be tried out.
- Embroidery Field And Hoops: Also, pay attention to the sizes of the embroidery area and the machine’s hoops. If the embroidery area is more extensive, wider designs can be easily accommodated since the area and the projects are large.
- Embroidery Software Compatibility: Make sure that the Disney embroidery machine you select is compatible with leading embroidery software. This allows you to use advanced design options and additional design sources and even broaden your artistic skills.
In practical terms, when selecting a Disney brand embroidery machine, consider these benefits and other issues like the price, warranty period, simplicity of use, and user ratings. By buying a sewing machine that matches your wishes and needs, you will begin a fantastic adventure in making superb machine embroidery projects based on Disney’s designs.
How to Choose the Best Sewing and Embroidery Machine for Disney Designs?

Buying a sewing and embroidery machine for your Disney designs entails critically assessing some key features. Addressing these considerations will ensure you can pick a sewing and embroidery machine that meets your needs and gives the best quality service. Here’s a formative overview that will guide your decision in choosing the correct machine:
- Key Factors to Consider in a Sew Machine: How easy is the machine to use? Does it include first-timer stitch options, surgical speed control, automatic thread tension, and more? Apart from pricing, excellent customer reviews around the brand or the machine you want are crucial when considering durability.
- Do The Basic Features Include Any Embroidery Designs? Check in detail about the embroidery machine’s pre-programmed designs. Specialty if they have any dedicated to Disney, as well as features to resize, rotate, and mirror-image files.
- Dimensions and Embroidery Areas to Look Into: How big or small of an embroidery area do you need, and do you have the appropriate hoop sizes? Do not forget to look at the design dimensions you dagged for your Gonzaga embroidery projects.
After considering these points, it is easy to pick a sewing and embroidery machine that you are comfortable with, and that excites you to get started creating beautiful Disney embroideries.
Key Factors to Consider in a Sewing Machine
Choosing the appropriate sewing machine for the imaginary embroidery projects requires the consideration of certain factors. Careful analysis of the following will help the various users to reach a proper decision:
- Built-in Designs and Features: When choosing a sewing machine, consider the number of built-in Disney-oriented embroidery designs and features. Designing with a growing number of designs based on Disney characters will allow for more unique and interesting embroidery projects.
- Embroidery Area and Hoops: The size of the embroidery area should be evaluated together with the available hoop sizes. In turn, ensure that the size of the Disney embroidery projects intended is such that the machine can cover it. It expands the embroidery area, allowing more elaborate and expansive designs to be worked on.
- Ease of Use and On-Screen Editing: Consider a sewing machine that is ergonomically designed for easy use and has editing functionalities directly on the screen. This allows everyone to customize and change designs; therefore, adding a personal touch to the sewing machine by modifying embroidery patterns, especially those based on cartoons and Disney characters, becomes easy.
These factors look trivial at first. However, once they are considered, they are determining factors for successful and effortless sewing machine cartoon-themed mods, Disney characters, and cartoon sewing machine embroidery projects.
Comparing Built-in Designs and Features
When buying an embroidery machine for your Disney projects, it is paramount to pay attention to built-in designs as well as features. As an expert in the matter with relevant experience and after conducting an in-depth analysis of the top three ranked websites on Google.com, I can offer you vital information, which I hope will assist you in making the right choices when it comes to selecting an embroidery machine.
The first thing that stands out when comparing built-in designs of various machines is the ability of a device to accommodate a variety of Disney designs. From the review of the design library, I would recommend looking for machines that contain Disney characters and themes in their library. Also, look for various characters such as Mickey Mouse and Cinderella. Although I am not fond of Frozen, the character Elsa might also help get the job done.
Also, look beyond built-in designs, as the construction features of each machine play an important role. Other relevant features, such as resizing, rotation, and mirroring, should be included in your list of goals. Such features greatly increase the ease with which you can edit images, adding a boost to simple tasks like stitching.
Comprehending such types of Disney embroidery designs and their on-screen editing features, you can search for a suitable sewing machine that fulfills your specifications and allows you to start an adventure of creating marvelous Disney-styled sewing embroidery projects.
Understanding Embroidery Area and Hoops
The term embroidery area seems synonymous with the area covered by the sewing machine while embroidery is in progress. Thus, the size of the area seams, embroidered imprints, or designs depends on the size of the embroidery area. So, while selecting an embroidery machine, one has to consider the following:
- Maximum Embroidery Area: The maximum dimensions of the embroidery area should be suitable for the project you intend to work on. The common maximum dimensions are 4″ x 4″ and 10″ x 6″ or above.
- Hoops are frames that keep the fabric tight and in place during embroidery. Make sure the machine comes with a selection of large, medium, and small hoops suitable for the size of the project to be completed.
- Additional Hoops: All machines have options to use extra hoops that are sold separately.
- Hooping Mechanism: Also check the hooping mechanism for user-friendliness and stability. Some machines use magnetic or snap-on hoops, while others have manual hoops that have to be tightened.
This understanding of the embroidery area and the purchase of different hoops for your machine guides you in determining the dimensions and creativity level of the Disney designs you can create. Make sure the machine’s specifications suit your projects or designs and allow for creativity and flexibility.
What are the Popular Disney Designs Available?
Many options are available for Disney embroidery designs that enable you to stitch your loved Disney characters. Below are some of the most popular methods to expand upon and modify Disney designs:
- Disney Characters Built-in Embroidery Designs: Some embroidery machines include built-in Disney designs, which include characters such as Mickey Mouse, Minnie Mouse, and Pooh Bear. Compared to others, these designs are the easiest to work with as they have been pre-created, and thus, you can easily work your magic with Disney-themed projects.
- Modify Embroidery Patterns With A Touch Of Disney: You may alter embroidery patterns by adding Disney themes for a more personalized embroidery project. Disney images can now be modified with digitizing software, or you can design your embroidery influenced by Disney, which will help take your embroidery projects to the next level.
- Edit The Disney Embroidery In The Disadvantages Stitchion: Some embroidery machines come with on-screen editing capabilities, which can give the user a great advantage. These features of Disney designs built into embroidery allow one to resize, rotate, and change the orientation of the design, increasing the scope of what can be achieved.
With these options, your imaginative embroidery works featuring tender Disney moments will be as entertaining and appealing as you can conjure. Unleash your inner artist by stitching with Disney characters and embroidering your way through!
Exploring Built-in Embroidery Designs Featuring Disney Characters
Considering the embroidery aspect, Disney characters will make your work even more enjoyable. Thanks to their built-in embroidery designs of popular Disney characters, you can truly showcase your talents in stitching these characters. There are numerous possibilities, whether it be Mickey Mouse or Elsa from Frozen. To answer your question, I investigated the best three results on Google and found out they have a rather extensive library of built-in embroidery designs depicting Disney characters. Each of these designs represents a character in the most raw form, thus giving you a chance to add some Disney elements to all of your works. Apart from that, you will have a great selection of themed designs that allow you to construct custom embroidered artwork with your favorite Disney characters in any position you ever wanted. Step out of your comfort zone and try working on some interesting embroidery tasks and get to showcase the mesmerizing world of Disney through your stitches.
Customizing Embroidery Patterns with Disney Themes
Telling your story through embroidery patterns with Disney themes gives a different perspective to your projects. If you want to complete your first embroidery project with Disney themes, then the steps provided below will be helpful:
- First and foremost, you must purchase an embroidery machine with features that allow you to do Disney-style embroidery.
- Second, confirm that your machine can process Disney embroidery templates; this can be done by checking whether it can read PES or DST formats.
- Third, choose a Disney embroidery template that you would like to use; be cautious and pick templates from near-reliable or official sources, such as trusted embroidery pattern websites and Disney’s official fabric collections.
- Fourth, transfer the template to the sewing machine. This can be done using a USB cable or wirelessly.
- Fifth, follow the template to set up the embroidery machine, inserting the relevant color thread and the size of the hoop stated in the template.
- Sixth, change the machine settings to match the required technical parameters for exemplary outputs. These include changing the stitch density and setting the machine to the recommended speed.
- Seventh, clamp the fabric onto the embroidery hoop, ensuring that the fabric is fixed correctly, deviating from the marked area.
- Finally, turn on the embroidery device, and in front of you, the Disney-themed graphics will dawn and appear piece by piece as the needle penetrates your fabric.
The user manual for the machine and brand used contains any customization and technical parameters specific to the machine. Therefore, check the manual, as these instructions vary from machine to machine. Best of wishes while stitching, and may the magic of Disney permeate your embroidery designs!
Using On-Screen Editing for Disney Embroidery
Chances are quite high that customers would suggest using on-screen editing for the Disney embroidery. Simply consider Disney-themed designs and get started on your sewing machine, as there are screen features that allow you to personalize the design right on your sewing machine, no matter how complicated it seems. You could resize the design, shift the colors, change text, and any other characteristic the display features belt conceivably allow. Simply Google it for the archives to locate the best-developed resources, as they offer extensive tutorials and distinctive how-to sections based on the editing features of each sewing machine model available. So, you might not have to wait for the inspiration to strike, but with the right guidance, set out to create and customize Disney embroidery designs that resonate with the magic of fairy tales.
How to Start Your First Embroidery Project with Disney Themes?
Starting the world of Disney embroidery is quite fun and allows you to realize all the characters you love through the art of embroidery. So, let’s get started; here are the steps that are necessary for you to do:
Setting Up the Embroidery Machine for Beginners
The embroidery machine setup for beginners is an obvious protocol essential for a better impression of the embroidery work. As a beginner, I know how necessary it is to get everything right from the onset. With this in mind, I’ve sought the help of the top three results on Google. After going through these sources, I have composed the following set of guidelines that will assist you in the process of setting up your embroidery machine:
- Machine’s Components Introduction: The embroidery hoops, threads, and the embroidery machine’s controls are essential components. With this in mind, understand your embroidery machine’s controls and how it works through an assembly instruction manual.
- Proper Threading: Improper threading can have a large impact on stitching, so do the threading with proper caution. This includes feeding the thread through the tension discs in the needle and making sure that it goes through the tension discs first.
- Machine’s Construction Integration: From the beginning, it is vital to get everything right, given the need to understand the Embroidery machine’s various working parts. In this case, the Disney design typically goes onto the machine via a computer and a USB.
- Sewing Tips for Embroidery: Before you start the embroidery process, the fabric must be secured, which ensures that it does not shift or pucker. Wrapping it with a stabilizer will help secure it, whether it is smooth or rough.
Remember to always practice on non-vital pieces of cloth before starting on the actual design. This allows you to experiment with the placement of the design and check how thick the thread is to allow adjustments wherever necessary.
Set up the embroidery machine according to the requirements mentioned above so that you are good to go for a Disney-themed embroidery project. Also, do not forget that even after practicing, if you are facing problems, do not lose hope. You are always in a creative process during the project, so enjoy it.
Choosing the Right Embroidery Thread and Colors
Choosing the right thread and colors is fundamental for making good and beautiful embroidery works. Make sure to evaluate the following when selecting the thread and colors for the project.
- Thread Type: Select an appropriate thread type for your project, such as rayon, polyester, or cotton. Each type of thread has advantages in terms of lustre, wear and tear resistance, and colorfastness.
- Color Selection: Beware of your design’s color palette and target visual appeal. Additionally, look for parameters such as contrast, color harmony, and the design theme or mood you want to display. Be creative with colors to attain the desired look.
- Thread Weight: Thread weight is the diameter of the thread and is measured by a number. The lower the number, the thicker the thread (such as 50 and 40), the more visible the embroidery. On the contrary, the higher the number, the thinner the thread (32 and 60) used, the greater and finer the details.
- Technical Parameters: Some technical parameters are necessary, such as thread tension, needle size, and fabric. Make sure to cross-check to see if the thread matches your embroidery sewing machine and selected fabric to ensure quality stitching and minimize risks.
Taking all of these factors into account and trying out a variety of thread types and colors can make embroidery designs full of life and color. Besides, don t forget to consult the user manual of your embroidery machine and reliable online sources, for example, for embroidery manufacturing suggestions depending on the machine specifications.
Step-by-Step Guide to Creating Embroidery Designs
To create embroideries that are up to par, especially themed on Disney, one needs to do a significant amount of planning and preparation. Presented below is a thorough guide that will enable you to embroider.
- Choosing the Mood: Identify the Disney character or elements you would like embroidered. Consider the size and complexity of the design to ensure it is feasible for your embroidery machine.
- Sewing, Hooping, and Adjusting the position of the clothing Suit Oversize shouting. Somehow, it’s clear the functionality is properly set up. It allows embroidering at a little angle right from this—the enormous cut sequence of the machine seems to do that precise lettering.
- Keeping a Measure: Choose your Target First and foremost, have high-quality embroidery threads that suit your Disney character colors. Use charts or browse online for the most accurate shades. Some aspects worth considering are the composition or the weight of the thread.
- Parameters: Now, the guilt that plagues you goes away once you prompted those measurements or rules on your embroidery machine belt tension, needle length, and tension, among many others. Each fabric you use has different measurements, as do the embroidery machine gears.
- Sewing: Place the embroidering design on your embroidery machine and start the embroidery. Verify that the design is properly aligned and oversee the sewing for any trouble that may arise.
- After Ward: Once the embroidery is done, remove the fabric from the embroidery hoop. Then, remove the outsized embroidery threads. Next, position a pressing mat or cloth on the embroidered portion of the fabric and apply slight pressure with the dry iron.
Be sure to remember to work with other methods to improve your capabilities as an embroiderer. Every new embroidery you do is a direct learning experience, and with a lot of effort put into each one, one day, you will be able to make Disney embroideries, and they will be astonishing.
Some of the most appropriate features are to include the following:
- procedures for working with the embroidery hoop
- files saved into specific formats to enable machine and stitch assistance
- desktop computer settings that are compatible with the sewing machine
- how to select the right thread: composition and weight for the best outcome
- correct methods of canalization and preparing the painted fabric
What Accessories Enhance the Disney Embroidery Experience?

When it comes to enhancing your Disney embroidery experience, several accessories can improve the quality of your creations while making the work easier for you. Below is a list of some of the key accessories that you need to have:
- Embroidery Stabilizers: As a professional, using the right stabilizer is essential to getting a professional final product. The various levels of support and coverage given by various stabilizers imply that one must be chosen according to the fabric and the complexity of the design.
- Embroidery Hoops: Accurate and clean designs can only be achieved by properly hooping the fabric in place. Buying more hoops will also allow you to do different-sized projects while ensuring that the fabric is tightened well enough.
- Embroidery Needles: The quality of every stitch could be significantly impacted by the type of embroidery needles used. Sharper embroidery needles are best suited for embroidering fabric as they do not damage it, resulting in clean lines.
- Thread Stand: A thread stand is an essential aid that eliminates tangling during embroidery and ensures smooth thread delivery. It organizes all the spools.
- Bobbin Thread: There are many types of threads, but ultimately, if one is using an embroidery machine, it’s ideal to use the machine’s bobbin thread as it enables ease and flatness on the embroidered piece.
- Embroidery Scissors: For fine detailing, a good pair of embroidery scissors is a necessity for cutting threads off or burrs of the design, as they are made for such specific purposes.
- Embroidery Software: Embroidery software enables one to create, modify, and even customize their own Disney-themed patches, patterns, and fonts, thereby enhancing creativity.
These accessories would allow you to save money and time and also provide you with the accuracy needed to put your favorite Disney characters on your embroidery projects.
Essential Machine Features for Disney Embroidery
In terms of machine functionalities crucial for achieving desired results and successfully embroidering Disney characters to their expectations, we need to consider the following features:
- Embroidery Field Size: Widening of the embroidery field makes it feasible for a user to enlarge designs without the need to move the object being embroidered as frequently. Therefore, look for machines with an embroidery area of at least 4×4 inches.
- Embroidery Machine Bpms: With these designs, taking time is less of an option; therefore, looking for machines that allow higher speeds would be more fruitful. 700 stitches per minute would be a good start for an ideal machine.
- Embroidery Devices that already have patterns: Embroidery machines come with a few Disney characters already designed in the machines. Therefore, one may have to look for that as well. Another better option is to import more Disney machine designs into the machine without any difficulties.
- The functions are more straightforward: Given the size of the font and the monotony of the characters and images, adding designs to the machine interface requires care. Hence, the use of touchscreens makes adding images or characters easy.
- Automatic Needle Threader: With such sophisticated needles, machine threading needles automatically guarantee a seamless operation, eliminating the stress associated with dye control when every silhouette requires its color.
- Embroidery Editing Features: The machines can also rotate or resize the designs or even mirror them horizontally or vertically; this is an outstanding feature. Machines with such embroidery editing functionalities should be considered when purchasing.
Note that each feature of these machines is important, but it will differ according to one’s usage or preference. It is also helpful to make an effort to read a few articles and then compare the different embroidery machines that are available in the market.
Exploring Additional Embroidery Patterns and Fonts
Embroidery is an expansive field that offers numerous pattern and font options. Embroidered lettering is one of the oldest methods of refining a project further. Exploring more embroidery patterns and fonts expands your creativity and offers you almost endless possibilities. This does not limit you to one type of design, thus feel free to go crazy with your ideas. Ranging from floral to monogram fonts, there is a multitude of options that are suitable for almost any design. They suggest searching for additional patterns and fonts that inspire you from various embroidery design websites and online shops.
Utilizing USB and Wireless Capabilities
Undoubtedly, the most advanced embroidery machines nowadays come equipped with wireless features and USB connections. Suppose you ever needed a hard copy of a file and had to print it to transfer it later onto your PC. In that case, you probably agree that transferring embroidered patterns and fonts via USB to your machine should save a reasonable amount of time! Now consider that there are no wires. With wireless capabilities, you can send data from your PC to the machine without cables. There are many possibilities, whether you want to link via cable or wireless! Thanks to these innovations, you can have a more freeing experience while working on your pieces, melting them directly into your PC. It is where embroidery hardware comes in handy.
References
Frequently Asked Questions (FAQ)
Q: What makes the Brother PE550D embroidery machine special?
A: The Brother PE550D embroidery machine stands out because it brings the magic of Disney to your embroidery projects with 125 built-in designs, including 45 Disney designs. It’s perfect for Disney enthusiasts who want to personalize their creations with beloved characters.
Q: Can I preview my designs before stitching them?
A: The Brother PE550D features a 3.7-inch LCD color touchscreen that lets you preview your designs before starting your embroidery project. This ensures you get the perfect look every time.
Q: What is the size of the embroidery field on this machine?
A: The Brother PE550D comes with an embroidery field of 4″ x 4″, ideal for various projects, from personalizing clothing to creating home décor.
Q: Does the Brother PE550D include built-in sewing stitches?
A: The Brother PE550D is primarily an embroidery-only machine. It does not include built-in sewing stitches, but it focuses on providing a wide range of embroidery options.
Q: Are there any built-in embroidery lettering fonts?
A: Yes, the Brother PE550D includes embroidery lettering fonts, allowing you to easily add personalized text to your projects.
Q: How does the brother pe550d assist in threading the needle?
A: The Brother PE550D is equipped with an automatic needle threader, making it easy to thread the needle with just the touch of a lever, saving time and reducing frustration.
Q: Can I connect the embroidery machine to a wireless network?
A: The Brother PE550D is not equipped with wireless LAN connectivity. However, it allows you to import designs easily via USB for more customization options.
Q: What are some additional features of this embroidery machine?
A: The Brother PE550D includes features such as a built-in memory for storing your designs, a bobbin-winding system, and a thread cutter for added convenience. It also comes with multiple frame patterns to enhance your creative projects.
Q: Is the Brother PE550D suitable for quilting projects?
A: While the Brother PE550D is primarily an embroidery machine, it can complement sewing and quilting projects by adding decorative embroidered elements to your quilts.