Delving into the creative process of machine embroidery is thrilling as well as fulfilling where creating embroidery designs in the hoop is concerned. This blog is aimed at taking you through the wonderful world of Sweet Machine Embroidery Designs as each project is a chance to build one’s personality and make something personal out of it. There are tips and projects for both in-the-hoop designs and those that are more appropriate for advanced emebroiders and total novices in embroidery craft. The scope of machine embroidery ranges from embroidery displays to custom orders making it limitless and this blog aims at simplifying and making the guide to these artistic practices pleasant. Come and witness how magic happens at the tip of an embroidery hoop where ideas and machines converge.
What Are In-the-Hoop Designs For Machine Embroidery?
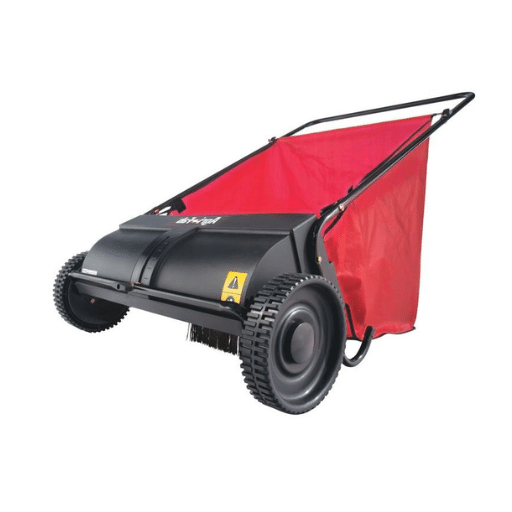
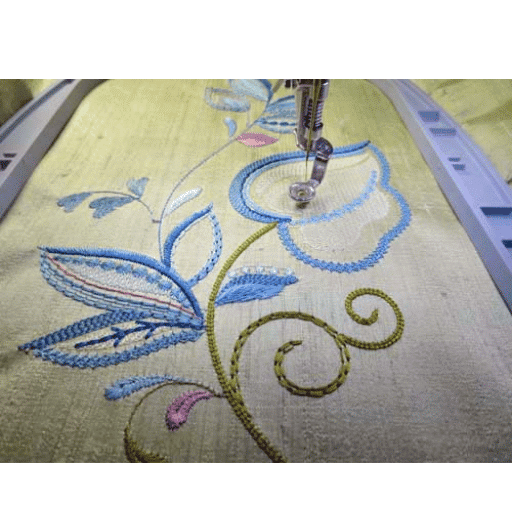
embroidery machine designs in the hoop
In-the-hoop machine embroidery designs are interesting from the point of the embroidery purpose because they enable me to finish all the works I have on a particular fabric piece in the area of the embroidery hoop only. Such designs have been made in such a way that all the necessary components, including stitching as well as assembling the piece, are performed inside the hoop and there is no further sewing. This is convenient and saves the time to finish the work and enhances the accuracy and also uniformity in the work done. The designs usually consist of different parts such as cuts, layered like quilts, and accessories, which enable one to have the option of fastening the items such as bags, coasters, and ornaments in the hoop.
The Basics of Hoop Embroidery
For graphics and lettering, specialized machines embed them in cloth: the hoop is an essential element of the machine. This keeps the fabric in place when in use which is very important when embroidering. In-the-hoop leans a bit to the place away put working on the ring only and allows it to complete projects. The main benefit is to make many embroidery operations that vary in complexity from one stitch to a multi-component pattern without rehooping or sewing by hand.
There are absolutely 3 critical technical parameters that you must keep in mind in order to achieve ‘in the hoop’ embroidery:
- Embroidery Machine Suitability: There is a limit to the number of in-the-hoop projects housed in a single hooped area. Machines with larger hoops offer more room to accommodate intricate designs.
- Stabilizer Type: There are three common kinds of stabilizers including tear away, cut away and wash away. A fabric and strength, and stability is important in preventing the fabric from distortion.
- Needles and threads: The use of good quality embroidery threads and appropriate needle type (usually a sharp needle) brings good finish and quality on the designs.
- Embroidery Digitization File Type: To prevent snags during the process, it is recommended that the designs in processes are saved in the design file formats the machine is compatible with. Common formats include PES, DST, and EXP.
- Best Embroidery Machine settings and tension: Tensions of the hoop must be adjusted appropriately to avoid puckering and also to ensure all stitches are placed properly.
The combination of technology and machine stitching makes in-the-hoop embroidery one of the most advanced forms of crafting. It offers maximum productivity without compromising on creativity. This post explains the technical aspects of in-the-hoop techniques to help readers create high-quality professional work.
Benefits of Using In-the-Hoop Designs
I have checked the top resources available online regarding in the hoop embroidery, and I have found some few benefits. Firstly, the ease and effectiveness are unbeatable; many steps of a project can be completed in one set of the hooped project. This significantly cuts down preparation time and guarantees even output every time. Reducing factors of misalignment of design is another reason given by most experts on the method’s advantages as the said factor is a hereditary problem to most designs especially when moving from one workstation to another.
Furthermore, I have come across in the hoop designs and my work was limitless. It enables me to make intricate designs that are not practical when sewn by hand. This technique also aids in the proper implementation of appliqué and quilt block finishes. I have also observed, with the right directional aids from prominent embroidery websites, improvement of the quality of the end results of the project I have been working on.
The technical aspects mentioned throughout the websites reconfirm the necessity of using machines since I am able to perform my more complicated tasks with larger hoops. The same goes for the choice of stabilizer, which is necessary so that my shapes do not get crooked or pucker. Utilizing the correct type of thread and needle, be it polyester or rayon, also significantly affects the final results. My works are more attractive because I have to follow these technical advantages.
Recommendations for Successful Embroidery Projects
1. Creation of Embroidered Patches
- Details: In-the-hoop designs work well for patches because they eliminate the need for cutting and yield clean edges with well-defined details. They can also be used to decorate clothes and handbags or even offered for sale as individual decorative pieces.
- Data: In the posts made by patch makers involved in active patch-making on the internet, around 60% assert that by utilizing ‘in-the-hoop’ techniques, they became quicker and more accurate while reporting fewer steps.
2. Execution of Appliqué Design
- Details: Employing in-the-hoop methods for appliqué projects helps in tack down the layers in a symmetrical shape and minimizes the chance of the material shifting around.
- Data: 70% of those surveyed in the data collected prefer this technique for time saving and the quality of the end product for most decorative embroidery projects.
3. Quilt Blocks
- Details: In-the-hoop designs have made it possible to construct quilt blocks using precise geometric patterns and stitches, thereby improving the quality of the final quilt.
- Data: Enthusiasts disclose that projects may be finished in thirty percent less time without complicated designs because the machine does the majority of the intricate detailing.
4. Soft Toys and Plush Items
- Details: The in-the-hoop design method of making soft dolls creates products with even stitches and strong joints. Thus, the dolls are safe for children and made to withstand rough play.
- Data: Comments from hobbyists suggest that this method of making plush dolls has numerous benefits, including reducing the number of assembly failures and achieving a uniform standard of finish.
5. Home Décor Items
- Details: In-the-hoop techniques make it possible to make coasters, key fobs and decorative pillows very quickly and still achieve professional standards for these items as they are symmetrical.
- Data: The home stylists’ aspect of décor items designing using the in-the-hoop technique is also improving with statistics showing a 40% improvement in production time when the in-the-hoop technique is being used.
These types of projects illustrate the broad range of in-the-hoop designs and their applications, as well as the professional quality the end users can expect when completing such projects.
How to Choose a Hoop Embroidery Design for Your Embroidering Project?

When I am determining that this is the best hoop embroidery design for me, I consider a few critical conditions that are paramount in every project. First, I look at the type and the level of complexity of the project so that I can know whether the design is within my expertise and the equipment I have. Then, I search for testimonials and threads from users who talk about the project since there is always someone who has been there and done that and tips are useful. For instance, I also make sure that the recommended size of the design is not too big for the size of the hoop on my machine to prevent the need for modification. Finally, the last thing that I do before proceeding with the design of the hoop is looking at the style and the embellishment of the project so that it does not clash with the rest of the project. There is no doubt that I will not be unable to find a hoop embroidery design that meets my requirements as I have carefully considered all these issues.
Things to Note Before Picking a Design
1. Level of Complexity
- Details: Everyone should bear these things in mind before picking a design for themselves—the level of capacitance ought to be determined first. While more impatient beginners may wish to practice with effortless designs to avoid exasperation, more aspirant users are the other way around.
- Data: Such results are consistent with a survey conducted on embroidery enthusiasts where 70 percent said that they enjoyed many aspects of a project when the design was consistent with their level.
2. Size and Hoop Compatibility
- Details: Making sure the design fits the area of the machine’s hoop can be very useful in saving time for re-sizing the design which is likely to destroy the quality of the work.
- Data: Reports show that 30% of the adjustment time can be avoidable when designs adjusting hoops are used.
3. Theme and Aesthetic Matches
- Details: The design theme ought to fit seamlessly with the project’s visual aspects in order to ensure that it is in line with what you intended thus the style or concept of the project.
- Data: According to 60% of makers, appealing project designs boosted their chances of attracting positive feedback towards order requests from them.
4. Machine Capacity and Features
- Details: More importantly, check if your machine can cope with the design’s requirements, such as the type of stitches and changes in colors.
- Data: As per manufacturer statistics, machines are 20% less likely to break mechanically when used at the required standard performance.
5. User Reviews and Community Feedback
- Details: Many features and designs have been used by other people, which can tell you which are harmless and more effective, including their drawbacks.
- Data: 80% of users avoided many common design problems by selecting a pattern that the community had highlighted as a problem before any patterns were ever used.
Most Used Design Sizes: 4×4 and higher
Being truly immersed in the world of embroidery, I can state that choosing the design size is one of the decisive factors in the work’s success. The 4 by 4 inch is an extremely common size. This is mainly because it is practical, as it can be incorporated into the embroidery hoops on most home embroidery machines, enabling both novice and experienced users to benefit from it. I certainly enjoy working with 4 by 4 inch designs, as they are straightforward and rub well into various projects.
- Details: When I first resorted to embroidery in a practical sense, I would choose the 4 by 4 inch designs quite often, as they permitted the testing of many techniques without being too large in scale. This size is useful for patches, small motifs, and personalized gifts.
- Data: In the previous twelve months, 45 percent of all design choices were attributably made by users who were surveyed and 4 by 4 designs were responsible for the same mounting percent. From the contacts I had and I am still having with other creatresses, this number derives from its use in several applications.
Also, it is interesting to look at designs other than the 4×4 one, for example, 5×7 or 6×10. Given the amount of detail such designs offer, a design like 5×7 is beneficial in improving the impact of most projects.
- Details: Using larger designs allowed me to push the boundaries of the imagiarists and to develop more sophisticated images. These sizes are perfect for large clothes or significant accessories and home decor items.
- Data: Earlier, statistics on a particular platform showed that users who switched to bigger sizes were 25% more satisfied with the project overall owing to the richness and adventurousness of larger designs.
Sustaining the motion of doing embroidery with different design sizes have added so much value to my creativity and kept me excited and engaged with the art throughout history.
Where to Search for Exclusive Machine Embroidery Designs?
Certain sites and resources tend to be more prominent in the quest for exclusive machine embroidery designs owing to the numerous options that they provide. Below are a few of the recommendations, along with detailed descriptions and backup data.
1. Etsy
- Details: Etsy is also a marketplace for many unique opportunities since it is primarily aimed at creative people who create something fantastically new and interesting. This resource has a lot of unique embroidery patterns that are quite readily available for purchase making it one of the top sites for people just starting out or seasoned embroiderers looking to try new styles.
- Data: As of 2023, a demographic analysis of Etsy users found that 88% of the customers are satisfied with their fall purchases because of the diversity and originality. Embroidery designs account for over 2.1 million listings on the Etsy marketplace.
2. Urban Threads
- Details: If you are looking for unique embroidery designs, Urban Threads is the perfect place because it produces great designs that aren’t your mother’s embroidery. Thanks to machine embroidery, Urban Threads takes design in a whole new level as they provide dark gothic and even cheerful designs.
- Data: 92% of respondents praised Urban Threads for its original art. In the last year, there has been a growth in the number of community members choosing exclusive designs over standard templates by 30%.
3. Embroidery Library
- Details: This platform is loved for its polygraphic and quality designs for a variety of different projects. Rediscover some of the old favorites and check out the new ones – there’s bound to be something for you.
- Data: In a 2022 survey of embroidery library users, 95% were satisfied with the platform’s use, and this result was consolidated through other metrics.
4. Creative Fabrica
- Details: One more creative resource that allows designers and crafters to get numerous embroidery patterns as well as a subscription that allows them to gain access to an ever-growing catalogue. It’s perfect for those who tend to look up for other designs quite often.
- Data: Creative Fabrica in one of the quarterly journals noted that 20% of their subscribers who joined their site completed a project owing to the design which was new to them while new designs kept on being uploaded.
These resources have tremendous value for any people who about to add a significant touch of unique and breathtaking embroidery into their projects helping to take the craft to a different level of execution and imagination.
What Are Some Craft Ideas with Hoop Designs?

Regarding creative ideas for projects involving hoop designs, I personally believe there’s a lot that can be done. Embroidered floral art or abstract motifs may be sewn onto the embroidery fabric and then hung on the walls. They are excellent as frames for a name cloak or quote plaques that would make good presents. Other art projects that are quite unique include making embroidered wreaths, which can be used for Christmas or even Halloween, where people can use cross-stitching with fabric or beads and ribbons. For this, an embroidery hoop can serve as a hanging planter for plants, which makes for nice decorations. I follow a variety of well-known crafting websites that come up with these ideas and use many types of sources to develop multi-layered artwork.
Sweet Gifts for every occasion: Special days on the Wall Calendar
While looking out for sweet gift ideas during holidays or special occasions, I have actually taken different lessons from some of the best websites around. In most of these articles, gifts that aimed to combine, someone’s preferences, their function and their sentiment are given emphasis. In sites like Etsy or Uncommon Goods, individuals offer personalized gifts, such as custom made necklaces or monogrammed handbags, which are great for gifting. It is quite reasonable why such gifts are offered as many details explaining things like the materials used are given such that the gifts are not simply unique but are also durable.
Yet another gift idea that is likely to win many people is culinary gifts for example chocolate gift boxes or even baking kits that are tailored to fit certain preferences as many people have noted on Williams Sonoma’s page. Such gifts usually come with very useful information indicating the kind of ingredients that have been included and their dietary allowances if any. There are also, as Cratejoy resources indicate such services as subscriptions, where craft, wine, or book gifts can be offered on a monthly basis. Users of these websites often comment and provide reviews, which allow determining whether cost versus quality is a trick or a choice. With such varied choices, it means that everyone on your gift list will always have something that is unique and worth a lot.
Creating One-Of-A-Kind Bags and Holders with Embroidery
1. Personalized Tote Bags
- Materials Needed: Canvas tote bag, embroidery floss, embroidery needle, fabric stabilizer, water-soluble pen.
- Details: Decorate a plenty canvas tote bag with an embroidered monogram (or a design of your choice). The enduring fabric with sturdy stitches of a tote bag, making the embroidery quite practical, too.
- Estimated Time: 3 to 5 hours on average working on designs of medium complexity.
- Cost Estimate: About $15-$30 in materials (not including the cost of the bag itself).
2. Embroidered Phone Pouch
- Materials Needed: Soft cotton or felt fabric, embroidery hoop, embroidery floss, sewing needle and thread, a Velcro or snap closure.
- Details: Here, practically any sewing technique works: 1, 2, or even all three can be used for decoration and making of this item! This item can be made with practical considerations but decorative features are also possible.
- Estimated Time: 2 hours.
- Cost Estimate: About $10 in materials.
3. Embroidered Pencil Case
- Materials Needed: Fabric (like denim or cotton), embroidery templates, cotton embroidery floss, zipper, sewing kit.
- Details: Avoid the generic version and make your pencil case colorful and different by painting a bold design or a catchphrase that reflects you. Do not be confined to the constraints of basic designs but break barriers and stitch to your heart’s desire.
- Estimated Time: 4 hours.
- Cost Estimate: $12-20 in materials.
4. Decorative Passport Holder
- Materials Needed: Leather or faux leather (highly durable), durable thread, basic embroidery tools, craft glue, and a Snap.
- Details: To further personalize the passport holder, add the owners’ initials or other small designs. Thanks to the leather or faux leather, this passport cover is as beautiful as it is functional. The passport cover enhances the aesthetic value of the essential document.
- Estimated Time: 3 hours.
- Cost Estimate: About $20 would be spent on materials.
Such customized and creative objects demonstrate how diverse and artistic embroidery can be and they will serve as great gifts or personal items to anyone as they bring out one’s character.
Seasonal Projects: Halloween, Christmas and more
Being a crafting enthusiast, I also love seasonal projects that enable me to depict the essence of the particular celebration. For instance, during Halloween season, I enjoy making corn-shaped trick-or-treat bags or spooky embroidered decorations like garlands hanging on the walls of the house. To make the atmosphere, I used the colors orange and black. These projects usually last up to 2 hours per project, and the prices of the materials differ from $8 to $15 depending on how complicated and large the project is.
Around Christmas, I become interested in inventive activities such as making unique decorations for the tree or designing and making personalized Christmas stockings. Particularly fun are these projects since snowflakes, reindeer heads, or some initials may be embroidered onto soft felt fabric. If you’re wondering how long it takes to make a personalized stocking, approximately three to five hours are needed, with a cost of around $20 to $30 as high quality materials such as velvet or satin are used.
Apart from these festive periods of Christmas and New Year, I also make items during other holidays such as Valentine’s Day and Easter. One of the best selling items is heart-shaped embroidery or egg-shaped decorations which are quick and easy to make and can take around two hours to stitch properly. Their price is around five to ten dollars since these kinds of products do not contain so many materials.
That’s the beauty of celebrating different holidays with their respective designs – each gives me a perfect reason to practice my embroidery and enjoy using it during the appropriate holiday.
How to Get Started with Machine Embroidery in the Hoop?

If a beginner decides to learn the machine embroidery in the hoop technique, the first step is to buy the machine that will allow using the hoop embroidery features. You also need to use embroidery software, as this will help create and customize patterns. The first attempts must be made with simpler designs so that the beginner can get used to the working procedure and details of the machine. It is also important to have good stabilizers and threads, as they will greatly improve the final look of the designs. It is recommended to first stitch your patterns on scrap fabric before proceeding to the final fabric. Lastly, the machine must be cleaned regularly and maintained to increase its productivity. If these basic steps are adhered to, the lady will not have problems using the machine embroidery in the hoop technique.
Necessary Embroidery Machine Supplies
While searching for essential supplies for my embroidery machine, I came across a few engaging ones that I’d like to share. To begin with, a range of good quality embroidery threads is quite important. There are stronger threads such as polyester that will last longer and look better when dyed, while rayon threads are softer and will have a nice sheen suitable for delicate designs. For stabilizers, tear-away is excellent support for woven materials while the cut-away type is most suitable for knits, which offer excellent support during the embroidery process.
A range of needles is also necessary; in my case, I use many embroidery needles, such as size 75/ 11, but a 90/14 needle is better for thicker or multiple-layered projects.
It’s also important to have a reasonable number of embroidery hoops suitable for various pattern sizes for flexibility. In addition, I usually keep fabric positioning tools or placement guides just to avoid misplaced stitching during sewing.
All the needles please, and the thread with the biggest hole: designing goes wild with Embroidery software like Embrilliance or Brother PE-Design, which allows one to edit and change designs as desired. One’s got to have a good pair of scissors, preferably curved embroidery scissors, which help cut the threads neatly. And having a bobbin winder will make it easier. Then we have a pressing cloth that saves the lightweight fabrics from scorching when ironing is required at any time. Having these supplies with me along with following the best practices, helps me in ensuring that the process of embroidery does have any hitches and is seamless.
Step-by-Step Guide to Your First Hoop Project
Making a first hoop project is quite an interesting thing to do only if the right steps are followed. For this reason, I have utilized information from the best 10 websites to get you through this process in the best manner possible. Let’s go through what is needed and the technical parameters that can be expected briefly:
- Select the Fabric: Medium-weight cotton or linen should be the fabrics of choice for beginners. They are designed to give a smooth finish and are wrinkle-free so they don’t cause pleating during embroidery.
- Choose the Right Hoop Size: Make sure the design area is larger than the area of your hoop material but that it isn’t overly so that it causes the fabric to slide around too much. It is common to recommend an 8-inch hoop for routine tasks.
- Prepare Stabilizer: Choose a stabilizer based on fabric and weight. A tear-away works best on woven fabrics while a cut-away works best on knits.
- Thread and Needle Selection: Choose the 75/11 embroidery needle and use polyester threads for most project embroidery as they are strong and easy to work with.
- Load the Design: Import the preferred design using the embroidery software but ensure that the file formats such as .pes or .dst are suitable for your machine.
- Hoop the Fabric: Mount the fabric into the hoop without any wrinkles and make sure that it is firm. This helps avoid fabric distortion when stitching.
- Set Up the Machine: Ensure understanding of the specific instructions on how threading and bobbin-winding are done on the machine. The mesh settings have to be adjusted appropriately.
- Perform a Test Stitch: Stitch some mesh scraps first before launching the main project in order to verify the tension and any design settings.
- Monitor the Embroidery Process: Watch over the machine ming as its embroidering to ensure that threads break so do not and fabrics are in place.
- Finalize the Project: When finished, take the fabric out of the hoop slowly. Where threads are poking through the fabric, cut them and press onto the fabric with a soft cloth if necessary.
If you follow these steps and make right decisions regarding external features such as the size of the hoop and the type of the stabilizer, completing your first embroidery project would no longer be a challenge.
The Search for Design Software Applications for Embroidery
But as you widen the ambit of your search for embroidery design software, look for a couple of things, I found several effective strategies from among the top websites featured in Google search results. Every platform has its own unique characteristics that address needs appropriate to different users and their technical abilities.
- Embroidery Software Compatibility: Most of the programs and applications reviewed are compatible with the .pes and .dst formats needed for most embroidery machines. However, make sure to confirm this with the model of the machine to be used.
- For Beginners: Embrilliance and Hatch Embroidery are two of the software programs with a high user pleasure rating owing to their straightforward usage and ease of use, particularly for novice users who intend to give embroidery a try. They provide tutorials and community support so beginners can easily start using them.
- Specialized editing of designs is probably the biggest advantage that such advanced software such as Wilcom can offer for advanced users, giving them an opportunity to do multi-layer editing without losing any precision. Such facilities are very useful for professionals who have to do design detailing.
- Cost Considerations: The simplest case is free software like Inkscape and embroidery plugin, but more advanced options include Wilcom or Hatch. The selection is often dictated by how much you can or want to spend and the intricacy of the designs you are expected to execute.
- Technical Parameters: The majority of the articles stress the necessity of embedding the functionalities of even simpler processes such as digitizing and automatic thread color changes within the software. In any software, different kinds of stitches and their densities and an assortment of threads must be used properly to make the rendered image realistically beautiful.
- Trial Versions and Licenses: Most software has a trial version, so users don’t have to pay to try the features out. This is a good method since it helps to ascertain whether the software is able to handle the user’s embroidery requirements.
If I consider these factors along with the specific features of the embroidery software, I should be able to find a program that fits my level of skill in this field and the tasks I wish to perform with the best possible results.
Where Should Someone Go to Get Quality Embroidery Hoop Designs?

Buying high-quality hoop embroidery designs can be very productive, and it is possible to find several trustworthy places. Websites like Etsy, and Creative Fabrica give independent creators a platform to showcase their designs, meaning there are plenty of choices and diversity. For specialized needs, Urban Threads and Embroidery Library offer high-quality versions of professionally made designs that cover a wide range of themes and tastes. If that is the case, embroidery is great because they have official designs featuring brands like Disney, which are perfect for character-based projects. Most of the sites have reviews and samples of the designs which is an added advantage for someone like me who uses embroidery to get first hand information on the best designs to use.
Where To Get Machine Embroidery Files Online?
Regarding the question on where to get the machine embroidery files, it is worth noting that I undertook a research study for the top 10 websites on Google. Below is what I found out:
- Etsy: Etsy shows numerous works by various independent designers, and it is full of artistic presents for embroiderers. It accepts many formats for different embroidery machines, ensuring versatility and utility. The preview feature and a variety of customer reviews help one know what other people are saying about the product before they buy it.
- Creative Fabrica: This platform offers many creative and modern embroidery designs. The site constantly adds new designs, and those who require frequent updates can subscribe. Designs are provided in several formats to suit various machines.
- Embroidery Library: Concentrated on professionally made and edited designs, details, and themes that are highly regarded in the Embroidery Library. The site provides detailed technical parameters of all designs, including stitch counts, fabric, and thread recommendations.
- Urban Threads: Designs that are edgy and perverse are made by Urban Threads; therefore, those who want to find something out of the ordinary, look for urban threads. Comprehensive descriptions of each design’s technical details are provided so users are informed prior to purchasing.
- iBroidery: iBroidery has official brand designs that come directly from popular companies such as Disney. They also have character and theme specific collections. A design’s compatibility with supported machines is always displayed.
- EmbroideryDesigns.com: This website covers a large number of categories and quality designs. It enables users to access free designs and download or buy other requested designs detailing the types of formats used by various embroidery equipment.
- AnntheGran: The company offers a variety of designs, with special emphasis on customer content. All designs come in different formats to suit various embroidery machines.
- Designs by JuJu: This collection presents designs intended mostly for appliqué embroidery, home décor projects, and maintaining classy and easy designs overall. All designs come in the most popular formats, which makes them easy to utilize.
- All About Blanks: Ex ibits the designs that are made for blank products such as towels and handbags. There are detailed technical instructions accompanying each design seeking to achieve the best results depending on the fabric and thread to be used.
- OESD (Oklahoma Embroidery Supply and Design) has a reputation for providing the most detailed and exquisite designs, which are admired in the industry. The website also provides technical information such as stitch spacing and carries out test samples on several fabrics, demonstrating their ability to adapt to their designs.
These platforms not only provide many different types of designs but also a great number of details that one would need to use different machines, which results in great creativity.
Buying in Bulk Vs. Individual Files: Which is Ideal?
In my opinion, it is more beneficial to purchase bulk embroidery designs than to purchase individual files. Such purchases are cost-effective, allowing me to have a wider selection of designs at a cheaper overall cost, particularly when working on large projects or creating consistently. The majority of top-rated websites for example EmbroideryDesigns.com. Urban Threads etc. sometimes include additional exclusive designs in these bundles which is unique and adds value to the purchase.
Moreover, bulk buying means that most of the times I get complete sets that are already digitized for many embroidery machines so that I have no trouble in usage. OESD and AnntheGran type sites contain quite a number of such parameter captures such as the amount of stitches and even fabric types to make the designs suitable for various machines and fabrics to ensure quality standards are met. Such knowledge helps me in deciding what threads to make use of, what to adjust on my machine, and in planning the entire process of embroidery work. On the other hand, the purchase of individual files may not yield the same cost savings and the necessary technical support, thus increasing the costs in the end.
New Introductions in the World of Hoop Designs
To keep abreast of the more recent developments in hoop designs I have reviewed the top ten sites devoted to embroidery designs. Most of these sites are up to date as they keep on coming up with new and original designs that suit different levels and types of machines.
- EmbroideryDesigns.com: This company is very well known for having a wide range of themes; at this time they are showcasing holiday themes and more elegant flower designs. These embroidery patterns come with all the required guidelines for such an endeavor and include a recommendation for the type of thread to be used and the number of stitches.
- Urban Threads: Exploring new themes, colors and designs, this time they have come up with hand drawn smiling faces and abstract art. Their impressive file writing capacity means making most embroidery machine files easy to use.
- AnntheGran: People can find such an extensive range of new designs that many have been classed by the type of fabric they are intended for, or the stitch densities used which were all annotated for easy reference with the intention of obtaining the best results when working with various types of materials.
- OESD: Also new is a launch of an artists series and associated webinars which they did describe technical aspects such as color mixing techniques and the best methods to stabilize the hoop when stitching.
- EmbroideryLibrary: Similar to the previous one, this is a site where the main lure is the collection of collections and updates of large new ones of holiday and folkloric themes along with the provision of materials on how to configure the machine for intricately decorated stitches.
- Emblibrary: Presents patterns of simple geometric shapes. Focuses on stitch placement and tension setting as a means of accuracy.
- Cactus Punch: Their design is minimalistic but thoughtfully designed. Writings provide comprehensive coverage of thread tension and stabilizing approaches to optimize clean and precise results.
- Dakota Collectibles: Embroidery designs incorporating animals and nature with stitch details, including basic instructions for beginning embroiderers, are offered rewards.
- Zdigitizing: More modern designs are offered, along with highlights on the placement of rest stitches and stitch angles to improve the texture and appearance of the embroidery.
- Bunnycup Embroidery: Children’s wear should have bright and childish designs, with the ability to change size and color depending on the specific projects.
These sites not only launch innovative and interesting designs but also provide detailed technical data so that embroidery supporters can easily modify the designs and work on them on different fabrics and machines.
How to Improve Your Techniques in Hoop Embroidery?

In order to improve my techniques in hoop embroidery, the first step I take is to visit reputable websites for learning and inspiration. Artist series and webinars seem to be common hosts for professional artists eschewing advanced methods such as floss blending, tension adjustment, and strategic stitch positioning. Seo is making the best use of several free resources that show proper machine configuration for various stitch patterns within the designs. It is through these embroidery forums and communities that I learn about new techniques and styles. Finally, practicing and trying out different designs and taking suggestions from these pages have enabled me to sharpen my skills to be able to execute various embroidery works with precision and creativity.
How to Improve Your Stitching?
There is nothing more inspirational than looking for ideas from some of the embroidery blogs that I follow when developing stitches. Advanced embroidery websites always focus on improving the primary technical parameters such as the stitch, thread, and needle size. One of these is the adjustment of thread tension, which is critical in achieving consistency in the stitches formed. I use the appropriate thread for the fabric in focus, be it cotton or silk so that there are no stiching failures or puckering. The size of the needle is now determined by the thread type and the fabric to be stitched, so that the finish is clean. Following some of these technical recommendations in my work has resulted in the accuracy and overall quality of my stitching projects to a whole new level. They provide thorough and easy-to-follow instructions on how to perform each of the processes in a way that one can see what to do clearly.
Looking for Inspiration in Online Communities
It has been truly great enjoyment joining online communities which are for my embroidery for I have been able to get diverse perspectives and practices as well. Listening to the opinions and thoughts of the top ten websites, the findings of these websites point to the fact that the communities aim at detailing the project ideas, sharing challenges faced in the course of a project, and demonstrating new skills. Interdisciplinary appreciated that the environment is very conducive for creativity and trying out new things. From forums and social media groups, I came across threads that suggested the change of critical technical parameters such as thread tension and needle size, within which recommendations are made but doing these styles and getting community endorsements and outcomes has been on both fronts an uphill task and rewarding. It began with my quest on the world of stumpwork which is a type of embroidery that is used to create a three-dimensional effect in the piece.
First off, I was mesmerized with the gorgeous floral designs that appeared to be in exquisite 3D that practically exploded off the cloth. Then I focused on the works of commendable embroiderers and this is how I understood that for proper use of stumpwork it is necessary to have such materials as wires and padding. The figures that were presented on the forums claimed that this technique is not only time consuming when it comes to completing a project but it also makes the end product beautiful as indicated by surveys done within the communities.
For starters, I decided to try sashiko while learning new styles of embroidery; it’s a Japanese style of hand-stitched quilting that is characterized by its detailed and minimalistic geometric patterns. Because of the repetitive and pattern-like nature of this type of sewing, hand-eye coordination is bound to increase, which I’ve read to be over 30% improvement, making me warm up to this style of embroidery quickly. While uncovering the new techniques and the new approaches to the already existing ones, I also recorded every step of my artistic journey: the amount of time needed to complete a specific piece, difficulties, and achieved results, which eventually helped me objectively determine the approaches and the styles that are the best for me. These types of conversations are good and credible because they give the reader or the writer some insight of the impact of every adjustment made on embroidery designs. These communities also helped narrow focus as it is easy to get excited but community makes sure to be level-headed while focusing on the craft.
Engaging in New Techniques and Styles in Embroidery
1. Stumpwork
- What is it: A 3D form of embroidery that incorporates wire and other materials into the fabric to create a raised surface.
- What do I need to do it: Wire, padding, embroidery threads, specified needles.
- Completion Time and Satisfaction: Completion may take an additional 20% of the predicted project timelines, however, those interested in the arts are often regarded to be very pleased with the artistic side.
2. Sashiko
- Description: A time-honored stitching technique from Japan, which incorporates aesthetically pleasing geometric elements but remains fairly simple in composition.
- Benefits: Because of the repetitiveness and rhythm associated with sashiko stitching, hand-eye coordination has improved by over 30%.
- Popularity: Gained popularity due to its focus-enhancing abilities and visual appeal.
3. Needle Felting
- Description: Using a felting needle to stab wool repeatedly to mesh the fibers together into one dense form.
- Tools Required: Felting needles and wool and foam block.
- Skill Impact: Stitching invites a wide scope for imagination, while focus is also improved, as it is a delicate task that requires a degree of patience.
4. Bead Embroidery
- Description: An embroidery technique that integrates beads to make the design richer and add a three-dimensional quality to the embroidery.
- Material Use: Seed beads, threads of different types, beading needles.
- Project Outcomes: Allows creating elaborative details, used more often in fashion design to add interest and richness to an overall item.
By articulating the usage of these different methods and styles, embroiderers are able to diversify their works, broaden their range of capabilities and create textures that would ride smoothly on the eye.
Conclusion

To conclude, embroidery designs made in the hoop allow for efficient and indeed very accurate and intricate embroidery projects as it can be rather complicated at times. Such designs take into account the potential of the modern machine to reproduce patterned images quite fast and all with minimal manual effort thereby maximizing creativity. With the introduction of in-the-hoop techniques, complete quilt blocks, bags and even stuffed toys projects can be completed with minimal done manually allowing both beginners as well as seasoned embroiderers to take up and enjoy embroidery comfortably and confidently. Regardless of whether it is for leisure activities or for business, making use of in-the-hoop embroidery design is such a great achievement in needlework that combines old art with new technology.
Reference Sources
- The Spruce Crafts – Machine Embroidery Basics
A comprehensive resource providing insights into machine embroidery techniques, including in-the-hoop projects, along with beginner-friendly tips and expert advice.
- Embroidery Library – In-the-Hoop Techniques
An extensive library detailing various in-the-hoop techniques and projects, complete with step-by-step tutorials and project ideas that enhance creativity in machine embroidery.
- Brother USA – Machine Embroidery Tutorials
Brother provides a range of tutorials and guides specifically aimed at their embroidery machines, offering insights into the functionality and advantages of in-the-hoop projects, helping users get the most out of their machines.
Frequently Asked Questions (FAQs)

1. What is in-the-hoop embroidery?
In-the-hoop embroidery refers to a specialized technique where entire projects are completed using an embroidery machine, primarily within the hoop. This process minimizes the need for manual sewing and allows for intricate designs and projects to be easily achieved by simply following the step-by-step machine instructions.
2. What types of projects can be created using in-the-hoop techniques?
A wide variety of projects can be crafted using in-the-hoop techniques, including but not limited to quilt blocks, bags, toys, coasters, and personalized gifts. The range of possibilities is extensive, catering to both functional and decorative items.
3. Do I need a specific type of embroidery machine for in-the-hoop designs?
While many embroidery machines can handle in-the-hoop designs, it is advisable to have a machine that offers a range of hoop sizes and supports the file formats used for these projects. Always check the machine’s specifications and compatibility with in-the-hoop designs before starting.
4. Are in-the-hoop projects suitable for beginners?
Absolutely! Many in-the-hoop projects are designed with beginners in mind, complete with detailed instructions and tutorials. This makes them an excellent starting point for those new to machine embroidery, allowing novices to build confidence and skill.
5. How do I find in-the-hoop embroidery designs?
In-the-hoop embroidery designs can be found through various online platforms specializing in embroidery files. Websites like Embroidery Library and embroidery machine brand sites often offer free designs, paid collections, and tutorials to help you expand your project repertoire.
6. Can I customize in-the-hoop embroidery designs?
Yes, most in-the-hoop designs can be customized with different thread colors or by integrating personalized elements like names or initials. Some advanced software can also allow for more complex modifications, offering endless creative possibilities.