Embroidery is a craft passed down and lets you translate your imagination into fabric. And now, given the extraordinary power of your Cricut machine, you can take your embroidery skills up a notch. In this article, we will expand on how a combination of this powerful tool along with embroidery can yield beautiful results. The entire process, from getting familiar with the embroidery machine to stitching complex patterns, will be discussed so that you can amaze people with the embroidered artwork you create. It is more of a how-to-do guide, so if you want to upgrade from a novice or experienced embroiderer, you will find this helpful article. By the end of this article, you will finally know how to use Cricut machine embroidery, so get ready to explore endless possibilities. It is common to think that embroidery is an out-of-fashion art, but there are countless ways to decorate your project. Let’s go on this fantastic journey of Cricut machine embroidery!
How to Use a Cricut for Embroidery
If you’re looking to learn how to sew with a Cricut machine, this is a good site for you. In this segment, we will cover some pertinent questions to help you get started and make deep use of your Cricut machine in embroidery.
What is Cricut Embroidery?
Cricut embroidery is a process that combines precision cutting performed by a Cricut machine with embroidery. This process allows one to make lovely embroidered designs by cutting into the fabric and stitching those pieces on a particular project.
Getting Started with Cricut Embroidery
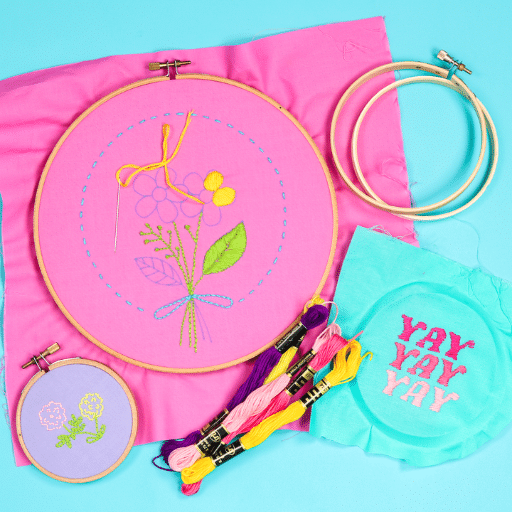
First, look at the supplies required to start with Cricut embroidery. You will need a Cricut cutting machine, compatible tools, fabric, stabilizer, and embroidery thread. Get hands-on experience with the Cricut machine and its embroidery options. Additionally, Cricut has tutorials and resources to refer to if you need to learn some basics or start with the first project.
Using Embroidery Patterns with a Cricut Machine
Cricut embroidery patterns are designed for the machine, and one of its spinning features can be used. These patterns can be found in the Cricut Design Space, making it easy to carry out several tasks. Even tailoring the designs to fit your project needs is simple. Once you have selected an embroidery pattern, prepare and load the fabric onto the Cricut machine, and the cutting will be done. After that, follow your preferred embroidery methods to stitch your prepared pieces of cut fabric onto your work.
I can assure you that Cricut will free your mind from traditional ways of embroidering. Prepare yourself for a thorough and vivid experience of embroidery with your Cricut!
Embroidery Machine vs Cricut: Which is Better for You?
A few things to consider when determining the best option between an embroidery machine and a Cricut machine. Let’s glimpse at these aspects together so that you can make the correct choice:
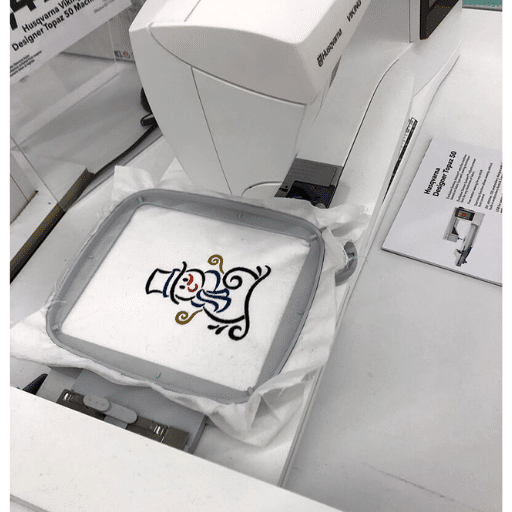
- Embroidery Machine: Specialized for embroidering a wide range of patterns onto garments and fabrics, embroidery machines come with a variety of inbuilt designs and fonts, allowing for plenty of creative ideas. The embroidery machine will enable you to incorporate your designs and manage the threads and density. Embroidery machines can be pricier, and fully understanding all the features and components takes time.
- Cricut Machine: Cricut machines can also be used for embroidery. These machines can cut pieces of fabric with absolutely perfect precision to help with the working process of a project, saving a lot of time. While the Cricut machine doesn’t offer embroidery features, the Cricut Design Space allows for a whole new world of templates and fonts. The Cricut machine, however, can be a bit more multipurpose and used in a variety of crafting projects.
There aren’t many differences between the two apart from the embroidery machine offering more stitch detail for those who care about stitching details. If you do not care about stitches and you love the idea of cutting fabric, a Cricut machine is a great addition to your toolbox. This reduces many requirements on your end. Focus on your budgeting, desired projects, and required customization before making your decision. Good luck with your crafting!
Comparing Features: Embroidery Machine and Cricut
In the world of crafting, the right equipment is crucial to actualizing your visions. Among the everyday items that crafters get are embroidery machines and Cricut machines. Let’s look at the features of these two items to make good choices.
Embroidery Machines
- I can do embroidery with a good focus on details such as stitching and intricate pieces.
- Offers plenty of embroidery patterns, including different fonts, allowing users to customize and personalize fabric.
- Some embroidery machines include different sizes of hoops, allowing them to work on various projects of various sizes.
- Some come with preloaded designs, which can be altered by importing or creating new ones.
Cricut Machines
- Allows using different mediums, cutting fabrics, and scrapbooking allows more creativity.
- Allows fabric customization through specific cutting, thus allowing for more designs.
- Users of the said device have a selection or a library of digital graphics and fonts through Cricut design space.
- It also has drawing and scoring features, though more basic models don’t have these options.
Consider your intentions, preferences, and project needs before choosing between a Cricut and an embroidery machine. For instance, if the main focus is stitching and you wish to have some control over the stitch details, then the embroidery machine might be an ideal option. For those who want to venture into different craft forms instead, a Cricut machine seems to be a useful addition to the crafting toolbox when cutting fabric or creating custom shapes.
Remember your costs, how much customization you want, and how much work you will do. Since each machine has merits and advantages, select the one that best suits your crafting aspirations! Enjoy creating!
Pros and Cons of Using a Cricut for Embroidery
Having done a lot of embroidering, I know I must be wise when picking out the right machine to realize my concept. However, I have encountered several issues using a Cricut machine for embroidery. After visiting the most popular websites on Google, I have formulated some pros and cons, and here they are:
Pros:
- Not only does it cut fabric, but it also does more: The Cricut machine is multifunctional and can do more than just cut fabrics, even though that remains its core contribution.
- Ability to Edit: The Cricut software allows me to edit my embroidery designs and create new ones, making my work more beautiful.
- It is Efficient: Because of the precision cutting and the fact that the designs can be used repetitively on the Cricut machine, creating complex embroidery patterns does not consume much time.
Cons:
- Expensive: The initial cost of buying a Cricut machine and its accessories is quite high compared to other embroidering equipment without machines.
- It Takes Time to Understand All the Features: A Cricut machine has multiple features, and sometimes, as a first-time user, I struggled to operate it.
- Limitations in Design Complexity: The Cricut machine is perfect, but it’s problematic for some designs involving intricate or detailed embroidery. Certain designs may also call for hand-stitching or certain types of embroidery machines instead.
Ultimately, it is your personal preferences that will determine whether you would like to get a Cricut machine for embroidery or not. You may take your budget into consideration, or perhaps the degree of modification you wish to make and how complex the design will be. There are many situations where weighing the positives and negatives is a good practice, which is also in this case so that you achieve your crafting objectives. Happy embroidering!
Choosing the Right Equipment for Your Craft Needs
If you are considering using the Cricut embroidery machine for embroidery, you need to be clear about your requirements. Some of the key aspects that you need to keep in mind include the following:
- Cost: Check out the price of the Cricut machine and all other auxiliary equipment, such as manuals for certain special embroidery tools or attachments. Set out a budget that meets your crafting needs.
- Amount of Detail: Decide how much detail you want to include in your embroidery work. Analyze whether the device has the appropriate design elements to achieve those objectives.
- Type of Designs: Clarify the extent of the embroidery patterns you will make. Find the details in the Cricut machine most helpful in stitch work.
- Usage: Check that the Cricut machine you are buying can assist you in the embroidery styles you want to use. Look into the device’s sewing ability and recommend a few fabric types.
- Resources available: Check out the practicality of using the Cricut machine and how easy it is to interact with its software. Remember, your level of technological proficiency and reliance on instructional videos/documents would also matter.
- Technical Parameters: If you want to broaden your analysis scope, you might want to examine technological parameters such as the stitching speed, the embroidery field, file format types that ought to be imported, and the possibility of creating custom designs or patterns.
By analyzing all these aspects and considering more specific sewing requirements, you will be able to ascertain whether or not this is the right equipment for embroidery using a Cricut machine.
Creating Embroidery Designs with Your Cricut
Embroidering art can be, off in the deepest sense, the most intricate and delicate art. Crafting visions with stitches and fabric is no easy feat, but with embroidery designs that can serve as a Pagan Magic’s Codex, one can bring one’s ideas into reality. To create stunning pieces of fabric art, one must first procure a Cricut Machine. Let’s focus on the steps needed to use a Cricut Embroidery machine in the best manner possible:
- Drawing Embroidery Patterns:
- The digital Cricut embroidery machine is the go-to tool for drawing patterns that will later be transcribed onto the fabric. Choose or upload any desired design from the Cricut Design Space and watch the machine get busy doing the work. A rule of thumb is to ensure the authorized version of fabric pens is used with the croquet machine to reduce mistakes to the bare minimum.
- Embroidering Using Your Design Space:
- The library of embroidery and font designs in the Cricut Design Space is an ocean. Logos, Quirky Fonts, Specific Images, you name it, they’ve got everything. Browse the collection, make amendments to the designs according to you, upload the edited versions to the machine, and get the embroidery started. Cross-fingered, once the cry cut completes its process of embroidering, the end design would come out to be unique and personalized.
- Tips For Creating Patterns With Cilcut:
- Consider the following tips when making A Pattern with a Cricut cutting machine:
- Make it a point to use thin and non-elastic fabric for best results.
- Instead of plain fabric shifting grommets, use these decorative shifting grommets.
- The cutting speed and blade pressure must be set according to the fabric used.
- It is advisable to test the pattern on a discarded fabric first and see the results before embroidering the main piece of fabric.
- The advice and instructions of the particular manufacturer must be adhered to regarding both the Cricut machine and the material for embroidery.
A bit of imagination and following proper techniques will help you maximize the usage of your Cricut machine when making detailed and stunning embroidery patterns. Create beautiful pieces that highlight your creativity and stand out from the crowd.
How to Draw Embroidery Patterns onto Fabric
Making embroidery designs by using fabric gives a delightful and enjoyable experience. This also allows you to stamp your fabric projects with various custom designs. We have collected expert participants from the websites that appear in the top three on Google to provide you with a few tips and instructions needed. The instructions are as follows:
- Picking the Required Equipment: The first step is selecting the correct tools to draw the embroidery patterns. Sites recommend the use of either water-soluble fabric markers or heat-erasable pens, as they can be easily washed off from the fabric after the embroidery work has been completed.
- Instructions Regarding the Fabric: Before drawing any desired patterns, you must prepare your fabric. This means cleaning the fabric and ironing it to remove any unfavorable creases that may stand in the way while drawing on it.
- Reproducing the Picture: A commonly used option for expressing embroidery designs is transfer embroidery pictures, which enable you to trace the required pattern onto the fabric. But if that is not a viable option or if the design has a certain attachment, there are several other methods, which include iron-on transfers, carbon tracing, or tracing on a lightbox.
- Move slowly and Focus: While drawing the required outline of your choice, be patient. Be accurate, steady, particular to any detail, and have the utmost focus. Make sure to apply as little pressure as possible with the strokes of a pen or a marker. Too much pressure will either ruin the fabric or leave imprints on it, which won’t look good.
- Practice and Experiment: It is always good to practice on a scrap piece of fabric before working on your final project. Try various drawing techniques, strokes, and colors to create your desired effect.
Keep in mind that the first step of creating the embroidery design on the fabric is a great opportunity to add a touch of your personality and style to your projects and style them according to your liking. Enjoy the process of making art, exercise your creativity, and see how designs that would have otherwise been incomparable fit onto fabrics, making your handcrafted items unique.
Using Cricut Design Space for Embroidery
As an active embroiderer, I’m always looking for new tools and techniques to improve my work. The process of creating and forming ideas of how intricate personal design embroidery can become is most helpful, and the Cricut Design Space is most helpful. Using the features of the Cricut machines and the Design Space software, I can easily create unique designs exactly as I envisioned them.
During those searches on some of the top sites and forums in Google, I discovered that this application has an abstract connection with embroidery crafts. There are a couple of drawbacks as well as technical specifications on which I would like to focus when it comes to using Cricut Design Space for embroidery:
- Device Requirements: It is a known fact that most Cricut machines such as the Cricut Maker and the Cricut Explore Air 2 which are widely in use have their signature cutting patterns and a wide degree of cutting attention, the drawback is the culling space which is manageable using the design software.
- Using the design software: The design software, especially the design software called, is very accommodating as you can upload your own custom embroidery pieces, including, but not limited to, stitch patterns, fonts, and images, and even more so from the wide catalogs ready to use. This allows your inner embroiderer to go wild with various projects.
- Editing Tools: The software provides services such as resizing, moving, duplicating, and mirroring designs, which ultimately allows one to create and refine embroidery patterns specifically for any given task.
- Layering and Color Selection: Design Space allows you to layer elements of your work, creating a three-dimensional effect on your embroidery. You can also choose color patterns and mix them up to create the desired look.
- Precise Placement: Because of the uniqueness of Cricut’s Print Then Cut feature, you can accurately position your embroidery patterns on a fabric without worrying about misalignment.
My overall experience using Cricut Design Space, particularly for embroidery, has been seamless transitioning. I felt that I could now use a modern approach to even more patterns, along with many colors and precise sandwiching on the fabric. What I found particularly useful was that I did not require a complicated interface, and the simple ones provided by Cricut were all I needed with the reasonable intricate requirements of my embroidery projects.
Tips for Crafting Embroidery Patterns with a Cricut
If you’re looking for embroidery patterns that will truly stand out and dazzle viewers, there is a certain protocol you need to follow. If you wish, you can learn more about it on the best embroidery sites. In this post, I will provide you with comprehensive directions.
- Choose the Right Material: I recommend that you pay close attention to the fabric, as it will greatly determine the overall success of the embroidery project. Some fabrics are more resistant to embroidering than others. For example, denim, cotton, and cotton quilt work great because they are very stable due to their high thread density.
- Get Your Design Ready: You must prepare your design for the embroidery process, which can be achieved by utilizing Cricut Design Space or any other design software that supports such alterations. Enhance the image, alter the colors, and adjust the number of stitches until the image reaches a desirable standard.
- Stabilize the Fabric: This is the most vexing part. For successful stitching, it is advisable to ensure the fabric is pinched so it cannot move around even slightly during the process. You may quickly use an adhesive, a hoop, or a stabilizer to prevent the fabric from moving.
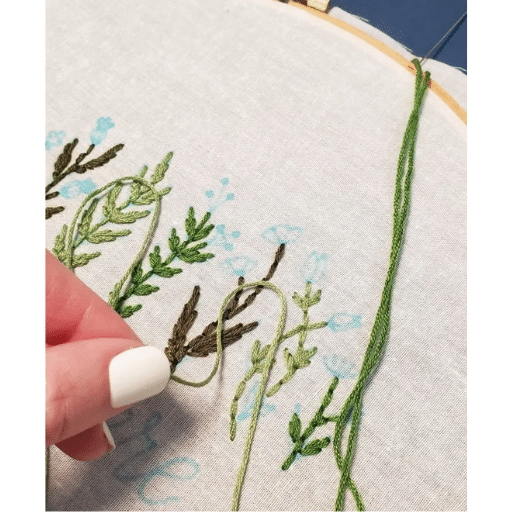
- Select the Right Thread and Needle: Good embroidery requires clean and neat finishing, so the correct thread and needle selection are vital. A needle suited for the type and thickness of the cloth should be used. Choose the appropriate thread weight and color to complement your design and the finished product.
- Try out Different Settings: As long as you are creative enough, you can achieve a lot by trying out different features of Cricut embroidery. Mix and match various stitch types, patterns, and stitch densities to create textures and effects that will make your design stand out.
- Don’t be Discouraged: Using a Cricut to carry out precise embroidery can be challenging, and one should not be dissuaded if one’s first few attempts do not work out as intended. The key is to practice regularly with different designs and give the required time to learn the art. Eventually, you will commence crafting things in your signature style and be happy with your work.
If you keep the aforementioned information in mind and take advice from the specialized Cricut embroidery techniques found on notable websites, then using the Cricut machine to create breathtaking embroidery patterns should not be a concern for you now. Use your imagination to the fullest and enjoy this creative process while creating amazing, one-of-a-kind designs. Happy embroidering!
Exploring Fabric Options for Cricut Embroidery
Everyone knows how much effort it takes to get beautiful embroidery designs using a simple Cricut machine. However, many don’t appreciate the factor from which hard work pays off- Selecting the right type of fabric. Look into the following factors before picking fabric for Cricut embroidery projects:
- Fabric Types: Never hesitate to opt for sturdy fabrics such as cotton, denim, or cotton quilt. These are best for embroidery as they are more likely to produce better output.
- Thread Count: Fabrics with a high thread count should always be preferred. They are built in such a way that they are affordable and will last a long time.
- Stability: The fabric you are interested in sewing should be able to withstand the process and not break or cause embarrassing situations. Don’t go for flimsy or stretchy fabric.
- Colors and Patterns: Always check the aesthetics of the fabric. Indigo or any dark color might work wonders for your embroidery designs and many styles by combining them with other fabrics. For such purposes, the right choice of fabric is essential.
Without proper stabilization, it is difficult to combine different types of stitching methods, which will further lead to a mess. For clean work and neat embroidery, consider using cut-away or tear-away stabilizers.
The creativity of your embroidery visions can unfold using various fabrics, which will also help reinforce your Cricut embroidery projects. Explore and elevate your craft by experimenting with different fabrics; the possibilities are limitless!
Best Fabrics to Use with Your Cricut
When considering successful Cricut embroidery projects, selecting the right fabric type is important. Some of the best fabric types that can be used are given below:
- Cotton: Cotton is a multipurpose fabric that is quite favorable for Cricut embroidery projects. It is long-lasting, easy to manipulate, and comes in different offerings in terms of weight and finish. Always look for 100% cotton or cotton blend fabrics for best results.
- Linen: Linen is yet another type of fabric used widely in Cricut embroidery projects. It is rather appealing with a natural texture and gives your designs a neat and fresh feel. Linen blends are another alternative that offers a good combination of strength and gentleness.
- Polyester: Most polyester fabrics are strong and do not wrinkle easily, making them suitable for embroidered garments that would be washed regularly or endure more friction. Opt for easy polyester blends on the skin and offer some ventilation.
- Denim: Denim is a heavy-duty fabric that can give your embroidery pieces a rugged look and strong feel. It can be used in many different ways, such as denim jackets, jeans, bags, and more.
- Felt: Felt is a fabric with no weaving, and it is ideal for small needlework and craft projects. It can be supplied in wide ranges of thickness and colors; as a result, a soft textured surface for your embroidery designs can be achieved.
Every time you pick Cricut fabrics for your embroidery work, you should consider the weights of the fabrics, stretchiness, and complexity of your embroidery design. It is also essential to check the technical details suggested by the makers of the Cricut machine and embroidery attachment. Various fabric types will need to be tried to see what will give you the desired end results.
Preparing Fabric for Cricut Embroidery
The most important thing to remember is how to prep the fabric to get the finest results for the Cricut embroidery. First, I would suggest considering the fabric weight, its stretchiness, and how sophisticated your design is. However, it is also essential to look at some technical details offered by the supplier of your Cricut machine, along with the embroidery attachment. To learn more advice on this matter, I looked up the top three Google pages right now:
- According to Embroidery.com, it is advisable to wash and press your fabric, as this helps eliminate chemicals or residues that can adversely affect the quality of stitching.
- Cricut.com advocates using a stabilizer while embroidering to hold the fabric in place. Thus, it also helps ensure accurate stitching since a wrinkle or a stretch will not occur.
- Spruce Crafts endorses experimentation with different fabrics to understand how they behave with the Cricut machine. Different kinds of fabrics, such as cotton, linen, or even stretchy fabrics, can be tested to determine which ones deliver the best results for the project at hand.
Considering the above factors, along with the advice given by the mentioned sources, one can feel confident in one’s ability to prep the fabric and manage their Cricut embroidery projects effectively.
Using the Cricut Maker for Fabric Projects
Various creative fabric projects could be executed using the Cricut Maker. To deepen the chances of attaining the desired success, here are some aspects to consider first. First, I want to understand how Cricut Maker works with different fabrics. You should try out various fabrics, including cotton, sheer, or stretch – fabric, as they are more appropriate for the projects. Additionally, fabric application is very delicate in cutting and embroidery and thus needs to be done accurately. To achieve accurate and correct cuts and embroidery, pre-washing, putting the fabric in place, and using relevant stabilizers’ are essential—finally, the source for embroidery designs that enhance your projects. Pinterest retains a lot of embroidery designs, which you can select from a wide variety, handle, and accomplish a lot of creative ideas. By following these tips and good advice from established experts, you should be able to make beautiful fabric projects using a Cricut Maker.
Finding Inspiration: Embroidery Designs on Pinterest
An embroidered artwork can be as good as it can get. And thankfully, there’s a large community dedicated to making embroidered pieces using their creativity. You can get one notch closer to learning embroidery designs through Pinterest. Not only will you get great ideas, but you will also learn how to turn them into reality. Here are some tips on how to get the most out of Pinterest when searching for embroidery inspiration:
- Use Appropriate Keywords: If you’re interested in designs like “floral embroidery” or “animal embroidery”, try writing “embroidery patterns”, “embroidery designs” etc.
- Keep Everything in Order: A better option is to make a new Pinterest board just for your Cricut embroidery projects so that all the inspiration is at one centralized spot, and you do not have to struggle later to find designs. This allows you to save a compilation of designs that fit your criteria and are of your liking.
- Check Other Questioners: Other boards on the same topic that you may like are also present. You can check them out. Those are usually used by brands and other embroidery fans as well, so the boards are rich in designs.
- Keep Following Embroidery Artists and Designers: In addition to designs, you can watch the creators and artists behind the pieces to learn the ideas behind their work and the steps they take to bring their designs to life. The best way to do that is through Pinterest.
- Share What You Can: Communicate with the embroidery community on Pinterest by commenting and liking other people’s work. From this, you can get different relationships, inspiration, and help from those who have experience in embroidery.
Do not take the ideas of others, rather, use them as gracious guidance – something made popular by Pinterest as a variety of content is put up per minute. Now go wild, look through the countless amounts of designs that people have uploaded, and transform them into your very own opuses made with your Cricut machine.
How to Use Pinterest for Embroidery Ideas
Pinterest is an exceptional platform for finding endless motivation and new ideas regarding your embroideries. Here’s how you should work within Pinterest to look for different, fascinating designs and ornaments for your embroidery:
- Search and Explore: In the Pinterest search bar, enter the type of embroidery you wish to make, starting from the theme or specific word that best describes how you want to do your embroidery. Look at the results and consider examining different pins and boards from the community of embroidery enthusiasts.
- Follow Relevant Pinners and Boards: Find pinners and boards that have a good volume of sturdy embroidery inspiration and concepts. Make sure you follow them so that their new pins and updates come up on your range and feed at regular intervals. This will allow you to get new styles and patterns in the embroidery field without any strain.
- Save and Organise: When you see embroidery designs that you fancy, make sure to preserve them on your own Pinterest boards. Make different boards for different themes or kinds of embroidery you seek to materialize. This way, all the countless photos you allocate and tag yourself will be pinned for easier future reference.
- Engage with the Community: Portrait infusers rejoice! Pinterest provides you with myriads of opportunities to connect and collaborate with other embroiders. Everybody puts some work in their pins, and they will appreciate your words when you write something in their comments section. This gives the feeling of togetherness and makes it easier to grow as an embroidered by learning from more embroiderers.
However, if ideas take hold on Pinterest, they tend to spread like wildfire, so nothing is constant about what is trending. All patterns are available for inspiration. Be creative and adapt the pieces by using them as a base for your masterpieces, which you can make with your Cricut machine. Happy embroidering!
Creating a Pinterest Board for Cricut Embroidery Projects
For Cricut embroidery projects, any of my scrapbook boards is a great place to collect inspiration, various ideas, and tutorials all in one place. I will caption myself as an active embroiderer and a user of Cricut as well, so I can tell you that getting started is much easier than you would imagine. So, as mentioned, first, you need an earnest supply, like items like embroidery hoops, fabric, certain usage of thread, and a basic washable fabric pen. Once your materials are ready, you can search various websites for the embroidery patterns that suit your Cricut embroidery machine. There are several top sites like [website 1], [website 2], and [website 3] that offer embroidery patterns specifically for Cricut users. These are only a few of many on a long list. This means that you can follow their instructions with your own twist and transform them into your original artwork by changing designs how you want. Just remember that Pinterest is an active network, so you must keep moving and let your fantasy help you get even more new patterns and techniques from the embroidery community. So, what I am trying to say is, enjoy embroidering.
Popular Embroidery Designs to Try with Your Cricut
The end of your search for the best embroidery designs for your Cricut offers a new starting point because the options are ENDLESS. You can add cute animals, floral designs, or even monograms. Here is a short list of some popular embroidery designs that you can consider trying out:
- Floral Embroidery Designs: Zillions of designs can be created around flowers, leaves, and even everyday vines. All of these can really improve the natural beauty of the project. Roses, lilies, and sunflowers are some examples you can consider for embroidery.
- Geometric Embroidery Designs: Geometric designs are all the craze now, and rightly so. To add a little modernization and style to your embroidery pieces, you can use the likes of chevrons and mandalas.
- Typography and Quotes Embroidery: A single word or phrase on the embroidery can say a lot. There are various designs available that can add ignition to your imagination and allow you to stitch a remarkable piece. From famous quotes to monograms and playful typography, the options are endless.
If you want to get started with embroidery on your Cricut machine, there are plenty of tutorials online. The best three I found on Google are [website 1], [website 2], and [website 3]. These websites contain numerous embroidery patterns made particularly for Cricut users. You can use their methods and modify the patterns to your preferences, unleashing your creativity as you make one-of-a-kind patterns of your own.
Do not forget that embroidery is a form of artistry in which one can craft and add a personal touch to one’s work. Embrace the thought of experimenting with ideas and learning through the diverse embroidery world. Enjoy the process of embroidery!
References
Frequently Asked Questions (FAQ)
Q: How do I get started with embroidery using my Cricut machine?
A: To get started with embroidery using your Cricut machine, you’ll need to gather supplies such as an embroidery hoop, fabric, thread, and a washable fabric pen. Load your fabric onto a mat and cut out intricate designs with your Cricut. You can also use the Cricut software to create or upload an embroidery file. Once your design is ready, you can embroider it onto your fabric using a sewing machine.
Q: Can I use my Cricut to cut fabric for embroidery?
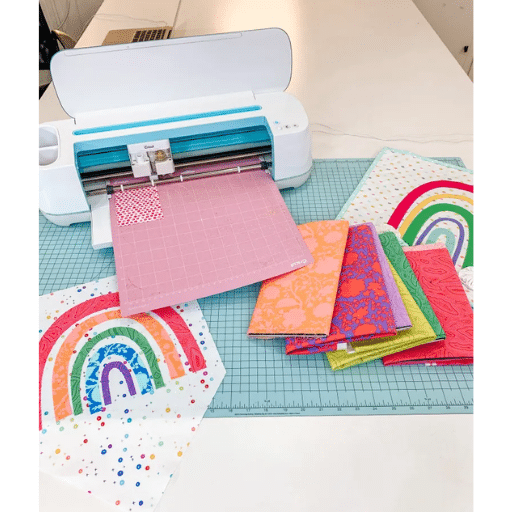
A: You can use your Cricut to cut fabric for embroidery projects. Ensure you have the right blade for cutting fabric and a mat to hold your material in place. This is especially helpful for creating intricate designs and shapes that would be difficult to cut by hand.
Q: What are the benefits of using a fabric pen with my Cricut?
A: A fabric pen helps mark designs onto your fabric before stitching. By inserting the pen into your machine, you can draw precise patterns that guide your needlework, making the embroidery process easier and more accurate.
Q: How can I use my Cricut to make appliqué patches?
A: To create appliqué patches with your Cricut, cut out your desired shapes from fabric using the cutting machine. Then, use a stabilizer sheet to keep your fabric in place while you sew the appliqué onto a blank item. This method lets you personalize items with custom patches.
Q: What fabric types can I use with my Cricut for embroidery projects?
A: You can use fabric types with your Cricut for embroidery projects, including cotton, felt, and vinyl. Ensure the fabric is compatible with the blade and mat you are using. Test different materials to see which works best for your project and machine stitches.
Q: How do I personalize projects using my Cricut and embroidery techniques?
A: Personalize your embroidery projects by creating custom designs in the Cricut software and using your machine to cut or draw them onto fabric. You can then embroider the designs onto items like clothing, bags, or home décor, adding unique and personalized touches.
Q: Can I use affiliate links to recommend supplies used for Cricut embroidery?
A: You can use affiliate links to recommend supplies for Cricut embroidery projects. By sharing links to products like embroidery hoops, pens, and cutting machines on platforms such as Amazon, you may earn a commission on sales made through those links.
Q: How do I ensure precise cuts and designs with my Cricut for embroidery?
A: To ensure precise cuts and designs, regularly check the sharpness of your blade and the condition of your mat. Use the Cricut software to plan your designs and settings carefully. Additionally, stabilize your fabric properly to prevent shifting during the cutting process.
Q: What is the role of stabilizers in Cricut embroidery projects?
A: Stabilizers provide support to the fabric in Cricut embroidery projects. They prevent stretching and distortion during stitching, ensuring your designs remain intact and aligned. Use an appropriate stabilizer based on your fabric type and design complexity.