Desktop laser cutters and engravers have transformed personal and professional fabrication by providing unprecedented ease, speed, efficiency, and versatility. These machines are now crucial for hobbyists, designers, and businessmen as they can easily make intricate designs, prototypes, and custom projects. Desktop laser cutters and engravers take users’ creativity to the next level by enabling them to craft gift decorations, detailed business signage, and architectural models. This article aims to explain how these devices enhance your creativity and productivity by describing their functionality, key benefits, and diverse applications. There is a way of harnessing the full potential of laser cutter and engraver innovations. This guide will provide insight into whether you want to expand your skill set or are new to the technology.
What is a Desktop Laser Cutter and How Does It Work?
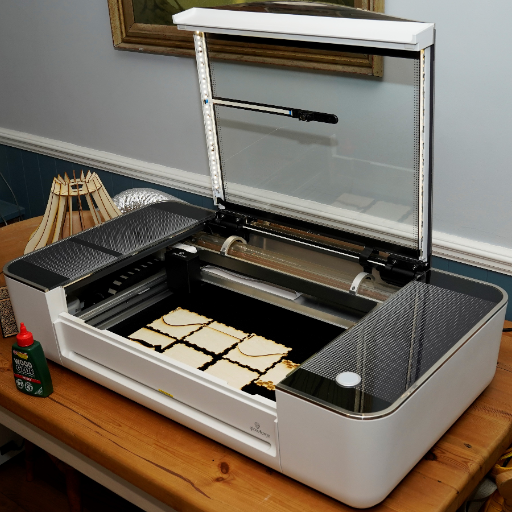
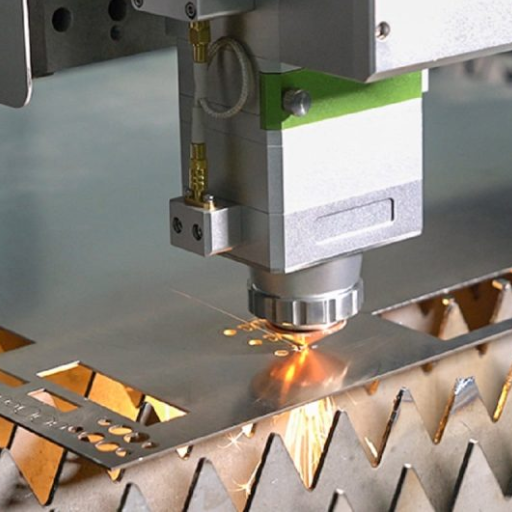
Depending on the desktop laser cutter type, it can precisely engrave or cut wood, metal, acrylic, fabric. These machines are compact and versatile in functionality and have a focused laser beam that is directed onto the material’s surface. The beam either vaporizes the material or removes layers to intricately design the material. The entire process starts with a digital file, usually SVG or DXF. The machine’s software then guides the movements of the laser beam using vector cutting, raster engraving, or scoring techniques, ultimately achieving the desired design. These machines are commonly used for precise crafting, prototyping, and manufacturing.
Understanding CO2 and Diode Laser Technology
Each type of machine has particular benefits, making it ideal for specific applications. Two of the most commonly used technologies in desktop laser cutters are CO2 and diode lasers.
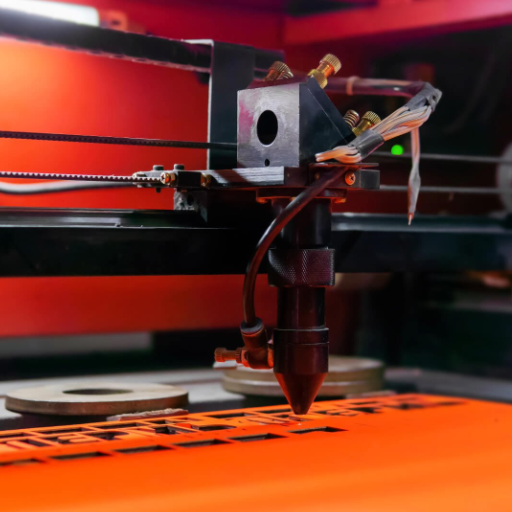
CO2 Lasers: Powered by electrical discharge, these lasers have a coil or metal tube filled predominantly with Carbon Dioxide. The energy emitted is in the form of infrared laser beams. The most notable trait of lasers of this kind is the precision cutting and engraving of non-metallic materials such as wood, leather, acrylic, and glass. Additionally, CO2 lasers are capable of cutting thicker materials with exceptional precision. These lasers typically cut at wavelengths of 10.6 micrometers. CO2 Lasers are spaced compared to Diode lasers due to their size and cooling systems, making them more effective for cutting materials such as glass.
Diode Lasers: A semiconductor device such as a diode emits text in visible or near-infrared light that resembles a laser beam. Diode laser devices are smaller and more energy-consuming, making them perfect for portable desktop machines. However, Diode lasers are less efficient than CO2 Lasers when cutting rigid materials. Their advantage is their ability to cut softer materials such as plastics, paper, and wood. However, they tend to lose power when compared to CO2 models.
Both technologies possess unique skills that can be utilized for different projects. Still, the primary choice between them is the type of materials and the precision needed in the results.
Key Components of a Desktop Laser Cutter
A laser cutter requires the assembling of parts to do its work optimally. The beam or laser tube is the most crucial element, which is critical for cutting or engraving materials. Following that, the motion control system consists of lasers and rails, which permit movement of the cutting head in the X or Y directions. In conjunction with the cutting head, the laser head focuses and directs the beam toward the workpiece using lenses and mirrors. Furthermore, these elements must be carefully integrated to provide a seamless cooling system so the laser does not overheat. These components must be precise and efficient for an optimal desktop laser cutter. The last piece of the laser cutter is the extraction and cooling system, which removes the smoke fumes and keeps the device clean and safe to use. This ensures safety in the workspace while ensuring cutting efficiency.
The Laser Cutting and Engraving Process Explained
The laser cutting and engraving process integrates focused energy and the machine’s motion control. First, a file or design is uploaded into the laser cutter’s control software. The software then transforms the design into instructions and coordinates the machine is meant to follow. The process follows with the laser beam being activated and directed towards the target surface. The laser head then follows the target surface in a programmed manner, and the rest of the axes are followed accordingly.
For the engraving process, the speed and power of the laser, as well as the thickness of the material, definitely affect the cuts that the laser makes. When cutting, the laser beam gives concentrated energy in the form of heat and clean cuts where it is needed. The cut’s cleanness for engraving is dated, allowing mini details to emerge without completely disregarding the material.
As the machine leaves are operated on the surrounding workspace, smoke, debris, and other particulates are collected and eliminated to maintain clarity and safety. The cooling system ensures that the laser tube’s temperature does not increase. This sophisticated process ensures the cuts’ accuracy, repeatability, and quality on metals, acrylic, wood, and leather.
How to Choose the Best Desktop Laser Cutter for Your Needs?
Numerous aspects are considered critical for selecting the most appropriate desktop laser cutter. The first thing to consider is the machine’s power output since it dictates the different materials the device can cut or engrave. Power lasers that are lower work best for light work, such as engraving wood and acrylic, while machines powered at a higher level can handle thicker and more rigid materials like metals. Next is the bed size, which determines the minimum and maximum dimensions of the material the cutter can take. Also, check if the laser cutter is compatible with the required software, especially the design applications or file formats such as SVG or DXF.
Furthermore, adjustable speed and power settings give different projects and tasks more control and flexibility. Finally, specific safety measures such as a robust cooling system or a reliable air filter should be prioritized as they guarantee efficient and safe operations in the workplace. To increase value and efficiency, it is recommended that a laser cutter that meets the requirements of any existing projects and anticipated future projects be selected.
Comparing CO2, Fiber, and Diode Laser Cutters
When CO2, fiber, and diode laser cutters are evaluated, their unique features and functionality must be considered.
CO2 Laser Cutters: These cutters are easily used as they work with a mixture of gas with carbon dioxide as the main component. They are very good at cutting and engraving wood, leather, acrylic, plastics, and non-metal materials. They are widely accepted in creative and industrial fields because of their cost-effectiveness. CO2 lasers, however, do face difficulty with cutting reflective metals but can do so with specialized coatings or materials.
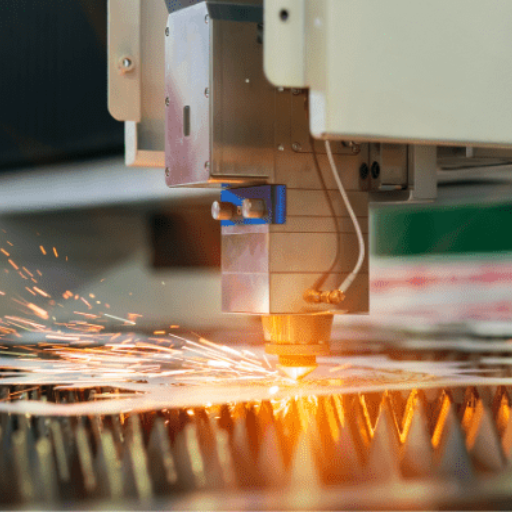
Fiber laser cutters: Fiber lasers use an optical fiber doped with rare elements, allowing for precision and efficiency in cutting metals such as steel, brass, or aluminum. They are perfect for heavy-duty industry projects requiring quick cutting of thick and shiny metals. Unlike other laser types, they do not need much maintenance and have a longer lifespan but are more expensive.
Diode laser cutters: Compared to CO2 or fiber laser cutters, diode lasers are smaller, cheaper, and less powerful. Therefore, they are best suited for engraving wood and other soft materials. Because they lack power, diode lasers are unsuited for metal and thick materials. They are best for small hobbies that do not require a lot of performance.
Each laser cutter has advantages and disadvantages, depending on the nature of the material, target accuracy, budget, and purpose.
Essential Features to Look for in a Desktop Laser Cutter
I value specific characteristics for effectiveness and worth in selecting a desktop laser cutter. Precision is full of power; I expect cutting wattage to be higher as it translates to greater thickness of the cut material. I’d also ensure the software is easy to use and adjust—I expect comfortable software for designing and operating the cutter. There has to be an enclosed cutting zone with air filters to keep the users safe from the cutting tools. These features are the minimum any device needs to sustain itself for long periods. Size and weight have to be such that it suits my workplace. I want a device that has timely updates for technical assistance and easy-to-follow maintenance instructions. Finally, what materials the cutter can cut determines whether it will be helpful for me now and in the future.
What Materials Can You Cut and Engrave with a Desktop Laser Cutter?
With the ability to cut various materials, desktop laser cutters are some of the most versatile tools. Desktop laser cutters can cut wood, acrylic, and leather and can be accurately used to engrave functional and non-functional designs thoroughly. Different materials like paper, cardboard, and some types of plastic can be used, making them great for prototyping and crafting. Some advanced models can work on thin metals, but the results tend to be more effective as most require more power. As the laser cutter’s capabilities vary from model to model, it is essential to understand whether it is compatible with all materials, as some, such as PVC, release harmful fumes when cut. Always following the manufacturer’s usage information is best to ensure complete safety.
Working with Acrylic: Tips and Techniques
When cutting acrylic with a laser, I apply some techniques while ensuring precision and quality whenever necessary. First, the laser power and speed are adjusted depending on the thickness of the acrylic. Without doing this, there would be incomplete cuts or over-melting. In addition, I apply masking tape or something similar on the surface of the acrylic to avoid burns or discoloration. After this is done, I ensure my workstation has good ventilation to manage fumes from cutting or engraving the acrylic adequately. Finally, I use cast acrylic rather than extruded for the cleanest results since cast acrylic provides better edges and is smoother when laser processed. Cleaning the optics of the machine regularly guarantees the best results. Using these methods ensures I obtain precise and professional results when working with acrylic.
Engraving and Cutting Metal: Possibilities and Limitations
The laser cutting and engraving of metals profoundly changes the modern world. There are factors that modern laser machines like fiber and CO2 lasers, faces, engraving or etching metals like stainless steel, Aluminum, and even anodized coatings are done with utmost precision. Engraving is mainly utilized with metals to add logos, texts, and detailed designs while cutting is more power consumption intensive as it is typically reserved for thin metallic sheets. With the ability to effortlessly mark and engrave without destroying the quality of the surface, along with explicit integration to metals, fiber lasers are the most efficient and detail-oriented.
On the flip side, limitations are tied down to the laser power and the type of metal used. CO2 lasers, for example, always struggle with power-intensive devices when deeper cutting or engraving is the goal. Approaches like heating absorption paste and even coatings take time, so soaking bare metals becomes tedious. On top of that, more expensive operational and maintenance costs are incurred with high-powered lasers around thick metals. Along with these intense lasers, fans and other devices are impotent to safely vent out fumes, and cooling systems fight off the excessive heat generated. Balancing these aspects become efficient when technicians gain the knowledge which helps them with the screws and nuts around methods of metal engraving and cutting.
Exploring Other Compatible Materials
In trying to find other materials that can be utilized, it has been determined that laser systems are efficient with non-metal substrates. Even non-metal substrates like wood, acrylic, glass, leather, and ceramics can be engraved and lasered accurately for art and practical uses. Softer materials such as acrylic and wood can be effectively laser cut or precision etched with low-power lasers devoid of any adverse effects on the materials. At the same time, engravings on materials like glass and ceramics need special care to mitigate the risk of glass fracturing or scratching. The selected material is a function of the type of laser, its power settings, and the application purpose to guarantee reliable outcomes on various projects.
How to Set Up and Use Your Desktop Laser Cutter Safely?

To function correctly, your desktop laser cutter requires particular attention during its setup regarding safety. First, pick a quiet area free from distractions and allow proper air circulation to avoid inhaling potentially harmful fumes. Ensure the workspace is stable and the cutter is connected to a power source. You should also have the necessary software installed on the computer. All firmware and drivers must be up to date. Ensure that there’s no physical harm to the machine, such as misaligned components or debris that may block the laser path. Always put on safety goggles that are functional for lasers, and as a general rule of thumb, never keep the machine running unattended. The laser lens and the ventilation system should be unclogged regularly to operate correctly without the chance of starting a fire. If an unexpected fire occurs, ensure a fire extinguisher is within reach. Read the manufacturer’s safety guidelines and materials to prevent any dangers.
Step-by-Step Guide to Setting Up Your Machine
- Choose and Prepare Your Workspace
I start by selecting a stable and well-ventilated area to set up the machine. This ensures proper air circulation and prevents fumes from accumulating during operation.
- Unbox and Inspect the Laser Cutter
After unboxing, I carefully inspect the components for any visible damage, such as loose connections or debris that could obstruct the laser’s operation.
- Install Necessary Software
I download and install the required software and drivers from the manufacturer’s website, ensuring everything is updated to the latest version.
- Position and Connect the Machine
I place the laser cutter securely on a flat surface, then connect it to a power source and the computer. I ensure all cables are properly secured.
- Calibrate the Laser
Before first use, I follow the setup instructions to calibrate the laser accurately, testing for alignment and focusing to ensure precision.
- Clean and Check Safety Measures
I clean the laser lens and make sure the ventilation system is free of obstructions. I also confirm that safety goggles and a fire extinguisher are on hand.
By following these steps, I ensure the desktop laser cutter is set up safely and operates effectively for any intended project.
Safety Precautions and Best Practices
When using the desktop laser cutter, my priority is my safety. I use the correct protective gear, like certified safety goggles that protect me from laser exposure. I always ensure that the area I’m working in is free of fumes and smoke buildup and never leave the machine while it is on. I conduct regular maintenance checks to prevent malfunctions, such as cleaning the laser lens and inspecting moving components for excessive wear. I do not permit myself to use any item that could emit harmful or combustible gasses, so I follow the manufacturer’s instructions religiously. Ultimately, I always have an easily accessible and prepared fire extinguisher and review emergency measures despite, hopefully, never needing to use them. All of this ensures the work environment is safe and efficient.
Maintenance and Care for Your Laser Cutter
I adhere to a routine to keep my laser cutter up to peak standards. Cleaning the laser lens and mirrors is a task I do regularly using lens cleaning wipes or appropriate optics cleaning solutions. This makes sure the laser beam is accurate and robust. I also check the exhaust system of the machine for any blockages because insufficient venting can affect performance and even pose some safety issues. Additionally, I check the alignment of the laser beam and readjust it when it is misaligned so that the cuts are not inefficient. Per the manufacturer’s instructions, I lubricate moving parts, such as rails and belts, to curb friction damage. Finally, I change the machine’s firmware and the software settings, where necessary, to ensure that the new features or functionality is not incompatible with the older settings.
What Are the Best Projects for Beginners Using a Desktop Laser Cutter?
While using a desktop laser cutter for the first time, easy projects such as engraved coasters, keychains, and other intricate ornaments can help one build essential skills. Such assignments involve an engraver’s mark and Stephen’s experimentation stunts with wood or acrylic. Custom name plaques and even customized signs help one clip efficiently while aiding in alignment. Plain jewelry assemblages like pendants and earrings are an invaluable introduction to precision cross-banding and slicing on a minute scale. From simple structured ornaments, the user can transition into constructing and cutting puzzle pieces or even joining small boxes. These moldings and shapes help one learn the manipulation of intricate assembly. Such projects are a great way to get used to the elementary features of a laser cutter design, as they are not overly complicated and demanding.
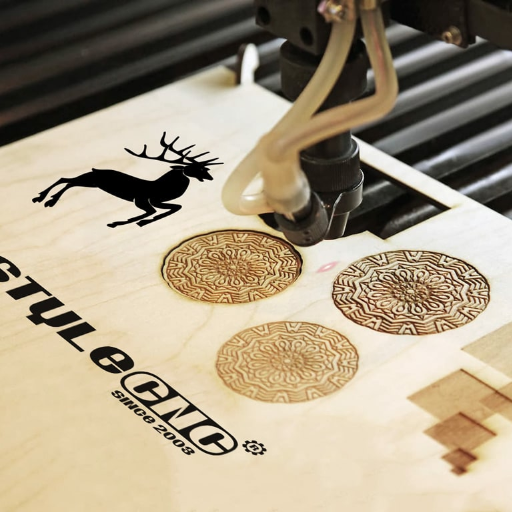
Simple Engraving Projects to Get Started
For a novice starting with a desktop laser cutter, many simple engraving projects may help develop essential skills. For example, engraved coasters are popular since they can be completed with little design work and allow for the practice of different materials like wood, cork, or slate. Custom keychains are another straightforward project that users can attempt to experiment with engraving names, initials, or tiny graphics. Wooden plaques or signs are also perfect for beginners, allowing them to engrave flat surfaces accurately while trying out different materials’ power and speed settings. These tasks focus on basic engraving techniques, thus giving the user more confidence and familiarity with the laser cutter.
Easy Cutting Projects for Novice Users
I highly recommend engaging with straightforward concepts for beginners for more uncomplicated poster designs. I recommend bookmarks with simple shapes; the detail included is very low. This fosters engagement while being productive in other areas. Another suggestion I have is to make custom geometric ornaments out of wood or acrylic (or any other thin material), as it allows you to play with the material’s thickness and cutting power. Furthermore, crafting puzzle pieces propels students’ abilities to create precise cuts while balancing the durability of the material. The best part is that new learners can do these projects and provide a good base for more complicated tasks in the future.
How Can a Desktop Laser Cutter Benefit Your Small Business?
A desktop laser cutter could serve as an enhancement to your small business by providing the flexibility, accuracy, and efficiency that is needed. Such machines can quickly produce custom items, including signs, packaging, and promotional goods, that set your business apart from the competition. They are effective at crafting complex designs and patterns, letting them work with precision and reducing the waste of materials and the time taken for production. Furthermore, their capacity to work with various materials such as wood, acrylics, leather, and fabric allows for versatility in different industries. Businesses looking to expand their offerings without heavily investing in large-scale production equipment would find these desktop laser cutters extremely beneficial, mainly because they have a significantly low space requirement.
Profitable Product Ideas for Laser Cutting and Engraving
Custom products stand out the most for ideas revolving around creating profitable products using laser cutting and engraving. Sentimental gifts give tumblers, photo frames, and key chains a unique edge to the audience and consistently attract potential customers. Another appealing option would be crafting decorative wooden or acrylic wall art for home decoration enthusiasts. Also, laser-cut business signs and promotional items such as logos or engraved pens would benefit businesses looking to market themselves uniquely. Effortless to create, these items appeal to different markets and can aid desktop laser cutters in doing so effectively.
Scaling Your Business with a Desktop Laser Cutter
Using a desktop laser cutting tool can increase your business focus by specializing in different products and expanding into new markets. You can target specialty areas like personalized products, business logos, and specialty art for the individual and corporate market. Moreover, these compact and affordable machines allow for fast delivery and low overhead costs, increasing profit margins. In addition, marketing and selling through the internet mean you can access markets from anywhere in the world, constantly growing while ensuring that production remains controllable.
What Are the Latest Advancements in Desktop Laser Cutting Technology?
The latest developments in laser cutting on a desktop level have dramatically improved its accuracy, speed, and range. Modern machines come outfitted with high-powered laser tubes that provide deeper and cleaner cuts across many materials. Enhanced software integration and AI optimization allow for more intricate designs to be executed with reduced human input, aiding in mitigating errors. The addition of cloud connectivity further facilitates effortless file sharing and remote monitoring. Operational safety features have also improved with the addition of filtration systems, which makes operations significantly safer. These innovations collectively make desktop laser cutters more efficient, user-friendly, and suitable for small-scale businesses and complex design projects.
Dual Laser Systems: Enhancing Versatility and Efficiency
Combining several laser sources or wavelengths into one machine forms dual laser systems that have revolutionized laser cutting technology. This hybrid functionality enables users to work efficiently across a broader spectrum of materials such as metals, acrylics, woods, and textiles, eliminating the need for multiple devices. These systems usually have CO2 lasers for other materials, non-metal materials, and fiber lasers for metals, preserving precision while enhancing versatility.
Switching from cutting to engraving with dual laser systems can be done as the need arises without worrying about downtime. Furthermore, with improved controls and software, users can now automate complex procedures, which significantly increases productivity. In addition, the systems often have sophisticated calibration systems and energy-saving tools that optimize performance while reducing operational expenditures. The profound combination of these attributes creates value for the industries or firms that will benefit from operating dual laser systems for high productivity and flexibility.
Innovations in Laser Modules and Power
The latest development of laser modules concentrates on marketing attention to power density, beam, and energy quality. Wider operating diodes and diode-pumped solid-state (DPSS) lasers are now integrated with high-brightness diode modules for better operational performance. These innovations enable more compact systems to be designed by increasing or at least maintaining the output by lowering the dimensions and mass of laser systems.
The latest development in the trend of enhancing laser power is the introduction of an adaptive power control system. This system adjusts a laser beam’s intensity automatically depending on the material and task, guaranteeing energy efficiency and the required level of accuracy. At the same time, new liquid cooling technology makes it possible to raise the power levels without overheating the system, which is crucial for prolonged and reliable performance.
Another important area of advancement is the precision of ultrafast lasers that generate pulses in the femtosecond to picosecond range. These lasers’ capacity to micromachine and use in medicine is more precise as less thermal collateral damage is inflicted. Altogether, these advancements in the modules and power of lasers are improving efficiency, accuracy, and environmentally friendly practices in all spheres of life, from industry to health care.
References
Frequently Asked Questions (FAQ)
Q: What is the best laser cutter and engraver for beginners?
A: For beginners, the best laser cutter and engraver is typically a desktop CO2 laser or a diode laser engraver. These machines offer a good balance of affordability, ease of use, and versatility. The Xtool F1 Ultra is a popular choice for starting, as it combines cutting and engraving capabilities in a compact, user-friendly design.
Q: What’s the difference between a CO2 laser cutter and a fiber laser engraver?
A: CO2 laser cutters use a gas-filled laser tube and are ideal for cutting and engraving non-metallic materials like wood, acrylic, and fabric. Fiber laser engravers, on the other hand, use solid-state technology and are better suited for engraving metals and some plastics. CO2 lasers generally offer more versatility, while fiber lasers excel in metal engraving applications.
Q: What materials can a desktop laser engraver work with?
A: Depending on the type of laser, desktop laser engravers can work with a wide range of materials. CO2 laser engravers can cut or engrave wood, acrylic, leather, paper, and plastics. Diode laser engravers can handle similar materials but may struggle with thicker substrates. For metal engraving, a fiber laser engraver is typically required.
Q: How do I choose the laser power for my cutting machine?
A: Choosing the right laser power depends on the materials you plan to work with and the thickness you need to cut. A 40W to 60W CO2 laser or a 5W to 10W diode laser is sufficient for most hobbyist applications. For more demanding tasks or professional use, higher-powered lasers in the 80W to 150W range for CO2 or 20W to 50W for fiber lasers may be necessary.
Q: What safety precautions should I take when using a laser cutting and engraving machine?
A: Safety is crucial when operating laser-cutting machines. Always use proper eye protection designed for the specific type of laser. Ensure adequate ventilation or use an air filtration system to remove fumes and particles. Many users prefer an enclosed laser system for added safety, as it never leaves the machine unattended while operating and keeps flammable materials away from the work area.
Q: Can I use a laser engraver for business purposes?
A: Absolutely! Many entrepreneurs use laser engravers and cutters to start or expand their businesses. These versatile machines can create personalized gifts, signage, promotional items, and custom products. The best laser cutters and engravers for business use typically offer a combination of speed, precision, and reliability to meet production demands.
Q: How do I maintain my CO2 laser tube to ensure longevity?
A: To maintain your CO2 laser tube, keep it clean and properly aligned. Regularly check and clean the mirrors and lenses in the beam path. Ensure the cooling system is functioning correctly to prevent overheating. Replace the laser tube when you notice a significant drop in power or inconsistent performance. Proper maintenance can significantly extend the life of your laser tube and maintain cutting and engraving quality.
Q: What software do I need for laser engraving and cutting?
A: Most laser engraving and cutting machines have software to control the device. However, you’ll also need design software to create your projects. Popular options include Adobe Illustrator, CorelDRAW, and Inkscape for vector designs. For photo engraving, software like Photoshop or GIMP can be helpful too. Some machines, like the Xtool F1 Ultra, offer integrated design and control software for a more streamlined workflow.