Butterfly embroidery designs open up a world of creative possibilities that delight embroidery enthusiasts with their intricate beauty and vibrant colors. This blog post serves as a comprehensive guide to machine embroidery techniques, helping you select the ideal patterns and achieve professional-quality results. Whether you are a beginner exploring the art of embroidery or an experienced designer looking to enhance your skills, this guide will introduce you to essential tools, thread choices, and fabric considerations. It will also cover step-by-step instructions on setting up your machine and executing complex butterfly patterns with ease. Join us as we delve into the captivating realm of butterfly embroidery, offering tips and inspiration to transform stunning designs into tangible expressions of art.
What Are Butterfly Machine Embroidery Designs?

Butterfly machine embroidery designs are computerized patterns that replicate the intricate details and vibrant hues of butterflies on fabric using an embroidery machine. These designs are created with a combination of threads in various colors and stitch types, allowing for rich texture and depth. They can range from simple outlines to elaborate, multi-layered patterns, providing a versatile option for decorating clothing, home décor, or accessories. The digital nature of these designs also ensures precision and consistency, making it easier for users to produce stunning, professional-quality embroidery with minimal effort.
Understanding Butterfly Embroidery Designs
When looking closer at butterfly embroidery designs, I notice that these complex branched motifs are made of a colorful array of vibrant embroidery stitches that capture the charm of butterflies perfectly. By making use of an embroidery machine, I can embellish clothes, curtains and other textiles with these designs. The trick is to determine the right combination of thread type, color palettes, and stitches so that the design can replicate the actual textures and volumes of butterflies. After some research, it appears that these embroidery designs can be simple or elaborate, thus giving leeway in terms of creativity and decoration. It makes it easy and fun for me since the end result is a digitally embroidered design that is highly accurate, consistent, and has no stitching errors.
Types of Machine Embroidery Patterns for Butterflies
I came across different kinds of machine embroidery patterns for butterflies that were most in demand and widely used. Appliqué patterns stand out because of the dimensional aspects they add to embroidery. This makes them very appealing when used. In contrast, filled stitch patterns are regarded with attention to detail added and rich color fill, which is best for great impressions. For those who want moderation, redwork or line art patterns are also available for decoration, where designing is done with an emphasis on outlines only. Every type available has its own beauty and can be adapted for use in various designs, and therefore, I feel that there is ample room for artistic expression.
Popular Butterflies Embroidery Styles
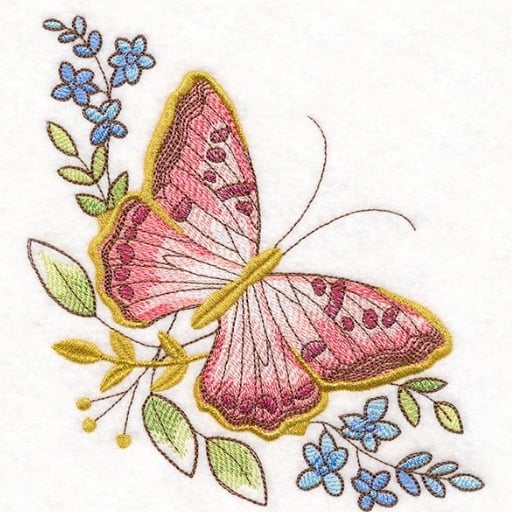
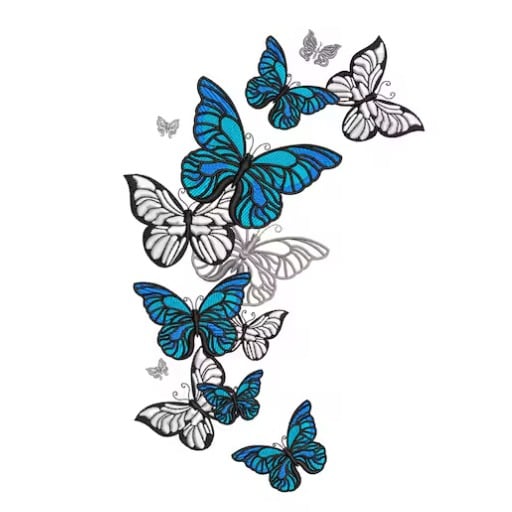
During my persistent engagement with searching for the popular butterfly embroidery patterns, there are three styles that seem to be recurrent: realistic, abstract, and whimsical. A realistic butterfly embroidery seems to represent a true portrait of a butterfly with a precise match of colors, delicate details, and cohesive usage of satin stitches high in the density of 5000–10000 stitches per design. On the other hand, abstract forms are able to use any color or shape that is off-subject and has a slacker stitch density to create a more artsy feel instead. On the other hand, whimsical patterns can also take use of more stylistic aspects such as bright colors or vivid stitching, though some of the stitches would have to be set to medium density to retain a degree of a joyous atmosphere. Each style contributes to the beauty in its own way, creating diversity in butterfly embroidery stitches.
How to Download Butterfly Embroidery Files?

To download butterfly embroidery files, follow these simple steps:
- Find a Reliable Source: Start by visiting reputable or online marketplaces that specialize in embroidery patterns. like Etsy, or specifically embroidery-focused, often have a wide selection of butterfly designs.
- Search for Designs: Use the search function to find butterfly designs that suit your style. You can use keywords related to the style, such as “realistic butterfly embroidery,” “abstract butterfly design,” or “whimsical butterfly pattern.”
- Check File Compatibility: Ensure the file format is compatible with your embroidery machine or software. Common formats include PES, DST, and JEF.
- Purchase or Download: If the design is free, you can simply download it. For paid designs, complete the payment process to access the download link.
- Save to Your Device: Once downloaded, save the file to your computer, USB drive, or directly to your embroidery machine if possible.
By following these steps, you can easily download beautiful butterfly embroidery files and start your creative projects.
Best Platforms for Butterfly Embroidery File Downloads
In the course of scouting the best butterfly embroidery file, I can say that I often visit Etsy, Urban Threads, and Embroidery Library. Etsy has many designs by different individual designers, which means each time I have a new design idea, I can always find something new and interesting. Urban Threads: I love their unusual and artistic designs, which go beyond the norm of the embroidery world. Last but not least, the Embroidery Library contains numerous quality designs, and I am therefore sure that I will have all the beautiful butterfly files I need for any project at hand.
How to Select the Right Digital Embroidery File
To start with, I look for embroidery files that contain designs that are compatible with my embroidery machine. I check for prefixes such as PES, JEF DST, etc, along with those requirements. After that, I check the stitch and the dimensions of the file in order to see if they are in accordance with the target material and other aspects of the project while making sure that they do not go beyond the capacity of my embroidery machine. Ready-made designs are offered at places like Etsy, Urban Threads, and Embroidery Library, among others. I go through the reviews and ratings to see if the designs are approved for effectiveness and practicality. I also try to find designs for embroidery that include guidance or comprehensive support so I know that I have the required information to perform the embroidery process efficiently.
What Hoop Sizes Are Suitable for Butterfly Embroidery Designs?
When selecting the embroidery machine requirements for a butterfly embroidery design, always ensure that the design dimensions correspond with the available hoop dimensions on the machine. However, a butterfly embroidery pattern, which is small and delicate in size, will typically require a 4” x 4” embroidery hoop that can also be used on clothes or other items as ornaments. Use a 5” x 7” hoop for larger motifs or a 6” x 10” hoop for more elaborate designs as it allows for much more detailed works with larger motifs. Remember that the hoop selection should have enough allowance for the design to fit comfortably and for proper fabric tension and stability when the machine is in use.
Exploring 4×4 and 5×7 Hoop Sizes
My understanding of 4×4 and 5×7 hoop sizes is based on how each size can best fulfill my embroidery requirements. Based on the information that I have gathered, the 4 by 4-inch hoop size is known to be quite helpful in dealing with small and simple patterns, even for the side edge. It is perfect for a novice or when one intends to make some modifications to children’s garments, small napkins, and small items in general. Urban Threads and others state that these smaller-sized hoops are excellent monogram and motif-makers. As such, however, the 5×7 hoop size has a greater preference for elaborate patterns because more space is available for the details of the design, which is appropriate for big home decor pieces or large themed designs on the garment. The Embroidery Library and blogs of other like-minded people are always coping with this issue as well and tend to note that this size definitely is quite the right one for the level of medium complexity designs and does not go oversize. As such, I am able to incorporate all of these insights while selecting the correct size of the hoop based on the details of the design that I have in mind and the range of embroidery designs that are comfortable for each of the projects.
Using the 6×10 Hoop for Larger Designs
There is nothing that can come close to using the 6×10 hoop for embroidering larger designs. I’ve come to understand that this size is ideal for impressive embroidery that requires additional room. This size allows a good deal of space for larger motifs and intricate pattern designs while still providing excellent tension and support over wider areas, which is necessary for steadying the designed look. The 6×10 hoop is a fantastic addition for working on detailed works such as quilts or covering large parts of a garment. Now, I am free to explore further in creativity while still ensuring accuracy and nice quality of every stitch.
Tips for Choosing the Right Hoop Size
Asking myself what design size and complexity level to start off my embroidery projects with, I look for the right hoop size. Smaller items or simple designs can be worked on smaller hoops that are around 4×4 inches, Due to the fact that more intricate patterns require a larger area for efficient stitching, a 5×7 or 6×10 hoop is a good choice. Additionally, I also take into account the technical parameters: the size of the hoops the machine can handle and the fabric hooping standard so that the design is not too loose and not over-stressed. So, such practical factors, together with their analysis, always help me determine the right size of the hoop in accordance with the requirements of the specific project.
How to Create Butterfly Applique with Machine Embroidery?

The very first step to creating a butterfly-tone applique using a sewing machine is gathering the materials, which include the fabric, stabilizer, thread, and a design that incorporates a butterfly. In most cases, it is wise to off-hoop the stabilizer alongside the fabric opening onto the umbrella, which is most suitable for the design. This is mostly a 4×7 ring. Load the butterfly design into the sewing machine and ensure to follow the instructions precisely so as not to make any mistakes. The main aspect of a sewing machine is to first embroider the butterfly outline, and only once the area is embroidered with the outline should you apply the fabric. Once this procedure is completed, use the next steps until the sewing design is finished. Remove the umbrella alongside the loose ends, and hence, you will have a butterfly-tone applique. The apex of the work is now achieved, where you take a moment to appreciate your fine diamond embroidery butterfly.
Step-by-Step Guide to Butterfly Applique
- Gathering Materials: As a first step, I make sure to have everything ready for me. This comprises my selected fabric, an appropriate stabilizer, adequate embroidery threads, and my butterfly design file. I see the need to prepare these items beforehand since it makes the workflow smooth and reduces any interruptions.
- Hooping the Fabric and Stabilizer: Afterwards, I proceed to hoop the stabilizer and fabric, I choose the—and the design size, fabric type and embroidery pattern does not interfere with this unhooping-sewing process either. When it comes to butterflies, I mostly work with 4×4 or 5×7 because of the intricacy and size of the design, but I use 5×7 when using a larger frame. Adequate hoops are critical in stabilizing the machine so that fabric tension does not change while sewing.
- Loading and Stitching the Design: After placing the design on the canvas, I proceed to adjust the machine settings for a seamless workflow to avoid fabric jamming and sewing the butterfly on all the folds. First, I load the butterfly design onto the embroidery machine onto. After following the instructions in the machine, I first sew the outer edges in order to seam all the fabrics together. This edging aligns my fabrics and stitches so that I upholstered a clean seam on the butterflies after placing them right.
- Placing and Trimming Applique Fabric: After when placing the outline stitch is when I place the appendage fabric for stitching. That stitch sews the fabric to my embroidering machine buttonhole along the stitch path after I cover the sewed section with fabric. Using scissors specifically made for embroidery, I cut off any fabric that protrudes from the stitches without altering the fabric.
- Completing the Design: For the last step in the embroidery machine’s sequence for the butterfly, I pull that stitch and finish any last details or decorations that beautify the design.
- Finishing Touches: Now I will take the hoop off the machine, get rid of any threads and the stabilizer. The end result is a delicate embroidered butterfly applique that can be used to enhance the elegance of any project.
Materials Needed for a Butterfly Applique
To create a butterfly applique, I gather the following materials:
- Embroidery Machine: Essential for stitching the design.
- Stabilizer: I use a cut-away or tear-away stabilizer to support the fabric.
- Fabric: I choose a fabric that complements my project and is suitable for the applique.
- Embroidery Thread: High-quality threads in various colors make the design vibrant.
- Applique Scissors: These help precisely trim excess fabric without damaging stitches.
- Embroidery Hoop: I select a hoop size that best fits the design’s dimensions.
- Adhesive Spray or Pins: These help to secure the fabric and stabilizer during hooping.
Each of these materials plays a crucial role in ensuring that the butterfly applique is crafted with precision and looks professional.
Common Mistakes to Avoid in Applique
When creating appliques, I focus on a few common mistakes to ensure my designs turn out beautifully:
- Improper Fabric Stabilization: Using the wrong type or insufficient stabilizer can result in puckered or misaligned designs. I always choose the correct type, like cut-away or tear-away, based on the project’s needs.
- Inadequate Tension Settings: Incorrect machine tension can cause thread breakage or uneven stitching. I check and adjust my machine’s tension settings regularly to ensure a smooth stitch.
- Poor Fabric Preparation: Neglecting to pre-wash or iron the fabric may lead to shrinkage or unwanted creases, affecting the final look. I carefully prepare my fabric before starting any applique work.
- Incorrect Hooping: Failing to hoop the fabric properly can cause slippage. I make sure the fabric and stabilizer are taut and securely fastened in the hoop.
By being aware of these common pitfalls, I am able to produce high-quality appliques that are both durable and visually appealing.
How to Customize Mini Butterfly Embroidery Designs?
To make mini butterfly embroidery designs, first choose an embroidery design software that is clean and simple to use to make the changes. The first thing that you might want to change is the colors in the design so as to suit the fabric or your style. Position the design with respect to the fabric size that is acceptable, reasonable, and appropriate, taking into consideration the visibility of the various components of the design. You can also put words or use several of them to make it more detailed. Create different looks, textures, and effects by using various types of stitches. Before embarking on the final design, remember to try it on a piece of fabric that’s not part of the final design, this will enable you to see how the modification looks like first. This way, you get to utilize your mini butterfly embroidery designs as you have always envisioned whilst standing out from the crowd through customizations while focus on quality.
Digitizing a Mini Butterfly Design
To help me understand your creative aspirations better, tell me briefly about the preferences that you have in mind, and importantly, please do furnish images of the ideas you are trying to communicate. Tell me about your ideas in greater detail, including your creative vision and the audience you are targeting. The images will hinge heavily on your preferences, and that’s why it’s a good idea to share your own images with us. There are a few things that can totally shape the design so don’t forget to mention those important details. I will be cross-checking with you at every stage of the planning process that we adhere to all of these critical elements whilst designing the digitized embroidery. Once I am successful in soothing all of the pointers, I will finally commence with the final product. If there are changes that you plan to incorporate, do let me know before I begin. To ensure does not change from what she was supposed to be, I would be available all the time to assist those who need my guidance. If visuals are that important, check and let us give everything a shot while having fun. On a serious note, an embroidery digitizer has the ability to contribute totally to the desires and goals that you seek to achieve. The professional world has forever seen tremendous fluctuations, while the rich history of concept arts stood there.
Using Machine Embroidery to Personalize Designs
Employing machine embroidery to personalize the designs enables me to inject individuality into fabric appliances by mixing automated precision and creativity. The first step for me is identifying a good embroidery machine that fits my design specifications and the types of materials used. Now, with that machine, it simply becomes a case of interfacing with the machine, where I upload my digitized designs and adjust the size and the colors of the designs for it to fit into the machine. After attaching a simple monogram, logo or an intricate design, one can personalize clothing and home furnishings. I create room for creativity by manipulating the machine’s settings to use various kinds of threads and stitches to make my or my client’s visions stand out. It is not only about vibrant motifs; it is about personalizing and creating a design for an object that someone would consider a valuable addition to his/her life.
Ideas for Mini Butterfly Embroidery Design Projects
There’s something quite fascinating about using butterfly embroidery designs, especially in smaller projects, and this is exactly the reason why I like creating miniature butterfly embroideries. An example is to use them as embellishments on children’s dresses or shirts where such patterns would work well. For interior decoration, picture mini embroidered butterflies which can be scattered on throw pillows and wall decors; they add an accent of nature. Some important technical parameters that must not be overlooked include a target stitch length of approximately 0.4mm to produce outlines without overpowering the fabric and the use of a 75/11 or 70/10 embroidery needle, which is appropriate for decorative sewing. I also suggest using 40-weight threads, either made of polyester or rayon, as these maintain good color and resist wear. All these technical aspects are needed to enhance the view and preservation of the design ensuring it remains pretty and appealing over time.
References
-
How To Embroider A Butterfly (Easy and Colorful!) – This source provides a colorful and straightforward guide to embroidering butterflies.
-
Machine Embroidery 101 For Beginners – A comprehensive guide for beginners covering the basic supplies and techniques needed for machine embroidery.
-
Learn how to get started with Machine Embroidery – Offers tips and guidance on starting with machine embroidery, including stitching names and monograms.
Frequently Asked Questions (FAQ)
Q: What is a butterfly embroidery design?
A: A butterfly embroidery design is a pattern used to create images of butterflies on fabric. These designs can range from simple butterfly silhouettes to intricate patterns and can be used in various embroidery projects, such as clothing, accessories, and home decor.
Q: How can I use a butterfly applique design in my projects?
A: A butterfly applique design can be used to add decorative elements to fabric projects by sewing or ironing the design onto the fabric. This technique is popular for creating standout designs on clothing, quilts, and accessories.
Q: Where can I find cute butterfly embroidery patterns?
A: You can find cute butterfly embroidery patterns on online platforms such as Etsy Finland, where various designers offer unique and creative options. These are often available as embroidery design files for download.
Q: What are the common file formats for butterfly embroidery designs?
A: Common file formats for butterfly embroidery designs include PES, DST, EXP, and HUS. These formats are compatible with different embroidery machines and software, allowing you to transfer designs for stitching.
Q: Can I purchase a baby girl embroidery file with butterfly designs?
A: Yes, you can purchase a baby girl embroidery file featuring butterfly designs. These files often include cute and charming butterfly patterns perfect for baby apparel and accessories.
Q: What is machine embroidery instant download?
A: Machine embroidery instant download refers to the ability to purchase and download embroidery design files immediately after purchase. This allows you to quickly access and begin working with the designs on your embroidery machine.
Q: How do I choose between a fill stitch embroidery and a miniature embroidery design?
A: A fill stitch embroidery uses dense stitching to completely fill an area with thread, creating a solid design, whereas a miniature embroidery design is small in size, ideal for tiny embellishments. Your choice depends on the detail and size required for your project.