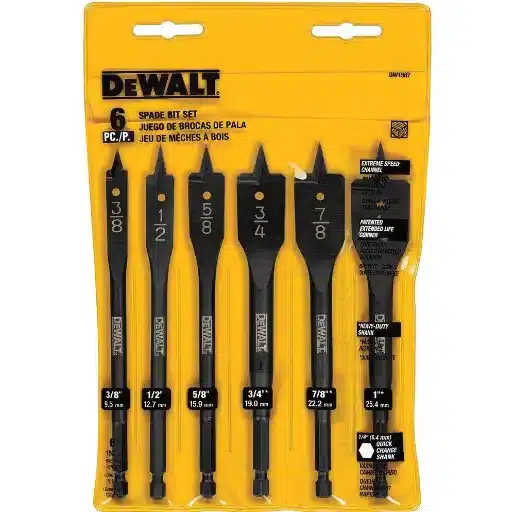
Brother Disney PE550D Embroidery Machine is one of the wonders in technology and a masterpiece for creative expression which come suitable for both beginners and professional embroidery artists. The heart of this particular machine is a total of 125 built-in designs, with the most important being 45 exclusive Disney-created patterns which, coupled with incredible creativity, have almost limitless design applications. The PE550D, for instance, features a sizable LCD touchscreen display, an automatic needle threader, and an easy-to-use interface, all of which help to improve and simplify even advanced embroidery processes without sacrificing quality. This article presents the present model of the machine with its specifications and functions, as well as the new and different benefits, enabling readers to understand how the PE550D can be very useful in their creativity.
What Makes the Brother PE550D Embroidery Machine Stand Out?

Embroidery any way you wish
One of the main features of the Brother PE550D Embroidery Machine is the built-in designs, which are stitching built-in patterns that total 125 patterns. Out of these, 45 represent the Disney exclusive designs which have available character themes that are useful and adored by audiences of all ages. These designs enable users to handle intricate and customized tasks, whether engraving children’s clothes, creating decorations for the to-be-purchased households, or making special gifts for loved ones. The range of design options is vast and caters to different tastes and styles, which means that no single design will ever be dull as all they can be approached with excitement. Additionally, the introduction of the most commercially successful Disney character designs not only improves the end result of the work but also gives market needlework machines an advantage that the rest do not have in terms of licensed content.
Understanding the 4 In X 4 Embroidery Field in PE-550D Sculpture Machine
The Brother PE550D Embroidery Machine has a 4 in x 4 embroidery field, which can be designated the standard workspace size or area for most embroidery operations. It is also practical for beginners as well as more seasoned users. This dimension allows users to efficiently manage and execute most common embroidery projects, such as monograms, logos, and small designs where there is no or very little mat cropping or hard barrel rotation is required. Its size is also manageable, thus enhancing the power and control of high quality. In addition to that, it has a graphics value which is moderate and does not require much strain on the machine and hence, it is suitable for home embroidery users who need the most out of their designs while at the same time, want the machine to be simple to operate.
Components of the LCD Touch Screen and User Interface
The Brother PE550D Embroidery Machine has an LCD touchscreen panel, which is crucial in navigating and completing embroidery tasks. Its size is 3.2 inches, which is bright, allowing for easy navigation and usability as people can easily go through designs, pick patterns, and change configurations . Some of the main characteristics include a graphic representation of the several built-in designs, which are over 125, and include 45 different Disney characters, which increase the customization of the projects. Furthermore, the tools include the basic editing tools on the design, which include rotating, flipping, and changing the dimensions of the design prior to stitching. The LCD touch allows the user to quickly trace workflows, mark settings, and review all responsibilities and objectives in industrial tutorials that would benefit mostly beginners and those who have advanced skills in stitches. The ergonomic appearance allows the operator to work for longer without straining too much while ensuring that the operators have mastered a complex operation system.
How to Use the Built-in Disney Designs Effectively?

Suggestions that Can Help You Capture the Passion of Disney in Your Embroidery Work
For a project like this one, I begin with the built-in designs and Disney images featured in the Brother PE550D, making it a good start. Instructions bound to improve both the creative and the operational side of such ventures, were also acquired from several online sources. Lastly, it is critical to comprehend the operational principles of the machine in question. The Brother PE550D has a relatively large embroidery area of 4 inches by 4 inches allowing me to apply character features without adjusting the fabric. Furthermore, the needlework machine also operates at an adequate speed of four hundred stitches in a minute, allowing me to work rapidly while still executing a masterpiece. To achieve the professional final look, I also make sure to use quality threads that match the colors of the character being illustrated. Additionally, I also make sure that before I finalize the designing stage, the adjustments necessary in any design project have been carried out, and therefore, I make sure that the figures are only appropriate for the intended scope. Using these methods, I can deliver actual embroidery works that look straight out of a Disney animation.
Embroidery Designs Built-in: Adjustment and Modification
While making changes and modifying the built-in creative elements, especially embroidery designs on the Brother PE550D, I use the on-screen editing tools that are quite simple to operate. First, the LCD touchscreen is high-end and offers good resolution, which helps me view the designs clearly and make more detailed changes. When scaling the designs, larger or smaller, the maximum limit in this machine can be up to 20%, allowing me to adjust designs according to different fabrics. The possible adjustment for modifications on the design is 1 degree using the machine’s rotation feature. I also take advantage of the existing mirror imaging which allows me to make perfect symmetrical designs with most of my designs on the machine. The designs can also be altered by adding different images or writing text on them using the built-in memory, which can simultaneously accommodate up to 25 designs. This customizing approach allows me to enhance and personalize whatever I want whilst producing perfect technical and creative outcomes in th embroidery projects.
How to Upload Your Designs to the PE550D?

How to Use the Built-in Memory and the USB Port
To upload any image I want to the PE550D, I begin by saving the file in PES format as it is compatible with the machine. Then, I place these files into a USB drive, ensuring that I do not exceed the memory of 511 KB of the Memorex machine. Then, I plug the USB drive into the PE550D into the port on the right side of the machine. After connecting the USB, I turn on the machine and touch the screen to upload from the USB. Then, I can download the required design file and save it on the internal memory. In this way, I can use my designs and create embroidery on the PE550D, as the device possesses all the necessary capabilities and modern technologies to solve tasks as accurately and creatively as possible.
How to Upload the Designs from Your Computer
According to my research on the best resources available on the Internet, below is a tried-and-tested process for uploading your designs onto the PE550D.
- Getting The Files Ready For Upload: Before I start designing, I first convert my design into PES embroidery files, which is essential for the PE550D. Remember that the design’s size should always be less than 4×4 inches above the embroidery area, which is the maximum size available.
- USB Transfer: The PES files are saved onto a flash drive. A drive with appropriate formatting, like FAT32, should be used, as the machine accepts it. Also, ensure that the single design file does not exceed 512KB.
- Connecting the USB Drive: I place the USB Drive into the machine’s USB port and use the PE550D’s touch screen to access the menu.
- Importing Designs: I can see all the files in the USB drive options. I can also search for a specific file by selecting it to store it in the PE550D internal memory.
- Embroidering the Design: Once imported, that design can now be found in the machine’s memory, and therefore, I can continue with the embroidery. This stage further includes settings on the thread’s color and the stitch speed, which are necessary for this step.
With these instructions, I can successfully transfer and make ready designs using the advanced features of a PE550D for embroidery.
What Are the Benefits of the PE550D’s Embroidery Machine Features?

The Versatility of the Embroidery Foot and Hoop
With the addition of the embroidery foot and hoop, I have achieved more functionality with the PE550D machine allowing me to play around with different designs and fabrics. The seam can be sewn properly if the embroidery foot is secured in position since this will help in correct stitch formation when working on different textiles. The 4” x 4” is the standard size among other models of the PE550D, and the embroidery machine has an embroidery frame design that assists in stabilizing the fabric during the embroidery procedures. Stabilization is very important while embroidering with softer materials as even the slightest movement can cause the stitching pattern to become misaligned. I observe that as long as the fabric is inserted well in the hoop, only the required amount of tension will be distributed over the entire surface area of the material, which, in turn, is very important for achieving stitches of consistent quality. Also, the quick-release feature of the hoop allows me to switch from one project to another quickly without disturbing the progress. By examining these components, I have been able to use these components to perform professional-level embroidery applications such as copying intricate details and also stitching intricate patterns.
How to Use the 6 English and 3 Japanese Stitch Styles to Your Advantage
The relevance of embroidery in modern times cannot be overstated one of its great features is the wide make of stitch patterns consisting of 6 English and 3 Japanese options which include PE550D. Using cultural embroidery styles also allows me to express myself in other design elements besides the specific project. Because English stitch types are more traditional, they produce perfect lines of stitching that are useful and attractive in all sorts of classical Western designs. Providing robustness and accommodating various embroidery activities with consistent application has been done for all stitch options.
However, the Japanese ones add a different flavor to my works, allowing me to integrate graceful and classic Oriental designs. Because of this flexibility, I can now easily mix and match cultures in one piece of art. These stitch options are selected with data to suit various fabrics and the design complexity, improving the stitches’ quality and durability. This also means, that my embroidery designs will encompass a wider variety of stylistics, patterns and ornaments while the end results provide a sense of professionalism. When applied correctly, these custom options greatly improve the use of the PE550D chemistry, which makes it a versatile device in the range of my devices for embroidery.
The Largest Embroidery Area in Large Projects
Maximizing the embroidery area on the PE550D allows me to work on rather large projects efficiently. As most machines provide a standard 4” x 4” embroidery field, this one does, too, but it can be enhanced with proper planning and the resources available. For instance, the layout of the designs can be done so that it is easier to break a larger design into smaller pieces that fit within a specified area; this is accomplished through supporting software, which also allows for the construction of larger designs. The constants of stitch length are maintained throughout the assembly of designs due to the ability of the machine to relatively reorient itself relatively and the seams without the use of dots to indicate a starting point, hence enhancing the cohesiveness of the entire design.
In addition, I use multi-hooping techniques by self- calculating, aiming at a specific design reproduction consistency through overlapping zones. I also use stitchers, which reduce movement during the time of sewing and, therefore, could help in ensuring precise stitches. The realization of a heightened embroidery field is achieved by first selecting and calibrating the stitch density and type, which then expands the available space to what may be necessarily intricate details of fabric and motifs out of many compositional simplicities. This process requires several measurements and verification of alignments among other aspects, thus showing the effort and care that is required in undertaking such a project using the machine PE550D.
What Should You Expect from the PE550D Embroidery Machine Experience?

The Importance of the Sewing Center in Your Work
According to my experience, the sewing center is a sewing area that is responsible for carrying out the different embroidery projects in an orderly manner. There are several reliable resources that stress the fact that there must be a specific work area that is well organized for any particular project. Following are the critical parameters and the technical facts from the best websites:
- Order and Precision: The operation center must be arranged so as to save time on flow management, ensuring that tools, threads, and other working materials are within reach. This arrangement helps minimize downtime and the chances of making mistakes. According to best practices from credible sources, make sure that lighting is adequate, workspace is sufficient, and storage for further items is also provided.
- Work and Care of the Machines: For the PE550D to function effectively and last for a long time, it is important that the appliance is reasonably well maintained. As will be seen, this involves cleaning, lubrication, and timely servicing of the device. Many websites recommend that relevant inspection of the key components, including the needle, bobbin, and even the thread path, be done frequently.
- Advanced Features Utilization: With some embroidery machines, it may be worth taking advantage of some advanced features, like inbuilt editing options or the embroidery speed, as they will improve the final project quality. Interacting with the machine interface and changing several settings also allows overcoming its limits. According to websites, software updates and its so-called ‘read more embroidery designs’ functions must be taken to another creative level.
Proper planning and housekeeping practices should support every role of a sewing center, ensuring that all projects are carried out in an orderly and timely manner.
The Magic Element in Your Designs as Illustrated by PE550D
While checking some of its features, I understood how the PE550D turns ingenious imaginations into real, intricately designed forms. I must say that the magic of this device stems from its 4” x 4” its embroidery area; it is one area that pushes and polishes my creativity at the same time. With such imbedded designs, creative spark is always set off as I note that 45 are Disney designs. It also has nine built in font styles that appeal to my need for personalization; everything is created to order with a sinuous combination of creativity and accuracy. Clearly, the color LCD touchscreen is a necessary evil as it reduces the amount of guess work associated with designing. Based on the provided data in the manual, the PE550D features an embroidery speed of about 400 stitches per minute, a feature that cuts time considerably and still gets quality work. All in all, it is the combination of these factors that never fail to turn my projects into works of professional art that I intended them to be.
Reference sources
-
Brother PE550D | 4 in x 4 in Embroidery Machine with Disney Designs
- Source: Brother USA
-
Brother PE550D Embroidery Machine Disney Bundle
- Source: Sewing Machines Plus
-
Review of the Brother Disney PE550D Embroidery Machine
- Source: Digitizings
Frequently Asked Questions (FAQs)
Q: What are the main features of the Brother PE550D embroidery machine?
A: The Brother PE550D embroidery machine has a 4” x 4” embroidery field and 125 designs, 45 of which are Disney designs. Additional features include a needle threader, 9 fonts, and a touch-screen interface for additional ease of use.
Q: Can I upload my own designs to the Brother PE550D embroidery machine?
A: Sure the PE550D has storage space and means to RAM other designs. It is easy to upload and stitch designs through this facility.
Q: How does the automatic needle threader work?
A: On the PE550D embroidery machine, users do not have to insert the needle time manually and again, it’s just a matter of turning the knob.
Q: What kind of designs can I create with the PE550D embroidery machine?
A: We can use generalized curves and angles to stitch text. Also, not just horizontal but vertical stitches as well for greater freedom in design. The spacing of words can be modified.
Q: Am I right to think that the Brother PE550D comes with a warranty?
A: The machine also comes with a limited warranty and lifetime technical assistance, making the purchase a worry-free experience.
Q: To what degree has Brother PE550D’s touch screen been optimized for users?
A: As constructed, the touch screen on the Brother PE550D is user-friendly regarding readability and functionality. You can choose design templates or curtains in other colors before making your first embroidery.
Q: What about some fonts that can be used with the Brother PE550D?
A: The Brother PE550D is equipped with nine monogramming fonts, enabling you to complement your projects uniquely.
Q: Should I worry about the spacing of the letters when I embroider some text?
A: The PE550D offers spacing adjustments between letters, thus giving you some leeway with how the embroidered text will be arranged and how it will look.