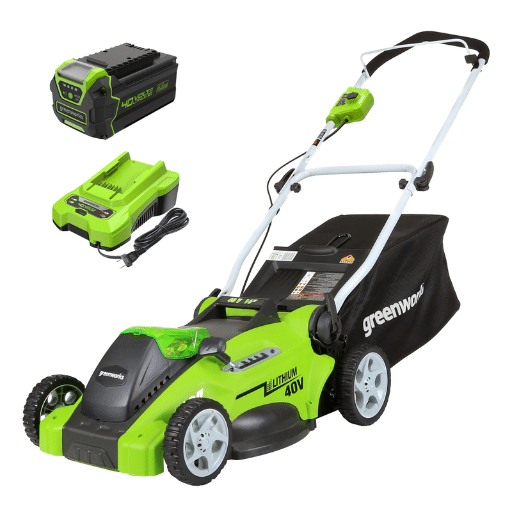
A well-maintained lawn is the pride of any homeowner, and one of the most critical tools in achieving that lush, manicured look is a sharp mower blade. Over time, mower blades can become dull, tearing through grass instead of delivering a clean cut, which can leave your lawn looking uneven and unhealthy. But how do you ensure your mower blades are as sharp as they need to be? This guide is here to take the guesswork out of the process. From understanding why sharp blades matter to exploring the best sharpeners available and step-by-step tips for getting the job done right, you’ll find everything you need to keep your mower—and your lawn—in peak condition. Get ready to elevate your lawn care routine!
Why Does Your Lawn Mower Blade Need Sharpening?

A sharp lawn mower blade is essential for clean and efficient cutting. Dull blades tear grass instead of cutting it cleanly, which can leave your lawn looking ragged and increase its vulnerability to diseases. Additionally, sharp blades improve mower efficiency, reducing strain on your equipment and ensuring a smoother mowing experience. Regular sharpening keeps your lawn healthy and promotes faster recovery after mowing.
Signs of a Dull Blade
- Uneven Grass Cuts
One of the most common signs of a dull blade is uneven or jagged grass cuts. Instead of slicing through the grass cleanly, dull blades tear at it, leaving uneven lengths and frayed edges. This can result in a lawn that appears patchy and unkempt.
- Brown or Discolored Grass Tips
Tearing caused by dull blades often leads to grass tips browning or discoloring shortly after mowing. These torn edges are more susceptible to drying out and can give your lawn an unhealthy appearance.
- Excessive Strain on the Mower
Dull blades require more effort to cut through the grass. If your mower sounds like it’s working harder than usual or if you notice it bogging down frequently, it could indicate that the blades need sharpening.
- Pulled or Uprooted Grass
Instead of slicing cleanly, dull blades may pull or uproot grass, damaging the roots. This not only affects the immediate aesthetics of your lawn but can also hinder healthy regrowth over time.
- Grass Clippings Appear Serrated
Upon closer inspection, sharp blades should produce uniform, clean-cut clippings. If the clippings look shredded or frayed, this is another indicator that the blade edge has dulled significantly.
By paying attention to these signs, homeowners can maintain the performance of their mower and preserve the health and appearance of their lawns. Experts recommend sharpening your lawn mower blade at least twice per mowing season or after approximately 20-25 hours of use, depending on the size of your lawn and frequency of mowing.
Impact on Lawn Care
A sharp lawn mower blade plays a critical role in promoting superior lawn health and appearance. Dull blades tend to tear grass unevenly, which can make a lawn more susceptible to diseases, pests, and dehydration. Studies suggest that cleanly cut grass blades recover more quickly and allow for more efficient nutrient absorption, promoting lush and even growth. Additionally, lawns cut with sharp blades maintain a more vibrant green color, as the grass tips do not develop the brown, ragged edges caused by tearing.
Data highlights that lawns mowed with well-maintained equipment, including sharp blades, show an improvement in growth consistency by up to 15% and a reduction in stress-induced damage by approximately 25%. Furthermore, ensuring your blade is sharp can reduce mowing time by up to 20%, as the mower operates more efficiently and requires fewer passes. This not only saves time but also reduces fuel or energy consumption, contributing to a more sustainable lawn care routine. Regular blade sharpening is a small yet effective practice to optimize both the aesthetics and long-term health of any lawn.
How Often Should You Sharpen?
The frequency at which you should sharpen your lawn mower blade largely depends on how often you mow, the size of your lawn, and the condition of the grass. Experts recommend sharpening the blade after every 20-25 hours of mowing. For the average homeowner, this typically translates to sharpening once or twice during the mowing season. However, if your lawn experiences heavy use, contains tougher grass types, or has debris like twigs and rocks, you may need to sharpen the blade more frequently.
A dull blade can significantly impact the health of your lawn. Research shows that dull blades tear the grass instead of cutting it cleanly, leading to jagged edges that increase the risk of disease. A sharp blade, on the other hand, ensures a smooth cut, reducing water loss from grass tips by up to 25% and improving the overall appearance of the lawn.
For professional landscapers or individuals with large properties, sharpening the blade more regularly—every 10-15 hours of use—may be necessary to maintain optimal performance. Regular inspections of the blade for nicks, dents, and wear can also help you determine when sharpening is needed. Utilizing this practice will not only enhance lawn health but also extend the lifespan of your equipment, making it a cost-effective strategy in the long term.
What Are the Different Types of Blade Sharpeners?

There are several types of blade sharpeners commonly used for maintaining lawn mower blades:
- Bench Grinders
Bench grinders are a powerful and efficient tool ideal for quickly sharpening blades. They are best suited for individuals experienced in blade sharpening due to their precision and speed.
- Hand Files
Hand files are a simple and cost-effective option for sharpening blades. They require no power and are ideal for making small adjustments and repairs to slightly dull edges.
- Angle Grinders
Angle grinders are a versatile and portable option for sharpening mower blades. They provide control and flexibility, making them a popular choice for both professionals and DIY enthusiasts.
- Sharpening Stones
Sharpening stones, also known as whetstones, are a traditional method of blade sharpening. They are best suited for precise, manual sharpening and work well for minor wear and tear.
Each of these options has its advantages, and the right choice depends on your level of experience, the tools available, and the condition of the blade.
The Angle Grinder Method
The angle grinder is one of the fastest and most efficient methods for sharpening blades, especially for larger, heavily damaged, or blunt tools. Designed for versatility, this tool can save significant time and effort compared to manual methods. To achieve optimal results, it is crucial to use the right grinding disc—generally, a grinding wheel or flap disc with a grit size of 36 to 60 is recommended for sharpening.
When utilizing an angle grinder for sharpening, holding the blade at the correct angle (typically between 20 to 30 degrees) ensures precision and reduces the risk of uneven edges. Experts suggest consistent, light pressure while moving the grinder along the edge in smooth, elongated strokes. Some recent studies highlight that improper use or excessive grinding pressure can overheat the blade, causing potential loss of its temper and durability. To avoid this, it is advised to immerse the blade in water intermittently to maintain a cool temperature.
For safety, always wear protective gear such as safety glasses, gloves, and hearing protection. The high-speed rotation of the grinder produces sparks and debris, which calls for caution during use. Industry professionals also recommend securing the blade firmly using a clamp or vice to enhance control and prevent accidents.
The angle grinder method is impactful and efficient for both professionals and hobbyists when sharpening blades, provided it is used with the proper safety measures, tools, and techniques. Its unparalleled speed makes it a go-to choice for revitalizing even the dullest tools.
Using a Bench Grinder
A bench grinder is an effective and powerful tool for sharpening blades and restoring their sharp edges. Equipped with two spinning abrasive wheels, it allows users to quickly and efficiently grind down dull or damaged edges. When using a bench grinder, it is important to choose the proper grit size for the task—coarser grits are better for removing significant material, while finer grits are ideal for finishing and smoothing edges.
To achieve the best performance, maintain the correct angle while grinding, usually between 20-25 degrees for most blades, to optimize cutting efficiency. It’s also critical to avoid overheating the blade during the process. Overheating can weaken the metal and reduce cutting performance. To prevent this, press the blade lightly against the wheel and periodically cool it in water.
Bench grinders are highly versatile; they can be used to sharpen kitchen knives, lawnmower blades, chisels, and even larger tools such as axes. Modern bench grinders often include safety features like spark guards, eye shields, and tool rests to improve precision and protect the user. For consistent and professional-level results, regular maintenance of the grinding wheels is essential, including cleaning and balancing to ensure even wear.
Pros and Cons of Drill Attachments
Drill attachments are highly practical accessories that enhance the versatility of a basic drill, allowing it to perform a variety of functions beyond standard drilling. Here are the key advantages and disadvantages of using drill attachments:
Pros:
- Enhanced Versatility
Drill attachments can transform your drill into different tools, such as sanders, polishers, screwdrivers, or even saws, eliminating the need to buy multiple individual tools. For instance, sanding attachments provide excellent polishing results on wood and metal surfaces, while hole saw attachments enable precise cutting of circular holes.
- Cost-Effective Solution
By investing in a quality drill and versatile attachments, users save money compared to purchasing single-purpose tools. Attachments are widely available in affordable kits, making them an economical option for DIY enthusiasts and professionals alike.
- Space Efficiency
Instead of storing multiple tools, having a handful of attachments requires far less storage space, proving particularly beneficial for users with limited workshop room or storage areas.
- Ease of Use
Drill attachments are generally simple to install and compatible with most standard drills. Changing out attachments is quick, enabling users to efficiently switch between tasks.
- Lightweight and Portable
Compared to standalone power tools, drill attachments are lighter and more compact, making them easier to transport for off-site jobs or home improvement projects.
Cons:
- Reduced Power and Efficiency
Some attachments may not deliver the same level of power, precision, or efficiency as tools specifically built for a task. For example, a sanding attachment may not achieve the same smooth quality as a dedicated orbital sander.
- Durability Limitations
Frequent use or heavy-duty applications can wear out certain attachments more rapidly than standalone, purpose-built tools, leading to potential additional costs for replacements.
- Compatibility Issues
While most attachments work with standard drills, certain specialty attachments require specific drill models or brands, limiting their accessibility. Users must ensure compatibility to avoid disappointment.
- Learning Curve
For beginners, mastering the use of various types of attachments can take practice. Improper use of attachments may lead to reduced performance or even potential safety hazards.
- Limited Heavy-Duty Capabilities
Attachments are generally better suited for light to moderate tasks. For demanding applications, such as cutting through thick steel or heavy-duty grinding, dedicated tools often perform better and last longer.
By understanding the pros and cons of drill attachments, users can make informed decisions based on their individual needs, project requirements, and budget.
How to Sharpen a Lawn Mower Blade Safely?

- Disconnect the Power Source
Ensure the lawn mower is powered off and disconnect the spark plug to prevent accidental starts.
- Remove the Blade
Use a wrench to loosen and remove the blade from the mower. Remember to wear gloves for protection.
- Secure the Blade
Clamp the blade in a vice to hold it steady while sharpening.
- Sharpen the Blade
Use a metal file or a grinding tool at the blade’s existing angle to create a sharp edge. Stroke in one direction for best results and maintain balanced sharpening on both ends.
- Check the Balance
After sharpening, check the blade’s balance by placing it on a balancing tool or a screwdriver shaft. A balanced blade ensures smooth operation.
- Reattach the Blade
Reinstall the blade securely onto the mower, tightening the bolts firmly.
- Reconnect the Power
Reconnect the spark plug or power source, and your lawn mower is ready for use.
Tools You’ll Need
To properly sharpen your lawn mower blade, you’ll need the following tools and materials, accompanied by details on their importance and usage:
- Work Gloves
Protect your hands from sharp edges and debris during the sharpening process. Durable gloves with a good grip are recommended for safety.
- Socket Wrench Set
Essential for removing and reinstalling the mower blade. Ensure the set includes the right sizes for your mower’s specific bolts or nuts.
- Blade Sharpening Tool or a File
A dedicated blade sharpener or a high-quality metal file is needed to achieve a sharp, precise edge. Consider using a handheld sharpener or an angle grinder for quicker and efficient results.
- Balancing Tool
To check if the blade is evenly balanced after sharpening, a blade balancing tool is indispensable. An imbalanced blade can lead to vibration and uneven cutting.
- Safety Goggles
Protect your eyes from sparks and flying debris, especially when using powered sharpening tools.
- Wire Brush
A wire brush helps clean off dirt, rust, and grass buildup from the blade, ensuring smooth sharpening.
- Vice or Clamp
Secure the blade in place while sharpening. A sturdy vice minimizes movement and ensures consistency throughout the sharpening process.
- Rag or Cleaning Cloth
Use a cloth to wipe off any remaining dirt, debris, or oil from the blade before and after sharpening.
These tools not only simplify the task but also ensure optimal lawn mower performance and operator safety. Always have your workspace organized and equipped before starting the process.
Steps to Sharpen the Blade
- Disconnect the Spark Plug
Before you begin, ensure safety by disconnecting the spark plug. This prevents accidental starts while you work on the blade.
- Remove the Blade
Tilt the mower on its side, ensuring the carburetor and fuel tank are facing up to avoid spills. Use a wrench to loosen and remove the bolt securing the blade. Make a note of the blade’s orientation for proper reinstallation.
- Clean the Blade
Use a stiff brush to remove built-up grass, debris, and rust from the blade. For persistent grime, a wire brush or metal scraper may be used. This step ensures a smoother sharpening process.
- Secure the Blade in a Vice
Place the blade in a sturdy vice to keep it steady. This prevents movement during sharpening and ensures precision.
- File the Cutting Edge
Use a metal file or a sharpening tool, maintaining the original angle of the blade (usually 30-45 degrees). File in one direction only, applying consistent pressure until the edge is sharp. For heavily worn blades, a bench grinder can be used, but caution is required to avoid overheating the blade.
- Check Blade Balance
An imbalanced blade can cause vibrations and damage to the mower. Place the blade on a blade balancer or hang it on a nail through the center hole. If one side dips lower, file additional material from that side until it balances evenly.
- Reinstall the Blade
Reattach the blade to the mower, ensuring it is positioned correctly according to your earlier notes. Tighten the bolt securely with a wrench.
- Reconnect the Spark Plug
Once the sharpening and reinstallation are complete, reconnect the spark plug. Perform a final inspection to ensure everything is properly assembled.
Common Mistakes to Avoid
- Sharpening the Blade Incorrectly
One of the most common mistakes is sharpening the blade at the wrong angle. Lawn mower blades generally require a 30- to 45-degree angle for optimal performance. A blade sharpened too steeply may dull quickly, while too shallow an angle can reduce cutting efficiency.
- Neglecting to Balance the Blade
After sharpening, it’s crucial to check for balance. An unbalanced blade can cause excessive vibration during operation, which not only damages the mower but can also result in uneven cuts across your lawn. Use a blade balancer to verify even weight distribution.
- Failing to Clean the Blade Properly
Cleaning away debris, sap, and rust before sharpening is often overlooked but essential. Dirt buildup can interfere with sharpening tools and result in inefficient cutting edges. Regular cleaning can also extend the blade’s life by preventing corrosion.
- Over-tightening or Under-tightening the Bolt
Improperly securing the blade, whether over-tightened or left too loose, can lead to operational issues. An over-tightened bolt may damage the blade or mower assembly, while a loose bolt could cause the blade to detach during use. Use a torque wrench to follow the manufacturer-recommended settings for bolt tightness.
- Skipping Routine Inspections
Failing to routinely inspect the blade for nicks, bends, or cracks can compromise the mower’s functionality. A damaged blade not only makes cutting less efficient but can also pose safety hazards. Inspect your blade every 20-25 hours of operation or at the start of each season.
By avoiding these common mistakes and adhering to proper maintenance protocols, you can ensure your lawn mower operates efficiently and safely for years to come.
How to Balance and Maintain Your Mower Blades?

- Remove the Blade Safely
Disconnect the spark plug to prevent accidental starts. Use a wrench to carefully remove the blade from the mower.
- Clean the Blade
Remove any dirt, grass clippings, or rust using a stiff brush or cloth. A clean blade ensures accurate balancing and better cutting performance.
- Check for Damage
Inspect the blade for cracks, bends, or excessive wear. If the blade is damaged beyond repair, replace it immediately.
- Sharpen the Blade
Use a file or a sharpening tool to restore the blade’s edge. Follow the existing angle of the blade for effective sharpening.
- Balance the Blade
Place the blade on a balance tool or a nail fixed in a stable surface. If one side dips lower, file away material from the heavier side until the blade sits evenly.
- Reattach the Blade
Secure the blade back onto the mower tightly, ensuring it is properly aligned. Reconnect the spark plug once the blade is installed.
By following these steps, you can maintain sharp, balanced blades that contribute to a healthier, well-manicured lawn. Regularly maintaining your mower blades also extends their lifespan and ensures safe operation.
Using a Blade Balancer
A blade balancer is an essential tool for achieving precise balance in your lawn mower blade, ensuring optimal performance and avoiding uneven cuts. To use a blade balancer effectively, start by placing it on a flat, stable surface. Once your blade is clean and sharp, position the center hole of the blade onto the balancer. The blade balancer will help you identify any imbalance by showing which side dips lower. This indicates that the heavier side of the blade needs material removed.
When correcting the imbalance, file away small amounts of material from the heavy side, testing the blade on the balancer after each adjustment. A perfectly balanced blade will sit level on the balancer without tilting. Consistently balanced blades improve cutting efficiency, reduce strain on the mower’s motor, and minimize vibration. Studies indicate that maintaining balanced blades can extend mower lifespan by reducing wear on internal components, lowering maintenance costs in the long run. This simple yet effective process ensures your mower operates smoothly season after season.
How to Check the Blade for Balance
Checking the blade for balance is a straightforward process that I follow carefully. First, I remove the blade from the mower, ensuring the machine is off and the spark plug is disconnected for safety. Then, I clean off any debris or grass buildup on the blade. Using a blade balancer or a simple nail mounted on a wall, I place the blade’s center hole onto the balancer or nail. If one side tilts downward, I know that side is heavier and needs adjustment. I file the heavier side slightly and repeat the process until the blade remains level. This ensures the blade is balanced and ready for efficient use.
Tips for Maintaining Sharp Blades
- Sharpen Regularly
Ensure mower blades are sharpened every 20-25 hours of use for optimal performance. Dull blades can tear grass rather than cut it cleanly, leading to uneven patches and increased stress on the lawn.
- Clean After Each Use
Remove dirt, grass clippings, and debris after each mowing session. A clean blade reduces the risk of rust, which can dull the edges over time.
- Inspect for Damage
Regularly check blades for cracks, bends, or significant wear. Damaged blades not only perform poorly but can also be a safety hazard.
- Keep Blades Balanced
Unbalanced blades can cause excessive vibration, damage to the mower, and uneven cuts. Follow proper balancing techniques after sharpening or replacing blades.
- Use Proper Tools
Invest in quality sharpening tools and file the blade at the correct angle (usually 30-45°). A bench grinder or rotary tool can help maintain consistent sharpness.
- Protect From Moisture
Store blades in a dry environment to prevent rust. After cleaning, apply a thin layer of oil to the blade to ensure long-term durability.
- Replace When Necessary
Even with careful maintenance, mower blades eventually wear out. Replace blades after three to four seasons of regular use or when sharpening no longer improves their cutting edge.
What Are the Best Practices for Blade Sharpening?

- Use the Right Tools
Choose a file, bench grinder, or rotary tool specifically designed for sharpening blades to achieve precise and effective results.
- Secure the Blade
Clamp the blade firmly in place to ensure stability and safety while sharpening.
- Follow the Original Angle
Sharpen along the blade’s existing edge angle. This maintains the correct shape for optimal performance.
- Remove Small Amounts
Grind or file in small increments to avoid overheating the blade, which can weaken the metal.
- Check for Balance
After sharpening, place the blade on a balancing tool or a nail to ensure it’s evenly weighted. An imbalanced blade can damage the mower.
- Wear Safety Gear
Always wear gloves and safety glasses to protect yourself during the sharpening process.
Correct Angle for Sharpening
When sharpening a lawn mower blade, achieving the correct angle is essential for both performance and longevity. The recommended sharpening angle for most mower blades is between 30 to 35 degrees. This angle strikes a balance between sharpness and durability, ensuring that the blade effectively cuts grass while resisting wear and tear.
Maintaining this angle is crucial because a blade that is too sharp (below 30 degrees) can dull more quickly or chip, while a blade with a steeper angle (above 35 degrees) may tear the grass rather than providing a clean cut. Using a sharpening guide or angle gauge can help you achieve and maintain the proper angle throughout the sharpening process. For additional accuracy, some professionals recommend using a bench grinder with an adjustable guide to lock in the desired angle.
Data suggests that properly sharpened blades, maintained at the correct angle, can improve the efficiency of mowing by up to 20%. This results in a cleaner cut, healthier grass, and even fuel savings as the mower doesn’t have to work as hard. Prioritizing the correct angle is a simple yet impactful step toward achieving optimal lawn maintenance.
Difference Between Grinding Wheels and Flap Discs
Grinding wheels are aggressive and ideal for heavy-duty material removal, while flap discs are versatile, offering smoother finishes and better contouring.
|
Parameter |
Grinding Wheels |
Flap Discs |
|---|---|---|
|
Material Removal |
High |
Moderate |
|
Finish |
Rough |
Smooth |
|
Flexibility |
Low |
High |
|
Noise |
High |
Low |
|
Durability |
High |
Moderate |
|
Best Use |
Heavy-duty tasks |
Finishing/contouring |
How to Keep the Blade Sharp
Maintaining a sharp blade is critical for efficient and effective lawn care. To begin, sharpening should ideally occur after every 20-25 hours of mowing, as dull blades tear grass rather than cutting it cleanly, which can lead to browning and increase vulnerability to diseases. Using high-quality tools such as a bench grinder or specially designed sharpening kits ensures precision and consistent sharpness. Experts recommend maintaining a cutting angle of approximately 30 degrees for most blades, as this strikes the right balance between durability and sharpness.
Regular inspections are equally important. Look for nicks, bends, or dull edges that can hinder performance. If damage is beyond repair, it’s better to replace the blade to maintain lawn health. Additionally, keeping the blade clean by removing grass clippings and debris prevents rust and corrosion, which can dull the edge faster over time.
Studies show that mowing with sharp blades can reduce fuel consumption by up to 15%, as it minimizes the strain on the mower’s engine. Furthermore, a clean cut promotes healthier grass, which absorbs nutrients more effectively and grows more uniformly. Incorporating these maintenance steps into your routine prolongs the life of your blade and enhances the overall appearance of your lawn.
Reference Sources
- Hand Tools Safety: Lawncare Training Guide – A guide discussing the importance of sharpening blades for effective lawn care.
- A Stroke of Shear Genius: The Development of the Blade Bandit – A thesis exploring the concept and development of a lawn mower blade sharpener.
- ERIC Document on Horticulture Service Occupations – A module emphasizing the necessity of sharpening rotary mower blades for proper grass cutting.
Frequently Asked Questions (FAQs)
Q: How do I know when it’s time to sharpen lawn mower blades?
A: It’s time to sharpen lawn mower blades when you notice uneven patches of grass, frayed grass tips, or if the mower requires more effort to cut. A dull mower blade can also make the engine work harder, which may result in a less healthy lawn.
Q: What is the best way to sharpen a mower blade?
A: The best way to sharpen a mower blade is to use an angle grinder with a flap disc or a belt grinder. These tools provide consistent sharpening and are easier to control, ensuring you don’t remove too much metal from the edge of the blade.
Q: Can I use an American Sharpener for lawn mower blade sharpening?
A: Yes, an American Sharpener is a great tool for lawn mower blade sharpening. It helps maintain the proper blade angle and makes the sharpening process more efficient.
Q: Is it necessary to remove the blade from the mower deck to sharpen it?
A: While it’s not always necessary to remove the blade from the mower deck, doing so can make it easier to sharpen your mower blade accurately and safely. It’s also easier to remove any debris and inspect the blade for damage when it’s detached.
Q: How often should I sharpen my mower blades?
A: You should sharpen your mower blades at least once every mowing season or after every 20-25 hours of mowing. If you mow frequently or encounter tough conditions, you might need to sharpen more often to maintain a healthy lawn.
Q: What tools do I need to sharpen a mower blade at home?
A: To sharpen a mower blade at home, you will need a vise to hold the blade in place, an angle grinder with a flap disc, or a power drill with a sharpening attachment. It’s also important to have protective gear, such as gloves and safety glasses.
Q: How do I maintain the proper blade angle when sharpening?
A: Maintaining the proper blade angle is crucial for effective mower blade sharpening. You can use a jig or guide to ensure consistent sharpening along the edge of the blade. A typical blade angle is around 30 degrees, but check your mower’s manual for specific recommendations.
Q: Can I sharpen mulching blades the same way as regular blades?
A: Yes, you can sharpen mulching blades using similar methods as regular blades. However, be careful to maintain the unique design of the mulching blades, which are typically curved to help with the mulching process.
Q: Is it better to sharpen or replace a very dull mower blade?
A: If your mower blade is extremely dull or damaged, it might be more effective to replace it with a new blade. However, regular sharpening can extend the life of the blade and ensure your mower performs at its best.
Q: What are the benefits of using a belt grinder to sharpen your blades?
A: Using a belt grinder to sharpen your blades provides a quick and efficient sharpening method. It helps achieve a consistent edge without removing too much metal, preserving the longevity of the blade. Additionally, it’s easier to control compared to other sharpening tools.